seat adjustment Hyundai Santa Fe Sport 2016 Owner's Manual
[x] Cancel search | Manufacturer: HYUNDAI, Model Year: 2016, Model line: Santa Fe Sport, Model: Hyundai Santa Fe Sport 2016Pages: 763, PDF Size: 37.75 MB
Page 22 of 763
Safety features of your vehicle
Seats . . . . . . . . . . . . . . . . . . . . . . . . . . . . . . . . . . . . \
. . 3-2
• Front seat adjustment - Manual . . . . . . . . . . . . . . . . . 3-5
• Front seat adjustment - Power. . . . . . . . . . . . . . . . . . . 3-6
• Driver position memory system . . . . . . . . . . . . . . . . . . 3-8
• Rear seat adjustment . . . . . . . . . . . . . . . . . . . . . . . . . 3-14
Seat belts . . . . . . . . . . . . . . . . . . . . . . . . . . . . . . . . . 3-22
• Seat belt restraint system . . . . . . . . . . . . . . . . . . . . . . 3-22
• Pre-tensioner seat belt. . . . . . . . . . . . . . . . . . . . . . . . . 3-27
• Seat belt precautions . . . . . . . . . . . . . . . . . . . . . . . . . . 3-30
• Care of seat belts . . . . . . . . . . . . . . . . . . . . . . . . . . . . . 3-33
Child restraint system . . . . . . . . . . . . . . . . . . . . . . 3-34
• Using a child restraint system . . . . . . . . . . . . . . . . . . 3-36
• Tether Anchor system . . . . . . . . . . . . . . . . . . . . . . . . . 3-39
• Securing a child restraint seat with child seat lower anchor system . . . . . . . . . . . . . . . . 3-41
Air bag - supplemental restraint system . . . . . . . 3-43
• How does the air bag system operate . . . . . . . . . . . . 3-44
• Do not Install a child restraint on a front passenger's seat . . . . . . . . . . . . . . . . . . . . . . . . . . . . . 3-45
• Air bag warning light . . . . . . . . . . . . . . . . . . . . . . . . . 3-46
• SRS components and functions . . . . . . . . . . . . . . . . . 3-46
• Occupant classification system. . . . . . . . . . . . . . . . . . 3-50
• Main components of occupant classification system 3-51
• Driver's and passenger's front air bag . . . . . . . . . . . 3-56
• Side impact air bag . . . . . . . . . . . . . . . . . . . . . . . . . . . 3-61 • Curtain air bag . . . . . . . . . . . . . . . . . . . . . . . . . . . . . . 3-62
• Inflation and non-inflation conditions of the
air bag . . . . . . . . . . . . . . . . . . . . . . . . . . . . . . . . . . . . \
. . . 3-65
• SRS Care . . . . . . . . . . . . . . . . . . . . . . . . . . . . . . . . . . . 3-\
69
• Additional safety precautions . . . . . . . . . . . . . . . . . . . 3-70
• Air bag warning label . . . . . . . . . . . . . . . . . . . . . . . . . 3-71
3
AN HMA 3.QXP 3/5/2015 3:09 PM Page 1
Page 26 of 763
35
Safety features of your vehicle
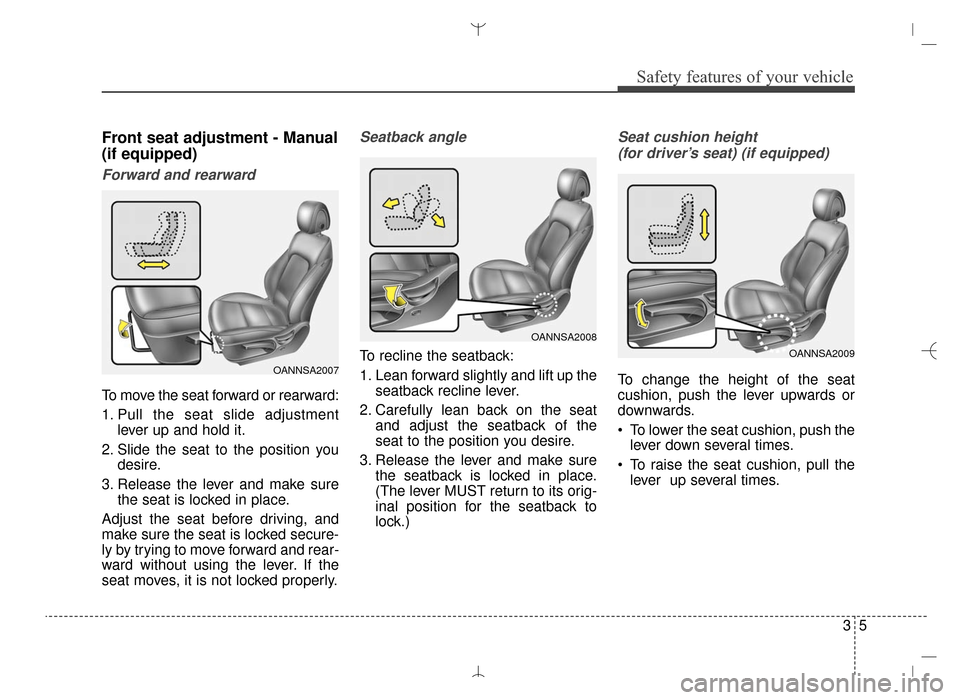
Front seat adjustment - Manual
(if equipped)
Forward and rearward
To move the seat forward or rearward:
1. Pull the seat slide adjustmentlever up and hold it.
2. Slide the seat to the position you desire.
3. Release the lever and make sure the seat is locked in place.
Adjust the seat before driving, and
make sure the seat is locked secure-
ly by trying to move forward and rear-
ward without using the lever. If the
seat moves, it is not locked properly.
Seatback angle
To recline the seatback:
1. Lean forward slightly and lift up the seatback recline lever.
2. Carefully lean back on the seat and adjust the seatback of the
seat to the position you desire.
3. Release the lever and make sure the seatback is locked in place.
(The lever MUST return to its orig-
inal position for the seatback to
lock.)
Seat cushion height
(for driver’s seat) (if equipped)
To change the height of the seat
cushion, push the lever upwards or
downwards.
To lower the seat cushion, push the lever down several times.
To raise the seat cushion, pull the lever up several times.OANNSA2007
OANNSA2008
OANNSA2009
AN HMA 3.QXP 3/5/2015 3:09 PM Page 5
Page 27 of 763
Safety features of your vehicle
63
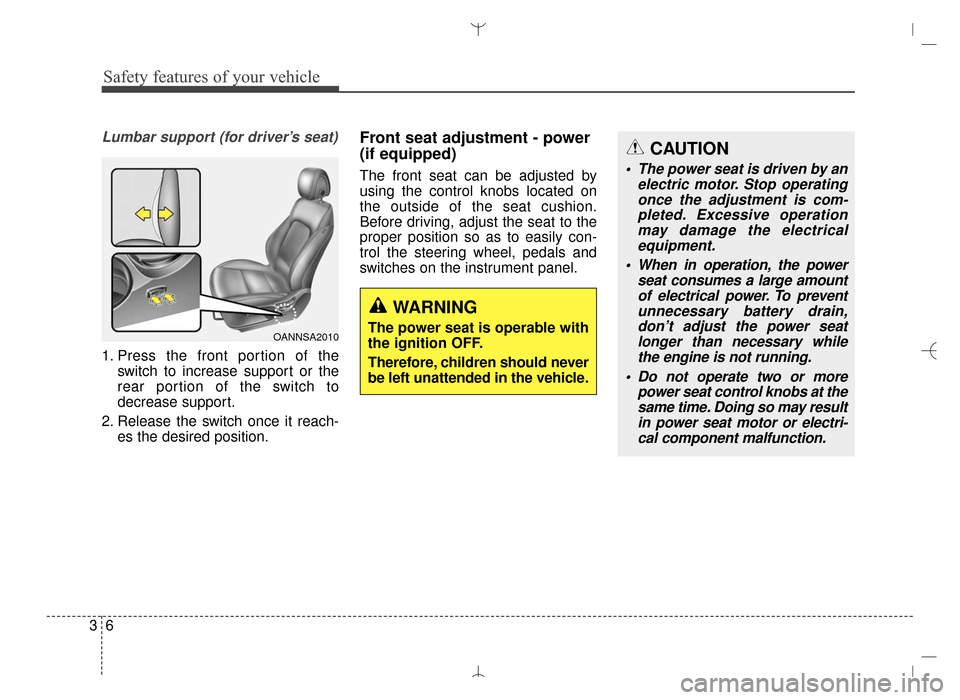
Lumbar support (for driver’s seat)
1. Press the front portion of theswitch to increase support or the
rear portion of the switch to
decrease support.
2. Release the switch once it reach- es the desired position.
Front seat adjustment - power
(if equipped)
The front seat can be adjusted by
using the control knobs located on
the outside of the seat cushion.
Before driving, adjust the seat to the
proper position so as to easily con-
trol the steering wheel, pedals and
switches on the instrument panel.
OANNSA2010
WARNING
The power seat is operable with
the ignition OFF.
Therefore, children should never
be left unattended in the vehicle.
CAUTION
The power seat is driven by anelectric motor. Stop operatingonce the adjustment is com-pleted. Excessive operationmay damage the electricalequipment.
When in operation, the power seat consumes a large amountof electrical power. To preventunnecessary battery drain,don’t adjust the power seatlonger than necessary whilethe engine is not running.
Do not operate two or more power seat control knobs at thesame time. Doing so may resultin power seat motor or electri-cal component malfunction.
AN HMA 3.QXP 3/5/2015 3:09 PM Page 6
Page 30 of 763
39
Safety features of your vehicle
Recalling positions from memory
1. Shift the shift lever into P or Nwhile the engine start/stop button
is ON or ignition switch ON.
2. To recall the position in the memo- ry, press the desired memory but-
ton (1 or 2). The system will beep
once, then the driver’s seat will
automatically adjust to the stored
position.
Adjusting the control switch for the
driver’s seat while the system is
recalling the stored position will
cause the movement to stop and
move in the direction that the control
switch is moved.Easy access function (if equipped)
The system will move the driver's
seat automatically as follows:
Without smart key system
- It will move the driver’s seat rear-ward when the ignition key is
removed and front driver’s door is
opened.
- It will move the driver’s seat for- ward when the ignition key is
inserted.
With smart key system - It will move the driver’s seat rear-ward when the engine start/stop
button is changed to the OFF
position and front driver’s door is
opened.
- It will move the driver’s seat for- ward when the engine start/stop
button is changed to the ACC or
START position.
You can activate or deactivate this
feature. Refer to "User settings" in
section 4.
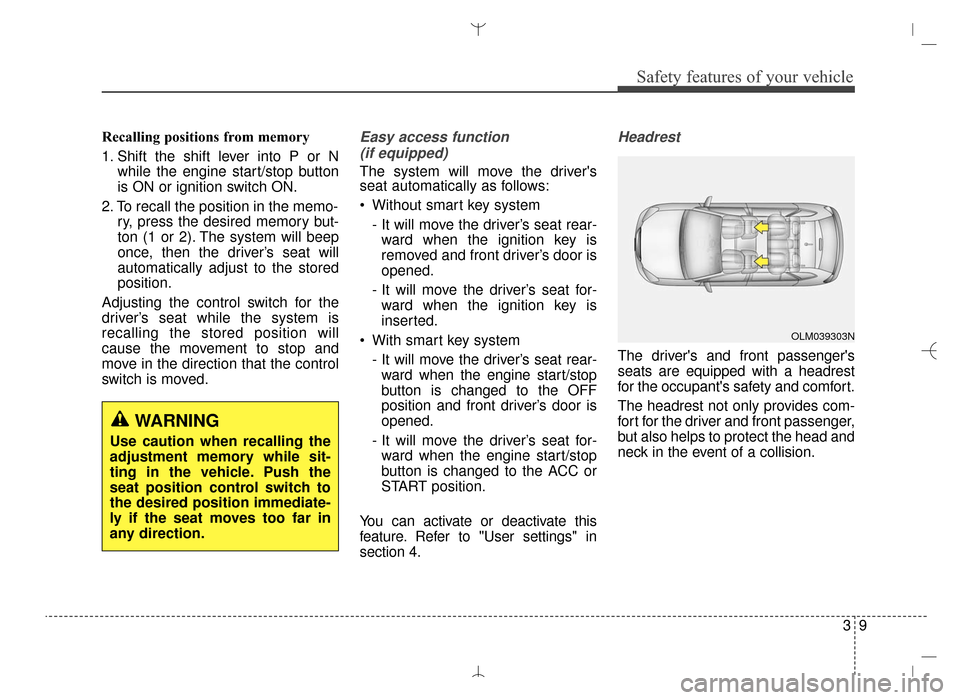
Headrest
The driver's and front passenger's
seats are equipped with a headrest
for the occupant's safety and comfort.
The headrest not only provides com-
fort for the driver and front passenger,
but also helps to protect the head and
neck in the event of a collision.
WARNING
Use caution when recalling the
adjustment memory while sit-
ting in the vehicle. Push the
seat position control switch to
the desired position immediate-
ly if the seat moves too far in
any direction.
OLM039303N
AN HMA 3.QXP 3/5/2015 3:09 PM Page 9
Page 31 of 763
Safety features of your vehicle
10
3
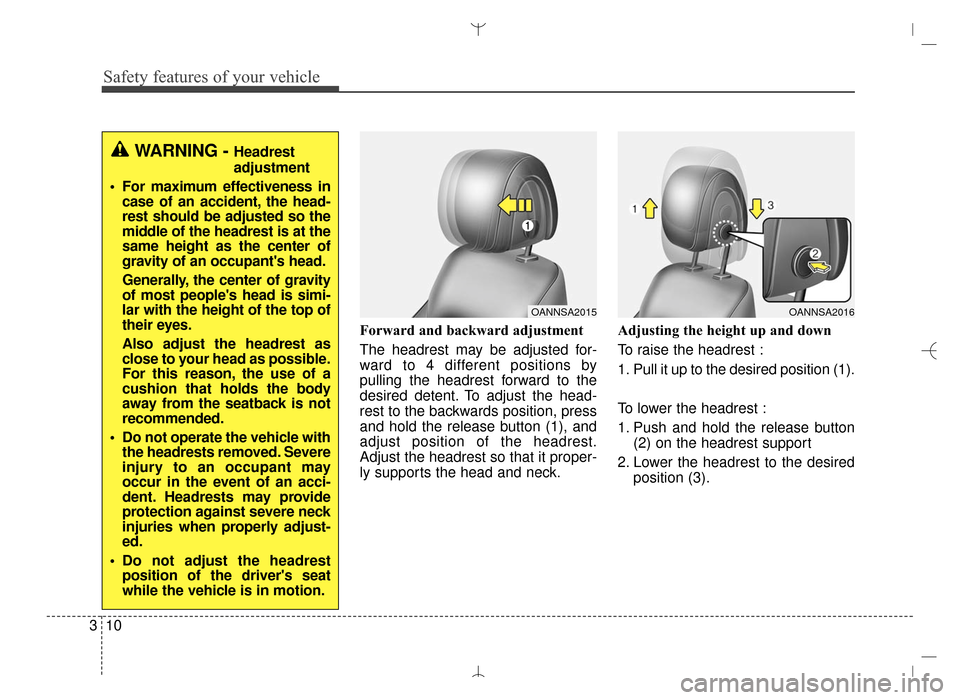
Forward and backward adjustment
The headrest may be adjusted for-
ward to 4 different positions by
pulling the headrest forward to the
desired detent. To adjust the head-
rest to the backwards position, press
and hold the release button (1), and
adjust position of the headrest.
Adjust the headrest so that it proper-
ly supports the head and neck. Adjusting the height up and down
To raise the headrest :
1. Pull it up to the desired position (1).
To lower the headrest :
1. Push and hold the release button
(2) on the headrest support
2. Lower the headrest to the desired position (3).
WARNING - Headrest
adjustment
For maximum effectiveness in case of an accident, the head-
rest should be adjusted so the
middle of the headrest is at the
same height as the center of
gravity of an occupant's head.
Generally, the center of gravity
of most people's head is simi-
lar with the height of the top of
their eyes.
Also adjust the headrest as
close to your head as possible.
For this reason, the use of a
cushion that holds the body
away from the seatback is not
recommended.
Do not operate the vehicle with the headrests removed. Severe
injury to an occupant may
occur in the event of an acci-
dent. Headrests may provide
protection against severe neck
injuries when properly adjust-
ed.
Do not adjust the headrest position of the driver's seat
while the vehicle is in motion.
OANNSA2015OANNSA2016
AN HMA 3.QXP 3/5/2015 3:09 PM Page 10
Page 35 of 763
Safety features of your vehicle
14
3
Rear seat adjustment
Forward and backward
(if equipped)
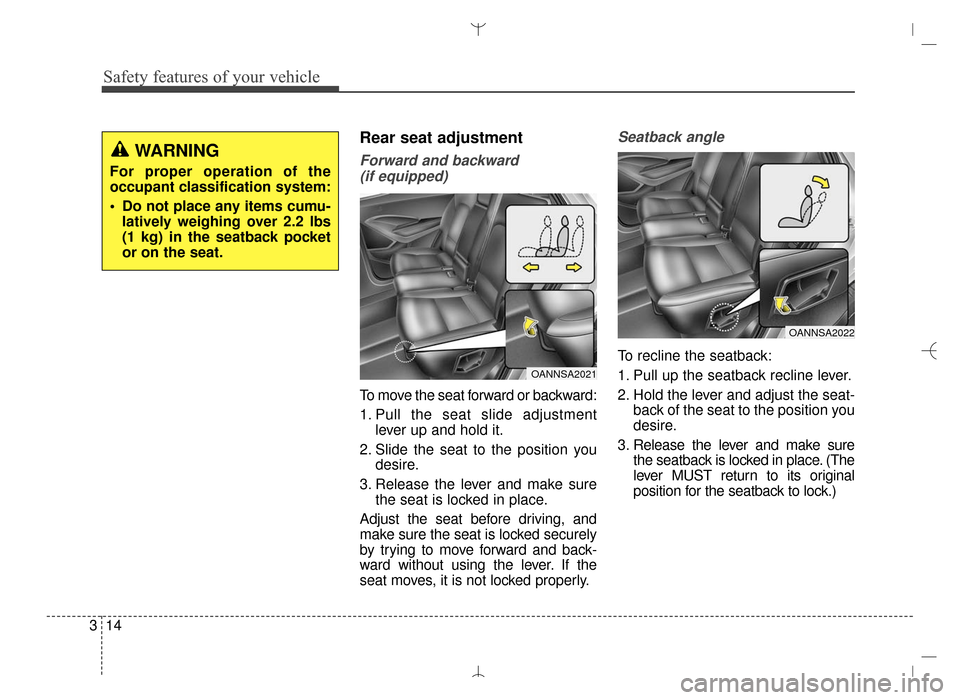
To move the seat forward or backward:
1. Pull the seat slide adjustment lever up and hold it.
2. Slide the seat to the position you desire.
3. Release the lever and make sure the seat is locked in place.
Adjust the seat before driving, and
make sure the seat is locked securely
by trying to move forward and back-
ward without using the lever. If the
seat moves, it is not locked properly.
Seatback angle
To recline the seatback:
1. Pull up the seatback recline lever.
2. Hold the lever and adjust the seat- back of the seat to the position you
desire.
3. Release the lever and make sure the seatback is locked in place. (The
lever MUST return to its original
position for the seatback to lock.)
OANNSA2021
WARNING
For proper operation of the
occupant classification system:
Do not place any items cumu-latively weighing over 2.2 lbs
(1 kg) in the seatback pocket
or on the seat.
OANNSA2022
AN HMA 3.QXP 3/5/2015 3:09 PM Page 14
Page 36 of 763
315
Safety features of your vehicle
Headrest (for rear seat)
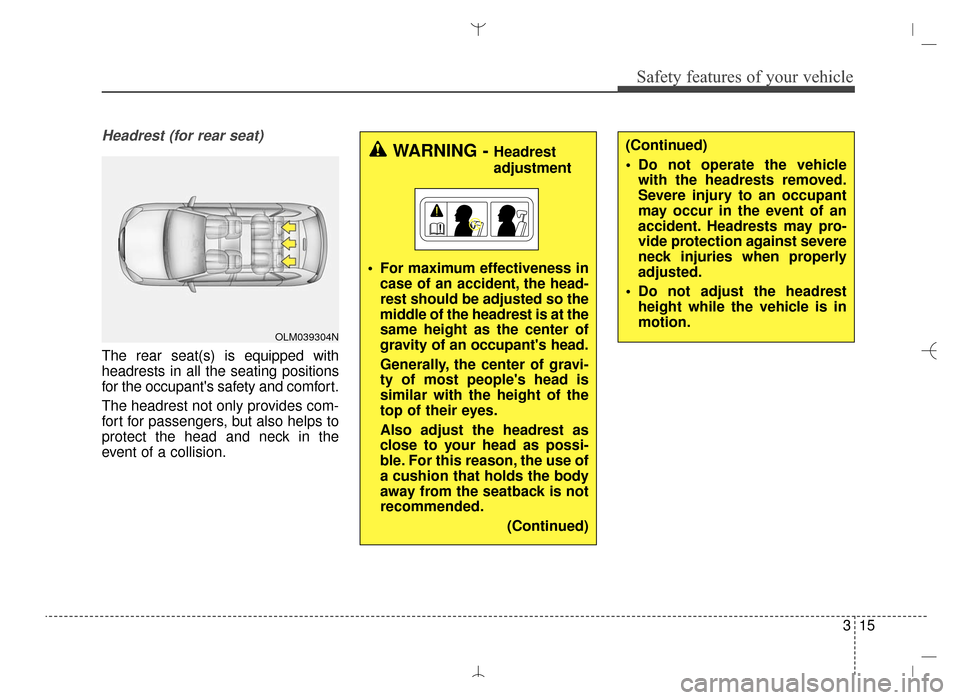
The rear seat(s) is equipped with
headrests in all the seating positions
for the occupant's safety and comfort.
The headrest not only provides com-
fort for passengers, but also helps to
protect the head and neck in the
event of a collision.
OLM039304N
WARNING - Headrest
adjustment
For maximum effectiveness in case of an accident, the head-
rest should be adjusted so the
middle of the headrest is at the
same height as the center of
gravity of an occupant's head.
Generally, the center of gravi-
ty of most people's head is
similar with the height of the
top of their eyes.
Also adjust the headrest as
close to your head as possi-
ble. For this reason, the use of
a cushion that holds the body
away from the seatback is not
recommended.
(Continued)(Continued)
Do not operate the vehiclewith the headrests removed.
Severe injury to an occupant
may occur in the event of an
accident. Headrests may pro-
vide protection against severe
neck injuries when properly
adjusted.
Do not adjust the headrest height while the vehicle is in
motion.
AN HMA 3.QXP 3/5/2015 3:09 PM Page 15
Page 46 of 763
325
Safety features of your vehicle
Height adjustment (Front)
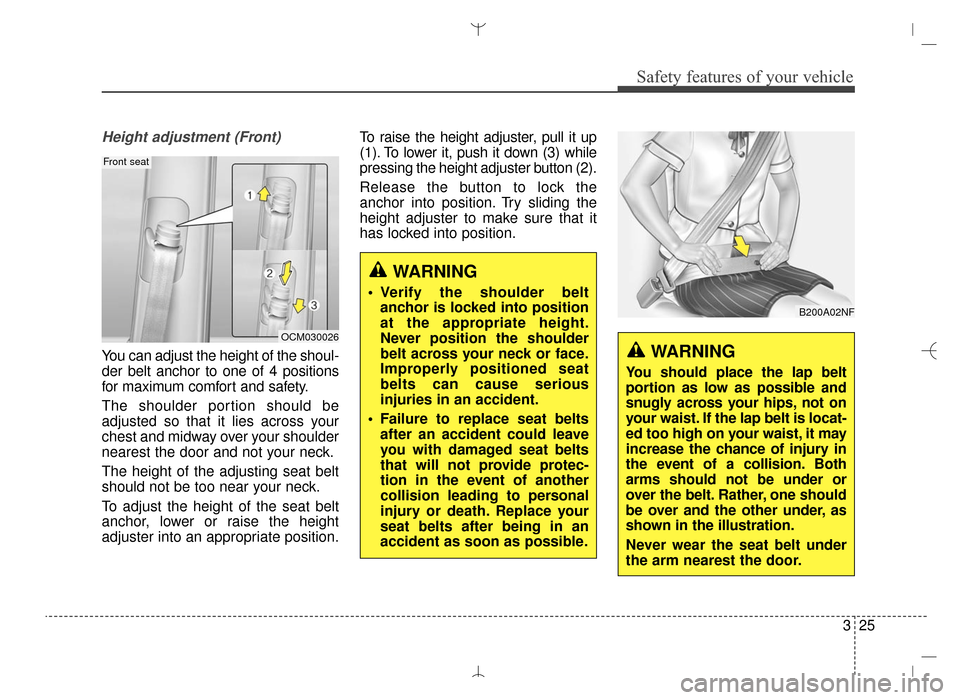
You can adjust the height of the shoul-
der belt anchor to one of 4 positions
for maximum comfort and safety.
The shoulder portion should be
adjusted so that it lies across your
chest and midway over your shoulder
nearest the door and not your neck.
The height of the adjusting seat belt
should not be too near your neck.
To adjust the height of the seat belt
anchor, lower or raise the height
adjuster into an appropriate position.To raise the height adjuster, pull it up
(1). To lower it, push it down (3) while
pressing the height adjuster button (2).
Release the button to lock the
anchor into position. Try sliding the
height adjuster to make sure that it
has locked into position.
WARNING
Verify the shoulder belt
anchor is locked into position
at the appropriate height.
Never position the shoulder
belt across your neck or face.
Improperly positioned seat
belts can cause serious
injuries in an accident.
Failure to replace seat belts after an accident could leave
you with damaged seat belts
that will not provide protec-
tion in the event of another
collision leading to personal
injury or death. Replace your
seat belts after being in an
accident as soon as possible.
OCM030026
Front seat
B200A02NF
WARNING
You should place the lap belt
portion as low as possible and
snugly across your hips, not on
your waist. If the lap belt is locat-
ed too high on your waist, it may
increase the chance of injury in
the event of a collision. Both
arms should not be under or
over the belt. Rather, one should
be over and the other under, as
shown in the illustration.
Never wear the seat belt under
the arm nearest the door.
AN HMA 3.QXP 3/5/2015 3:09 PM Page 25
Page 152 of 763
Features of your vehicle
60
4
MIRRORS
Inside rearview mirror
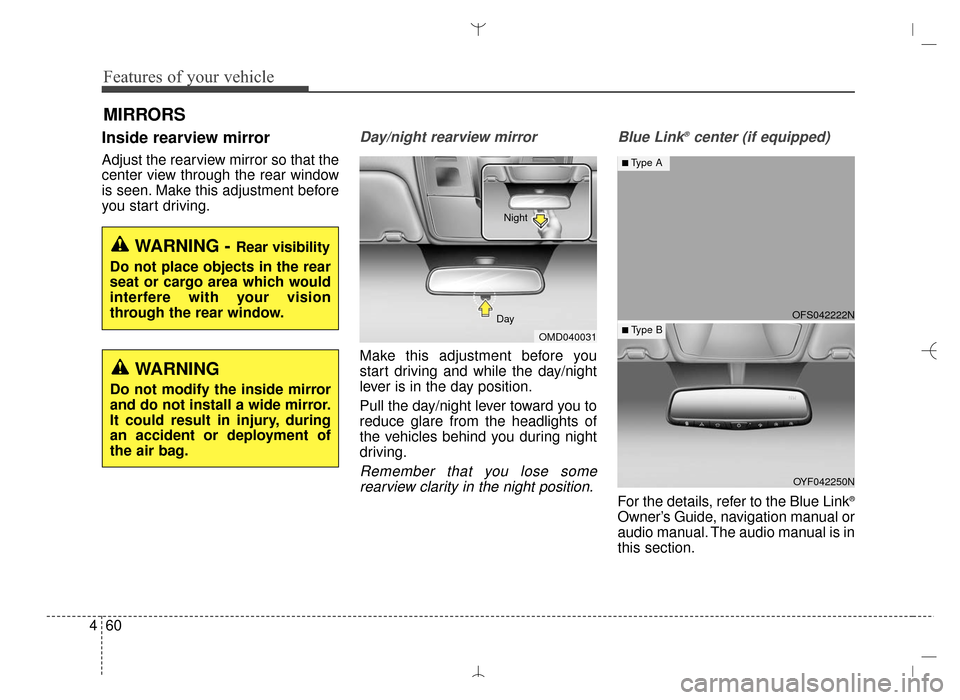
Adjust the rearview mirror so that the
center view through the rear window
is seen. Make this adjustment before
you start driving.
Day/night rearview mirror
Make this adjustment before you
start driving and while the day/night
lever is in the day position.
Pull the day/night lever toward you to
reduce glare from the headlights of
the vehicles behind you during night
driving.
Remember that you lose some
rearview clarity in the night position. Blue Link
®center (if equipped)
For the details, refer to the Blue Link®
Owner’s Guide, navigation manual or
audio manual. The audio manual is in
this section.
WARNING - Rear visibility
Do not place objects in the rear
seat or cargo area which would
interfere with your vision
through the rear window.
OMD040031
Day Night
WARNING
Do not modify the inside mirror
and do not install a wide mirror.
It could result in injury, during
an accident or deployment of
the air bag.
OFS042222N
OYF042250N
■Type A
■ Type B
AN HMA 4A.QXP 3/5/2015 3:18 PM Page 60
Page 757 of 763
I5
Index
Jack and tools ..............................................................6-20
Jack label ....................................................................6-29\
Removing and storing the spare tire ..........................6-21
Floor mat anchor(s) ......................................................4-162
Fluid Brakes fluid ................................................................7-31
Washer fluid ................................................................7-33
Folding Key ......................................................................4-\
4
Folding the rear seat ......................................................3-18
Front fog light ..............................................................4-125
Front seat adjustment - Manual ........................................3-5
Front seat adjustment - Power ..........................................3-6
Fuel Economy ..............................................................4-100
Fuel filler door ................................................................4-44 Emergency fuel filler door release ..............................4-47
Fuel Gauge ......................................................................4-\
82
Fuel requirements ............................................................1-3
Fuse switch ....................................................................7-61\
Fuse/relay panel description ..........................................7-63
Fuses ........................................................................\
......7-59 Engine compartment panel fuse ........................7-61, 7-67
Fuse switch ..................................................................7-61
Fuse/relay panel description ........................................7-63
Instrument panel fuse ..................................................7-60
Multi fuse ....................................................................7-62\
Gauges ........................................................................\
....4-81
Glove box......................................................................4-\
156
Good braking practices ..................................................5-43
Good driving practices....................................................5-19
Gross vehicle weight ........................................................8-5
Hazard warning flasher ................................................4-119
Hazardous driving conditions ........................................5-60
Headlamp welcome ......................................................4-133
Headlight (Headlamp) escort function ........................4-120
Headlight bulb replacement ............................................7-71
Headlight position ........................................................4-122
Headrest (Front) ................................................................3-9
Headrest (Rear) ..............................................................3-15
Heated steering wheel ....................................................4-54
Height adjustment (Front) ..............................................3-25
High beam operation ....................................................4-123
Highway driving ............................................................5-64
Hill-start Assist Control (HAC) ......................................5-42
Hood........................................................................\
........4-42
Horn ........................................................................\
........4-56
How to use this manual ....................................................1-2G
H
AN HMA INDEX.QXP 3/3/2015 11:36 AM Page 5