Hyundai Santa Fe Sport 2017 Owner's Manual
Manufacturer: HYUNDAI, Model Year: 2017, Model line: Santa Fe Sport, Model: Hyundai Santa Fe Sport 2017Pages: 614, PDF Size: 18.99 MB
Page 221 of 614
Features of your vehicle
124
4
Rear view camera
(if equipped)
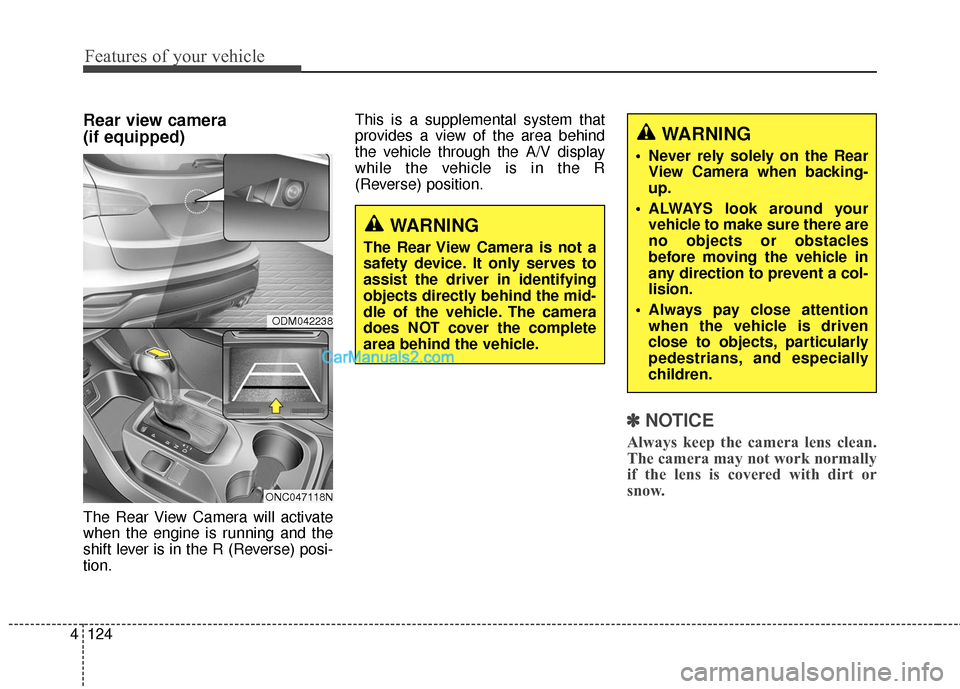
The Rear View Camera will activate
when the engine is running and the
shift lever is in the R (Reverse) posi-
tion. This is a supplemental system that
provides a view of the area behind
the vehicle through the A/V display
while the vehicle is in the R
(Reverse) position.
✽ ✽
NOTICE
Always keep the camera lens clean.
The camera may not work normally
if the lens is covered with dirt or
snow.
ODM042238
ONC047118N
WARNING
The Rear View Camera is not a
safety device. It only serves to
assist the driver in identifying
objects directly behind the mid-
dle of the vehicle. The camera
does NOT cover the complete
area behind the vehicle.
WARNING
Never rely solely on the Rear
View Camera when backing-
up.
ALWAYS look around your vehicle to make sure there are
no objects or obstacles
before moving the vehicle in
any direction to prevent a col-
lision.
Always pay close attention when the vehicle is driven
close to objects, particularly
pedestrians, and especially
children.
Page 222 of 614
4125
Features of your vehicle
Multi-view Camera System
(if equipped)
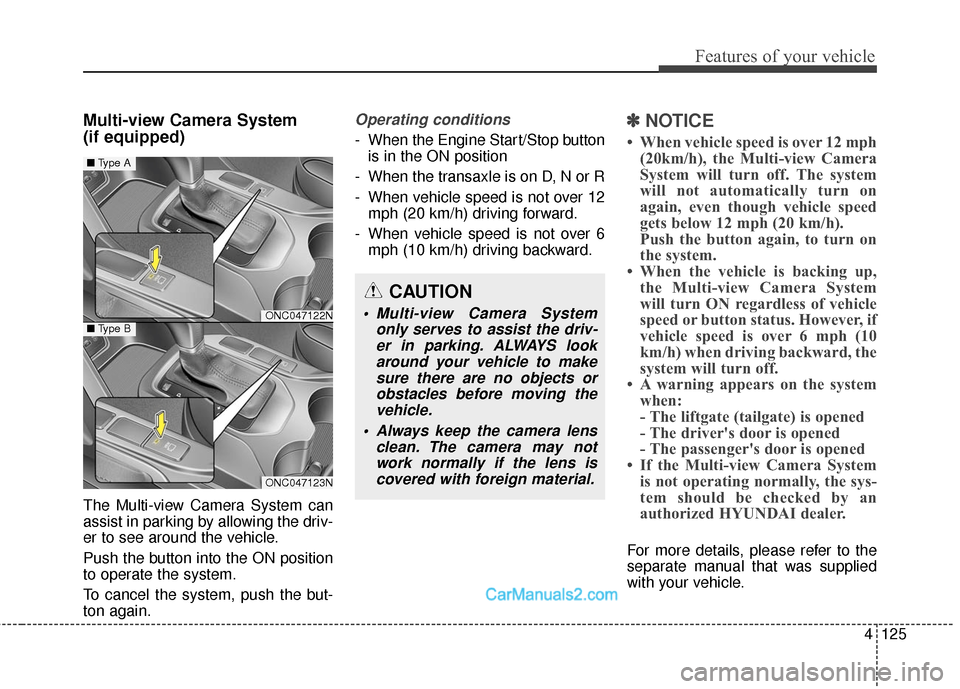
The Multi-view Camera System can
assist in parking by allowing the driv-
er to see around the vehicle.
Push the button into the ON position
to operate the system.
To cancel the system, push the but-
ton again.
Operating conditions
- When the Engine Start/Stop buttonis in the ON position
- When the transaxle is on D, N or R
- When vehicle speed is not over 12 mph (20 km/h) driving forward.
- When vehicle speed is not over 6 mph (10 km/h) driving backward.
✽ ✽ NOTICE
• When vehicle speed is over 12 mph
(20km/h), the Multi-view Camera
System will turn off. The system
will not automatically turn on
again, even though vehicle speed
gets below 12 mph (20 km/h).
Push the button again, to turn on
the system.
• When the vehicle is backing up, the Multi-view Camera System
will turn ON regardless of vehicle
speed or button status. However, if
vehicle speed is over 6 mph (10
km/h) when driving backward, the
system will turn off.
• A warning appears on the system when:
- The liftgate (tailgate) is opened
- The driver's door is opened
- The passenger's door is opened
• If the Multi-view Camera System is not operating normally, the sys-
tem should be checked by an
authorized HYUNDAI dealer.
For more details, please refer to the
separate manual that was supplied
with your vehicle.
CAUTION
Multi-view Camera System
only serves to assist the driv-er in parking. ALWAYS lookaround your vehicle to makesure there are no objects orobstacles before moving thevehicle.
Always keep the camera lens clean. The camera may notwork normally if the lens iscovered with foreign material.ONC047122N
ONC047123N
■ Type A
■Type B
Page 223 of 614
The hazard warning flasher should
be used whenever you find it neces-
sary to stop the car in a hazardous
location. When you must make such
an emergency stop, always pull off
the road as far as possible.
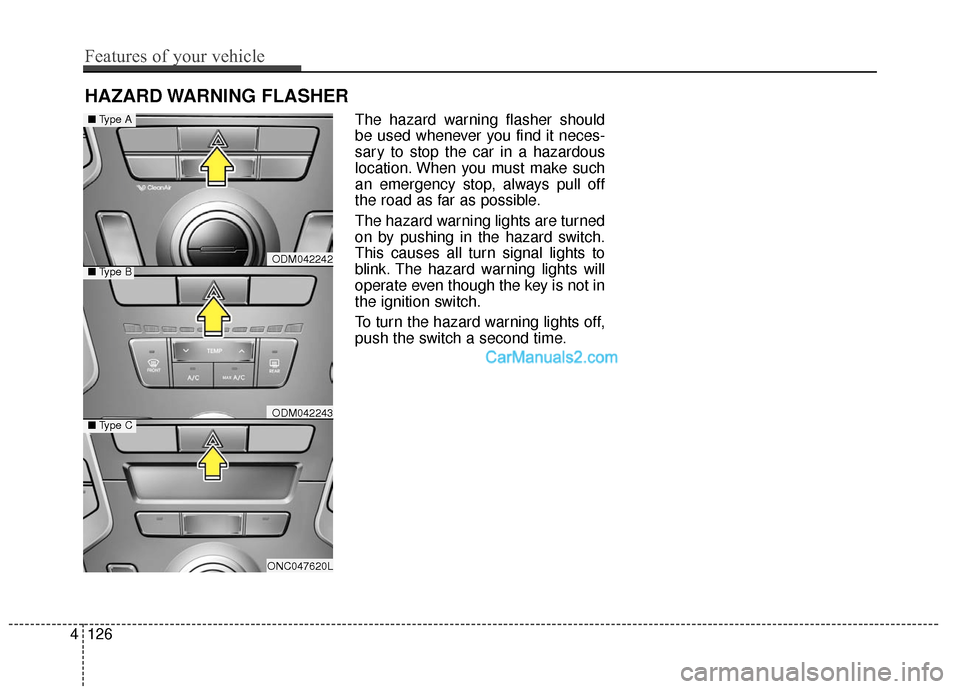
The hazard warning lights are turned
on by pushing in the hazard switch.
This causes all turn signal lights to
blink. The hazard warning lights will
operate even though the key is not in
the ignition switch.
To turn the hazard warning lights off,
push the switch a second time.
HAZARD WARNING FLASHER
ODM042242
ODM042243
ONC047620L
■Type A
■Type B
■Type C
4126
Features of your vehicle
Page 224 of 614
4127
Features of your vehicle
Battery saver function
• The purpose of this feature is toprevent the battery from being dis-
charged. The system automatically
turns off the parking lights when
the driver removes the ignition key
(smart key : turns off the engine)
and opens the driver-side door.
With this feature, the parking lights will be turned off automatically if
the driver parks on the side of the
road at night.
If necessary, to keep the lights on
when the ignition key is removed
(smart key : turns off the engine),
perform the following:
1) Open the driver-side door.
2) Turn the parking lights OFF and ON again using the light switch
on the steering column.
Headlamp delay
If you turn the ignition switch to the
ACC or OFF position with the head-
lights ON, the headlights remain on
for about 5 minutes. However, if the
driver’s door is opened and closed,
the headlights are turned off after 15
seconds.
The headlights can be turned off by
pressing the lock button on the trans-
mitter (or smart key) twice or turning
the light switch to the OFF or Auto
position.
However, if you turn the light switch
to the Auto position when it is dark
outside, the headlights will not be
turned off.
You can activate or deactivate this
feature. Refer to “User Settings” in
this section.
LIGHTING
CAUTION
If the driver gets out of the vehi-cle through other doors (otherthan the driver's door), the bat-tery saver function does notoperate and the headlamp delaydoes not turn off automatically.This will cause the battery to bedischarged. In this case, makesure to turn off the lamp beforegetting out of the vehicle.
Page 225 of 614
Features of your vehicle
128
4
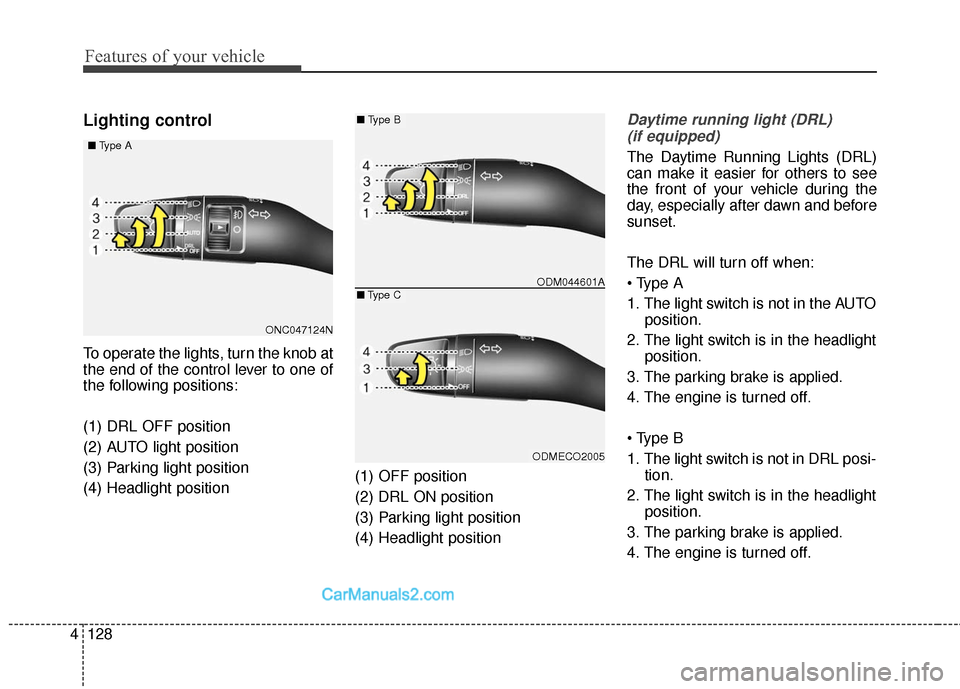
Lighting control
To operate the lights, turn the knob at
the end of the control lever to one of
the following positions:
(1) DRL OFF position
(2) AUTO light position
(3) Parking light position
(4) Headlight position (1) OFF position
(2) DRL ON position
(3) Parking light position
(4) Headlight position
Daytime running light (DRL)
(if equipped)
The Daytime Running Lights (DRL)
can make it easier for others to see
the front of your vehicle during the
day, especially after dawn and before
sunset.
The DRL will turn off when:
1. The light switch is not in the AUTO position.
2. The light switch is in the headlight position.
3. The parking brake is applied.
4. The engine is turned off.
1. The light switch is not in DRL posi- tion.
2. The light switch is in the headlight position.
3. The parking brake is applied.
4. The engine is turned off.
ONC047124N
■
Type A
■Type B
■Type CODM044601A
ODMECO2005
Page 226 of 614
4129
Features of your vehicle
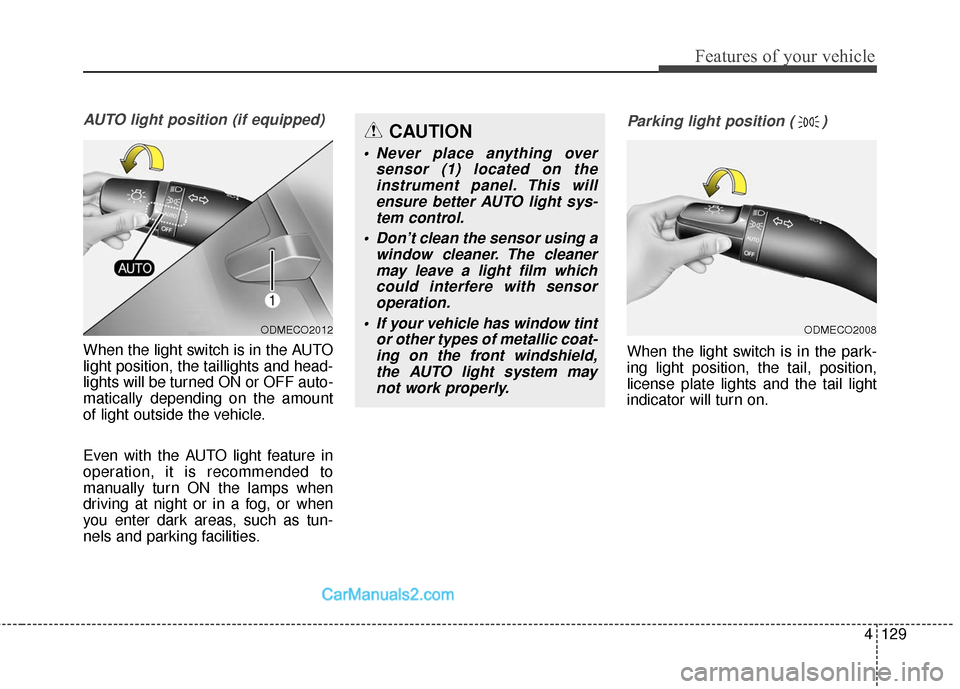
AUTO light position (if equipped)
When the light switch is in the AUTO
light position, the taillights and head-
lights will be turned ON or OFF auto-
matically depending on the amount
of light outside the vehicle.
Even with the AUTO light feature in
operation, it is recommended to
manually turn ON the lamps when
driving at night or in a fog, or when
you enter dark areas, such as tun-
nels and parking facilities.
Parking light position ( )
When the light switch is in the park-
ing light position, the tail, position,
license plate lights and the tail light
indicator will turn on.
ODMECO2012
CAUTION
• Never place anything oversensor (1) located on theinstrument panel. This willensure better AUTO light sys-tem control.
Don’t clean the sensor using a window cleaner. The cleanermay leave a light film whichcould interfere with sensoroperation.
If your vehicle has window tint or other types of metallic coat-ing on the front windshield,the AUTO light system maynot work properly.
ODMECO2008
Page 227 of 614
Features of your vehicle
130
4
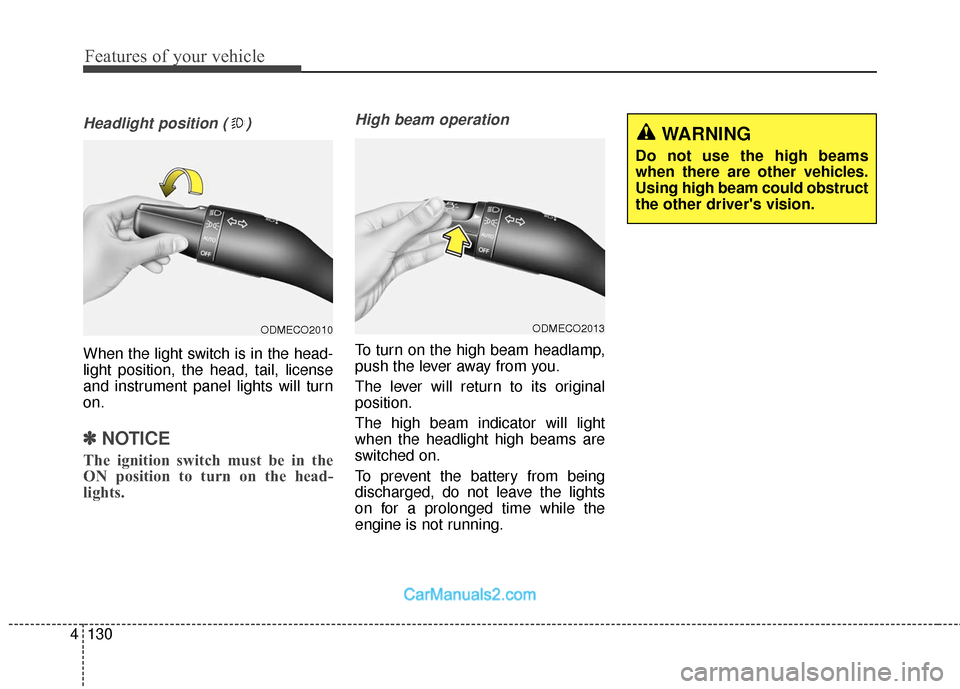
Headlight position ( )
When the light switch is in the head-
light position, the head, tail, license
and instrument panel lights will turn
on.
✽ ✽
NOTICE
The ignition switch must be in the
ON position to turn on the head-
lights.
High beam operation
To turn on the high beam headlamp,
push the lever away from you.
The lever will return to its original
position.
The high beam indicator will light
when the headlight high beams are
switched on.
To prevent the battery from being
discharged, do not leave the lights
on for a prolonged time while the
engine is not running.
ODMECO2013
WARNING
Do not use the high beams
when there are other vehicles.
Using high beam could obstruct
the other driver's vision.
ODMECO2010
Page 228 of 614
4131
Features of your vehicle
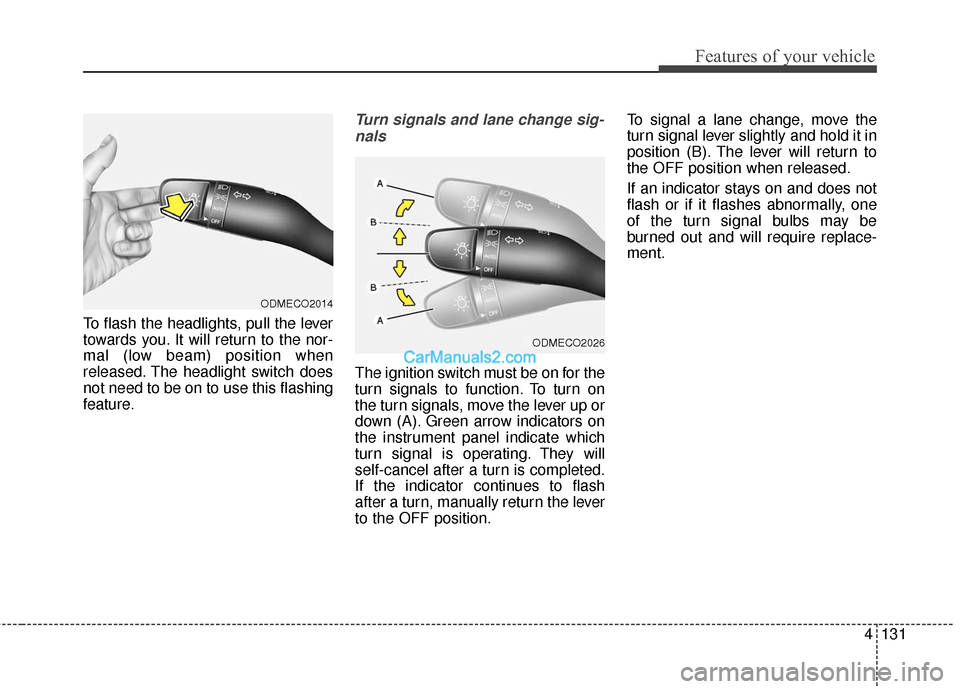
To flash the headlights, pull the lever
towards you. It will return to the nor-
mal (low beam) position when
released. The headlight switch does
not need to be on to use this flashing
feature.
Turn signals and lane change sig-nals
The ignition switch must be on for the
turn signals to function. To turn on
the turn signals, move the lever up or
down (A). Green arrow indicators on
the instrument panel indicate which
turn signal is operating. They will
self-cancel after a turn is completed.
If the indicator continues to flash
after a turn, manually return the lever
to the OFF position. To signal a lane change, move the
turn signal lever slightly and hold it in
position (B). The lever will return to
the OFF position when released.
If an indicator stays on and does not
flash or if it flashes abnormally, one
of the turn signal bulbs may be
burned out and will require replace-
ment.
ODMECO2026
ODMECO2014
Page 229 of 614
Features of your vehicle
132
4
One Touch Turn Signal
To activate the one-touch lane
change function, move the turn sig-
nal lever slightly and then release it.
The lane change signals will blink 3
(5 or 7, if equipped) times.
You can activate/deactivate the One
Touch Turn Signal function or choose
the number of blinking (3, 5, or 7)
from the User Settings Mode on the
LCD display (if equipped).
✽ ✽
NOTICE
If an indicator flash is abnormally
quick or slow, a bulb may be burned
out or have a poor electrical connec-
tion in the circuit.
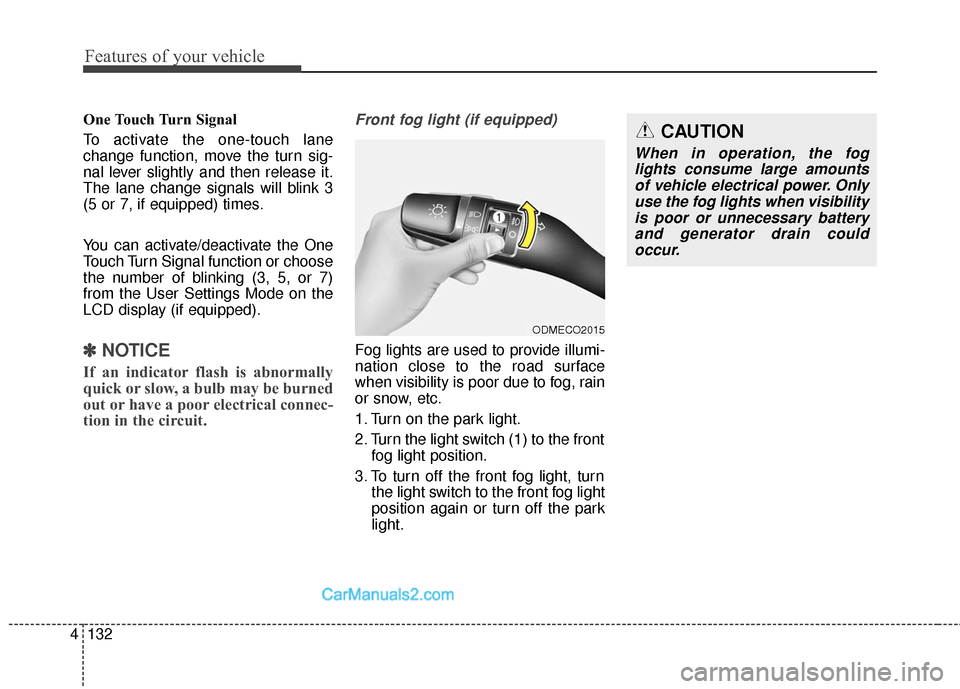
Front fog light (if equipped)
Fog lights are used to provide illumi-
nation close to the road surface
when visibility is poor due to fog, rain
or snow, etc.
1. Turn on the park light.
2. Turn the light switch (1) to the front
fog light position.
3. To turn off the front fog light, turn the light switch to the front fog light
position again or turn off the park
light.
ODMECO2015
CAUTION
When in operation, the foglights consume large amountsof vehicle electrical power. Onlyuse the fog lights when visibilityis poor or unnecessary batteryand generator drain couldoccur.
Page 230 of 614
4133
Features of your vehicle
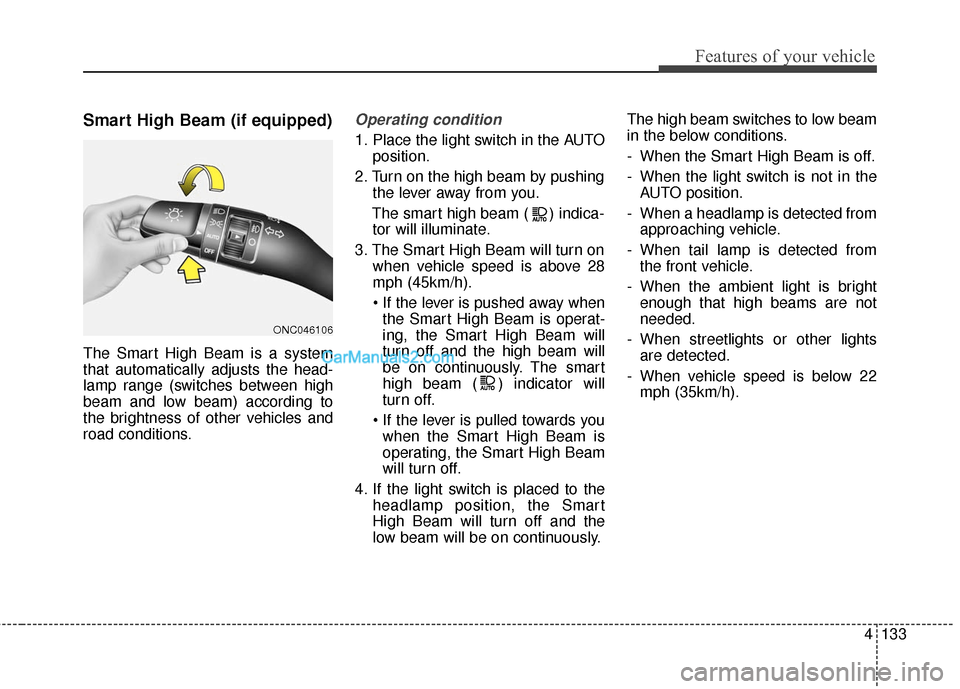
Smart High Beam (if equipped)
The Smart High Beam is a system
that automatically adjusts the head-
lamp range (switches between high
beam and low beam) according to
the brightness of other vehicles and
road conditions.
Operating condition
1. Place the light switch in the AUTOposition.
2. Turn on the high beam by pushing the lever away from you.
The smart high beam ( ) indica- tor will illuminate.
3. The Smart High Beam will turn on when vehicle speed is above 28
mph (45km/h).
the Smart High Beam is operat-
ing, the Smart High Beam will
turn off and the high beam will
be on continuously. The smart
high beam ( ) indicator will
turn off.
when the Smart High Beam is
operating, the Smart High Beam
will turn off.
4. If the light switch is placed to the headlamp position, the Smart
High Beam will turn off and the
low beam will be on continuously. The high beam switches to low beam
in the below conditions.
- When the Smart High Beam is off.
- When the light switch is not in the
AUTO position.
- When a headlamp is detected from approaching vehicle.
- When tail lamp is detected from the front vehicle.
- When the ambient light is bright enough that high beams are not
needed.
- When streetlights or other lights are detected.
- When vehicle speed is below 22 mph (35km/h).
ONC046106