lock Hyundai Sonata 2004 Owner's Guide
[x] Cancel search | Manufacturer: HYUNDAI, Model Year: 2004, Model line: Sonata, Model: Hyundai Sonata 2004Pages: 208, PDF Size: 16.93 MB
Page 42 of 208
1- 30 FEATURES OF YOUR HYUNDAI
!
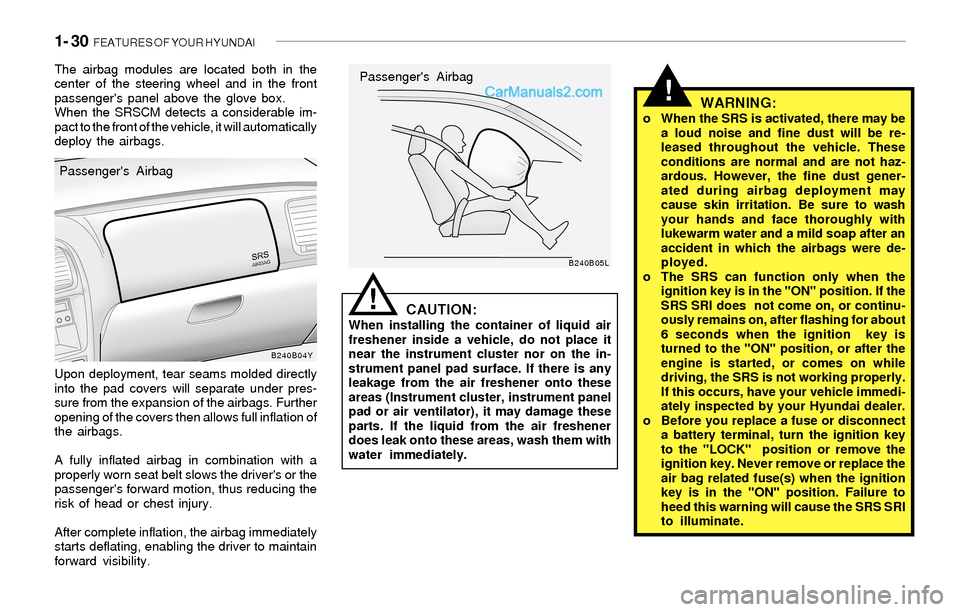
The airbag modules are located both in the
center of the steering wheel and in the front
passenger's panel above the glove box.
When the SRSCM detects a considerable im-
pact to the front of the vehicle, it will automatically
deploy the airbags.
Upon deployment, tear seams molded directly
into the pad covers will separate under pres-
sure from the expansion of the airbags. Further
opening of the covers then allows full inflation of
the airbags.
A fully inflated airbag in combination with a
properly worn seat belt slows the driver's or the
passenger's forward motion, thus reducing the
risk of head or chest injury.
After complete inflation, the airbag immediately
starts deflating, enabling the driver to maintain
forward visibility.
CAUTION:When installing the container of liquid air
freshener inside a vehicle, do not place it
near the instrument cluster nor on the in-
strument panel pad surface. If there is any
leakage from the air freshener onto these
areas (Instrument cluster, instrument panel
pad or air ventilator), it may damage these
parts. If the liquid from the air freshener
does leak onto these areas, wash them with
water immediately.
WARNING:o When the SRS is activated, there may be
a loud noise and fine dust will be re-
leased throughout the vehicle. These
conditions are normal and are not haz-
ardous. However, the fine dust gener-
ated during airbag deployment may
cause skin irritation. Be sure to wash
your hands and face thoroughly with
lukewarm water and a mild soap after an
accident in which the airbags were de-
ployed.
o The SRS can function only when the
ignition key is in the "ON" position. If the
SRS SRI does not come on, or continu-
ously remains on, after flashing for about
6 seconds when the ignition key is
turned to the "ON" position, or after the
engine is started, or comes on while
driving, the SRS is not working properly.
If this occurs, have your vehicle immedi-
ately inspected by your Hyundai dealer.
o Before you replace a fuse or disconnect
a battery terminal, turn the ignition key
to the "LOCK" position or remove the
ignition key. Never remove or replace the
air bag related fuse(s) when the ignition
key is in the "ON" position. Failure to
heed this warning will cause the SRS SRI
to illuminate.
!
B240B04YB240B05L
Passenger's AirbagPassenger's Airbag
Page 43 of 208
FEATURES OF YOUR HYUNDAI 1- 31
!
!
B990A04Y-AATPASSENGER PRESENCE DETECTION
The passenger presence detection system
detects the presence of a passenger in the right
front seat. If no passenger is recognized on the
front passenger seat, the deployment of the
front passenger and/or side airbag and seat belt
pretensioner will be prevented.
This system is designed to prevent the replace-
ment of airbag components that deploy need-
lessly in an accident.
NOTE:Luggage or other cargo heavier than 33 lbs
(15 kg) should not be placed on the passen-
ger front seat. This can allow the deploy-
ment of the front passenger and/or side air
bag in the case of an accident.
WARNING:The Passenger Presence Detection system
is not intended to prevent airbag deploy-
ment while a child is in the front passen-
ger's seat. It is intended only as a means to
reduce unnecessary collision damage re-
pair expense by preventing airbag and seat
belt pretensioner deployment when the
right front passenger seat is unoccupied.
Deployment is still possible if only a few
pounds are placed upon the seat. There-
fore, children must not be transported inthe front seat. All children must be seated
in the rear seat and properly restrained with
the vehicle's restraint system or a child
restraint system appropriate for the child's
size and weight.
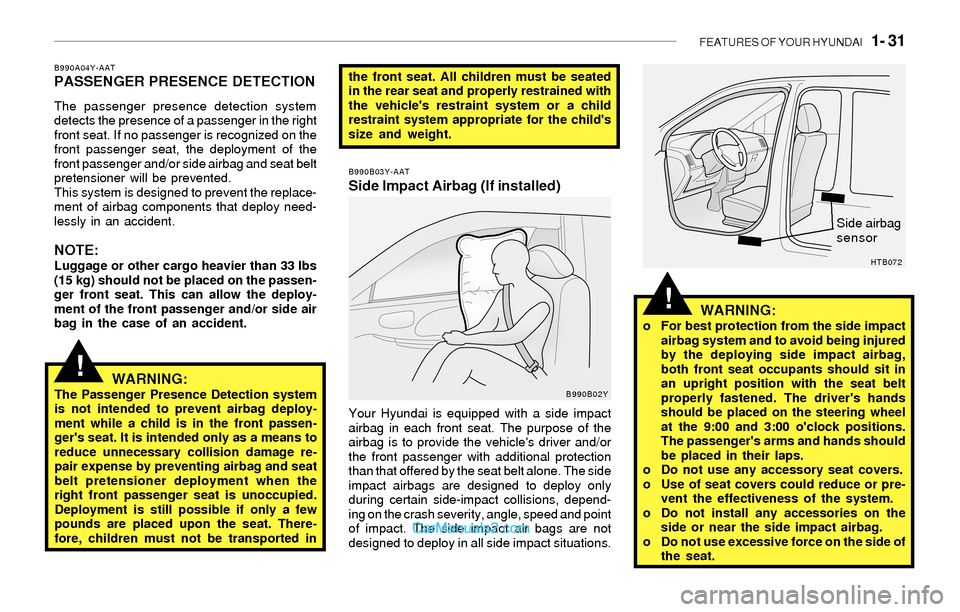
B990B03Y-AATSide Impact Airbag (If installed)
Your Hyundai is equipped with a side impact
airbag in each front seat. The purpose of the
airbag is to provide the vehicle's driver and/or
the front passenger with additional protection
than that offered by the seat belt alone. The side
impact airbags are designed to deploy only
during certain side-impact collisions, depend-
ing on the crash severity, angle, speed and point
of impact. The side impact air bags are not
designed to deploy in all side impact situations.
WARNING:o For best protection from the side impact
airbag system and to avoid being injured
by the deploying side impact airbag,
both front seat occupants should sit in
an upright position with the seat belt
properly fastened. The driver's hands
should be placed on the steering wheel
at the 9:00 and 3:00 o'clock positions.
The passenger's arms and hands should
be placed in their laps.
o Do not use any accessory seat covers.
o Use of seat covers could reduce or pre-
vent the effectiveness of the system.
o Do not install any accessories on the
side or near the side impact airbag.
o Do not use excessive force on the side of
the seat.
B990B02YHTB072
Side airbag
sensor
Page 46 of 208
1- 34 FEATURES OF YOUR HYUNDAI
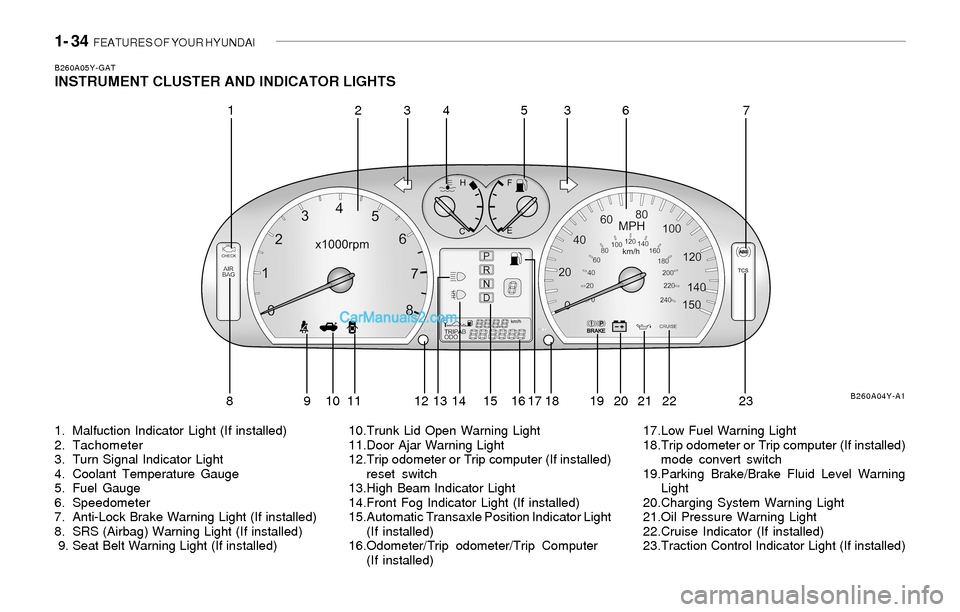
B260A05Y-GATINSTRUMENT CLUSTER AND INDICATOR LIGHTS
1. Malfuction Indicator Light (If installed)
2. Tachometer
3. Turn Signal Indicator Light
4. Coolant Temperature Gauge
5. Fuel Gauge
6. Speedometer
7. Anti-Lock Brake Warning Light (If installed)
8. SRS (Airbag) Warning Light (If installed)
9. Seat Belt Warning Light (If installed)10.Trunk Lid Open Warning Light
11.Door Ajar Warning Light
12.Trip odometer or Trip computer (If installed)
reset switch
13.High Beam Indicator Light
14.Front Fog Indicator Light (If installed)
15.Automatic Transaxle Position Indicator Light
(If installed)
16.Odometer/Trip odometer/Trip Computer
(If installed)17.Low Fuel Warning Light
18.Trip odometer or Trip computer (If installed)
mode convert switch
19.Parking Brake/Brake Fluid Level Warning
Light
20.Charging System Warning Light
21.Oil Pressure Warning Light
22.Cruise Indicator (If installed)
23.Traction Control Indicator Light (If installed)
B260A04Y-A1
12345637
8 9 10 11 12 13 14 15 16 17 18 19 20 21 22 23
Page 48 of 208
1- 36 FEATURES OF YOUR HYUNDAI
!
B260H02A-AATParking Brake/Brake Fluid Level
Warning Lightadding fluid, if no other trouble is found, the car
should be immediately and carefully driven to a
Hyundai dealer for inspection. If further trouble
is experienced, the vehicle should not be driven
at all but taken to a dealer by a professional
towing service or some other safe method.
Your Hyundai is equipped with dual-diagonal
braking systems. This means you still have
braking on two wheels even if one of the dual
systems should fail. With only one of the dual
systems working, more than normal pedal travel
and greater pedal pressure are required to stop
the car. Also, the car will not stop in as short a
distance with only half of the brake system
working. If the brakes fail while you are driving,
shift to a lower gear for additional engine braking
and stop the car as soon as it is safe to do so.
WARNING:If you suspect brake trouble, have your
brakes checked by a Hyundai dealer as
soon as possible. Driving your car with a
problem in either the brake electrical sys-
tem or brake hydraulic system is danger-
ous, and could result in a serious injury or
death.
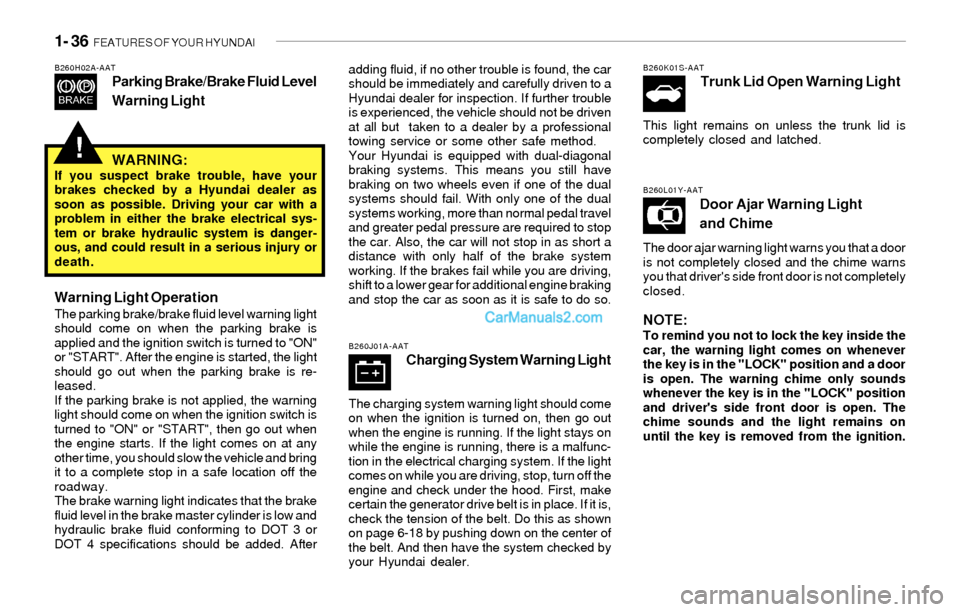
Warning Light OperationThe parking brake/brake fluid level warning light
should come on when the parking brake is
applied and the ignition switch is turned to "ON"
or "START". After the engine is started, the light
should go out when the parking brake is re-
leased.
If the parking brake is not applied, the warning
light should come on when the ignition switch is
turned to "ON" or "START", then go out when
the engine starts. If the light comes on at any
other time, you should slow the vehicle and bring
it to a complete stop in a safe location off the
roadway.
The brake warning light indicates that the brake
fluid level in the brake master cylinder is low and
hydraulic brake fluid conforming to DOT 3 or
DOT 4 specifications should be added. After
B260J01A-AATCharging System Warning Light
The charging system warning light should come
on when the ignition is turned on, then go out
when the engine is running. If the light stays on
while the engine is running, there is a malfunc-
tion in the electrical charging system. If the light
comes on while you are driving, stop, turn off the
engine and check under the hood. First, make
certain the generator drive belt is in place. If it is,
check the tension of the belt. Do this as shown
on page 6-18 by pushing down on the center of
the belt. And then have the system checked by
your Hyundai dealer.
B260K01S-AATTrunk Lid Open Warning Light
This light remains on unless the trunk lid is
completely closed and latched.
B260L01Y-AAT
Door Ajar Warning Light
and Chime
The door ajar warning light warns you that a door
is not completely closed and the chime warns
you that driver's side front door is not completely
closed.
NOTE:To remind you not to lock the key inside the
car, the warning light comes on whenever
the key is in the "LOCK" position and a door
is open. The warning chime only sounds
whenever the key is in the "LOCK" position
and driver's side front door is open. The
chime sounds and the light remains on
until the key is removed from the ignition.
Page 49 of 208
FEATURES OF YOUR HYUNDAI 1- 37
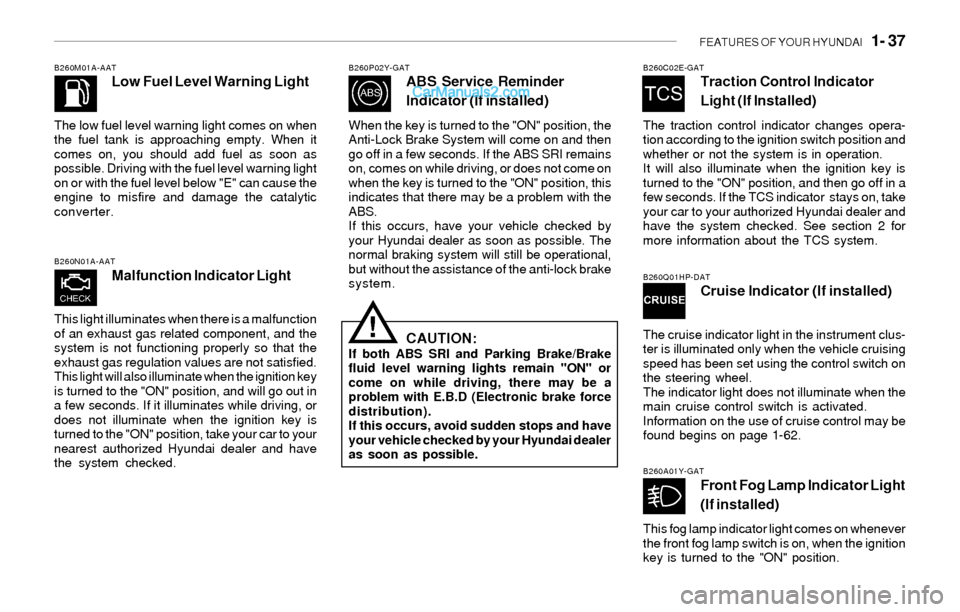
B260M01A-AATLow Fuel Level Warning Light
The low fuel level warning light comes on when
the fuel tank is approaching empty. When it
comes on, you should add fuel as soon as
possible. Driving with the fuel level warning light
on or with the fuel level below "E" can cause the
engine to misfire and damage the catalytic
converter.
B260N01A-AAT
Malfunction Indicator Light
This light illuminates when there is a malfunction
of an exhaust gas related component, and the
system is not functioning properly so that the
exhaust gas regulation values are not satisfied.
This light will also illuminate when the ignition key
is turned to the "ON" position, and will go out in
a few seconds. If it illuminates while driving, or
does not illuminate when the ignition key is
turned to the "ON" position, take your car to your
nearest authorized Hyundai dealer and have
the system checked.
B260P02Y-GATABS Service Reminder
Indicator (If installed)
When the key is turned to the "ON" position, the
Anti-Lock Brake System will come on and then
go off in a few seconds. If the ABS SRI remains
on, comes on while driving, or does not come on
when the key is turned to the "ON" position, this
indicates that there may be a problem with the
ABS.
If this occurs, have your vehicle checked by
your Hyundai dealer as soon as possible. The
normal braking system will still be operational,
but without the assistance of the anti-lock brake
system.
CAUTION:If both ABS SRI and Parking Brake/Brake
fluid level warning lights remain "ON" or
come on while driving, there may be a
problem with E.B.D (Electronic brake force
distribution).
If this occurs, avoid sudden stops and have
your vehicle checked by your Hyundai dealer
as soon as possible.
!
B260C02E-GATTraction Control Indicator
Light (If Installed)
The traction control indicator changes opera-
tion according to the ignition switch position and
whether or not the system is in operation.
It will also illuminate when the ignition key is
turned to the "ON" position, and then go off in a
few seconds. If the TCS indicator stays on, take
your car to your authorized Hyundai dealer and
have the system checked. See section 2 for
more information about the TCS system.
B260Q01HP-DATCruise Indicator (If installed)
The cruise indicator light in the instrument clus-
ter is illuminated only when the vehicle cruising
speed has been set using the control switch on
the steering wheel.
The indicator light does not illuminate when the
main cruise control switch is activated.
Information on the use of cruise control may be
found begins on page 1-62.
B260A01Y-GATFront Fog Lamp Indicator Light
(If installed)
This fog lamp indicator light comes on whenever
the front fog lamp switch is on, when the ignition
key is turned to the "ON" position.
Page 57 of 208
FEATURES OF YOUR HYUNDAI 1- 45
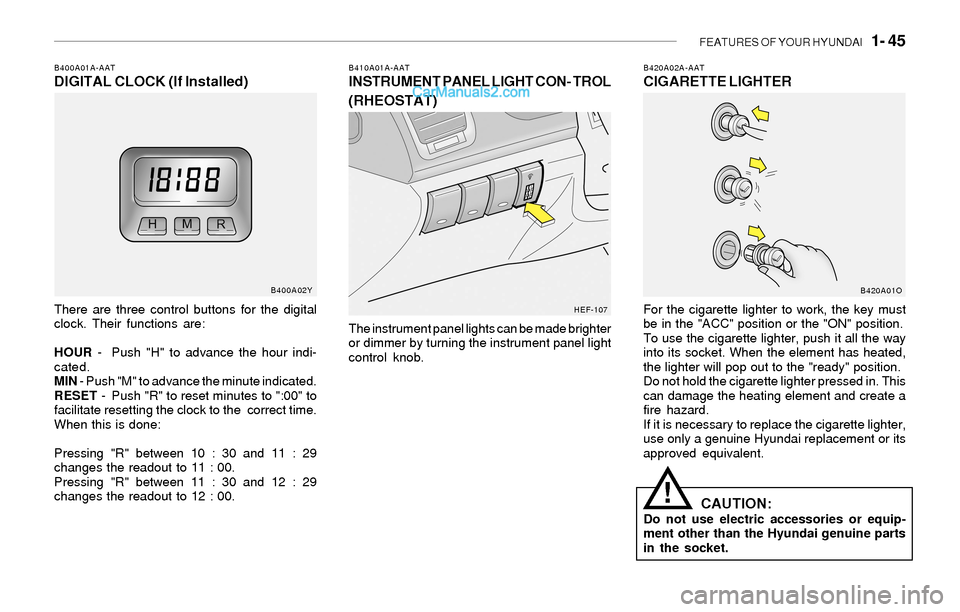
B420A02A-AATCIGARETTE LIGHTER
For the cigarette lighter to work, the key must
be in the "ACC" position or the "ON" position.
To use the cigarette lighter, push it all the way
into its socket. When the element has heated,
the lighter will pop out to the "ready" position.
Do not hold the cigarette lighter pressed in. This
can damage the heating element and create a
fire hazard.
If it is necessary to replace the cigarette lighter,
use only a genuine Hyundai replacement or its
approved equivalent.
CAUTION:Do not use electric accessories or equip-
ment other than the Hyundai genuine parts
in the socket.
!
B410A01A-AATINSTRUMENT PANEL LIGHT CON- TROL
(RHEOSTAT)
The instrument panel lights can be made brighter
or dimmer by turning the instrument panel light
control knob.
B400A01A-AATDIGITAL CLOCK (If Installed)
There are three control buttons for the digital
clock. Their functions are:
HOUR - Push "H" to advance the hour indi-
cated.
MIN - Push "M" to advance the minute indicated.
RESET - Push "R" to reset minutes to ":00" to
facilitate resetting the clock to the correct time.
When this is done:
Pressing "R" between 10 : 30 and 11 : 29
changes the readout to 11 : 00.
Pressing "R" between 11 : 30 and 12 : 29
changes the readout to 12 : 00.
B400A02Y
HEF-107B420A01O
Page 59 of 208
FEATURES OF YOUR HYUNDAI 1- 47
!!
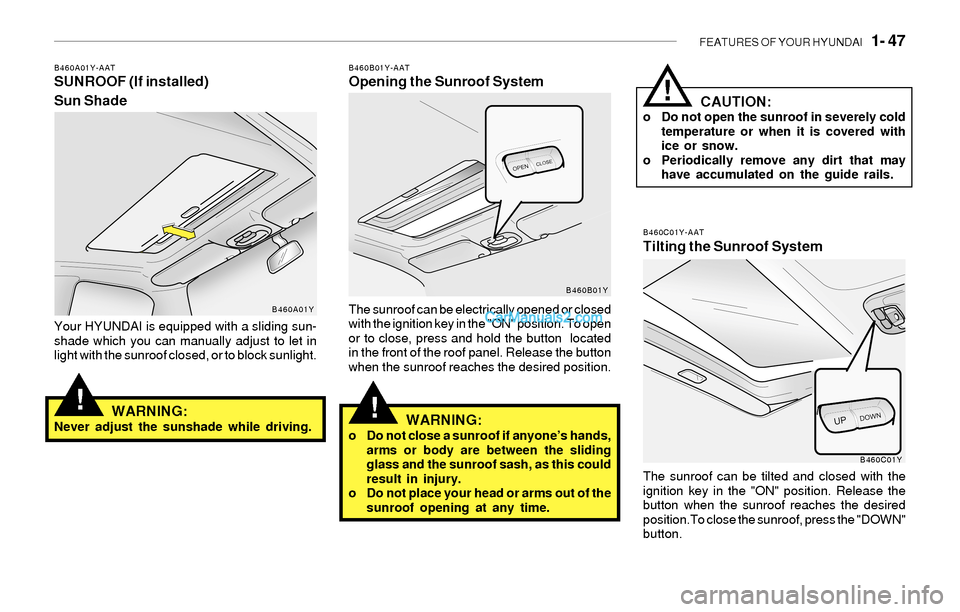
B460A01Y-AATSUNROOF (If installed)
Sun Shade
Your HYUNDAI is equipped with a sliding sun-
shade which you can manually adjust to let in
light with the sunroof closed, or to block sunlight.
WARNING:Never adjust the sunshade while driving.
B460B01Y-AATOpening the Sunroof System
The sunroof can be electrically opened or closed
with the ignition key in the "ON" position. To open
or to close, press and hold the button located
in the front of the roof panel. Release the button
when the sunroof reaches the desired position.
WARNING:o Do not close a sunroof if anyone’s hands,
arms or body are between the sliding
glass and the sunroof sash, as this could
result in injury.
o Do not place your head or arms out of the
sunroof opening at any time.
B460A01YB460B01Y
CAUTION:o Do not open the sunroof in severely cold
temperature or when it is covered with
ice or snow.
o Periodically remove any dirt that may
have accumulated on the guide rails.
!
B460C01Y-AAT
Tilting the Sunroof System
The sunroof can be tilted and closed with the
ignition key in the "ON" position. Release the
button when the sunroof reaches the desired
position.To close the sunroof, press the "DOWN"
button.
B460C01Y
Page 60 of 208
1- 48 FEATURES OF YOUR HYUNDAI
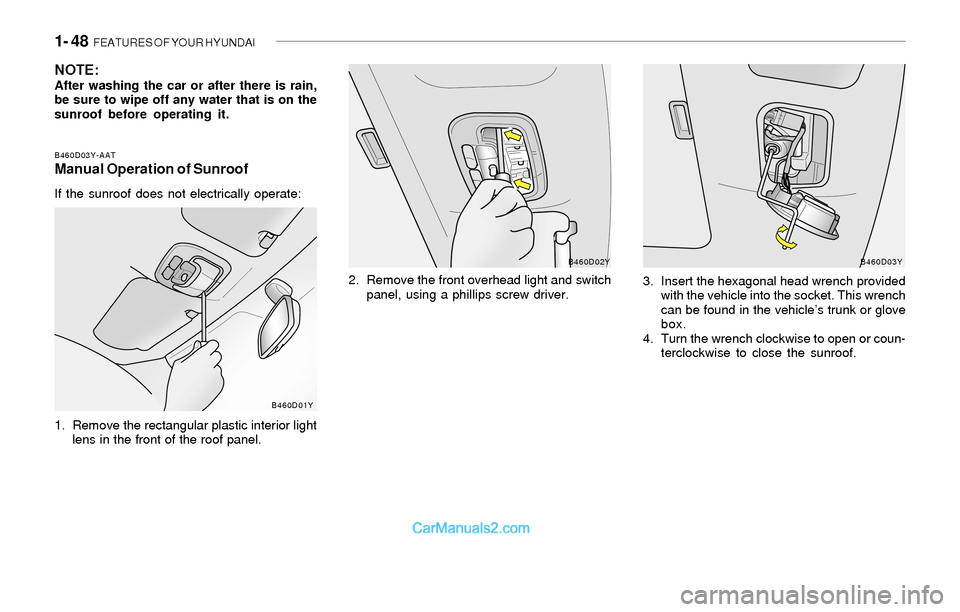
B460D03Y-AATManual Operation of Sunroof
If the sunroof does not electrically operate:
1. Remove the rectangular plastic interior light
lens in the front of the roof panel.2. Remove the front overhead light and switch
panel, using a phillips screw driver.3. Insert the hexagonal head wrench provided
with the vehicle into the socket. This wrench
can be found in the vehicle’s trunk or glove
box.
4. Turn the wrench clockwise to open or coun-
terclockwise to close the sunroof.
B460D02Y
B460D01YB460D03Y
NOTE:After washing the car or after there is rain,
be sure to wipe off any water that is on the
sunroof before operating it.
Page 67 of 208
FEATURES OF YOUR HYUNDAI 1- 55
Operating HomeLink
Simply press the appropriate HomeLink button
to activate the trained product (garage door,
security system, entry door lock, estate gate,
lighting, etc.). The original handheld transmit-
ters may also be used at any time.
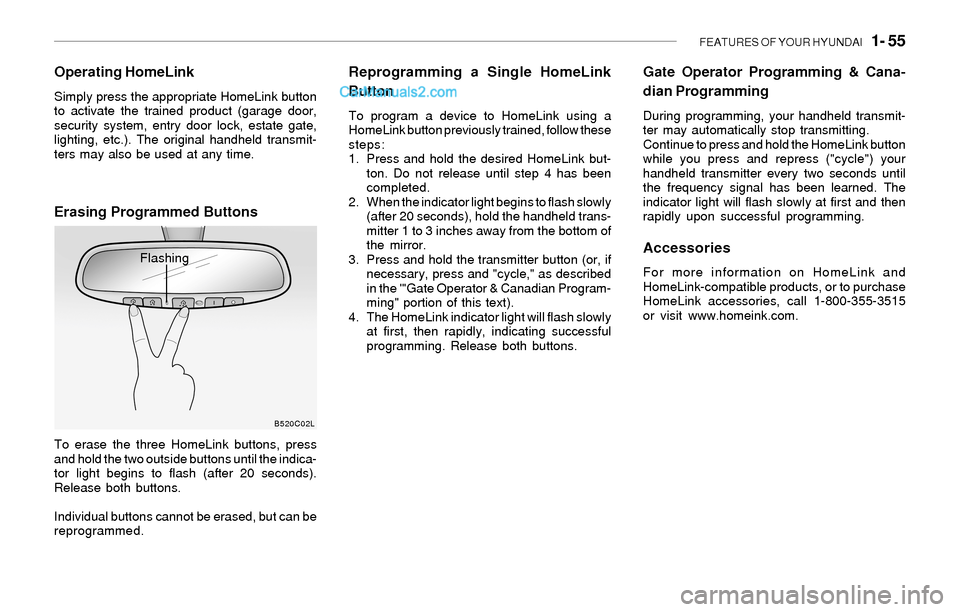
Erasing Programmed Buttons
To erase the three HomeLink buttons, press
and hold the two outside buttons until the indica-
tor light begins to flash (after 20 seconds).
Release both buttons.
Individual buttons cannot be erased, but can be
reprogrammed.
Reprogramming a Single HomeLink
Button
To program a device to HomeLink using a
HomeLink button previously trained, follow these
steps:
1. Press and hold the desired HomeLink but-
ton. Do not release until step 4 has been
completed.
2. When the indicator light begins to flash slowly
(after 20 seconds), hold the handheld trans-
mitter 1 to 3 inches away from the bottom of
the mirror.
3. Press and hold the transmitter button (or, if
necessary, press and "cycle," as described
in the '"Gate Operator & Canadian Program-
ming" portion of this text).
4. The HomeLink indicator light will flash slowly
at first, then rapidly, indicating successful
programming. Release both buttons.
B520C02L
Flashing
Gate Operator Programming & Cana-
dian Programming
During programming, your handheld transmit-
ter may automatically stop transmitting.
Continue to press and hold the HomeLink button
while you press and repress ("cycle") your
handheld transmitter every two seconds until
the frequency signal has been learned. The
indicator light will flash slowly at first and then
rapidly upon successful programming.
Accessories
For more information on HomeLink and
HomeLink-compatible products, or to purchase
HomeLink accessories, call 1-800-355-3515
or visit www.homeink.com.
Page 68 of 208
1- 56 FEATURES OF YOUR HYUNDAI
!
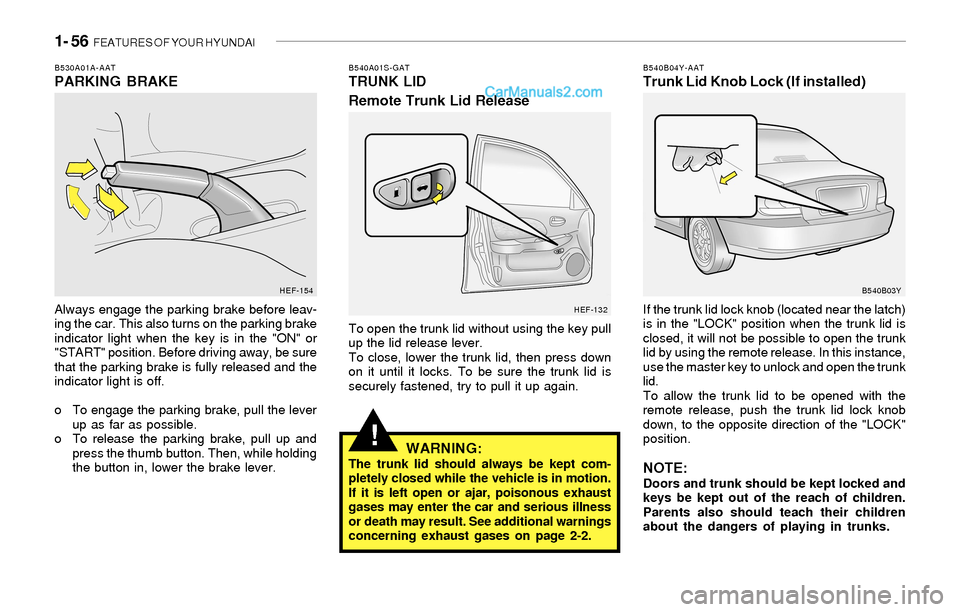
B530A01A-AATPARKING BRAKE
Always engage the parking brake before leav-
ing the car. This also turns on the parking brake
indicator light when the key is in the "ON" or
"START" position. Before driving away, be sure
that the parking brake is fully released and the
indicator light is off.
o To engage the parking brake, pull the lever
up as far as possible.
o To release the parking brake, pull up and
press the thumb button. Then, while holding
the button in, lower the brake lever.
B540A01S-GATTRUNK LID
Remote Trunk Lid Release
To open the trunk lid without using the key pull
up the lid release lever.
To close, lower the trunk lid, then press down
on it until it locks. To be sure the trunk lid is
securely fastened, try to pull it up again.
WARNING:The trunk lid should always be kept com-
pletely closed while the vehicle is in motion.
If it is left open or ajar, poisonous exhaust
gases may enter the car and serious illness
or death may result. See additional warnings
concerning exhaust gases on page 2-2.
B540B04Y-AATTrunk Lid Knob Lock (If installed)
If the trunk lid lock knob (located near the latch)
is in the "LOCK" position when the trunk lid is
closed, it will not be possible to open the trunk
lid by using the remote release. In this instance,
use the master key to unlock and open the trunk
lid.
To allow the trunk lid to be opened with the
remote release, push the trunk lid lock knob
down, to the opposite direction of the "LOCK"
position.
NOTE:Doors and trunk should be kept locked and
keys be kept out of the reach of children.
Parents also should teach their children
about the dangers of playing in trunks.
HEF-154
HEF-132 B540B03Y