fuel pressure Hyundai Sonata 2017 Owner's Manual
[x] Cancel search | Manufacturer: HYUNDAI, Model Year: 2017, Model line: Sonata, Model: Hyundai Sonata 2017Pages: 563, PDF Size: 17.7 MB
Page 160 of 563
3-75
Convenient features of your vehicle
3
LCD Modes
L
LC
C D
D
D
D I
IS
S P
P L
LA
A Y
Y
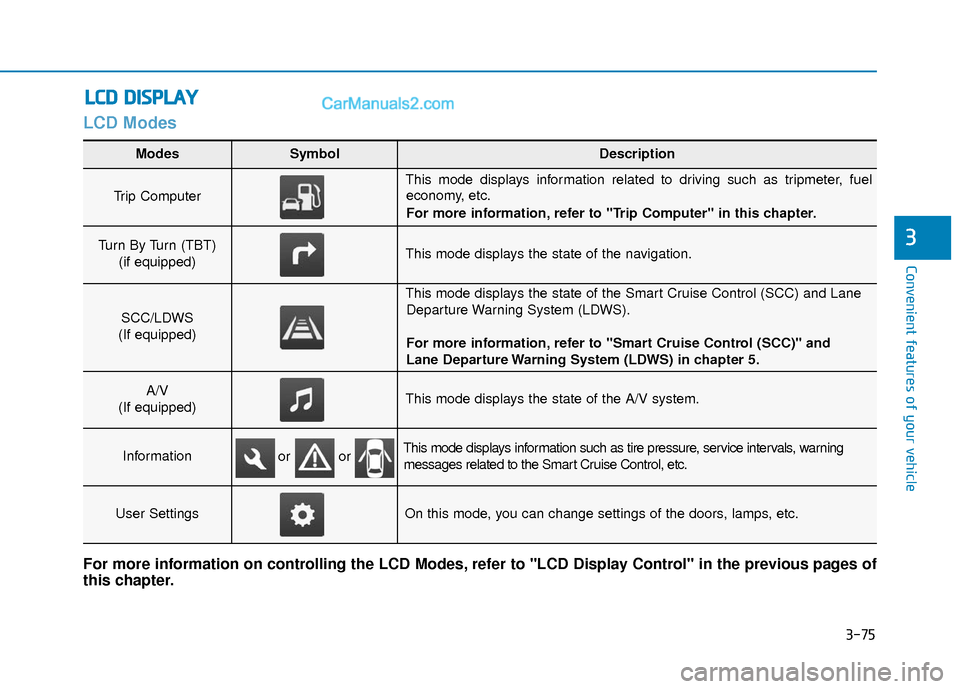
Modes SymbolDescription
Trip Computer
This mode displays information related to driving such as tripmeter, fuel
economy, etc.
For more information, refer to "Trip Computer" in this chapter.
Turn By Turn (TBT)
(if equipped)This mode displays the state of the navigation.
SCC/LDWS
(If equipped)
This mode displays the state of the Smart Cruise Control (SCC) and Lane Departure Warning System (LDWS).
For more information, refer to "Smart Cruise Control (SCC)" and
Lane Departure Warning System (LDWS) in chapter 5.
A/V
(If equipped)This mode displays the state of the A/V system.
InformationThis mode displays information such as tire pressure, service intervals, warning messages related to the Smart Cruise Control, etc.
User SettingsOn this mode, you can change settings of the doors, lamps, etc.
For more information on controlling the LCD Modes, refer to "LCD Display Control" in the previous pages of
this chapter.
or or
Page 169 of 563
3-84
Convenient features of your vehicle
Other Features
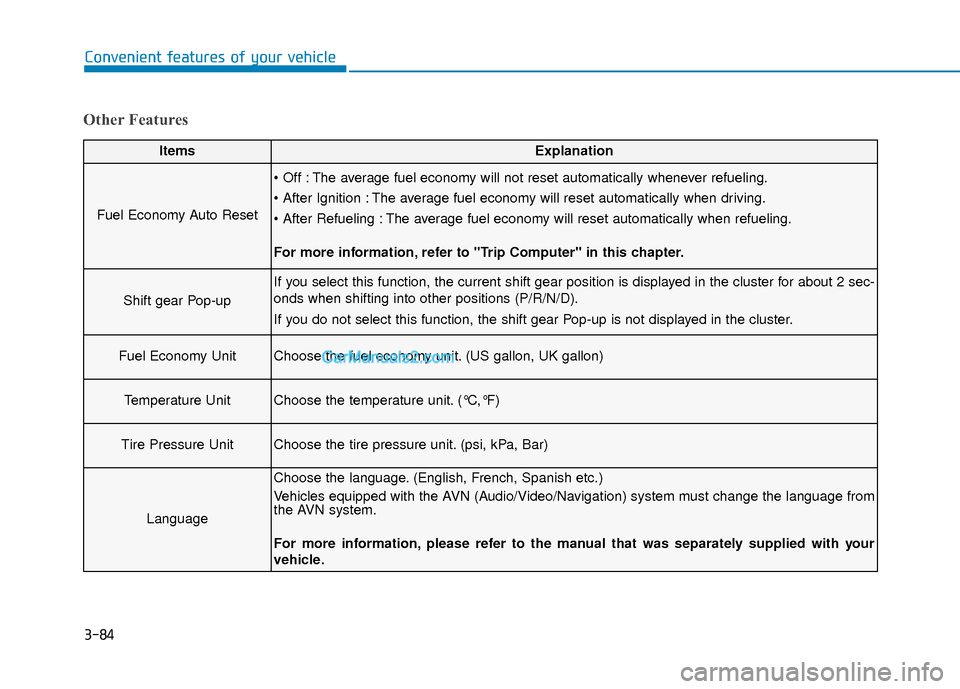
ItemsExplanation
Fuel Economy Auto Reset
The average fuel economy will not reset automatically whenever refueling.
The average fuel economy will reset automatically when driving.
The average fuel economy will reset automatically when refueling.
For more information, refer to "Trip Computer" in this chapter.
Shift gear Pop-up
If you select this function, the current shift gear position is displayed in the cluster for about 2 sec-
onds when shifting into other positions (P/R/N/D).
If you do not select this function, the shift gear Pop-up is not displayed in the cluster.
Fuel Economy UnitChoose the fuel economy unit. (US gallon, UK gallon)
Temperature UnitChoose the temperature unit. (°C,°F)
Tire Pressure UnitChoose the tire pressure unit. (psi, kPa, Bar)
Language
Choose the language. (English, French, Spanish etc.)
Vehicles equipped with the AVN (Audio/Video/Navigation) system must change the language from
the AVN system.
For more information, please refer to the manual that was separately supplied with your
vehicle.
Page 187 of 563
3-102
Convenient features of your vehicle
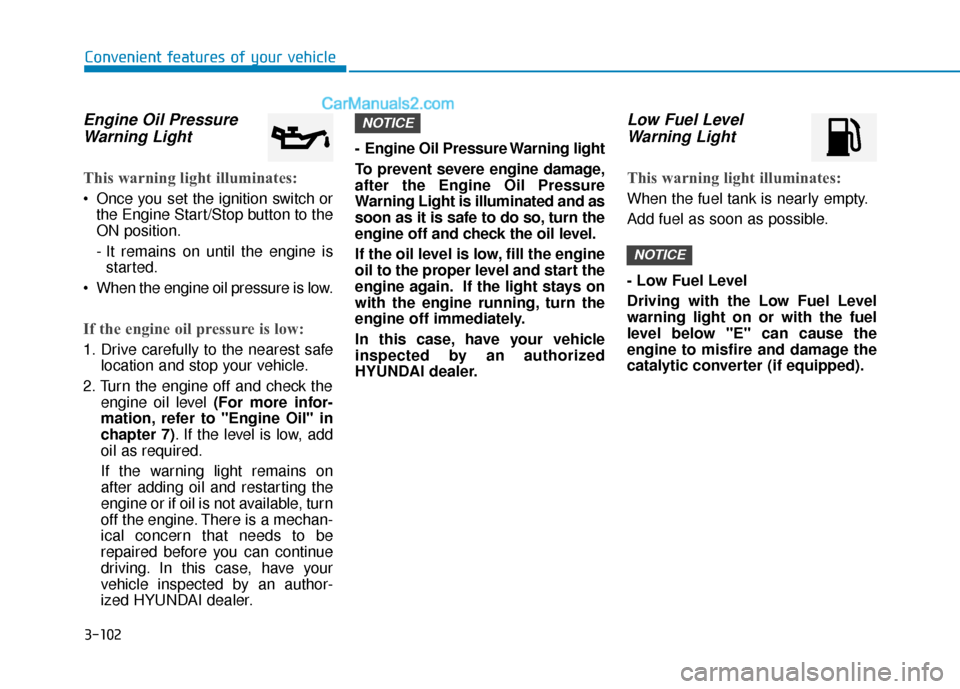
Engine Oil PressureWarning Light
This warning light illuminates:
Once you set the ignition switch or
the Engine Start/Stop button to the
ON position.
- It remains on until the engine isstarted.
When the engine oil pressure is low.
If the engine oil pressure is low:
1. Drive carefully to the nearest safe location and stop your vehicle.
2. Turn the engine off and check the engine oil level (For more infor-
mation, refer to "Engine Oil" in
chapter 7). If the level is low, add
oil as required.
If the warning light remains on
after adding oil and restarting the
engine or if oil is not available, turn
off the engine. There is a mechan-
ical concern that needs to be
repaired before you can continue
driving. In this case, have your
vehicle inspected by an author-
ized HYUNDAI dealer. - Engine Oil Pressure Warning light
To prevent severe engine damage,
after the Engine Oil Pressure
Warning Light is illuminated and as
soon as it is safe to do so, turn the
engine off and check the oil level.
If the oil level is low, fill the engine
oil to the proper level and start the
engine again. If the light stays on
with the engine running, turn the
engine off immediately.
In this case, have your vehicle
inspected by an authorized
HYUNDAI dealer.
Low Fuel Level
Warning Light
This warning light illuminates:
When the fuel tank is nearly empty.
Add fuel as soon as possible.
- Low Fuel Level
Driving with the Low Fuel Level
warning light on or with the fuel
level below "E" can cause the
engine to misfire and damage the
catalytic converter (if equipped).
NOTICE
NOTICE
Page 423 of 563
6-10
What to do in an emergency
Tire Pressure Monitoring
System
Each tire, including the spare (if pro-
vided), should be checked monthly
when cold and inflated to the inflation
pressure recommended by the vehi-
cle manufacturer on the vehicle plac-
ard or tire inflation pressure label. (If
your vehicle has tires of a different
size than the size indicated on the
vehicle placard or tire inflation pres-
sure label, you should determine the
proper tire inflation pressure for
those tires.)
As an added safety feature, your
vehicle has been equipped with a tire
pressure monitoring system (TPMS)
that illuminates a low tire pressure
telltale when one or more of your
tires is significantly under-inflated.
Accordingly, when the low tire pres-
sure telltale illuminates, you should
stop and check your tires as soon as
possible, and inflate them to the
proper pressure. Driving on a signifi-
cantly under-inflated tire causes the
tire to overheat and can lead to tire
failure.Under-inflation also reduces fuel effi-
ciency and tire tread life, and may
affect the vehicle’s handling and
stopping ability.
Please note that the TPMS is not a
substitute for proper tire mainte-
nance, and it is the driver’s responsi-
bility to maintain correct tire pres-
sure, even if under-inflation has not
reached the level to trigger illumina-
tion of the TPMS low tire pressure
telltale.
Your vehicle has also been equipped
with a TPMS malfunction indicator to
indicate when the system is not
operating properly. The TPMS mal-
function indicator is combined with
the low tire pressure telltale. When
the system detects a malfunction,
the telltale will flash for approximate-
ly one minute and then remain con-
tinuously illuminated. This sequence
will continue upon subsequent vehi-
cle start-ups as long as the malfunc-
tion exists.
When the malfunction indicator is
illuminated, the system may not be
able to detect or signal low tire pres-
sure as intended. TPMS malfunc-
tions may occur for a variety of rea-
sons, including the installation of
replacement or alternate tires or
wheels on the vehicle that prevent
the TPMS from functioning properly.
Always check the TPMS malfunction
telltale after replacing one or more
tires or wheels on your vehicle to
ensure that the replacement or alter-
nate tires and wheels allow the
TPMS to continue to function proper-
ly.
Page 447 of 563
7
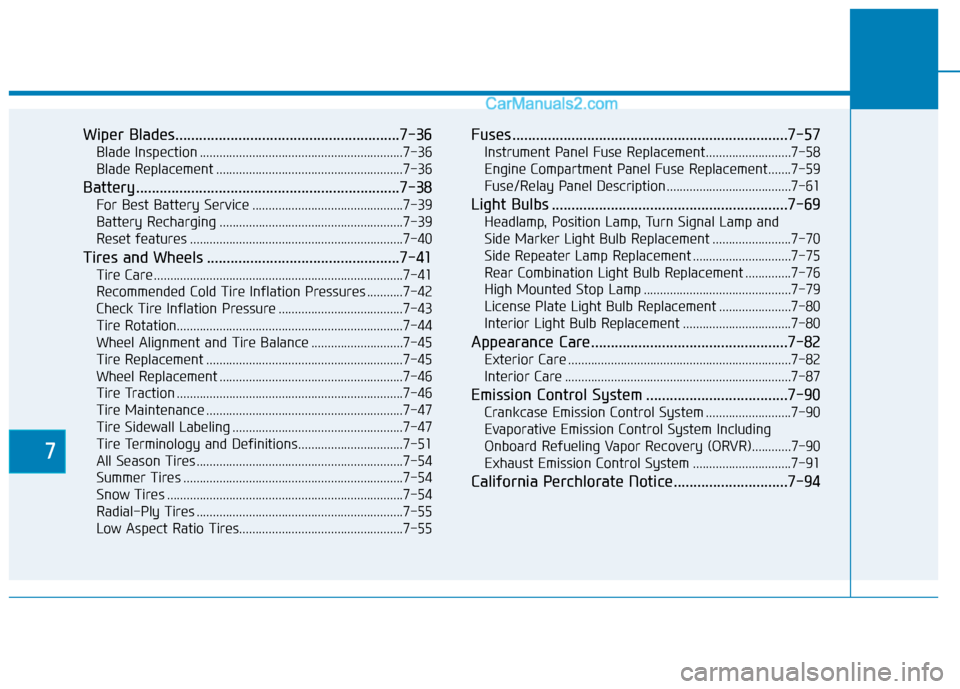
Wiper Blades.........................................................7-36
Blade Inspection ..............................................................7-36
Blade Replacement .........................................................7-36
Battery...................................................................7-38
For Best Battery Service ..............................................7-39
Battery Recharging ........................................................7-39
Reset features .................................................................7-40
Tires and Wheels .................................................7-41
Tire Care ........................................................................\
....7-41
Recommended Cold Tire Inflation Pressures ...........7-42
Check Tire Inflation Pressure ......................................7-43
Tire Rotation...................................................................\
..7-44
Wheel Alignment and Tire Balance ............................7-45
Tire Replacement ............................................................7-45
Wheel Replacement ........................................................7-46
Tire Traction .....................................................................7-4\
6
Tire Maintenance ............................................................7-47
Tire Sidewall Labeling ....................................................7-47
Tire Terminology and Definitions................................7-51
All Season Tires ...............................................................7-54
Summer Tires ...................................................................7-54
Snow Tires ........................................................................\
7-54
Radial-Ply Tires ...............................................................7-55
Low Aspect Ratio Tires..................................................7-55
Fuses ......................................................................7-\
57
Instrument Panel Fuse Replacement..........................7-58
Engine Compartment Panel Fuse Replacement.......7-59
Fuse/Relay Panel Description ......................................7-61
Light Bulbs ............................................................7-69
Headlamp, Position Lamp, Turn Signal Lamp and
Side Marker Light Bulb Replacement ........................7-70
Side Repeater Lamp Replacement ..............................7-75
Rear Combination Light Bulb Replacement ..............7-76
High Mounted Stop Lamp .............................................7-79
License Plate Light Bulb Replacement ......................7-80
Interior Light Bulb Replacement .................................7-80
Appearance Care..................................................7-82
Exterior Care ....................................................................7-82\
Interior Care .....................................................................7-8\
7
Emission Control System ....................................7-90
Crankcase Emission Control System ..........................7-90
Evaporative Emission Control System Including
Onboard Refueling Vapor Recovery (ORVR)............7-90
Exhaust Emission Control System ..............................7-91
California Perchlorate Notice.............................7-94
Page 453 of 563
7-8
Maintenance
Owner Maintenance Schedule
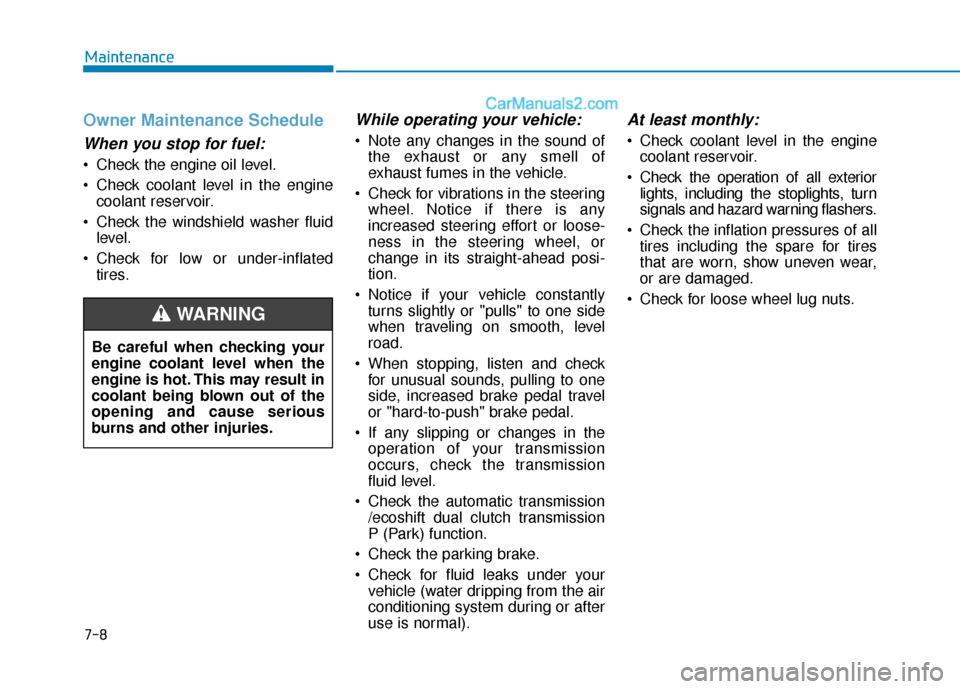
When you stop for fuel:
Check the engine oil level.
Check coolant level in the enginecoolant reservoir.
Check the windshield washer fluid level.
Check for low or under-inflated tires.
While operating your vehicle:
Note any changes in the sound ofthe exhaust or any smell of
exhaust fumes in the vehicle.
Check for vibrations in the steering wheel. Notice if there is any
increased steering effort or loose-
ness in the steering wheel, or
change in its straight-ahead posi-
tion.
Notice if your vehicle constantly turns slightly or "pulls" to one side
when traveling on smooth, level
road.
When stopping, listen and check for unusual sounds, pulling to one
side, increased brake pedal travel
or "hard-to-push" brake pedal.
If any slipping or changes in the operation of your transmission
occurs, check the transmission
fluid level.
Check the automatic transmission /ecoshift dual clutch transmission
P (Park) function.
Check the parking brake.
Check for fluid leaks under your vehicle (water dripping from the air
conditioning system during or after
use is normal).
At least monthly:
Check coolant level in the enginecoolant reservoir.
Check the operation of all exterior lights, including the stoplights, turn
signals and hazard warning flashers.
Check the inflation pressures of all tires including the spare for tires
that are worn, show uneven wear,
or are damaged.
Check for loose wheel lug nuts.
Be careful when checking your
engine coolant level when the
engine is hot. This may result in
coolant being blown out of the
opening and cause serious
burns and other injuries.
WARNING
Page 486 of 563
7-41
7
Maintenance
T
TI
IR
R E
ES
S
A
A N
N D
D
W
W H
HE
EE
EL
LS
S
Tire Care
For proper maintenance, safety, and
maximum fuel economy, you must
always maintain recommended tire
inflation pressures and stay within the
load limits and weight distribution rec-
ommended for your vehicle.
(Continued)Replace tires that are worn,
show uneven wear, or are dam-
aged. Worn tires can cause
loss of braking effectiveness,
steering) control, or traction.
ALWAYS replace tires with the
same size as each tire that
was originally supplied with
this vehicle. Using tires and
wheels other than the recom-
mended sizes could cause
unusual handling characteris-
tics, poor vehicle control, or
negatively affect your vehi-
cle’s Anti-Lock Brake System
(ABS) resulting in a serious
accident.
Tire failure may cause loss of
vehicle control resulting in an
accident. To reduce risk of
SERIOUS INJURY or DEATH,
take the following precautions:
Inspect your tires monthly for
proper inflation as well as
wear and damage.
The recommended cold tire
pressure for your vehicle can
be found in this manual and on
the tire label located on the dri-
ver’s side center pillar. Always
use a tire pressure gauge to
measure tire pressure. Tires
with too much or too little
pressure wear unevenly caus-
ing poor handling.
Check the pressure of the
spare every time you check
the pressure of the other tires
on your vehicle.
(Continued)
WARNING
Page 488 of 563
7-43
7
Maintenance
Check Tire Inflation Pressure
Check your tires, including the spare
tire, once a month or more.
How to check
Use a good quality tire pressure
gauge to check tire pressure. You
can not tell if your tires are properly
inflated simply by looking at them.
Radial tires may look properly inflat-
ed when they are under-inflated.
Remove the valve cap from the tire
valve stem. Press the tire gauge firm-
ly onto the valve to get a pressure
measurement. If the cold tire inflation
pressure matches the recommended
pressure on the tire and loading
information label, no further adjust-
ment is necessary. If the pressure is
low, add air until you reach the rec-
ommended pressure. Make sure to
put the valve caps back on the valve
stems. Without the valve cap, dirt or
moisture could get into the valve
core and cause air leakage. If a valve
cap is missing, install a new one as
soon as possible.If you overfill the tire, release air by
pushing on the metal stem in the
center of the tire valve. Recheck the
tire pressure with the tire gauge. Be
sure to put the valve caps back on
the valve stems. Without the valve
cap, dirt or moisture could get into
the valve core and cause air leakage.
If a valve cap is missing, install a new
one as soon as possible.
Under-inflation results in
excessive wear, poor handling
and reduced fuel economy.
Wheel deformation is also
possible. Keep your tire pres-
sures at the proper levels. If a
tire frequently needs refilling,
have it checked by an author-
ized HYUNDAI dealer.
Over-inflation produces a
harsh ride, excessive wear at
the center of the tire tread,
and a greater possibility of
damage from road hazards.
CAUTION
Page 496 of 563
7-51
7
Maintenance
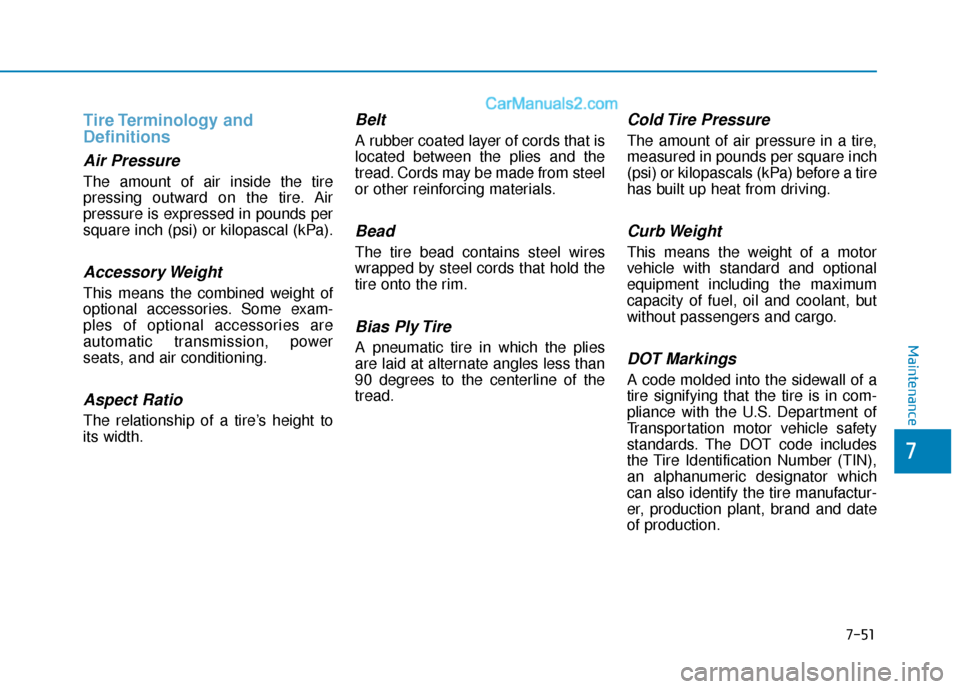
Tire Terminology and
Definitions
Air Pressure
The amount of air inside the tire
pressing outward on the tire. Air
pressure is expressed in pounds per
square inch (psi) or kilopascal (kPa).
Accessory Weight
This means the combined weight of
optional accessories. Some exam-
ples of optional accessories are
automatic transmission, power
seats, and air conditioning.
Aspect Ratio
The relationship of a tire’s height to
its width.
Belt
A rubber coated layer of cords that is
located between the plies and the
tread. Cords may be made from steel
or other reinforcing materials.
Bead
The tire bead contains steel wires
wrapped by steel cords that hold the
tire onto the rim.
Bias Ply Tire
A pneumatic tire in which the plies
are laid at alternate angles less than
90 degrees to the centerline of the
tread.
Cold Tire Pressure
The amount of air pressure in a tire,
measured in pounds per square inch
(psi) or kilopascals (kPa) before a tire
has built up heat from driving.
Curb Weight
This means the weight of a motor
vehicle with standard and optional
equipment including the maximum
capacity of fuel, oil and coolant, but
without passengers and cargo.
DOT Markings
A code molded into the sidewall of a
tire signifying that the tire is in com-
pliance with the U.S. Department of
Transportation motor vehicle safety
standards. The DOT code includes
the Tire Identification Number (TIN),
an alphanumeric designator which
can also identify the tire manufactur-
er, production plant, brand and date
of production.
Page 509 of 563
7-64
Maintenance
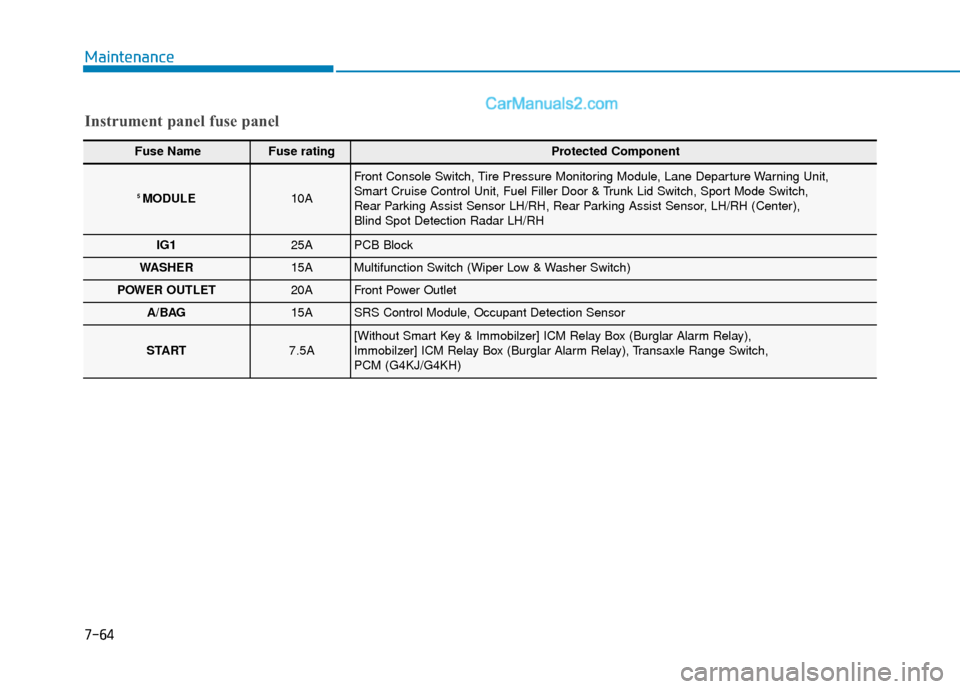
Instrument panel fuse panel
Fuse Name Fuse rating Protected Component
5 MODULE10A
Front Console Switch, Tire Pressure Monitoring Module, Lane Departure Warning Unit,
Smart Cruise Control Unit, Fuel Filler Door & Trunk Lid Switch, Sport Mode Switch,
Rear Parking Assist Sensor LH/RH, Rear Parking Assist Sensor, LH/RH (Center),
Blind Spot Detection Radar LH/RH
IG125APCB Block
WASHER15AMultifunction Switch (Wiper Low & Washer Switch)
POWER OUTLET20AFront Power Outlet
A/BAG15ASRS Control Module, Occupant Detection Sensor
START7.5A[Without Smart Key & Immobilzer] ICM Relay Box (Burglar Alarm Relay),
Immobilzer] ICM Relay Box (Burglar Alarm Relay), Transaxle Range Switch,
PCM (G4KJ/G4KH)