coolant capacity Hyundai Terracan 2003 Owner's Manual
[x] Cancel search | Manufacturer: HYUNDAI, Model Year: 2003, Model line: Terracan, Model: Hyundai Terracan 2003Pages: 349, PDF Size: 4.56 MB
Page 50 of 349
FEATURES OF YOUR HYUNDAI
1- 42
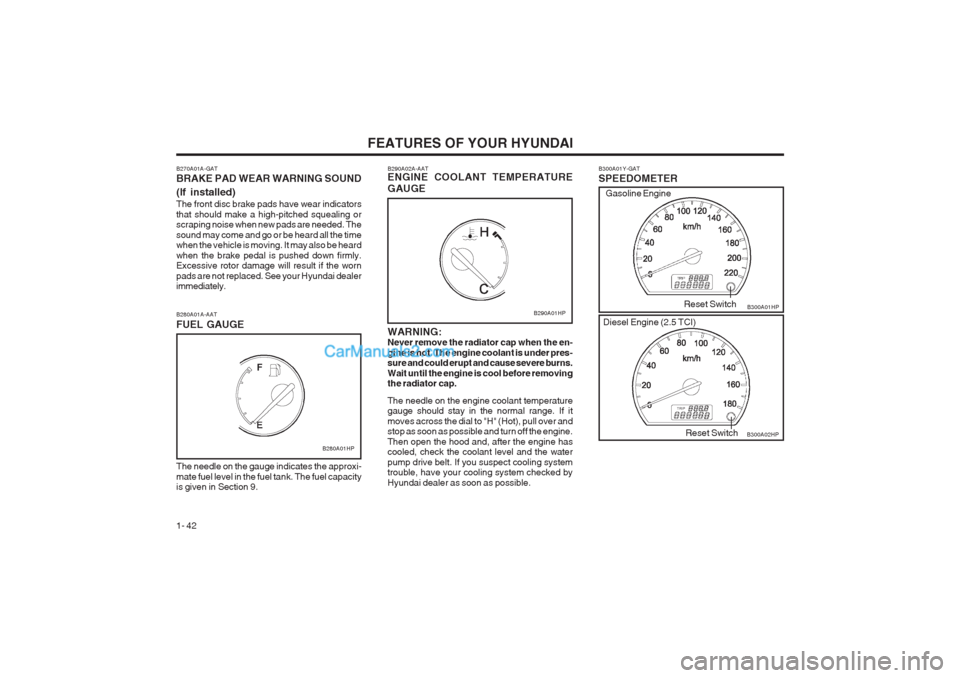
B300A01Y-GAT SPEEDOMETER B300A01HP
B300A02HP
Reset Switch
Reset Switch
Gasoline Engine
Diesel Engine (2.5 TCI)
B280A01A-AAT FUEL GAUGE
B280A01HP
The needle on the gauge indicates the approxi- mate fuel level in the fuel tank. The fuel capacity is given in Section 9. B290A02A-AAT ENGINE COOLANT TEMPERATURE GAUGE WARNING: Never remove the radiator cap when the en- gine is hot. The engine coolant is under pres- sure and could erupt and cause severe burns. Wait until the engine is cool before removing the radiator cap. The needle on the engine coolant temperature gauge should stay in the normal range. If it moves across the dial to "H" (Hot), pull over and stop as soon as possible and turn off the engine. Then open the hood and, after the engine has cooled, check the coolant level and the water pump drive belt. If you suspect cooling system trouble, have your cooling system checked by Hyundai dealer as soon as possible.
B290A01HP
B270A01A-GAT BRAKE PAD WEAR WARNING SOUND (If installed) The front disc brake pads have wear indicators that should make a high-pitched squealing or scraping noise when new pads are needed. The sound may come and go or be heard all the time when the vehicle is moving. It may also be heard when the brake pedal is pushed down firmly. Excessive rotor damage will result if the worn pads are not replaced. See your Hyundai dealer immediately.
Page 153 of 349
DO-IT-YOURSELF MAINTENANCE 6-7
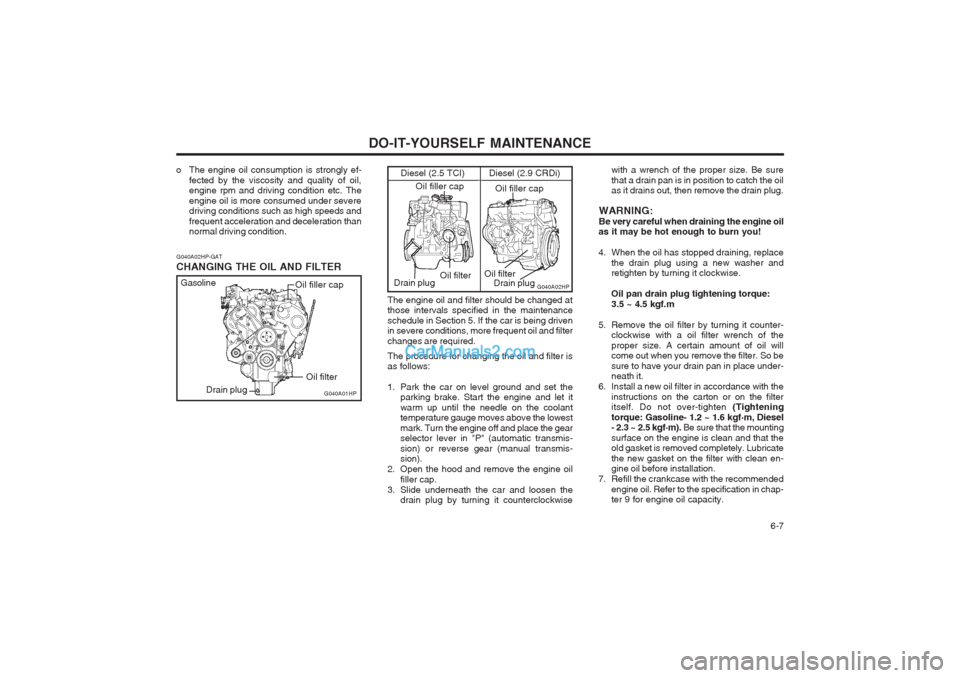
The engine oil and filter should be changed at those intervals specified in the maintenance schedule in Section 5. If the car is being driven in severe conditions, more frequent oil and filter changes are required. The procedure for changing the oil and filter is as follows:
1. Park the car on level ground and set theparking brake. Start the engine and let it warm up until the needle on the coolant temperature gauge moves above the lowest mark. Turn the engine off and place the gear selector lever in "P" (automatic transmis- sion) or reverse gear (manual transmis- sion).
2. Open the hood and remove the engine oil filler cap.
3. Slide underneath the car and loosen the drain plug by turning it counterclockwise with a wrench of the proper size. Be sure that a drain pan is in position to catch the oil as it drains out, then remove the drain plug.
WARNING: Be very careful when draining the engine oil
as it may be hot enough to burn you!
4. When the oil has stopped draining, replace
the drain plug using a new washer and retighten by turning it clockwise. Oil pan drain plug tightening torque: 3.5 ~ 4.5 kgf.m
5. Remove the oil filter by turning it counter- clockwise with a oil filter wrench of theproper size. A certain amount of oil will come out when you remove the filter. So be sure to have your drain pan in place under- neath it.
6. Install a new oil filter in accordance with the instructions on the carton or on the filteritself. Do not over-tighten (Tightening
torque: Gasoline- 1.2 ~ 1.6 kgf .
m, Diesel
- 2.3 ~ 2.5 kgf .
m). Be sure that the mounting
surface on the engine is clean and that theold gasket is removed completely. Lubricate the new gasket on the filter with clean en- gine oil before installation.
7. Refill the crankcase with the recommended engine oil. Refer to the specification in chap-ter 9 for engine oil capacity.
G040A02HP
Diesel (2.9 CRDi)
Diesel (2.5 TCI)
Oil filter
Oil filler cap
Oil filler cap
Drain plug Oil filter
Drain plug
G040A02HP-GAT CHANGING THE OIL AND FILTER
o The engine oil consumption is strongly ef-
fected by the viscosity and quality of oil, engine rpm and driving condition etc. The engine oil is more consumed under severe driving conditions such as high speeds and
frequent acceleration and deceleration than normal driving condition.
G040A01HP
Gasoline
Oil filter
Drain plug Oil filler cap
Page 155 of 349
DO-IT-YOURSELF MAINTENANCE 6-9
coolant container, add the appropriate quan- tity of coolant to the radiator.
G050D03HP
G050D01HP
G050D02HP
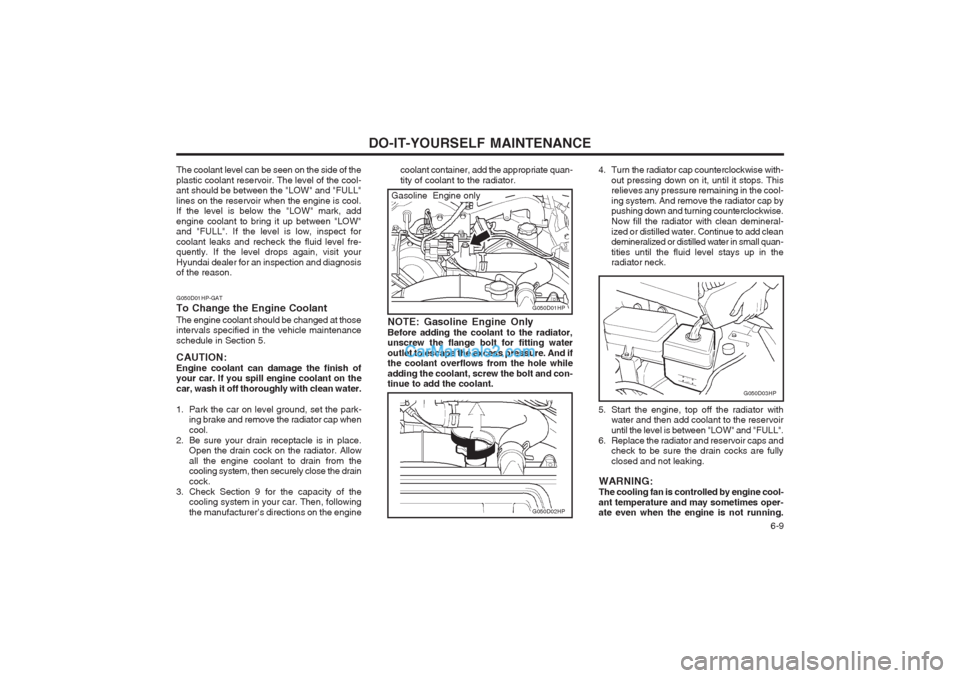
NOTE: Gasoline Engine Only Before adding the coolant to the radiator, unscrew the flange bolt for fitting water outlet to escape the excess pressure. And if the coolant overflows from the hole while adding the coolant, screw the bolt and con- tinue to add the coolant. 4. Turn the radiator cap counterclockwise with-
out pressing down on it, until it stops. Thisrelieves any pressure remaining in the cool- ing system. And remove the radiator cap by pushing down and turning counterclockwise. Now fill the radiator with clean demineral-ized or distilled water. Continue to add clean demineralized or distilled water in small quan- tities until the fluid level stays up in the radiator neck.
5. Start the engine, top off the radiator with water and then add coolant to the reservoir until the level is between "LOW" and "FULL".
6. Replace the radiator and reservoir caps and check to be sure the drain cocks are fullyclosed and not leaking.
WARNING:The cooling fan is controlled by engine cool-
ant temperature and may sometimes oper- ate even when the engine is not running.
Gasoline Engine only
The coolant level can be seen on the side of the plastic coolant reservoir. The level of the cool- ant should be between the "LOW" and "FULL" lines on the reservoir when the engine is cool. If the level is below the "LOW" mark, add engine coolant to bring it up between "LOW" and "FULL". If the level is low, inspect for coolant leaks and recheck the fluid level fre- quently. If the level drops again, visit your Hyundai dealer for an inspection and diagnosis of the reason.
G050D01HP-GAT To Change the Engine CoolantThe engine coolant should be changed at those intervals specified in the vehicle maintenance schedule in Section 5. CAUTION: Engine coolant can damage the finish of your car. If you spill engine coolant on the car, wash it off thoroughly with clean water.
1. Park the car on level ground, set the park-
ing brake and remove the radiator cap when cool.
2. Be sure your drain receptacle is in place. Open the drain cock on the radiator. Allowall the engine coolant to drain from the cooling system, then securely close the drain cock.
3. Check Section 9 for the capacity of the cooling system in your car. Then, followingthe manufacturer’s directions on the engine
Page 157 of 349
DO-IT-YOURSELF MAINTENANCE 6-11
G090A01HP-AAT FILLING THE WASHER RESERVOIR
G090A01HP
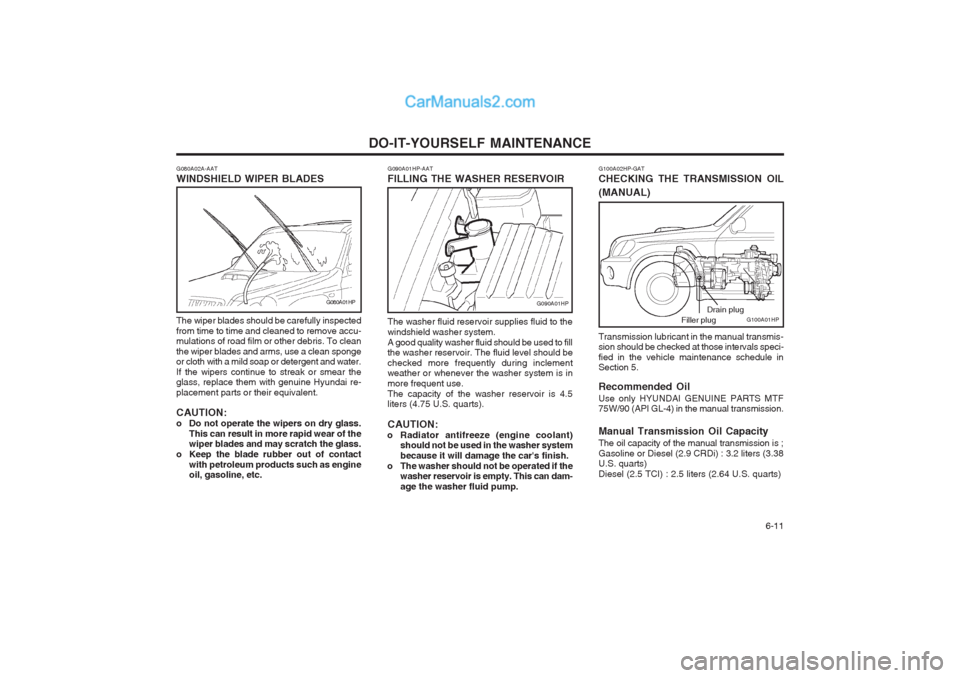
The washer fluid reservoir supplies fluid to the windshield washer system.A good quality washer fluid should be used to fill the washer reservoir. The fluid level should be checked more frequently during inclement weather or whenever the washer system is in more frequent use.The capacity of the washer reservoir is 4.5 liters (4.75 U.S. quarts). CAUTION:
o Radiator antifreeze (engine coolant) should not be used in the washer system because it will damage the car's finish.
o The washer should not be operated if the washer reservoir is empty. This can dam-age the washer fluid pump.
G100A02HP-GAT CHECKING THE TRANSMISSION OIL (MANUAL)
G100A01HP
Drain plug
Filler plug
Transmission lubricant in the manual transmis- sion should be checked at those intervals speci- fied in the vehicle maintenance schedule in Section 5. Recommended Oil Use only HYUNDAI GENUINE PARTS MTF 75W/90 (API GL-4) in the manual transmission. Manual Transmission Oil Capacity The oil capacity of the manual transmission is ; Gasoline or Diesel (2.9 CRDi) : 3.2 liters (3.38 U.S. quarts) Diesel (2.5 TCI) : 2.5 liters (2.64 U.S. quarts)
G080A02A-AAT WINDSHIELD WIPER BLADES
The wiper blades should be carefully inspected from time to time and cleaned to remove accu- mulations of road film or other debris. To clean the wiper blades and arms, use a clean sponge or cloth with a mild soap or detergent and water. If the wipers continue to streak or smear the glass, replace them with genuine Hyundai re- placement parts or their equivalent. CAUTION:
o Do not operate the wipers on dry glass. This can result in more rapid wear of the wiper blades and may scratch the glass.
o Keep the blade rubber out of contact with petroleum products such as engineoil, gasoline, etc.
G080A01HP
Page 183 of 349
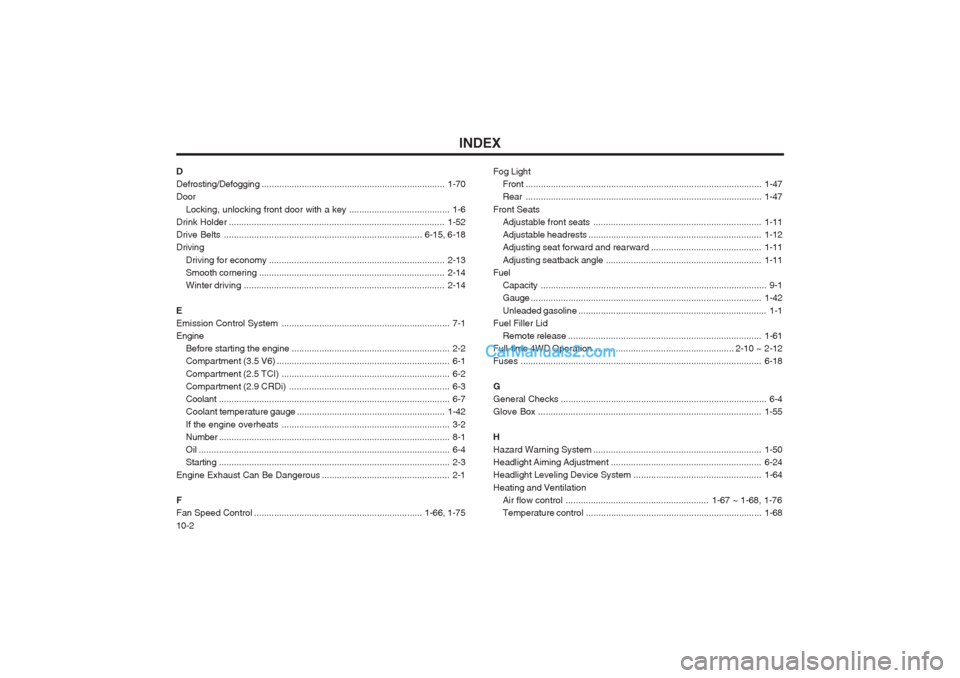
INDEX
10-2
D Defrosting/Defogging
......................................................................... 1-70
Door
Locking, unlocking front door with a key ........................................ 1-6
Drink Holder ...................................................................................... 1-52
Drive Belts ............................................................................... 6-15, 6-18
Driving
Driving for economy ...................................................................... 2-13
Smooth cornering .......................................................................... 2-14
Winter driving ................................................................................ 2-14
E
Emission Control System ................................................................... 7-1
Engine
Before starting the engine ............................................................... 2-2
Compartment (3.5 V6) ..................................................................... 6-1
Compartment (2.5 TCI) ................................................................... 6-2
Compartment (2.9 CRDi) ................................................................ 6-3
Coolant ............................................................................................ 6-7
Coolant temperature gauge ........................................................... 1-42
If the engine overheats ................................................................... 3-2
Number ............................................................................................ 8-1
Oil .................................................................................................... 6-4Starting ............................................................................................ 2-3
Engine Exhaust Can Be Dangerous ................................................... 2-1
FFan Speed Control ................................................................... 1-66, 1-75 Fog Light
Front .............................................................................................. 1-47
Rear .............................................................................................. 1-47
Front Seats Adjustable front seats ................................................................... 1-11
Adjustable headrests ..................................................................... 1-12
Adjusting seat forward and rearward ............................................1-11
Adjusting seatback angle .............................................................. 1-11
Fuel Capacity .......................................................................................... 9-1
Gauge ............................................................................................ 1-42
Unleaded gasoline ........................................................................... 1-1
Fuel Filler Lid Remote release ............................................................................. 1-61
Full-time 4WD Operation ....................................................... 2-10 ~ 2-12
Fuses ................................................................................................ 6-18
GGeneral Checks .................................................................................. 6-4
Glove Box ......................................................................................... 1-55
HHazard Warning System ................................................................... 1-50
Headlight Aiming Adjustment ............................................................ 6-24
Headlight Leveling Device System ...................................................1-64
Heating and Ventilation Air flow control ......................................................... 1-67 ~ 1-68, 1-76
Temperature control ...................................................................... 1-68
Page 322 of 349
OWNER MAINTENANCE
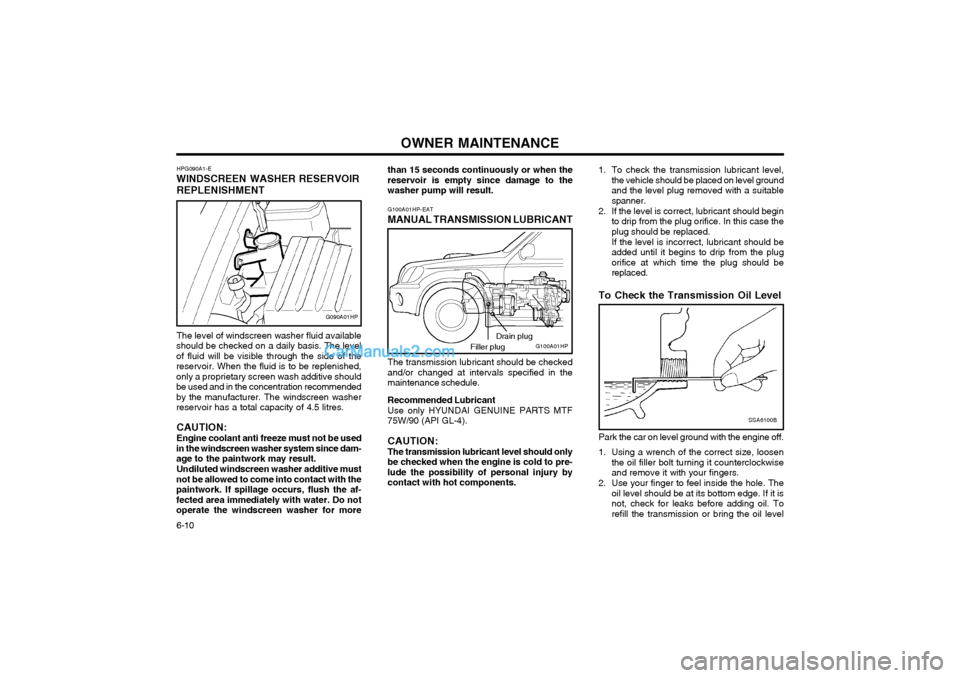
6-10 1. To check the transmission lubricant level,
the vehicle should be placed on level ground and the level plug removed with a suitablespanner.
2. If the level is correct, lubricant should begin to drip from the plug orifice. In this case theplug should be replaced. If the level is incorrect, lubricant should be added until it begins to drip from the plugorifice at which time the plug should bereplaced.
To Check the Transmission Oil Level
SSA6100B
Park the car on level ground with the engine off.
1. Using a wrench of the correct size, loosen the oil filler bolt turning it counterclockwise and remove it with your fingers.
2. Use your finger to feel inside the hole. The oil level should be at its bottom edge. If it isnot, check for leaks before adding oil. Torefill the transmission or bring the oil level
G100A01HP-EAT
MANUAL TRANSMISSION LUBRICANT
The transmission lubricant should be checkedand/or changed at intervals specified in themaintenance schedule. Recommended Lubricant Use only HYUNDAI GENUINE PARTS MTF 75W/90 (API GL-4). CAUTION: The transmission lubricant level should onlybe checked when the engine is cold to pre-lude the possibility of personal injury bycontact with hot components.
G090A01HP
HPG090A1-E
WINDSCREEN WASHER RESERVOIR
REPLENISHMENT The level of windscreen washer fluid available
should be checked on a daily basis. The level of fluid will be visible through the side of thereservoir. When the fluid is to be replenished,only a proprietary screen wash additive shouldbe used and in the concentration recommendedby the manufacturer. The windscreen washerreservoir has a total capacity of 4.5 litres.
CAUTION: Engine coolant anti freeze must not be used
in the windscreen washer system since dam- age to the paintwork may result.
Undiluted windscreen washer additive must
not be allowed to come into contact with thepaintwork. If spillage occurs, flush the af-fected area immediately with water. Do notoperate the windscreen washer for more than 15 seconds continuously or when thereservoir is empty since damage to thewasher pump will result.
G100A01HP
Drain plug
Filler plug
Page 346 of 349
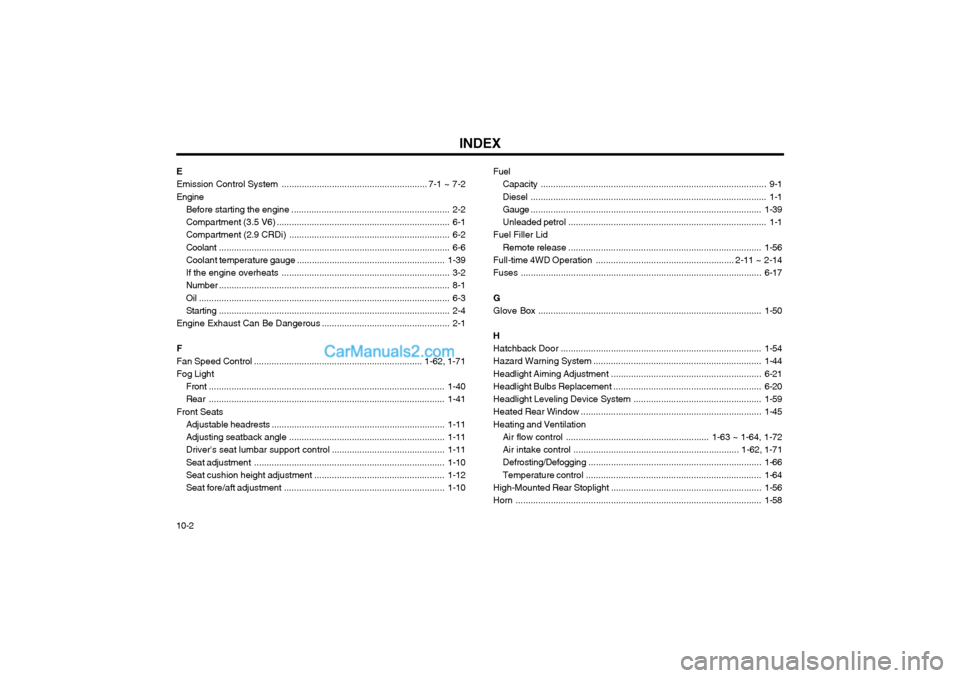
INDEX
10-2 E Emission Control System
.......................................................... 7-1 ~ 7-2
Engine Before starting the engine ............................................................... 2-2 Compartment (3.5 V6) ..................................................................... 6-1
Compartment (2.9 CRDi) ................................................................ 6-2
Coolant ............................................................................................ 6-6
Coolant temperature gauge ........................................................... 1-39
If the engine overheats ................................................................... 3-2
Number ............................................................................................ 8-1
Oil .................................................................................................... 6-3 Starting ............................................................................................ 2-4
Engine Exhaust Can Be Dangerous ................................................... 2-1
F Fan Speed Con trol ................................................................... 1-62, 1-71
Fog Light
Front .............................................................................................. 1-40
Rear .............................................................................................. 1-41
Front Seats Adjustable headrests ..................................................................... 1-11
Adjusting seatback angle .............................................................. 1-11
Driver's seat lumbar support control .............................................1-11
Seat adjustment ............................................................................ 1-10
Seat cushion height adjustment .................................................... 1-12
Seat fore/aft adjustment ................................................................ 1-10Fuel
Capacity .......................................................................................... 9-1
Diesel .............................................................................................. 1-1
Gauge ............................................................................................ 1-39
Unleaded petrol ............................................................................... 1-1
Fuel Filler Lid
Remote release ............................................................................. 1-56
Full-time 4WD Operation .................... ................................... 2-11 ~ 2-14
Fuses ................................................................................................ 6-17
G Glove Box ......................................................................................... 1-50
H Hatchback Door ................................................................................ 1-54
Hazard Warning System ................................................................... 1-44
Headlight Aiming Adjustment ............................................................ 6-21
Headlight Bulbs Replacement ........................................................... 6-20
Headlight Leveling Device System ................................................... 1-59
Heated Rear Window ........................................................................ 1-45
Heating and Ventilation Air flow control ......................................................... 1-63 ~ 1-64, 1-72
Air intake control .................................................................. 1-62, 1-71
Defrosting/Defogging ..................................................................... 1-66
Temperature control ...................................................................... 1-64
High-Mounted Rear Stoplight ............................................................ 1-56
Horn .................................................................................................. 1-58