tow Hyundai Terracan 2005 User Guide
[x] Cancel search | Manufacturer: HYUNDAI, Model Year: 2005, Model line: Terracan, Model: Hyundai Terracan 2005Pages: 539, PDF Size: 18.03 MB
Page 67 of 539
1
FEATURES OF YOUR HYUNDAI
53
o Do not install a child restraint
system in the front passenger seat position.
o A child restraint system must
never be placed in the front seat.The infant or child could be se- verely injured by an airbag de- ployment in case of an accident.
o If components of the airbag sys- tem must be discarded, or if thevehicle must be scrapped, cer-tain safety precautions must be observed. Your Hyundai dealer knows these precautions and cangive you the necessary informa- tion. Failure to follow these pre- cautions and procedures couldincrease the risk of personal in- jury.
o If you sell your vehicle, make certain that this manual is trans-ferred to the new owner.
o If your car was flooded and has soaked carpeting or water onflooring, you shouldn't try to start engine; have the car towed toauthorized Hyundai dealer.o Do not replace the bumper or thebumper guard with the one other than the Hyundai genuine parts. Otherwise, it can adversely af- fect SRS performance and leadto unexpected injury.
Page 73 of 539
1
FEATURES OF YOUR HYUNDAI
59
B260G01A-AAT Low Oil Pressure Warning Light
CAUTION:
If the oil pressure warning light stays on while the engine is run- ning, serious engine damage mayresult. The oil pressure warning light comes on whenever there is insufficient oil pressure. In normaloperation, it should come on when the ignition switch is turned on, then go out when the engine isstarted. If the oil pressure warning light stays on while the engine is running, there may be a seriousmalfunction. If this happens, stop the car as soon as it is safe to do so, turn offthe engine and check the oil level. If the oil level is low, fill engine oil to the proper level and start the en-gine again. If the light stays on with the engine running, turn the engine off immediately. In any instancewhere the oil light stays on when the engine is running, the engine
!
should be checked by an autho- rized Hyundai dealer before the car is driven again.
!
B260H02A-GAT Parking Brake / Low Brake Fluid Level Warn-ing Light Warning Light Operation The parking brake/low brake fluid level warning light should come on when theparking brake is applied and the igni- tion switch is turned to "ON" or "START". After the engine is started,the light should go out when the park- ing brake is released. If the parking brake is not applied, thewarning light should come on when the ignition switch is turned to "ON" or "START", then go out when the enginestarts. If the light comes on at any other time, you should slow the vehicle and bring it to a complete stop in a safelocation off the roadway. The brake fluid level warning light indi- cates that the brake fluid level in thebrake master cylinder is low and hy- draulic brake fluid conforming to DOT 3 or DOT 4 specifications should beadded. After adding fluid, if no other trouble is found, the car should be immediately and carefully driven to aHyundai dealer for inspection. If fur- ther trouble is experienced, the vehicle should not be driven at all but taken toa dealer by a professional towing ser- vice or some other safe method.
WARNING:
If you suspect brake trouble, have your brakes checked by a Hyundaidealer as soon as possible. Driving your car with a problem in either the brake electrical system or brakehydraulic system is dangerous, and could result in a serious injury or death.
Page 78 of 539
1FEATURES OF YOUR HYUNDAI
64
should slow the vehicle and bring it to a complete stop in a safe location offthe roadway. After starting the engine, do not drive the vehicle until the vacuum level isabove 275 mmHg below atmosphere and warning light has turned off. If further trouble is experienced, the ve-hicle should not be driven at all but taken to a dealer by a professional towing service. B265C02HP-GAT
Diesel Preheat Indicator Light
The indicator light illuminates amber when the ignition switch is placed atthe "ON" position. The engine can be started after the preheat indicator light goes off. The illuminating time varieswith the water temperature. NOTE: If the engine were not started within 2 seconds after the preheating iscompleted, turn the ignition key once more to the "LOCK" position during 10 seconds, and then to the"ON" position, in order to preheat again.Water temperature
(°C)
Below -30 -20 -156080 Illuminating time
(2.5 TCI) (sec) 22.586
0.5 0
Water temperature (°C)
Below -30 -25 -20-15-10-50
20 Illuminating time
(2.9 CRDi) (sec) 26201510
5.53.5 21
!
B265B01HP-GAT Brake Vacuum Warning Light (Diesel Engine)
WARNING:
If you suspect brake trouble, have your brakes checked by a Hyundai dealer as soon as possible. Drivingyour car with a problem in either the brake electrical system or brake hydraulic system is dangerous, andcould result in serious injury or death. The brake vacuum warning light should come on when the vacuum level in brake booster descends to about 275 mmHg or below. The brake system isdesigned to stop the vehicle with re- serve assist if brake pedal is held down. This reserve is greatly reducedeach time you release the brake. With- out vacuum assist your vehicle can still be stopped by pushing much harderon brake pedal, however the stopping distance may be much longer. If the light comes on at any other time, you
Page 88 of 539
1FEATURES OF YOUR HYUNDAI
74
B340F01A-GAT Daytime Running Lights (If Installed) Your Hyundai is equipped with day- time running lights. The daytime run-ning lights are used to improve visibil- ity for oncoming traffic. Your vehicle daytime running lights are designed toremain on continuously when the en- gine is operating even though the head- light switch is in the "OFF" position.However, the daytime running lights will be off while the parking brake is applied. B340D01A-AAT High-beam Switch
Parking Light Auto Cut If you do not turn the parking lights "OFF" after driving, the parking lightswill automatically shut "OFF" when the driver's door is opened. To turn them "ON" again, you mustsimply turn the ignition key to the "ON" position.
To turn on the headlight high beams,push the lever forward (away from you). The High Beam Indicator Lightwill come on at the same time. For low beams, pull the lever back toward you.HHP2097
Page 89 of 539
1
FEATURES OF YOUR HYUNDAI
75
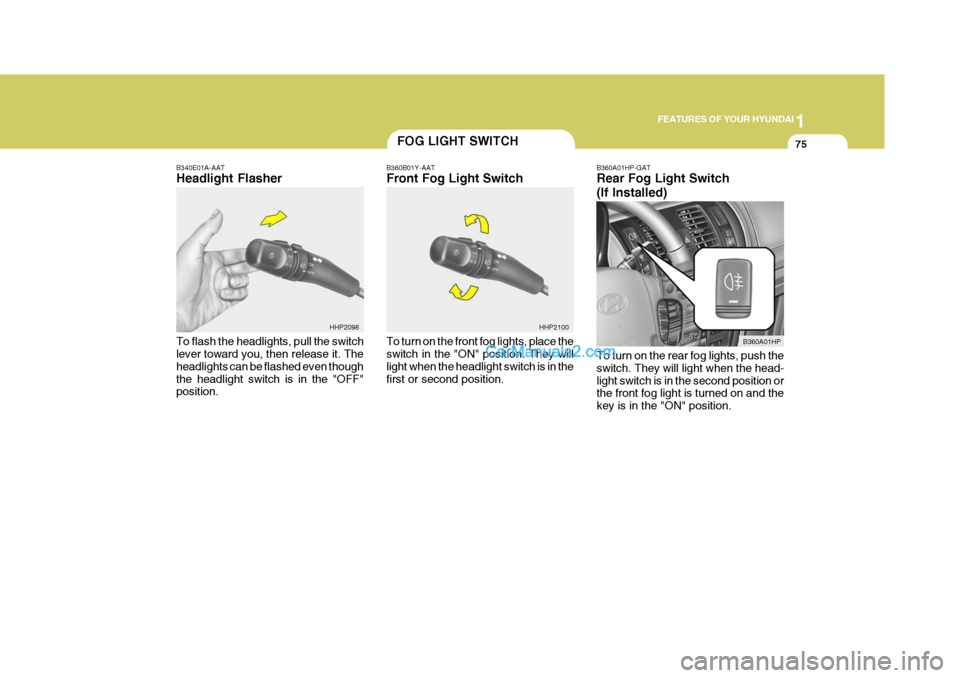
B340E01A-AAT Headlight Flasher To flash the headlights, pull the switch lever toward you, then release it. The headlights can be flashed even thoughthe headlight switch is in the "OFF" position.
FOG LIGHT SWITCH
B360B01Y-AAT Front Fog Light Switch To turn on the front fog lights, place the switch in the "ON" position. They will light when the headlight switch is in thefirst or second position. B360A01HP-GAT Rear Fog Light Switch (If Installed) To turn on the rear fog lights, push the switch. They will light when the head-light switch is in the second position or the front fog light is turned on and the key is in the "ON" position.
HHP2100
B360A01HP
HHP2098
Page 90 of 539
1FEATURES OF YOUR HYUNDAI
76
HHP2104
WINDSHIELD WIPER AND WASHER SWITCH
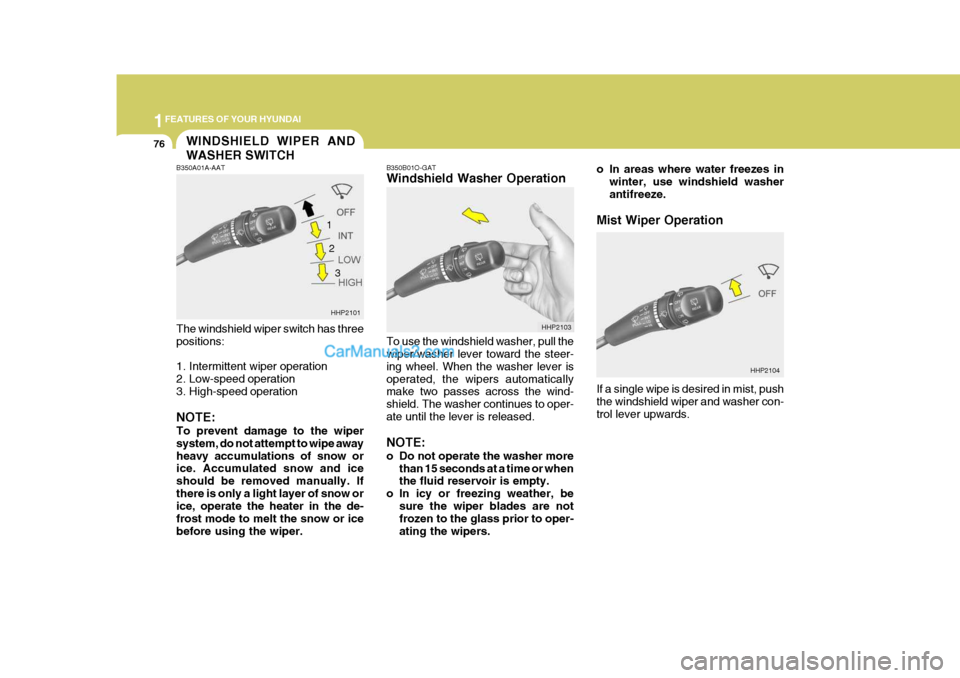
B350B01O-GAT Windshield Washer Operation To use the windshield washer, pull the wiper/washer lever toward the steer- ing wheel. When the washer lever isoperated, the wipers automatically make two passes across the wind- shield. The washer continues to oper-ate until the lever is released. NOTE:
o Do not operate the washer more
than 15 seconds at a time or when the fluid reservoir is empty.
o In icy or freezing weather, be
sure the wiper blades are notfrozen to the glass prior to oper- ating the wipers.
B350A01A-AAT The windshield wiper switch has three positions:
1. Intermittent wiper operation
2. Low-speed operation
3. High-speed operation NOTE: To prevent damage to the wiper system, do not attempt to wipe awayheavy accumulations of snow or ice. Accumulated snow and ice should be removed manually. Ifthere is only a light layer of snow or ice, operate the heater in the de- frost mode to melt the snow or icebefore using the wiper.
HHP2101
HHP2103
1
2
3 o In areas where water freezes in
winter, use windshield washerantifreeze.
Mist Wiper Operation If a single wipe is desired in mist, push the windshield wiper and washer con- trol lever upwards.
Page 104 of 539
1FEATURES OF YOUR HYUNDAI
90
!
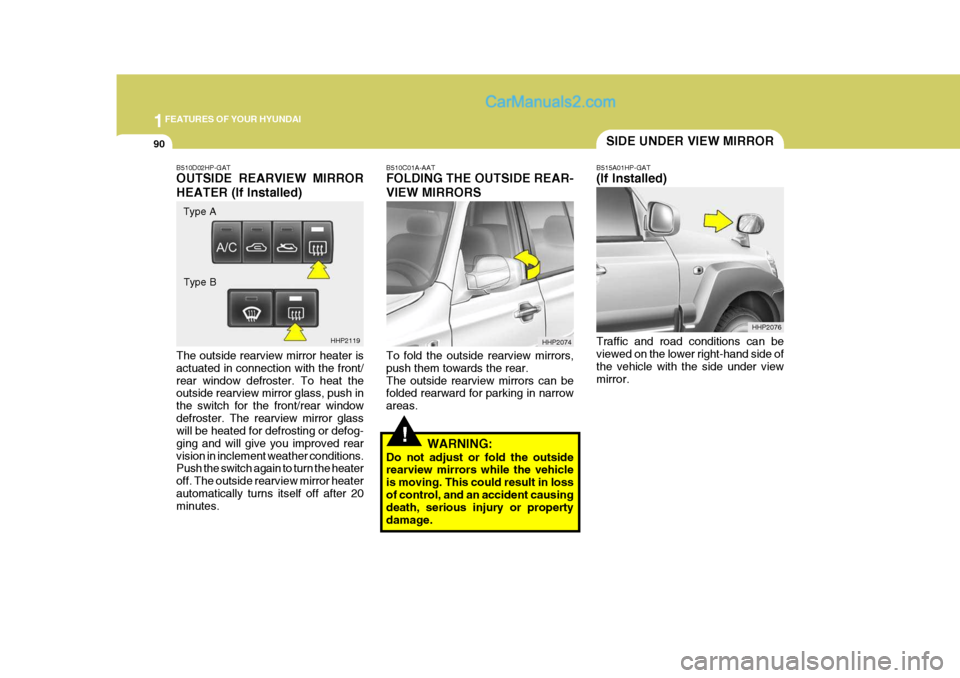
B510C01A-AAT FOLDING THE OUTSIDE REAR- VIEW MIRRORS To fold the outside rearview mirrors, push them towards the rear.The outside rearview mirrors can be folded rearward for parking in narrow areas.
WARNING:
Do not adjust or fold the outside rearview mirrors while the vehicle is moving. This could result in lossof control, and an accident causing death, serious injury or property damage. B515A01HP-GAT (If Installed) Traffic and road conditions can be viewed on the lower right-hand side of the vehicle with the side under viewmirror.
HHP2074 SIDE UNDER VIEW MIRROR
HHP2076B510D02HP-GAT OUTSIDE REARVIEW MIRROR HEATER (If Installed) The outside rearview mirror heater is actuated in connection with the front/rear window defroster. To heat the outside rearview mirror glass, push in the switch for the front/rear windowdefroster. The rearview mirror glass will be heated for defrosting or defog- ging and will give you improved rearvision in inclement weather conditions. Push the switch again to turn the heater off. The outside rearview mirror heaterautomatically turns itself off after 20 minutes. HHP2119
Type A
Type B
Page 105 of 539
1
FEATURES OF YOUR HYUNDAI
91PARKING BRAKEDAY/NIGHT INSIDE REAR- VIEW MIRROR
B520B01O-GAT (Electric type) (If Installed) The electric type day/night inside rear- view mirror controls automatically the glare of headlights of the car behindyou. Adjust the rearview mirror to the desired position. B530A01A-AAT
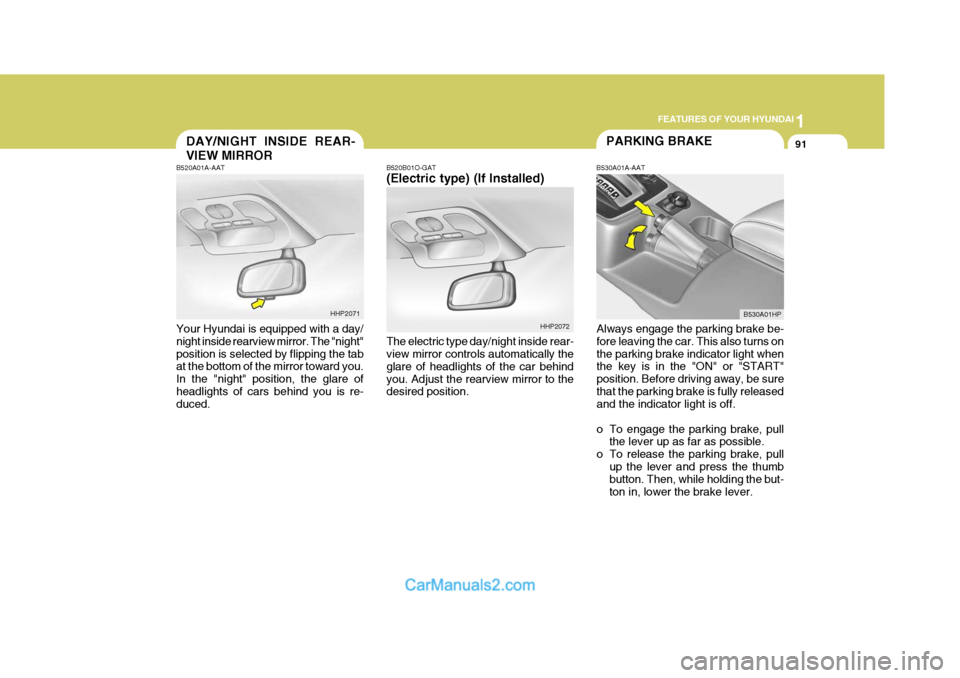
Always engage the parking brake be-fore leaving the car. This also turns on the parking brake indicator light when the key is in the "ON" or "START" position. Before driving away, be surethat the parking brake is fully released and the indicator light is off.
o To engage the parking brake, pull the lever up as far as possible.
o To release the parking brake, pull up the lever and press the thumb button. Then, while holding the but- ton in, lower the brake lever.
B520A01A-AAT Your Hyundai is equipped with a day/ night inside rearview mirror. The "night" position is selected by flipping the tab at the bottom of the mirror toward you. In the "night" position, the glare ofheadlights of cars behind you is re- duced.
HHP2071
HHP2072B530A01HP
Page 108 of 539
1FEATURES OF YOUR HYUNDAI
94ROOF RACK
B650A01S-AAT Stowage Precautions
1. Do not place objects on the cargo security screen. Such objects may be thrown about inside the vehicle and possibly injure vehicle occu- pants during an accident or whenbraking.
2. For better fuel economy, do not
carry unnecessary weight.
3. Never allow anyone to ride in the luggage compartment. It is designedfor luggage only.
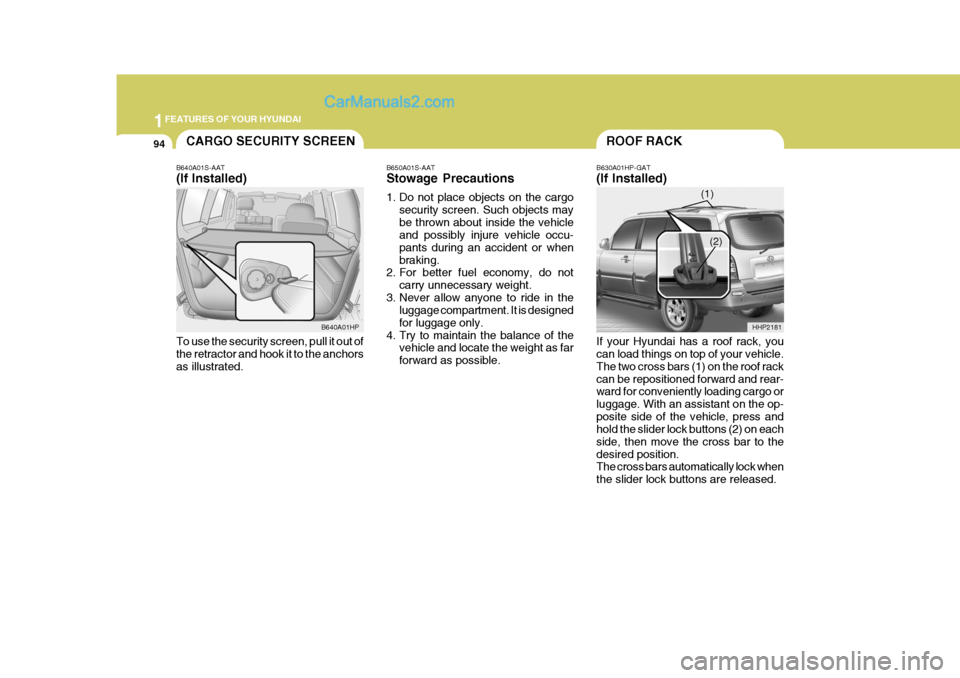
4. Try to maintain the balance of the vehicle and locate the weight as farforward as possible. B630A01HP-GAT (If Installed) If your Hyundai has a roof rack, you can load things on top of your vehicle. The two cross bars (1) on the roof rackcan be repositioned forward and rear- ward for conveniently loading cargo or luggage. With an assistant on the op-posite side of the vehicle, press and hold the slider lock buttons (2) on each side, then move the cross bar to thedesired position. The cross bars automatically lock when the slider lock buttons are released.
HHP2181CARGO SECURITY SCREEN
B640A01S-AAT (If Installed) To use the security screen, pull it out of the retractor and hook it to the anchors as illustrated. B640A01HP
(1)
(2)
Page 113 of 539
1
FEATURES OF YOUR HYUNDAI
99HEADLIGHT LEVELING DE- VICE SYSTEMSTEERING WHEEL TILT LEVERREAR SEAT ARMREST
!
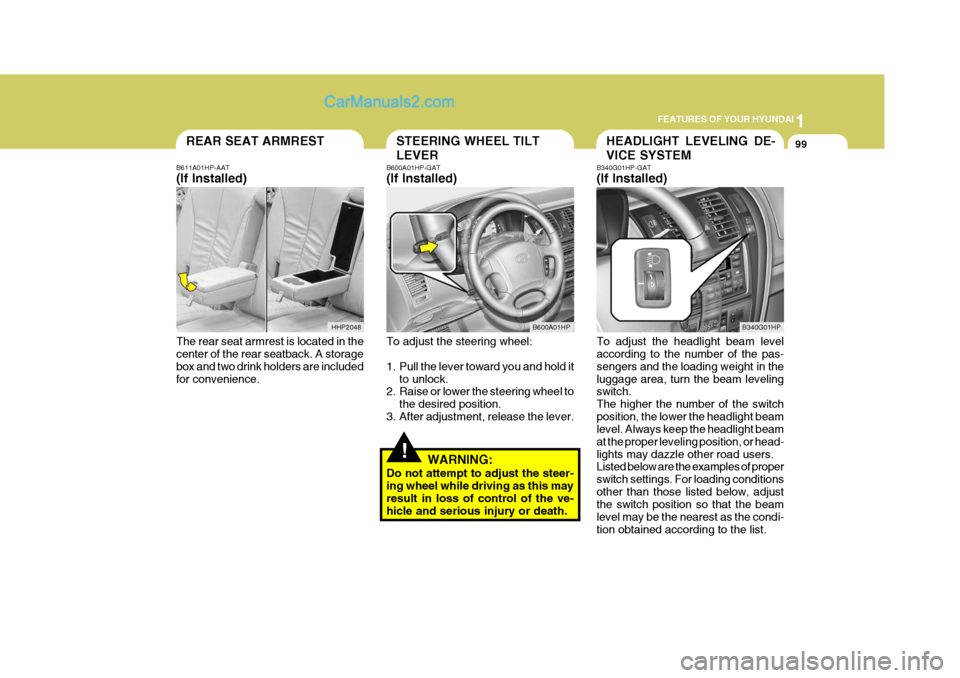
B611A01HP-AAT (If Installed) The rear seat armrest is located in the center of the rear seatback. A storage box and two drink holders are includedfor convenience. B600A01HP-GAT (If Installed) To adjust the steering wheel:
1. Pull the lever toward you and hold it
to unlock.
2. Raise or lower the steering wheel to
the desired position.
3. After adjustment, release the lever.
WARNING:
Do not attempt to adjust the steer- ing wheel while driving as this may result in loss of control of the ve- hicle and serious injury or death. B340G01HP-GAT (If Installed) To adjust the headlight beam level according to the number of the pas- sengers and the loading weight in theluggage area, turn the beam leveling switch. The higher the number of the switchposition, the lower the headlight beam level. Always keep the headlight beam at the proper leveling position, or head-lights may dazzle other road users. Listed below are the examples of proper switch settings. For loading conditionsother than those listed below, adjust the switch position so that the beam level may be the nearest as the condi-tion obtained according to the list.
B600A01HP
B340G01HP
HHP2048