lights Hyundai Terracan 2005 Service Manual
[x] Cancel search | Manufacturer: HYUNDAI, Model Year: 2005, Model line: Terracan, Model: Hyundai Terracan 2005Pages: 539, PDF Size: 18.03 MB
Page 367 of 539
1CONTROLS AND EQUIPMENT
62FOG LIGHT SWITCH
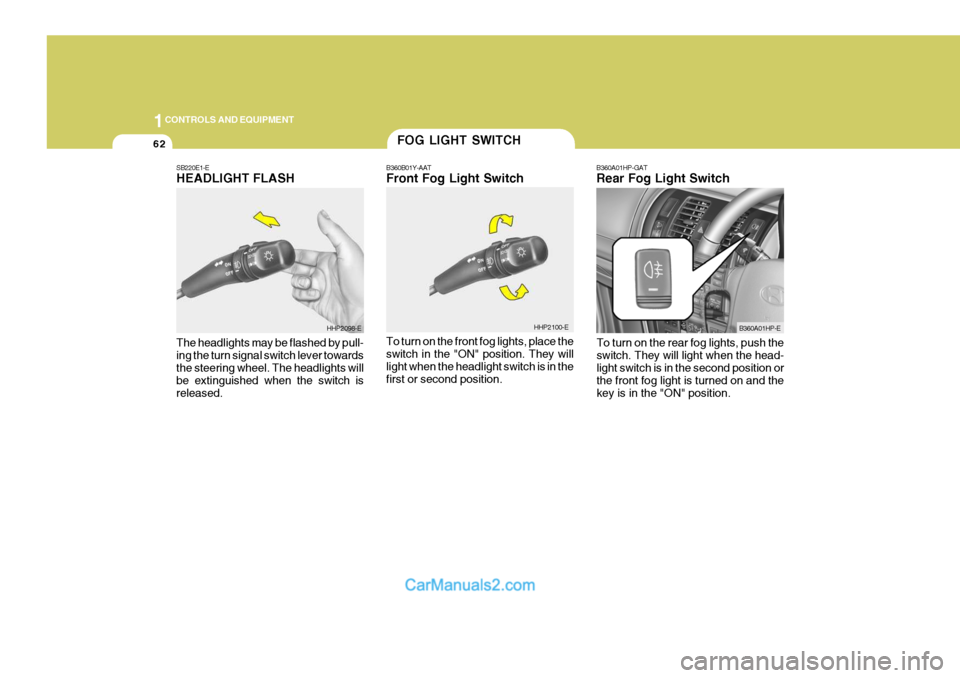
B360B01Y-AAT Front Fog Light Switch To turn on the front fog lights, place the switch in the "ON" position. They will light when the headlight switch is in thefirst or second position. B360A01HP-GAT Rear Fog Light Switch
HHP2100-E B360A01HP-E
SB220E1-EHEADLIGHT FLASH The headlights may be flashed by pull- ing the turn signal switch lever towards the steering wheel. The headlights will be extinguished when the switch isreleased.
HHP2098-E
To turn on the rear fog lights, push the switch. They will light when the head- light switch is in the second position or the front fog light is turned on and thekey is in the "ON" position.
Page 370 of 539
1
CONTROLS AND EQUIPMENT
65
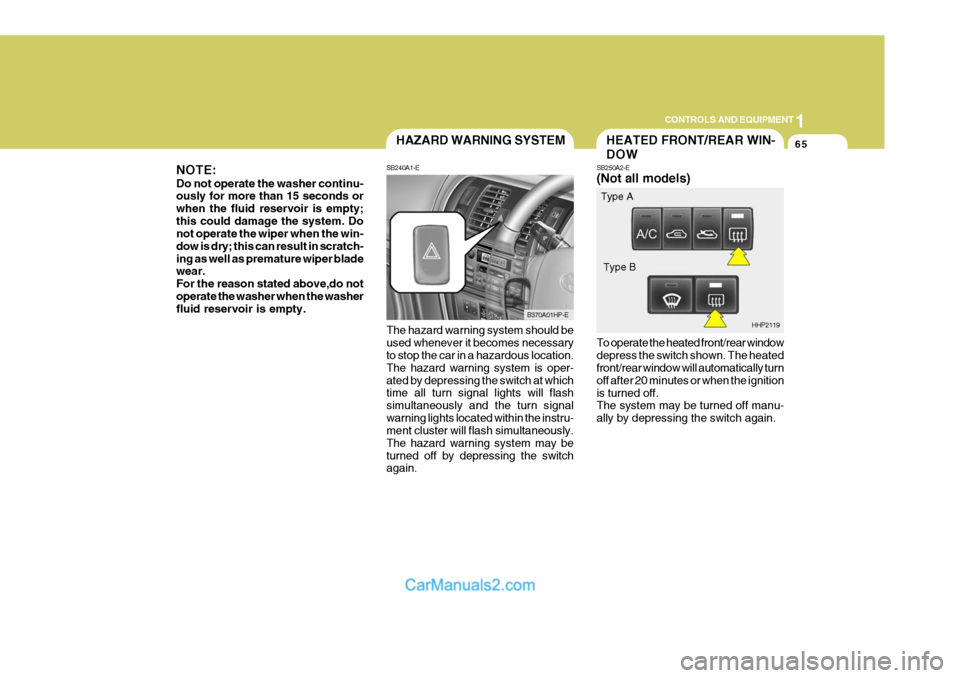
The hazard warning system should be used whenever it becomes necessary to stop the car in a hazardous location. The hazard warning system is oper-ated by depressing the switch at which time all turn signal lights will flash simultaneously and the turn signalwarning lights located within the instru- ment cluster will flash simultaneously. The hazard warning system may beturned off by depressing the switch again.HAZARD WARNING SYSTEM
SB240A1-E
B370A01HP-E
NOTE: Do not operate the washer continu- ously for more than 15 seconds or when the fluid reservoir is empty;this could damage the system. Do not operate the wiper when the win- dow is dry; this can result in scratch-ing as well as premature wiper blade wear. For the reason stated above,do notoperate the washer when the washer fluid reservoir is empty.
To operate the heated front/rear window depress the switch shown. The heated front/rear window will automatically turn off after 20 minutes or when the ignitionis turned off. The system may be turned off manu- ally by depressing the switch again.
HEATED FRONT/REAR WIN- DOW
SB250A2-E (Not all models)
HHP2119
Type A
Type B
Page 373 of 539
1CONTROLS AND EQUIPMENT
68
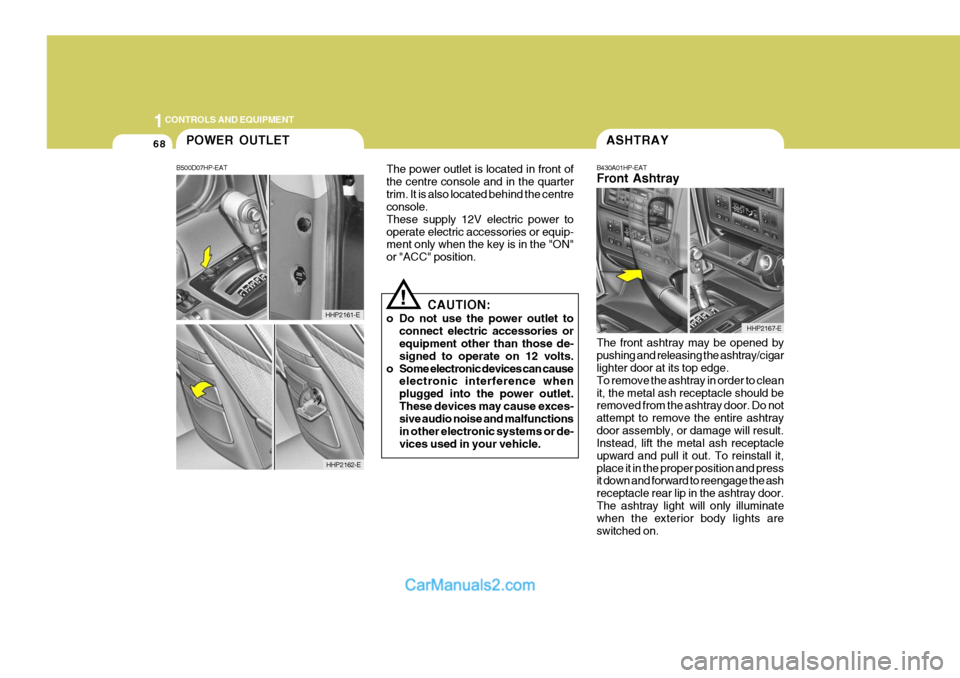
The front ashtray may be opened by pushing and releasing the ashtray/cigar lighter door at its top edge. To remove the ashtray in order to cleanit, the metal ash receptacle should be removed from the ashtray door. Do not attempt to remove the entire ashtraydoor assembly, or damage will result. Instead, lift the metal ash receptacle upward and pull it out. To reinstall it,place it in the proper position and press it down and forward to reengage the ash receptacle rear lip in the ashtray door.The ashtray light will only illuminate when the exterior body lights are switched on.ASHTRAY
B430A01HP-EAT Front Ashtray
HHP2167-E
!
The power outlet is located in front of the centre console and in the quartertrim. It is also located behind the centre console. These supply 12V electric power tooperate electric accessories or equip- ment only when the key is in the "ON" or "ACC" position.
CAUTION:
o Do not use the power outlet to connect electric accessories or equipment other than those de- signed to operate on 12 volts.
o Some electronic devices can cause electronic interference whenplugged into the power outlet.These devices may cause exces- sive audio noise and malfunctions in other electronic systems or de-vices used in your vehicle.
POWER OUTLET
B500D07HP-EAT
HHP2162-E
HHP2161-E
Page 382 of 539
1
CONTROLS AND EQUIPMENT
77
!
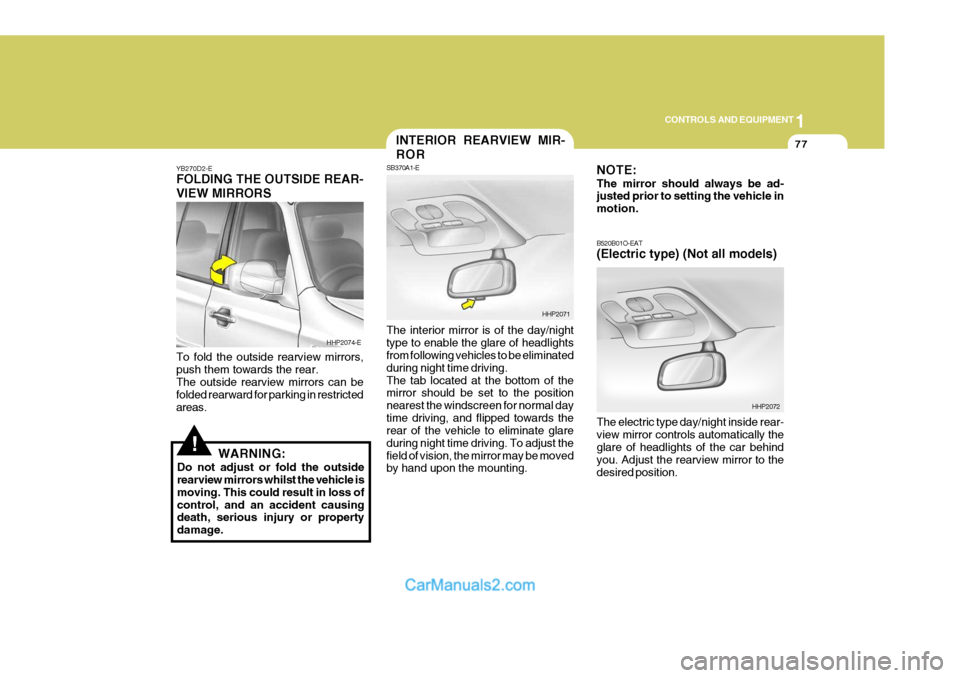
YB270D2-E FOLDING THE OUTSIDE REAR- VIEW MIRRORS To fold the outside rearview mirrors, push them towards the rear. The outside rearview mirrors can be folded rearward for parking in restrictedareas.
WARNING:
Do not adjust or fold the outside rearview mirrors whilst the vehicle is moving. This could result in loss ofcontrol, and an accident causing death, serious injury or property damage. The interior mirror is of the day/nighttype to enable the glare of headlights from following vehicles to be eliminated during night time driving.The tab located at the bottom of the mirror should be set to the position nearest the windscreen for normal daytime driving, and flipped towards the rear of the vehicle to eliminate glare during night time driving. To adjust thefield of vision, the mirror may be moved by hand upon the mounting.
HHP2074-E
HHP2071
INTERIOR REARVIEW MIR- ROR
SB370A1-E NOTE: The mirror should always be ad- justed prior to setting the vehicle in motion. B520B01O-EAT (Electric type) (Not all models) The electric type day/night inside rear- view mirror controls automatically the glare of headlights of the car behind you. Adjust the rearview mirror to thedesired position.
HHP2072
Page 387 of 539
1CONTROLS AND EQUIPMENT
82
!
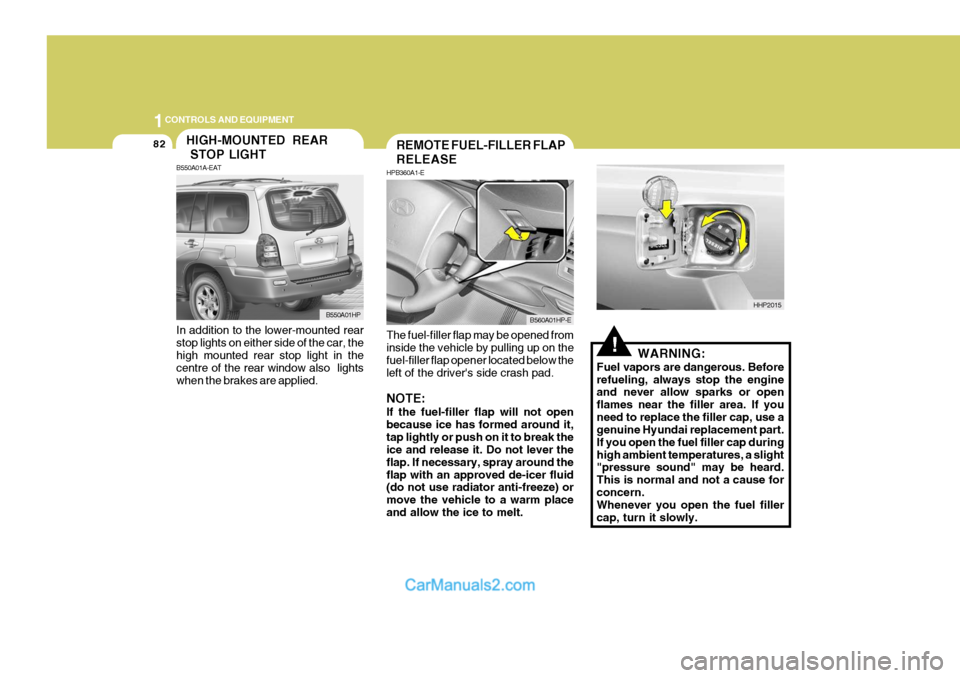
The fuel-filler flap may be opened from inside the vehicle by pulling up on the fuel-filler flap opener located below theleft of the driver's side crash pad. NOTE: If the fuel-filler flap will not open because ice has formed around it,tap lightly or push on it to break the ice and release it. Do not lever the flap. If necessary, spray around theflap with an approved de-icer fluid (do not use radiator anti-freeze) or move the vehicle to a warm placeand allow the ice to melt. WARNING:
Fuel vapors are dangerous. Beforerefueling, always stop the engine and never allow sparks or open flames near the filler area. If youneed to replace the filler cap, use a genuine Hyundai replacement part. If you open the fuel filler cap duringhigh ambient temperatures, a slight "pressure sound" may be heard. This is normal and not a cause forconcern. Whenever you open the fuel filler cap, turn it slowly.
REMOTE FUEL-FILLER FLAP RELEASE
HPB360A1-E
B560A01HP-E
HHP2015
In addition to the lower-mounted rear stop lights on either side of the car, the high mounted rear stop light in the centre of the rear window also lightswhen the brakes are applied.
HIGH-MOUNTED REAR STOP LIGHT
B550A01A-EAT
B550A01HP
Page 390 of 539
1
CONTROLS AND EQUIPMENT
85
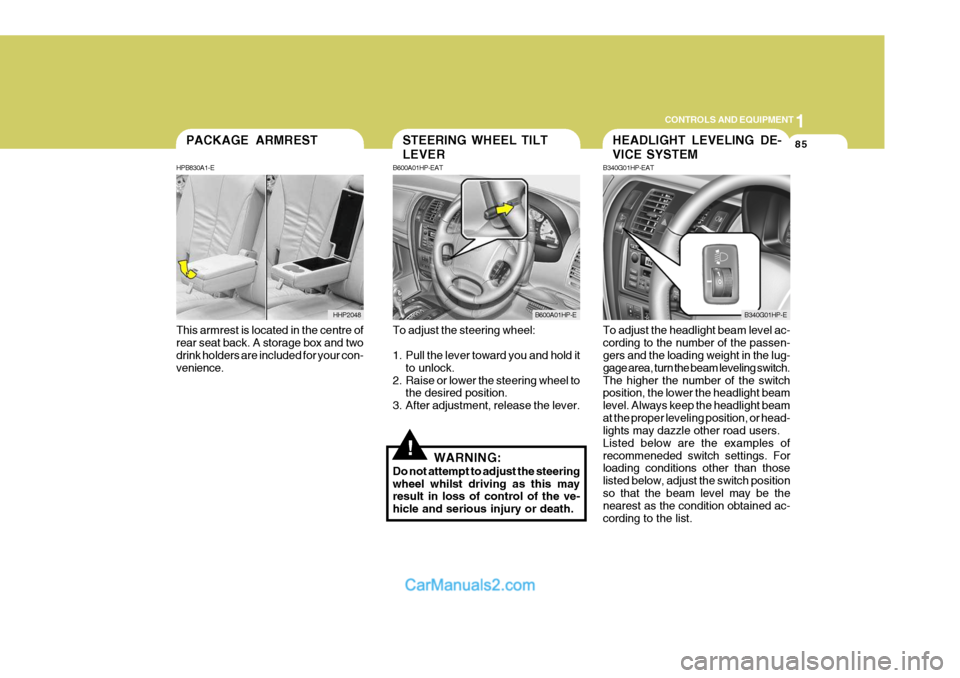
This armrest is located in the centre of rear seat back. A storage box and two drink holders are included for your con- venience.PACKAGE ARMREST
HPB830A1-E
HHP2048
!
To adjust the steering wheel:
1. Pull the lever toward you and hold it to unlock.
2. Raise or lower the steering wheel to the desired position.
3. After adjustment, release the lever.
WARNING:
Do not attempt to adjust the steering wheel whilst driving as this may result in loss of control of the ve- hicle and serious injury or death. To adjust the headlight beam level ac-cording to the number of the passen- gers and the loading weight in the lug- gage area, turn the beam leveling switch.The higher the number of the switch position, the lower the headlight beam level. Always keep the headlight beamat the proper leveling position, or head- lights may dazzle other road users. Listed below are the examples ofrecommeneded switch settings. For loading conditions other than those listed below, adjust the switch positionso that the beam level may be the nearest as the condition obtained ac- cording to the list.
STEERING WHEEL TILT LEVER
B600A01HP-EAT
B600A01HP-E
HEADLIGHT LEVELING DE- VICE SYSTEM
B340G01HP-EAT
B340G01HP-E
Page 416 of 539
2
DRIVING YOUR HYUNDAI
3
!WARNING:
Your vehicle is equipped with tyres designed to provide for safe ride and handling capability.Do not use a size and type of tyre and wheel that is different from the one that was originally installed on yourvehicle. It can affect the safety and performance of your vehicle, which could lead to handling failure orrollover and serious injury. When replacing the tyres, be sure to equip all four tyres with the tyre andwheel of the same size, type, tread, brand and load-carrying capacity. If you nevertheless decide to equipyour vehicle with any tyre/wheel com- bination not recommended by Hyundai for off-road driving, youshould not use these tyres for high- way driving.
TO START THE ENGINEBEFORE STARTING THE ENGINE
C020A01A-EAT Before you start the engine, you should always:
1. Look around the vehicle to be sure
there are no flat tyres, puddles of oil or water or other indications of pos- sible trouble.
2. After entering the car, check to be
sure the parking brake is engaged.
3. Check that all windows, and lights
are clean.
4. Check that the interior and exterior mirrors are clean and in position.
5. Check your seat, seatback and headrest to be sure they are in theirproper positions.
6. Close all the doors.
7. Fasten your seat belt and be sure that all other occupants have fas-tened theirs.
8. Turn off all lights and accessories that are not needed.
9. When you turn the ignition switch to "ON" check that all appropriate warning lights are operating and that you have sufficient fuel.
10.Check the operation of warning lights and all bulbs when key is inthe "ON" position. C030A01HP-EAT Cmbination Ignition Switch and Steering Lock
o If your Hyundai is equipped with a
manual transmission, place the shift lever in neutral and depress the clutch pedal fully.
o If your Hyundai has an automatic
transmission, place the shift lever in"P" (park).
o To start the engine, insert the igni- tion key and turn it to the "START"position. Release it as soon as the engine starts. Do not hold the key inthe "START" position for more than 15 seconds.
NOTE: For safety, the engine will not start if the shift lever is not in "P" or "N" position (Automatic Transmission).
Page 423 of 539
2 DRIVING YOUR HYUNDAI
10
!
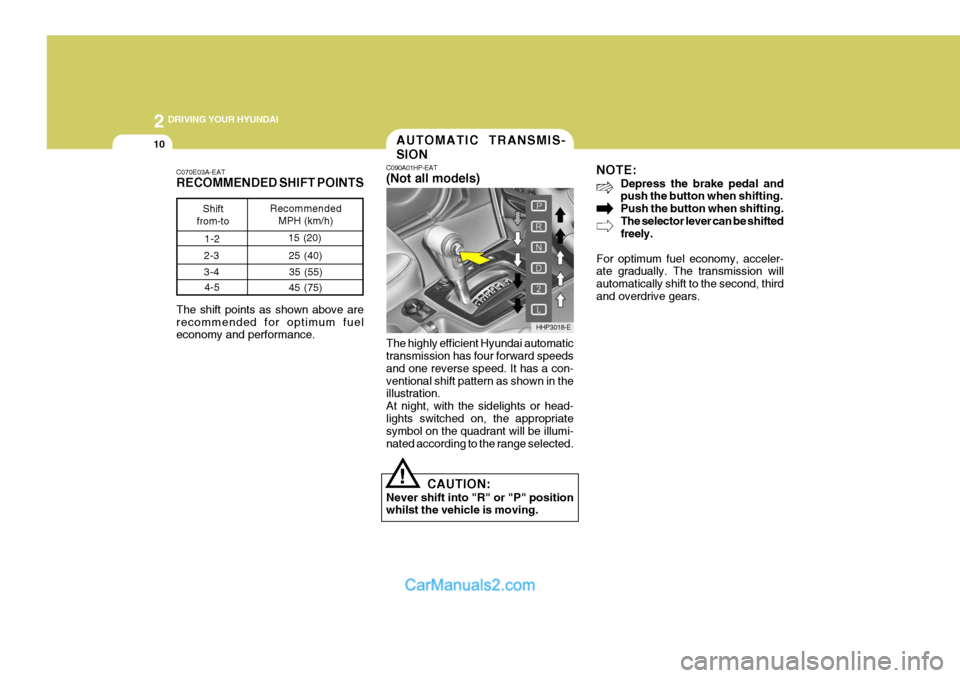
The highly efficient Hyundai automatic transmission has four forward speeds and one reverse speed. It has a con-ventional shift pattern as shown in the illustration. At night, with the sidelights or head-lights switched on, the appropriate symbol on the quadrant will be illumi- nated according to the range selected. NOTE:
Depress the brake pedal and push the button when shifting. Push the button when shifting.The selector lever can be shifted freely.
For optimum fuel economy, acceler-ate gradually. The transmission will automatically shift to the second, thirdand overdrive gears.
CAUTION:
Never shift into "R" or "P" position whilst the vehicle is moving.
C070E03A-EAT RECOMMENDED SHIFT POINTS The shift points as shown above are recommended for optimum fuel economy and performance.
Shift
from-to Recommended
MPH (km/h)
AUTOMATIC TRANSMIS- SION
C090A01HP-EAT (Not all models)
HHP3018-E
1-2
15 (20)
2-3 3-4 4-5 25 (40)
35 (55)
45 (75)
Page 436 of 539
2
DRIVING YOUR HYUNDAI
23
brake pedal several times whilst driv- ing slowly.
o Apply the parking brake only when the vehicle is at rest.
o Since the power assistance pro-
vided by the brake servo is derived from the engine, coasting with the engine turned off or towing of thevehicle with the engine turned off will result in greatly increased pedal pressures being required to stop thevehicle.
o Do not hold the vehicle on the up-
grade with the accelerator pedal.This can cause the transmission to overheat. Always use the brake pedal or parking brake.DRIVING FOR ECONOMY
C140A01A-EAT You can save fuel and get more miles from your car if you follow these sug-gestions:
o Drive smoothly. Accelerate at a moderate rate. Don't make "jack- rabbit" starts or full-throttle shifts and maintain a steady cruisingspeed. Don't race between stop- lights. Try to adjust your speed to that of the other traffic so you don'thave to change speeds unneces- sarily. Avoid heavy traffic whenever possible. Always maintain a safedistance from other vehicles so you can avoid unnecessary braking. This also reduces brake wear.
o Drive at a moderate speed. The faster you drive, the more fuel yourcar uses. Driving at a moderatespeed, especially on the highway, is one of the most effective ways to reduce fuel consumption.
o Don't "ride" the brake or clutch pedal. This can increase fuel consumptionand also increase wear on thesecomponents. In addition, driving with your foot resting on the brake pedal may cause the brakes to overheat, which reduces their effectivenessand may lead to more serious conse-quences.
o Take care of your tyres. Keep them
inflated to the recommended pres-sure. Incorrect inflation, either too much or too little, results in unnec- essary tyre wear. Check the tyrepressures at least once a month.
o Be sure that the wheels are aligned
correctly. Improper alignment canresult from hitting curbs or driving too fast over irregular surfaces. Poor alignment causes faster tyre wearand may also result in other prob- lems as well as greater fuel con- sumption.
o Keep your car in good condition. For better fuel economy and reducedmaintenance costs, maintain yourcar in accordance with the mainte- nance schedule in Section 5. If you drive your car in severe conditions,more frequent maintenance is re- quired (see Section 5 for details).
o Keep your car clean. For maximum service, your Hyundai should bekept clean and free of corrosive materials. It is especially importantthat mud, dirt, ice, etc. not be al-
Page 443 of 539
2 DRIVING YOUR HYUNDAI
30
14. When going down a hill, shift into alower gear and use the engine brak- ing effect. When ascending a long grade, downshift the transmission to alower gear and reduce speed to reduce chances of engine over- loading and/or overheating.
15.If you have to stop whilst going uphill, do not hold the vehicle inplace by pressing on the accelera-tor. This can cause the automatic transmission to overheat. Use the parking brake or footbrake.
NOTE: When towing, check transmission fluid more frequently.
HPC200E1-E Trailer or Vehicle Towing Tips
1. Before towing, check towbar and
safety cable connections as well as proper operation of the trailer run- ning lights, brake lights, and turn signals.
2. Always drive your vehicle at a mod- erate speed (Less than 60 MPH).
3. Trailer towing requires more fuel than normal conditions.
4. To maintain engine braking effi-
ciency and electrical charging per-formance, do not use fifth gear (manual transmission).
5. Always secure items in the trailer to prevent load shift whilst driving.
6. Check the condition and air pres-
sure of all tyres on the trailer and your car. Low tyre pressure can seriously affect the handling. Also check the spare tyre.
7. The vehicle/trailer combination is more affected by crosswind andbuffeting.When being passed by a large ve- hicle, keep a constant speed and steer straight ahead. If there is toomuch wind buffeting slow down to get out of the other vehicle's air turbulence. 8. When parking your car and trailer,
especially on a hill, be sure to followall the normal precautions. Turn your front wheel into the curb, set the parking brake firmly, and putthe transmission in 1st or Reverse (manual) or Park (automatic). In addition, place wheel chocks at eachof the trailer's tyres.
9. If the trailer has electric brakes,
start your vehicle and trailer mov-ing, and then apply the trailer brake controller by hand to be sure the brakes are working. This lets youcheck your electrical connection at the same time.
10.During your trip, check occasion- ally to be sure that the load issecure, and that the lights and any trailer brakes are still working.
11.Avoid jerky starts, sudden accel- eration or sudden stops.
12.Avoid sharp turns and rapid lane changes.
13.Avoid holding the brake pedal down
too long or too frequently. This couldcause the brakes to overheat, re- sulting in reduced braking efficiency.