battery replacement Hyundai Terracan 2005 Owner's Manual
[x] Cancel search | Manufacturer: HYUNDAI, Model Year: 2005, Model line: Terracan, Model: Hyundai Terracan 2005Pages: 539, PDF Size: 18.03 MB
Page 29 of 539
1
FEATURES OF YOUR HYUNDAI
15
!
After completion of the step above, the turn signal lights will blink twice toindicate that the system is disarmed. NOTE: If any door, tail gate or engine hood is not opened within 30 seconds,the system will be rearmed.
CAUTION:
Only the transmitter can disarm thearmed stage. If the transmitter does not disarm the system, it is neces- sary to take the following steps;
1. Unlock the door with the key, which will cause the alarm to be activated.
2. Insert the key in the ignition key
cylinder and turn the ignition keyto "ON" position.
3. Wait for 30 seconds. After completing the steps above, the system will be disarmed. B070F01A-GAT Keyless Entry System (If Installed) Locking doors
1. Close all doors.
2. Push the "LOCK" button on the trans-
mitter.
3. At the same time all doors lock, the
turn signal lights will blink once toindicate that the system is armed.
Unlocking doors
1. Push the "UNLOCK" button on the transmitter.
2. At the same time all doors unlock,
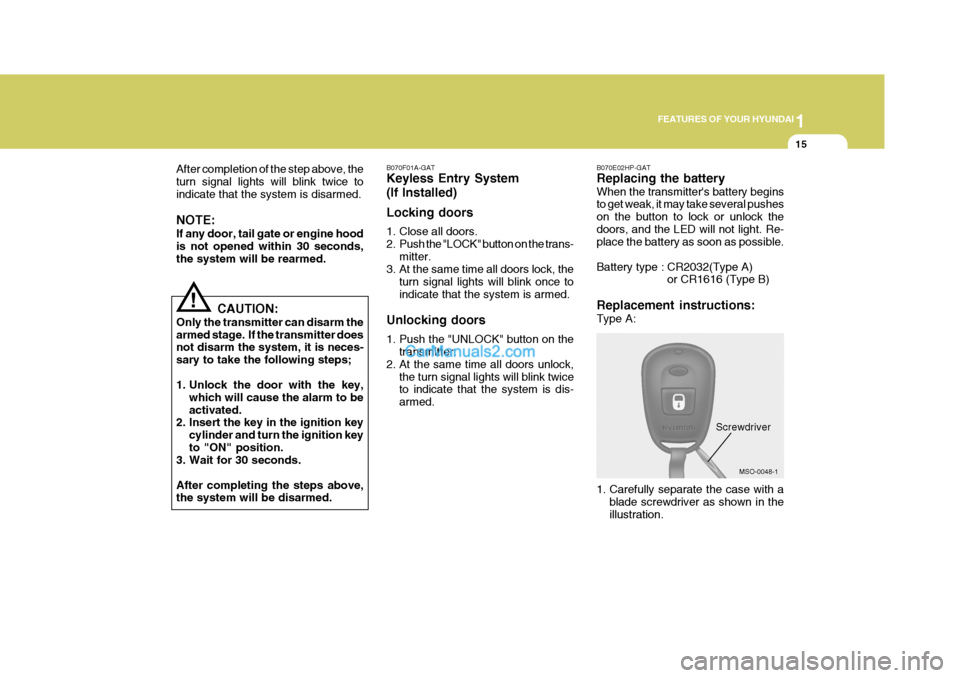
the turn signal lights will blink twice to indicate that the system is dis- armed. B070E02HP-GAT Replacing the battery When the transmitter's battery begins to get weak, it may take several pushes on the button to lock or unlock thedoors, and the LED will not light. Re- place the battery as soon as possible.
Battery type : CR2032(Type A)
or CR1616 (Type B)
Replacement instructions: Type A:
MSO-0048-1
1. Carefully separate the case with a blade screwdriver as shown in the illustration.
Screwdriver
Page 223 of 539
Engine Compartment ................................................... 6-2
General Checks ........................................................... 6-5
Checking the Engine Oil .............................................. 6-6
Changing the Engine Oil and Filter ..........................6-10
Checking and Changing the Engine Coolant ........... 6-11
Spark Plugs ................................................................ 6-14
Changing the Air Cleaner Filter ................................ 6-15
Checking the Transmission Oil (Manual) .................. 6-18
Checking the Transmission Fluid (Automatic) .......... 6-20
Checking the Brakes ................................................. 6-22
Checking the Clutch Fluid ......................................... 6-24
Air Conditioning Care ................................................ 6-24
Changing the Air Conditioner Filter .......................... 6-26
Checking Drive Belts ................................................. 6-29
Checking and Replacing Fuses ................................ 6-30
Checking The Battery ................................................ 6-32
Checking The Eclectric Cooling Fans ....................... 6-34
Power Steering Fluid Level ....................................... 6-34
Fuel Filter ................................................................... 6-35
Replacement of Headlight Bulbs ............................... 6-39
Headlight Aiming Adjustment .................................... 6-40
Bulb Wattages ............................................................ 6-43
Fuse Panel Description ............................................. 6-44
DO-IT-YOURSELF MAINTENANCE
6
6
Page 319 of 539
1CONTROLS AND EQUIPMENT
14
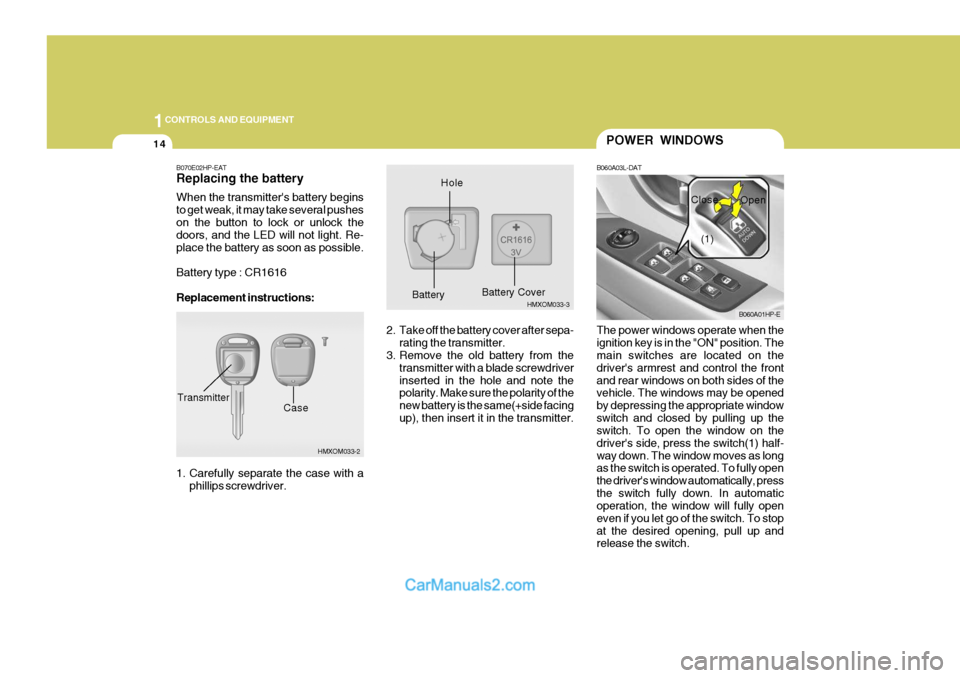
B070E02HP-EAT Replacing the battery When the transmitter's battery begins to get weak, it may take several pusheson the button to lock or unlock the doors, and the LED will not light. Re- place the battery as soon as possible. Battery type : CR1616 Replacement instructions:
1. Carefully separate the case with aphillips screwdriver.
HMXOM033-2
CaseTransmitter
HMXOM033-3
HoleBattery
Battery Cover
The power windows operate when the ignition key is in the "ON" position. The main switches are located on the driver's armrest and control the frontand rear windows on both sides of the vehicle. The windows may be opened by depressing the appropriate windowswitch and closed by pulling up the switch. To open the window on the driver's side, press the switch(1) half-way down. The window moves as long as the switch is operated. To fully open the driver's window automatically, pressthe switch fully down. In automatic operation, the window will fully open even if you let go of the switch. To stopat the desired opening, pull up and release the switch.
POWER WINDOWS
B060A03L-DAT
B060A01HP-E
(1)
Close
Open
2. Take off the battery cover after sepa- rating the transmitter.
3. Remove the old battery from the
transmitter with a blade screwdriver inserted in the hole and note the polarity. Make sure the polarity of the new battery is the same(+side facingup), then insert it in the transmitter.
Page 465 of 539
44APPEARANCE CARE
4
JE070A1-E POLISHING The exterior paint work should be pol- ished with a proprietary wax polish when water no longer collects in beadform on the paint work. The instruc- tions of the product manufacturer should be adhered to. JE080A1-E BUMPER MAINTENANCE The special material from which the bumpers are manufactured warrantsspecial attention to preserve the ap- pearance of the bumpers. Avoid con- tact with battery electrolyte or brakefluid and ensure that accidental spill- ages are immediately flushed with water.Do not use abrasive cleaning materi- als which may damage the bumpers. Avoid subjecting the bumpers to hightemperatures such as may be encoun- tered in high bake paint ovens.
JE090A1-E ACCIDENT REPAIRS In the event of the body work sustain- ing damage, the following points shouldbe noted prior to repairs being under- taken. If body panels are replaced or re-paired, anti corrosion treatment must be applied to the repair area. The product used must be compatible withthose used in manufacture. It is rec- ommended that repairs are entrusted to a Hyundai dealer to ensure thatreplacement parts used are of the same high quality as those used in manufac- ture of the vehicle and that the correctrepair methods and materials will en- sure adequate levels of corrosion pro- tection and the continued validity of theAnti Perforation Warranty.
JE060A1-E STAIN/SPOT REMOVAL Should tree sap, dead insects or tar prove to be difficult to remove from thepaint film, turpentine or a proprietary paint cutting compound may be used. Ensure that the area to be cleaned isnot rubbed intensively to prevent break- ing through the colour coat and expos- ing the under coat.
Page 478 of 539
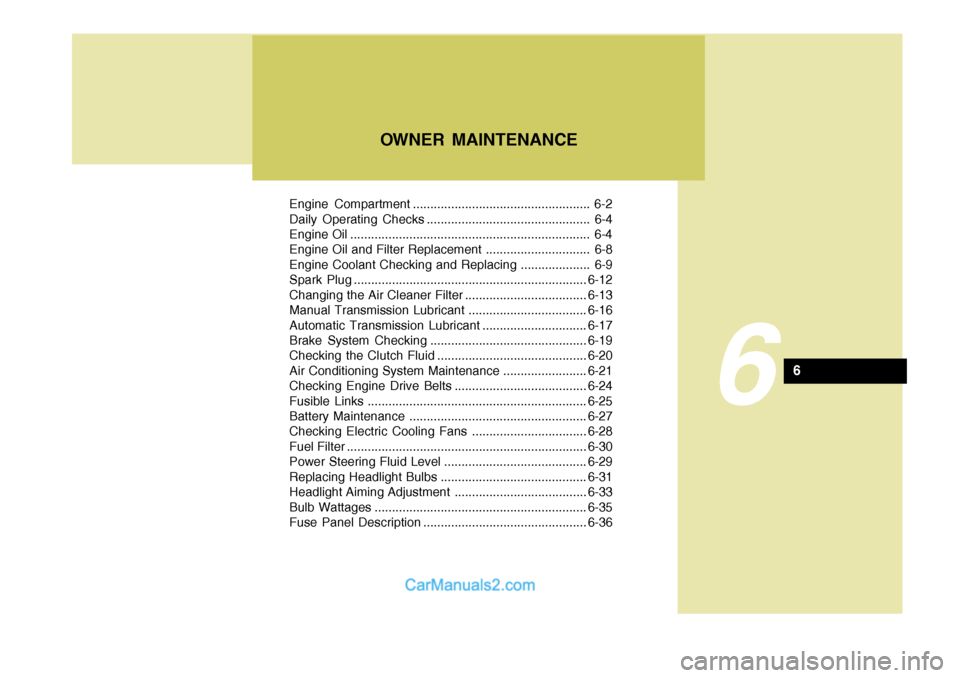
Engine Compartment ................................................... 6-2
Daily Operating Checks ............................................... 6-4
Engine Oil ..................................................................... 6-4
Engine Oil and Filter Replacement .............................. 6-8
Engine Coolant Checking and Replacing .................... 6-9Spark Plug................................................................... 6-12
Changing the Air Cleaner Filte r ...................................6-13
Manual Transmission Lubricant ..................................6-16
Automatic Transmission Lubricant ..............................6-17
Brake System Checking ............................................. 6-19
Checking the Clutch Fluid ........................................... 6-20
Air Conditioning System Maintenance ........................ 6-21
Checking Engine Drive Belts ...................................... 6-24
Fusible Links ............................................................... 6-25
Battery Mai ntenance ................................................... 6-27
Checking Electric Cooling Fans .................................6-28
Fuel Filter ..................................................................... 6-30
Power Steering Fluid Level ......................................... 6-29
Replacing Headlight Bulbs .......................................... 6-31
Headlight Aiming Adjustment ...................................... 6-33
Bulb Wattages ............................................................. 6-35
Fuse Panel D escription ............................................... 6-36
OWNER MAINTENANCE
6
6