Hyundai Tiburon 2008 Owner's Manual
Manufacturer: HYUNDAI, Model Year: 2008, Model line: Tiburon, Model: Hyundai Tiburon 2008Pages: 268, PDF Size: 9.93 MB
Page 131 of 268
1
FEATURES OF YOUR HYUNDAI
119
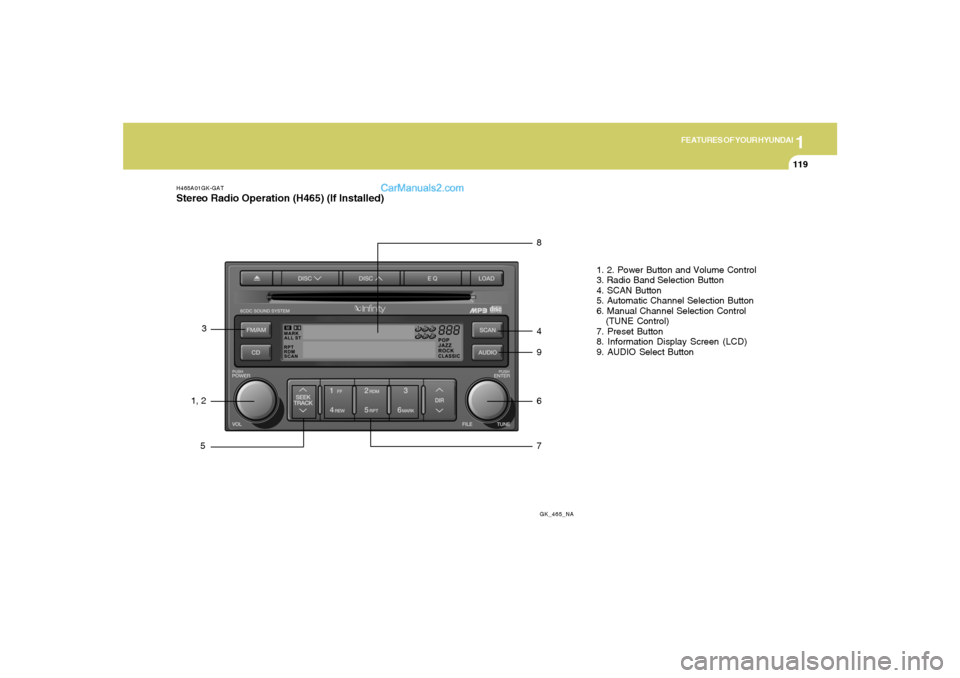
H465A01GK-GATStereo Radio Operation (H465) (If Installed)
GK_465_NA
1, 23
58
4
9
6
71. 2. Power Button and Volume Control
3. Radio Band Selection Button
4. SCAN Button
5. Automatic Channel Selection Button
6. Manual Channel Selection Control
(TUNE Control)
7. Preset Button
8. Information Display Screen (LCD)
9. AUDIO Select Button
Page 132 of 268
1FEATURES OF YOUR HYUNDAI
120
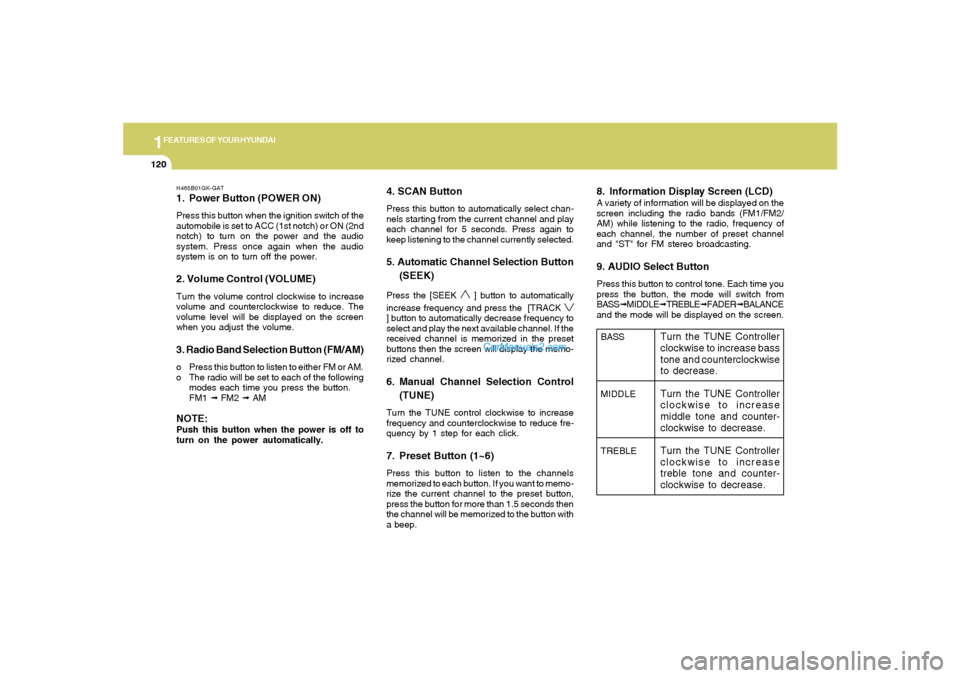
H465B01GK-GAT1. Power Button (POWER ON)Press this button when the ignition switch of the
automobile is set to ACC (1st notch) or ON (2nd
notch) to turn on the power and the audio
system. Press once again when the audio
system is on to turn off the power.2. Volume Control (VOLUME)Turn the volume control clockwise to increase
volume and counterclockwise to reduce. The
volume level will be displayed on the screen
when you adjust the volume.3. Radio Band Selection Button (FM/AM)o Press this button to listen to either FM or AM.
o The radio will be set to each of the following
modes each time you press the button.
FM1 ➟ FM2 ➟ AMNOTE:Push this button when the power is off to
turn on the power automatically.
4. SCAN ButtonPress this button to automatically select chan-
nels starting from the current channel and play
each channel for 5 seconds. Press again to
keep listening to the channel currently selected.5. Automatic Channel Selection Button
(SEEK)Press the [SEEK
] button to automatically
increase frequency and press the [TRACK
] button to automatically decrease frequency to
select and play the next available channel. If the
received channel is memorized in the preset
buttons then the screen will display the memo-
rized channel.6. Manual Channel Selection Control
(TUNE)Turn the TUNE control clockwise to increase
frequency and counterclockwise to reduce fre-
quency by 1 step for each click.7. Preset Button (1~6)Press this button to listen to the channels
memorized to each button. If you want to memo-
rize the current channel to the preset button,
press the button for more than 1.5 seconds then
the channel will be memorized to the button with
a beep.
8. Information Display Screen (LCD)A variety of information will be displayed on the
screen including the radio bands (FM1/FM2/
AM) while listening to the radio, frequency of
each channel, the number of preset channel
and "ST" for FM stereo broadcasting.9. AUDIO Select ButtonPress this button to control tone. Each time you
press the button, the mode will switch from
BASS➟MIDDLE➟TREBLE➟FADER➟BALANCE
and the mode will be displayed on the screen.BASS
MIDDLE
TREBLE
Turn the TUNE Controller
clockwise to increase bass
tone and counterclockwise
to decrease.
Turn the TUNE Controller
clockwise to increase
middle tone and counter-
clockwise to decrease.
Turn the TUNE Controller
clockwise to increase
treble tone and counter-
clockwise to decrease.
Page 133 of 268
1
FEATURES OF YOUR HYUNDAI
121
!BALANCE
FADER
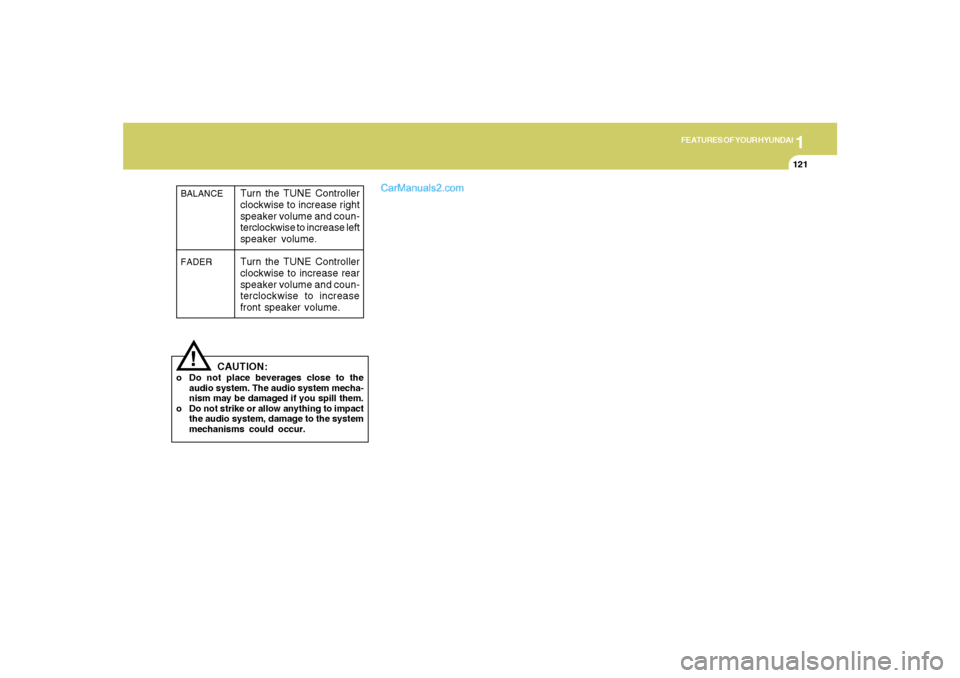
Turn the TUNE Controller
clockwise to increase right
speaker volume and coun-
terclockwise to increase left
speaker volume.
Turn the TUNE Controller
clockwise to increase rear
speaker volume and coun-
terclockwise to increase
front speaker volume.
CAUTION:
o Do not place beverages close to the
audio system. The audio system mecha-
nism may be damaged if you spill them.
o Do not strike or allow anything to impact
the audio system, damage to the system
mechanisms could occur.
Page 134 of 268
1FEATURES OF YOUR HYUNDAI
122
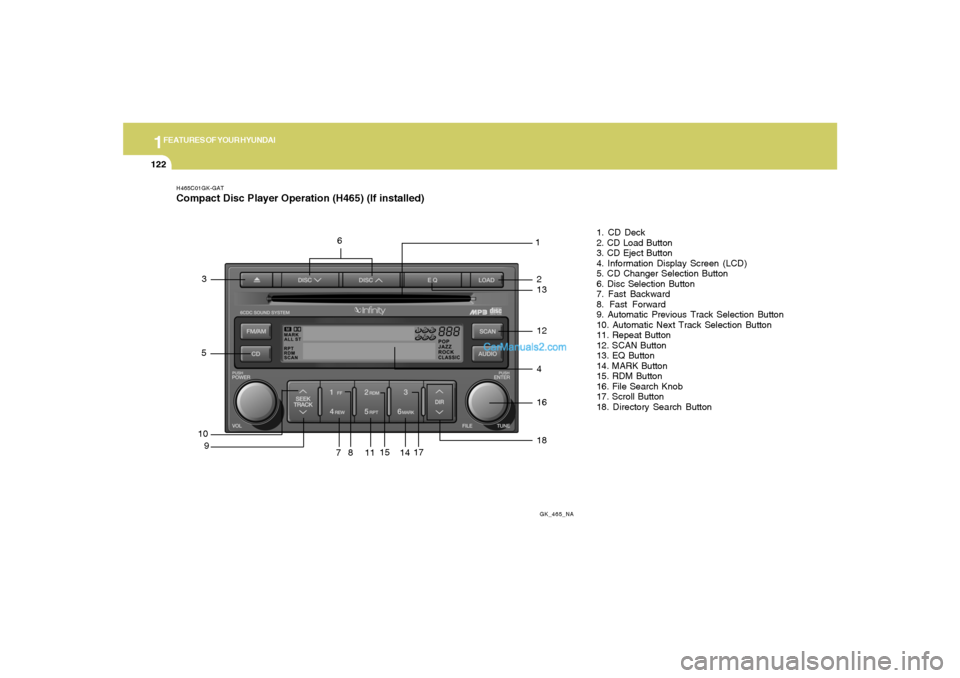
H465C01GK-GATCompact Disc Player Operation (H465) (If installed)
GK_465_NA
10
91
81. CD Deck
2. CD Load Button
3. CD Eject Button
4. Information Display Screen (LCD)
5. CD Changer Selection Button
6. Disc Selection Button
7. Fast Backward
8. Fast Forward
9. Automatic Previous Track Selection Button
10. Automatic Next Track Selection Button
11. Repeat Button
12. SCAN Button
13. EQ Button
14. MARK Button
15. RDM Button
16. File Search Knob
17. Scroll Button
18. Directory Search Button
71117
41618
14
15
53
12132
6
Page 135 of 268
![Hyundai Tiburon 2008 Owners Manual 1
FEATURES OF YOUR HYUNDAI
123
H465D01GK-GAT1.CD DeckThe deck will open only when you press [LOAD]
button. Make sure the printed side of the disk
faces upward when you insert the disk. The CD
changer Hyundai Tiburon 2008 Owners Manual 1
FEATURES OF YOUR HYUNDAI
123
H465D01GK-GAT1.CD DeckThe deck will open only when you press [LOAD]
button. Make sure the printed side of the disk
faces upward when you insert the disk. The CD
changer](/img/35/19687/w960_19687-134.png)
1
FEATURES OF YOUR HYUNDAI
123
H465D01GK-GAT1.CD DeckThe deck will open only when you press [LOAD]
button. Make sure the printed side of the disk
faces upward when you insert the disk. The CD
changer can only play 12cm disks. If you insert
video CD or DATA CD, then the screen will
display "ERROR DISC," eject the disk and
return to the previous mode.2. CD Load ButtonWhen you press [LOAD] button, the empty lots
of the CD Changer will be opened in the order
of 1, 2, 3, 4, 5 and 6. When you insert CD, you
can listen to the corresponding CD. In this case,
the last CD you inserted will be played. If you do
not take any actions after pressing (LOAD) then
the (LOAD) will be cancelled.3. CD Eject ButtonWhen you press [
] button, the currently
played CD will be ejected. If you press the button
for more than 2 seconds, you will be able to eject
all CDs. If currently played CD is in the 3rd slot,
the ejection order will be 3, 4, 5, 6, 1 and 2.
4. Information Display Screen (LCD)This shows the location of disk inside the CD
Changer and the corresponding CD deck num-
ber will flicker when you load or eject the CD.
5. CD Changer Selection ButtonIf the power was turned off when the CD is inside
the CD changer or if you press "CD" button
when radio was on, the system will play CD. If
you press [CD] button when there is no CD in
the changer then the system will display "NO
DISK" for 2 seconds and return to the previous
mode.NOTE:If you press this button when the power is
off and CD is inside the deck, the power will
be automatically turned on.6. Disc Selection ButtonIf you press [DISC
] button while using CD
Changer, the next disc will be played (If you
press the button when you are listening to CD
1, the CD 2 will be played).
If you wish to listen to the previous CD, then
press [DISC
] button then the previous disc
will be played (If you press the button when you
are listening to CD 2, the CD 1 will be played).
If the CD Changer is not fully loaded, this will
move to the next available deck. When the
player moves from deck to deck, the screen will
display the selected deck number.
7. Fast Backward (REW)Press and hold [REW] button while playing CD
then the player will play the disk backwards 5
times the regular speed for first 5 seconds and
15 times faster after that. The sound will be
reduced by 12dB while you are holding the
button.8. Fast Forward (FF)Press and hold [FF] button while playing CD
then the player will play the disk forward 5 times
the regular speed for first 5 seconds and 15
times faster after that. The sound will be re-
duced by 12dB while you are holding the button.9. Automatic Previous Track Selection
ButtonPress [TRACK
] button to go to the beginning
of the song you are listening to while playing the
CD. Press the button again to go to the beginning
of the song before the song you were listening
to.
10. Automatic Next Track Selection
ButtonPress [SEEK
] button to go to the beginning
of the song next to the song you are listening to
while playing the CD.
Page 136 of 268
![Hyundai Tiburon 2008 Owners Manual 1FEATURES OF YOUR HYUNDAI
124
11. Section Repeat Button (RPT)Press [RPT] button to repeat the song you are
listening to. Press this button again to cancel
repetition.12. SCAN ButtonIf you press this b Hyundai Tiburon 2008 Owners Manual 1FEATURES OF YOUR HYUNDAI
124
11. Section Repeat Button (RPT)Press [RPT] button to repeat the song you are
listening to. Press this button again to cancel
repetition.12. SCAN ButtonIf you press this b](/img/35/19687/w960_19687-135.png)
1FEATURES OF YOUR HYUNDAI
124
11. Section Repeat Button (RPT)Press [RPT] button to repeat the song you are
listening to. Press this button again to cancel
repetition.12. SCAN ButtonIf you press this button, the player will play 10
seconds of each track. Press it again to cancel
scanning.13. EQ ButtonEach time you press this button the sound
equalizer setting will switch from
POP➟JAZZ➟ROCK➟CLASSIC➟OFF (Not
displayed).14. BOOKMARK ButtonThis button lets you select the songs you want
to listen to in the CD. Move to the track and press
(MARK) for more than 1 second then the screen
will display " M " and select the track. Press the
button less than 1 second to play the songs you
selected and the system will display " M "15. RDM (Random) ButtonPress [RDM] button to play the songs in random
order.
NOTE:When you use CD-R or CD-RW, the CD may
not be played due to the manufacturing
method of CD makers and the recording
method of the user. In this case, change CD
unless the continuous use of such CDs
may cause damage to the system.16. FILE Search KnobTurn this knob to the left and right while listening
to CD to change track number. If you press the
button within 5 seconds then the selected track
will be played. If you do not press the button
within 5 seconds then it will display the currently
played track.17. SCROLL ButtonIf the title of MP3 or WMA file is too long, press
this button to scroll the entire song title on the
LCD screen.18. Directory Search ButtonIn case the MP3/WMA CD contains more than
2 folders, press this button up and down to
search each directory. You can move to the
directory and turn the search knob to search
through the tracks. If you do not press the knob
within 5 seconds after you select a track then
the system will automatically return to the cur-
rent track.
CAUTION:
o Do not insert warped or poor quality
discs into the CD player as damage to the
unit may occur.
o Do not insert anything like coins into the
player slot as damage to the unit may
occur.
o Do not place beverages close to the
audio system. The playback mechanism
may be damaged if you spill them.
o Do not strike or allow anything to impact
the audio system, damage to the system
mechanisms could occur.
o Off-road or rough surface driving may
cause the compact disc to skip. Do not
use the compact disc when driving in
such conditions as damage to the com-
pact disc face could occur.
o Do not attempt to grab or pull the com-
pact disc out while the disc is being
pulled into the audio unit by the self-
loading mechanism. Damage to the
audio unit and compact disc could oc-
cur.
o Avoid using recorded compact discs in
your audio unit. Original compact discs
are recommended.
!
Page 137 of 268
1
FEATURES OF YOUR HYUNDAI
125
CARE OF CASSETTE TAPES
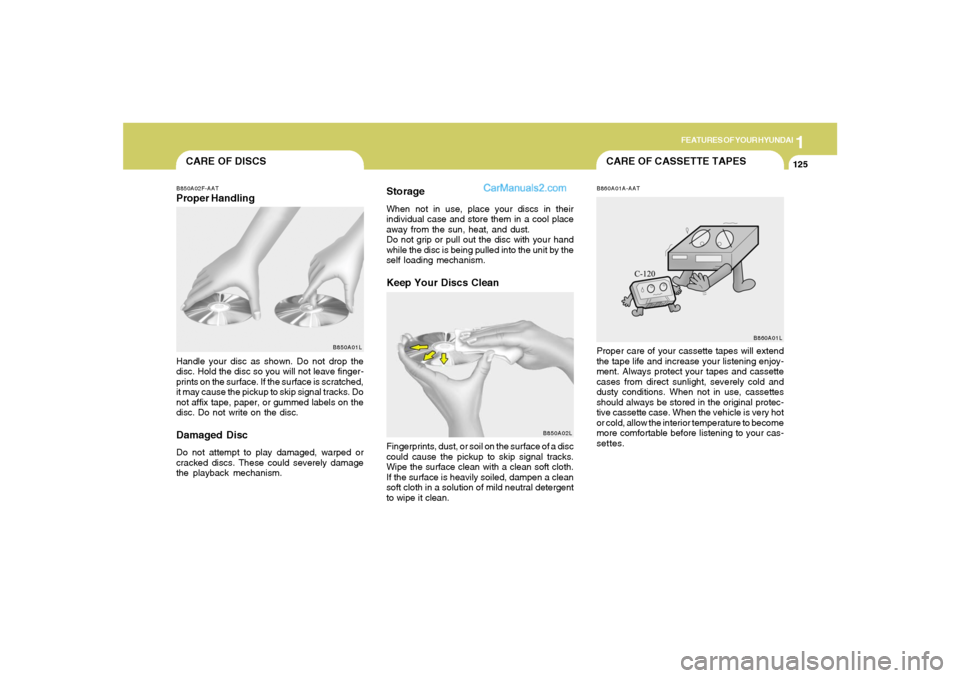
CARE OF DISCSB850A02F-AATProper Handling
B850A01L
Handle your disc as shown. Do not drop the
disc. Hold the disc so you will not leave finger-
prints on the surface. If the surface is scratched,
it may cause the pickup to skip signal tracks. Do
not affix tape, paper, or gummed labels on the
disc. Do not write on the disc.Damaged DiscDo not attempt to play damaged, warped or
cracked discs. These could severely damage
the playback mechanism.
StorageWhen not in use, place your discs in their
individual case and store them in a cool place
away from the sun, heat, and dust.
Do not grip or pull out the disc with your hand
while the disc is being pulled into the unit by the
self loading mechanism.Keep Your Discs Clean
B850A02L
Fingerprints, dust, or soil on the surface of a disc
could cause the pickup to skip signal tracks.
Wipe the surface clean with a clean soft cloth.
If the surface is heavily soiled, dampen a clean
soft cloth in a solution of mild neutral detergent
to wipe it clean.
B860A01A-AATProper care of your cassette tapes will extend
the tape life and increase your listening enjoy-
ment. Always protect your tapes and cassette
cases from direct sunlight, severely cold and
dusty conditions. When not in use, cassettes
should always be stored in the original protec-
tive cassette case. When the vehicle is very hot
or cold, allow the interior temperature to become
more comfortable before listening to your cas-
settes.
B860A01L
Page 138 of 268
1FEATURES OF YOUR HYUNDAI
126
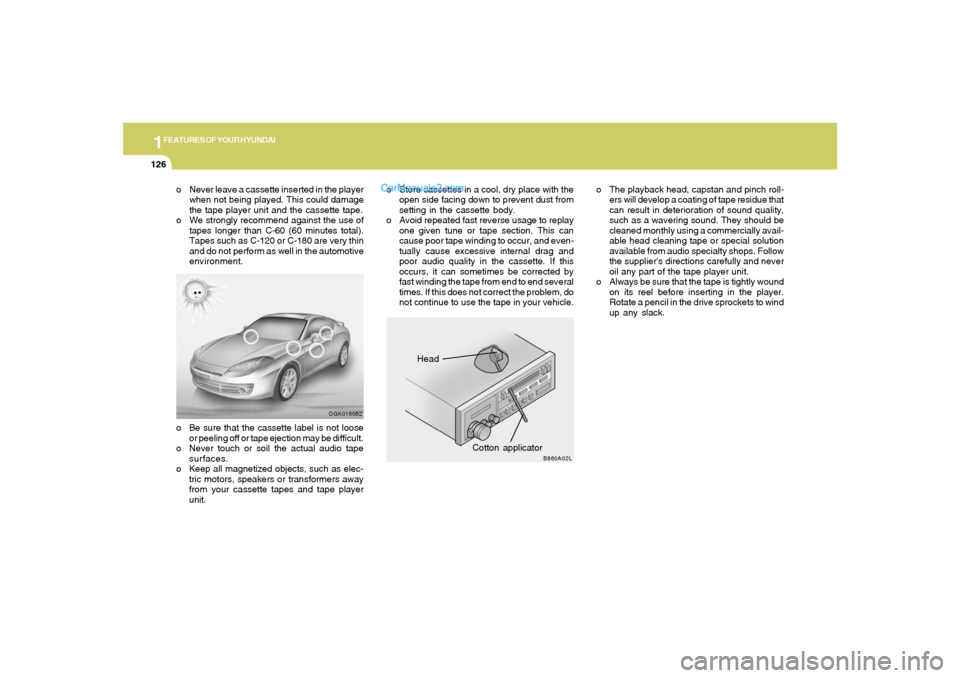
Head
Cotton applicator
OGK016062
B860A02L
o Never leave a cassette inserted in the player
when not being played. This could damage
the tape player unit and the cassette tape.
o We strongly recommend against the use of
tapes longer than C-60 (60 minutes total).
Tapes such as C-120 or C-180 are very thin
and do not perform as well in the automotive
environment.o The playback head, capstan and pinch roll-
ers will develop a coating of tape residue that
can result in deterioration of sound quality,
such as a wavering sound. They should be
cleaned monthly using a commercially avail-
able head cleaning tape or special solution
available from audio specialty shops. Follow
the supplier's directions carefully and never
oil any part of the tape player unit.
o Always be sure that the tape is tightly wound
on its reel before inserting in the player.
Rotate a pencil in the drive sprockets to wind
up any slack.o Be sure that the cassette label is not loose
or peeling off or tape ejection may be difficult.
o Never touch or soil the actual audio tape
surfaces.
o Keep all magnetized objects, such as elec-
tric motors, speakers or transformers away
from your cassette tapes and tape player
unit.o Store cassettes in a cool, dry place with the
open side facing down to prevent dust from
setting in the cassette body.
o Avoid repeated fast reverse usage to replay
one given tune or tape section. This can
cause poor tape winding to occur, and even-
tually cause excessive internal drag and
poor audio quality in the cassette. If this
occurs, it can sometimes be corrected by
fast winding the tape from end to end several
times. If this does not correct the problem, do
not continue to use the tape in your vehicle.
Page 139 of 268
1
FEATURES OF YOUR HYUNDAI
127
B860A03L
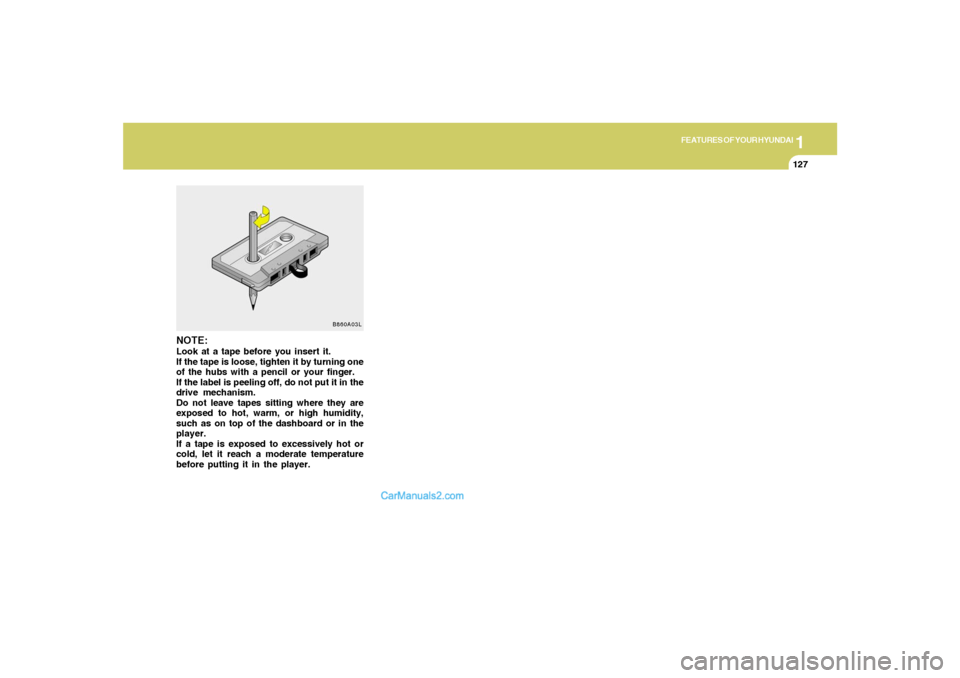
NOTE:Look at a tape before you insert it.
If the tape is loose, tighten it by turning one
of the hubs with a pencil or your finger.
If the label is peeling off, do not put it in the
drive mechanism.
Do not leave tapes sitting where they are
exposed to hot, warm, or high humidity,
such as on top of the dashboard or in the
player.
If a tape is exposed to excessively hot or
cold, let it reach a moderate temperature
before putting it in the player.
Page 140 of 268
DRIVING YOUR HYUNDAI
2
Engine Exhaust Can Be Dangerous! ............................ 2-2
Before Starting the Engine ............................................ 2-3
Key Positions ................................................................ 2-4
Starting ..........................................................................2-5
Operating the Manual Transaxle ................................... 2-6
Automatic Transaxle ..................................................... 2-8
Anti-Lock Brake System (ABS) ..................................2-12
Electronic Stability Control (ESC)...............................2-13
Good Braking Practices..............................................2-14
Driving for Economy...................................................2-15
Winter Driving.............................................................2-16
Trailer or Vehicle Towing ............................................2-19
Vehicle Load Limit.......................................................2-22
2