check engine light HYUNDAI TUCSON 2009 User Guide
[x] Cancel search | Manufacturer: HYUNDAI, Model Year: 2009, Model line: TUCSON, Model: HYUNDAI TUCSON 2009Pages: 273, PDF Size: 10.29 MB
Page 159 of 273
2
DRIVING YOUR HYUNDAI
24
C160K01A-AATCarry Emergency EquipmentDepending on the severity of the weather
where you drive your car, you should carry
appropriate emergency equipment. Some
of the items you may want to carry include
tire chains, tow straps or chains, flashlight,
emergency flares, sand, a shovel, jumper
cables, a window scraper, gloves, ground
cloth, coveralls, a blanket, etc.
C160H02A-AATUse Approved Window Washer Anti-
Freeze in SystemTo keep the water in the window washer
system from freezing, add an approved
window washer anti-freeze solution in
accordance with instructions on the con-
tainer. Window washer anti-freeze is avail-
able from Hyundai dealers and most auto
parts outlets. Do not use engine coolant or
other types of anti-freeze as these may
damage the paint finish.
C160G01A-AATTo Keep Locks from FreezingTo keep the locks from freezing, squirt an
approved de-icer fluid or glycerine into the
key opening. If a lock is covered with ice,
squirt it with an approved de-icing fluid to
remove the ice. If the lock is frozen inter-
nally, you may be able to thaw it out by
using a heated key. Handle the heated key
with care to avoid injury.
C160J01A-AATDon't Let Ice and Snow Accumulate
UnderneathUnder some conditions, snow and ice can
build up under the fenders and interfere
with the steering. When driving in severe
winter conditions where this may happen,
you should periodically check underneath
the car to be sure the movement of the front
wheels and the steering components is
not obstructed.
C160I01A-AATDon't Let Your Parking Brake FreezeUnder some conditions your parking brake
can freeze in the engaged position. This
is most likely to happen when there is an
accumulation of snow or ice around or
near the rear brakes or if the brakes are
wet. If there is a risk the parking brake may
freeze, apply it only temporarily while you
put the gear selector lever in "P" (auto-
matic) or in first or reverse gear (manual
transaxle) and block the rear wheels so the
car cannot roll. Then release the parking
brake.
C160F01A-AATCheck Spark Plugs and Ignition
SystemInspect your spark plugs as described in
Section 6 and replace them if necessary.
Also check all ignition wiring and compo-
nents to be sure they are not cracked, worn
or damaged in any way.C160E01A-AATChange to "Winter Weight" Oil if
NecessaryIn some climates it is recommended that a
lower viscosity "winter weight" oil be used
during cold weather. See Section 9 for
recommendations. If you aren't sure what
weight oil you should use, consult your
Hyundai dealer.
Page 160 of 273
2
DRIVING YOUR HYUNDAI
25
!
HIGHER SPEED MOTORINGC170A02A-AATPre-Trip Inspections1. Tires:
Adjust the tire inflation pressures to speci-
fication. Low tire inflation pressures will
result in overheating and possible failure
of the tires.
Avoid using worn or damaged tires which
may result in reduced traction or tire fail-
ure.NOTE:Never exceed the maximum tire infla-
tion pressure shown on the tires.
WARNING:
o Underinflated or overinflated tires can
cause poor handling, loss of vehicle
control, and sudden tire failure lead-
ing to accidents, injuries, and even
death. Always check tires are prop-
erly inflated before driving. Refer to
pages 2-29 and 8-3 for proper tire
pressures and further information.
o Driving on tires with no or insufficient
tread is dangerous. Worn-out tires
can result in loss of vehicle control,
collisions, injury, and even death.
Worn-out tires should be replaced as
soon as possible and should never be
used for driving. Always check tire
tread before driving your car. Refer to
8-11 for further information and tread
limits.
USE OF LIGHTSC180A01A-AATCheck your lights regularly for correct op-
eration and always keep them clean. When
driving during the day in conditions of poor
visibility, it is helpful to drive with head-
lights on low beam. This enables you to be
seen as well as to see.
2. Fuel, engine coolant and engine oil:
High speed travel consumes more fuel
than urban motoring. Do not forget to check
both engine coolant and engine oil.
3. Drive belt:
A loose or damaged drive belt may result
in overheating of the engine.
Page 163 of 273
2
DRIVING YOUR HYUNDAI
28
C190F01O-AATTrailer or Vehicle Towing Tips1. Before towing, check hitch and safety
chain connections as well as proper
operation of the trailer running lights,
brake lights, and turn signals.
2. Trailer towing requires more fuel than
normal conditions.
3. To maintain engine braking efficiency,
do not tow a trailer with the transaxle in
fifth gear (manual transaxle) or over-
drive (automatic transaxle).
4. Always secure items in the trailer to
prevent load shift while driving.
5. Check the condition and air pressure of
all tires on the trailer and your car. Low
tire pressure can seriously affect the
handling. Also check the spare tire.
6. The vehicle/trailer combination is more
affected by crosswind and buffeting.
When being passed by a large vehicle,
keep a constant speed and steer straight
ahead. If there is too much wind buffet-
ing, slow down to get out of the other
vehicle's air turbulence.
7. When parking your car and trailer, es-
pecially on a hill, be sure to follow all the
normal precautions. Turn your front
wheel into the curb, set the parking
brake firmly, and put the transaxle in 1st
or Reverse (manual) or Park (automatic).
In addition, place wheel chocks at each
of the trailer's tires.8. If the trailer has electric brakes, start
your vehicle and trailer moving, and
then apply the trailer brake controller by
hand to be sure the brakes are working.
This lets you check your electrical con-
nection at the same time.
9. During your trip, check occasionally to
be sure that the load is secure, and that
the lights and any trailer brakes are still
working.
10. Avoid jerky starts, sudden accelera-
tion or sudden stops.
11. Avoid sharp turns and rapid lane
changes.
12. Avoid holding the brake pedal down
too long or too frequently. This could
cause the brakes to overheat, resulting
in reduced braking efficiency.
13. When going down a hill, shift into a
lower gear and use the engine braking
effect.
When ascending a long grade, down-
shift the transaxle to a lower gear and
reduce speed to reduce chances of
engine overloading and/or overheat-
ing.
14. If you have to stop while going uphill,
do not hold the vehicle in place by
pressing on the accelerator. This can
cause the automatic transaxle to over-
heat. Use the parking brake or
footbrake.
15.If the transaxle shifts frequently while
going up a hill, shift down one gear.
!
WARNING:
o Improperly loading your vehicle and
trailer can seriously affect its steer-
ing and braking performance causing
a crash which could cause serious
injury or death.
o Towing a trailer affected vehicle han-
dling and braking.
o Drive more slowly when towing a trailer
and allow more distance when brak-
ing.
o Be careful when driving in slippery
and windy conditions.
o Be careful when turning and while
driving up and down hills.
o Do not exceed 45 mph or the posted
towing speed limit, whichever is lower.
Page 171 of 273
32WHAT TO DO IN AN EMERGENCY
IF THE ENGINE WILL NOT START!
D010A01A-AAT D010B02A-AAT
If Engine Doesn't Turn Over or Turns
Over Slowly
D010C02Y-AATIf Engine Turns Over Normally but
Does Not Start1. Check fuel level.
2. With the key in the "OFF" position, check
all connectors at ignition, coil and spark
plugs. Reconnect any that may be dis-
connected or loose.
3. Check the fuel line in the engine com-
partment.
4. If the engine still does not start, call a
Hyundai dealer or seek other qualified
assistance.D010D01A-AATIf Engine Stalls While Driving1. Reduce your speed gradually, keeping
a straight line. Move cautiously off the
road to a safe place.
2. Turn on your emergency flashers.
3. Try to start the engine again. If your ve-
hicle will not start, contact a Hyundai
dealer or seek other qualified assistance.
WARNING:
If the engine will not start, do not push or
pull the car to start it. This could result in
a collision or cause other damage. In
addition, push or pull starting may cause
the catalytic converter to be overloaded
and create a fire hazard.
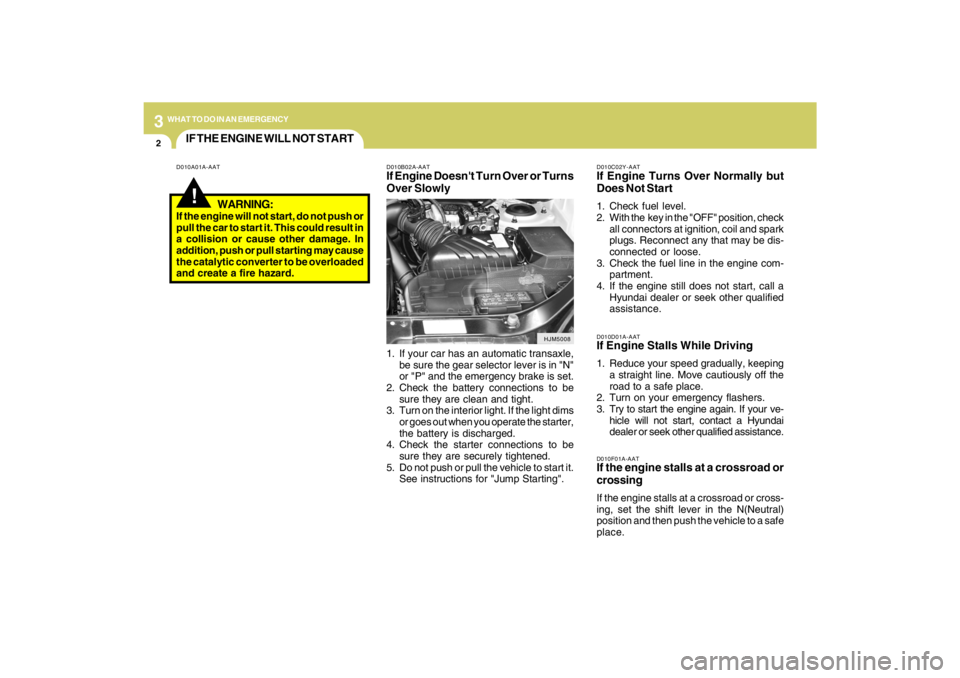
1. If your car has an automatic transaxle,
be sure the gear selector lever is in "N"
or "P" and the emergency brake is set.
2. Check the battery connections to be
sure they are clean and tight.
3. Turn on the interior light. If the light dims
or goes out when you operate the starter,
the battery is discharged.
4. Check the starter connections to be
sure they are securely tightened.
5. Do not push or pull the vehicle to start it.
See instructions for "Jump Starting".
HJM5008
D010F01A-AAT
If the engine stalls at a crossroad or
crossingIf the engine stalls at a crossroad or cross-
ing, set the shift lever in the N(Neutral)
position and then push the vehicle to a safe
place.
Page 172 of 273
3
WHAT TO DO IN AN EMERGENCY
3
JUMP STARTING!
o If you should accidentally get acid on
your skin or in your eyes, immediately
remove any contaminated clothing and
flush the area with clear water for at
least 15 minutes. Then promptly obtain
medical attention. If you must be trans-
ported to an emergency facility, con-
tinue to apply water to the affected area
with a sponge or cloth.
o The gas produced by the battery during
the jump-start operation is highly explo-
sive. Do not smoke or allow a spark or
an open flame in the vicinity.
o The battery being used to provide the
jump start must be 12-volt. If you cannot
determine that it is a 12-volt battery, do
not attempt to use it for the jump start.
o To jump start a car with a discharged
battery, follow this procedure exactly:
1. If the booster battery is installed in an-
other vehicle, be sure the two vehicles
are not touching.
2. Turn off all unnecessary lights and
acces-sories in both vehicles.
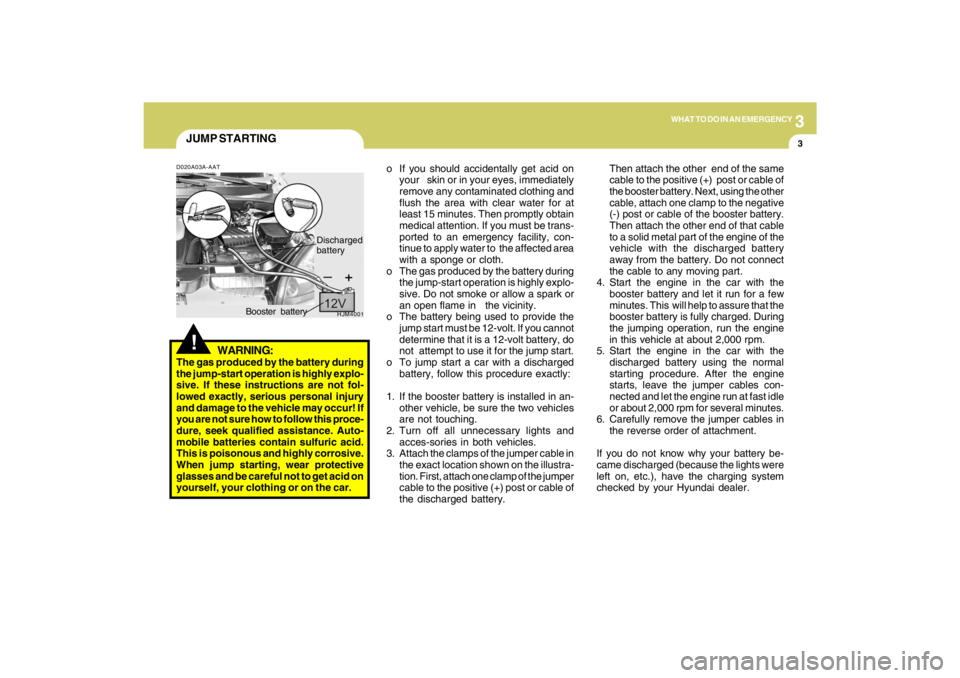
3. Attach the clamps of the jumper cable in
the exact location shown on the illustra-
tion. First, attach one clamp of the jumper
cable to the positive (+) post or cable of
the discharged battery.Then attach the other end of the same
cable to the positive (+) post or cable of
the booster battery. Next, using the other
cable, attach one clamp to the negative
(-) post or cable of the booster battery.
Then attach the other end of that cable
to a solid metal part of the engine of the
vehicle with the discharged battery
away from the battery. Do not connect
the cable to any moving part.
4. Start the engine in the car with the
booster battery and let it run for a few
minutes. This will help to assure that the
booster battery is fully charged. During
the jumping operation, run the engine
in this vehicle at about 2,000 rpm.
5. Start the engine in the car with the
discharged battery using the normal
starting procedure. After the engine
starts, leave the jumper cables con-
nected and let the engine run at fast idle
or about 2,000 rpm for several minutes.
6. Carefully remove the jumper cables in
the reverse order of attachment.
If you do not know why your battery be-
came discharged (because the lights were
left on, etc.), have the charging system
checked by your Hyundai dealer.
D020A03A-AAT
WARNING:
The gas produced by the battery during
the jump-start operation is highly explo-
sive. If these instructions are not fol-
lowed exactly, serious personal injury
and damage to the vehicle may occur! If
you are not sure how to follow this proce-
dure, seek qualified assistance. Auto-
mobile batteries contain sulfuric acid.
This is poisonous and highly corrosive.
When jump starting, wear protective
glasses and be careful not to get acid on
yourself, your clothing or on the car.
HJM4001
Booster batteryDischarged
battery
Page 205 of 273
6
Engine Compartment .................................................... 6-2
General Checks ............................................................ 6-4
Checking the Engine Oil ............................................... 6-5
Changing the Oil and Filter ............................................ 6-6
Checking and Changing the Engine Coolant ................ 6-8
Changing the Air Cleaner Filter ...................................6-10
Checking the Transaxle Oil (Manual) .........................6-11
Checking the Transaxle Fluid (Automatic)..................6-12
Checking the Brakes ..................................................6-14
Checking the Clutch Fluid...........................................6-15
Air Conditioning Care..................................................6-16
Changing the Climate Control Air Filter .......................6-17
Checking the Free-play...............................................6-19
Checking Drive Belts ..................................................6-20
Checking and Replacing Fuses..................................6-21
Checking the Battery..................................................6-23
Power Steering Fluid Level .........................................6-25
Replacement of Light Bulbs ........................................6-27
Bulb Wattage ...............................................................6-34
Fuse Panel Description...............................................6-35
6
DO-IT-YOURSELF MAINTENANCE
Page 208 of 273
6
DO-IT-YOURSELF MAINTENANCE
4
GENERAL CHECKS
G020C01A-AATVehicle InteriorThe following should be checked each
time when the vehicle is driven:
o Lights operation
o Windshield wiper operation
o Horn operation
o Defroster, heating system operation
(and air conditioning, if installed)
o Steering operation and condition
o Mirror condition and operation
o Turn signal operation
o Accelerator pedal operation
o Brake operation, including parking
brake
o Manual transaxle operation, including
clutch operation
o Automatic transaxle operation, includ-
ing "Park" mechanism operation
o Seat control condition and operation
o Seat belt condition and operation
o Sunvisor operation
If you notice anything that does not operate
correctly or appears to be functioning cor-
rectly, inspect it carefully and seek assis-
tance from your Hyundai dealer if service
is needed.
G020B01A-AATVehicle ExteriorThe following should be checked monthly:
o Overall appearance and condition
o Wheel condition and wheel nut torque
o Exhaust system condition
o Light condition and operation
o Windshield glass condition
o Wiper blade condition
o Paint condition and body corrosion
o Fluid leaks
o Door and hood lock condition
o Tire pressure and condition
(including spare tire)
G020A01A-AATEngine CompartmentThe following should be checked regu-
larly:
o Engine oil level and condition
o Transaxle fluid level and condition
o Brake fluid level
o Clutch fluid level
o Engine coolant level
o Windshield washer fluid level
o Accessory drive belt condition
o Engine coolant hose condition
o Fluid leaks (on or below components)
o Power steering fluid level
o Battery condition
o Air filter condition
Page 223 of 273
6
DO-IT-YOURSELF MAINTENANCE
19
G150A01JM
!
B145A01JM
CAUTION:
Be sure to install the air conditioner filter
in the direction of the arrow sign. Other-
wise, noise or filter damage may result.
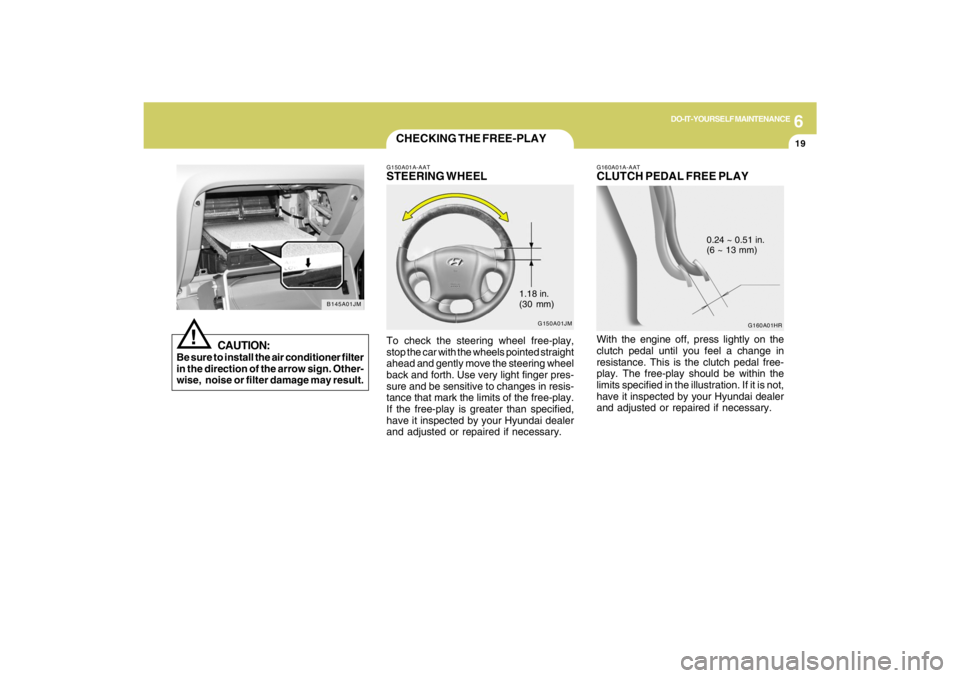
CHECKING THE FREE-PLAYG150A01A-AATSTEERING WHEELTo check the steering wheel free-play,
stop the car with the wheels pointed straight
ahead and gently move the steering wheel
back and forth. Use very light finger pres-
sure and be sensitive to changes in resis-
tance that mark the limits of the free-play.
If the free-play is greater than specified,
have it inspected by your Hyundai dealer
and adjusted or repaired if necessary.
1.18 in.
(30 mm)
G160A01HR G160A01A-AAT
CLUTCH PEDAL FREE PLAYWith the engine off, press lightly on the
clutch pedal until you feel a change in
resistance. This is the clutch pedal free-
play. The free-play should be within the
limits specified in the illustration. If it is not,
have it inspected by your Hyundai dealer
and adjusted or repaired if necessary.
0.24 ~ 0.51 in.
(6 ~ 13 mm)
Page 225 of 273
6
DO-IT-YOURSELF MAINTENANCE
21
CHECKING AND REPLACING
FUSES
!
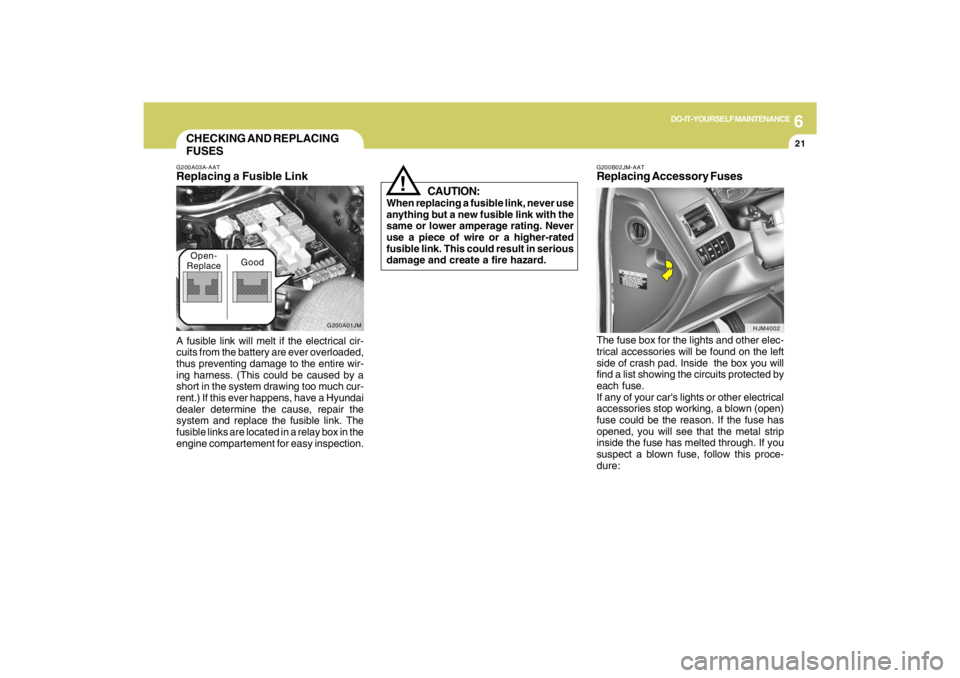
G200B02JM-AATReplacing Accessory Fuses
CAUTION:
When replacing a fusible link, never use
anything but a new fusible link with the
same or lower amperage rating. Never
use a piece of wire or a higher-rated
fusible link. This could result in serious
damage and create a fire hazard.
The fuse box for the lights and other elec-
trical accessories will be found on the left
side of crash pad. Inside the box you will
find a list showing the circuits protected by
each fuse.
If any of your car's lights or other electrical
accessories stop working, a blown (open)
fuse could be the reason. If the fuse has
opened, you will see that the metal strip
inside the fuse has melted through. If you
suspect a blown fuse, follow this proce-
dure:
G200A03A-AATReplacing a Fusible LinkA fusible link will melt if the electrical cir-
cuits from the battery are ever overloaded,
thus preventing damage to the entire wir-
ing harness. (This could be caused by a
short in the system drawing too much cur-
rent.) If this ever happens, have a Hyundai
dealer determine the cause, repair the
system and replace the fusible link. The
fusible links are located in a relay box in the
engine compartement for easy inspection.
HJM4002
G200A01JM
Open-
ReplaceGood
Page 226 of 273
6
DO-IT-YOURSELF MAINTENANCE
22
G200B02L
!
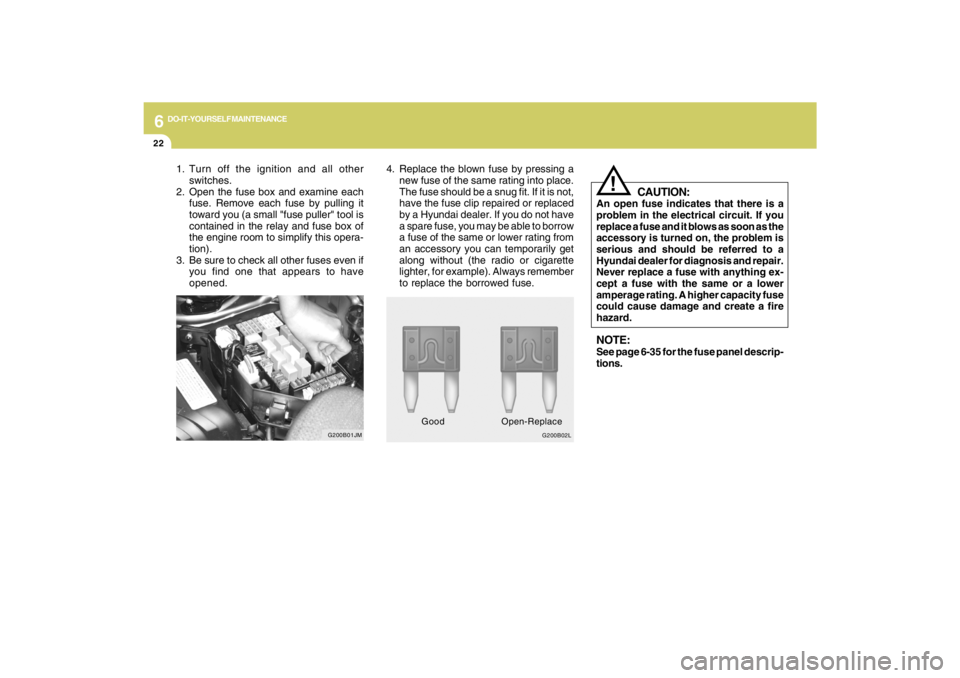
4. Replace the blown fuse by pressing a
new fuse of the same rating into place.
The fuse should be a snug fit. If it is not,
have the fuse clip repaired or replaced
by a Hyundai dealer. If you do not have
a spare fuse, you may be able to borrow
a fuse of the same or lower rating from
an accessory you can temporarily get
along without (the radio or cigarette
lighter, for example). Always remember
to replace the borrowed fuse.
CAUTION:
An open fuse indicates that there is a
problem in the electrical circuit. If you
replace a fuse and it blows as soon as the
accessory is turned on, the problem is
serious and should be referred to a
Hyundai dealer for diagnosis and repair.
Never replace a fuse with anything ex-
cept a fuse with the same or a lower
amperage rating. A higher capacity fuse
could cause damage and create a fire
hazard.NOTE:See page 6-35 for the fuse panel descrip-
tions.
GoodOpen-Replace
1. Turn off the ignition and all other
switches.
2. Open the fuse box and examine each
fuse. Remove each fuse by pulling it
toward you (a small "fuse puller" tool is
contained in the relay and fuse box of
the engine room to simplify this opera-
tion).
3. Be sure to check all other fuses even if
you find one that appears to have
opened.
G200B01JM