parking brake Hyundai Tucson 2019 - RHD (UK, Australia) Service Manual
[x] Cancel search | Manufacturer: HYUNDAI, Model Year: 2019, Model line: Tucson, Model: Hyundai Tucson 2019Pages: 685, PDF Size: 17.76 MB
Page 391 of 685
5-67
Driving your vehicle
5
The hazard warning flasher turns
OFF, when the driving speed exceeds
6 mph (10 km/h) after a complete
stop. The hazard warning flasher
turns OFF, when the vehicle drives at
a low speed for a certain period of
time. The driver can manually turn
OFF the hazard warning flasher by
pressing the button.
Information
The Emergency Stop Signal (ESS) sys-
tem will not activate, when the hazard
warning flasher already blinks.
Good braking practices
Wet brakes can be dangerous! The
brakes may get wet if the vehicle is
driven through standing water or if it
is washed. Your vehicle will not stop
as quickly if the brakes are wet. Wet
brakes may cause the vehicle to pull
to one side.To dry the brakes, apply the brakes
lightly until the braking action returns
to normal, taking care to keep the
vehicle under control at all times. If
the braking action does not return to
normal, stop as soon as it is safe to
do so and we recommend that you
call a HYUNDAI authorised repairer
for assistance.
DO NOT drive with your foot resting
on the brake pedal. Even light, but
constant pedal pressure can result in
the brakes overheating, brake wear,
and possibly even brake failure.
If a tyre goes flat whilst you are driv-
ing, apply the brakes gently and
keep the vehicle pointed straight
ahead whilst you slow down. When
you are moving slowly enough for it
to be safe to do so, pull off the road
and stop in a safe location.
Keep your foot firmly on the brake
pedal when the vehicle is stopped to
prevent the vehicle from rolling for-
ward.
i
Whenever leaving the vehicle or
parking, always come to a com-
plete stop and continue to
depress the brake pedal. Move
the shift lever into the P (Park)
position, then apply the parking
brake, and place the Engine
Start/Stop button in the OFF
position.
Vehicles with the parking brake
not fully engaged are at risk for
moving inadvertently and caus-
ing injury to yourself or others.
WARNING
TLe UK 5.qxp 5/10/2018 12:23 PM Page 67
Page 398 of 685
5-74
Driving your vehicle
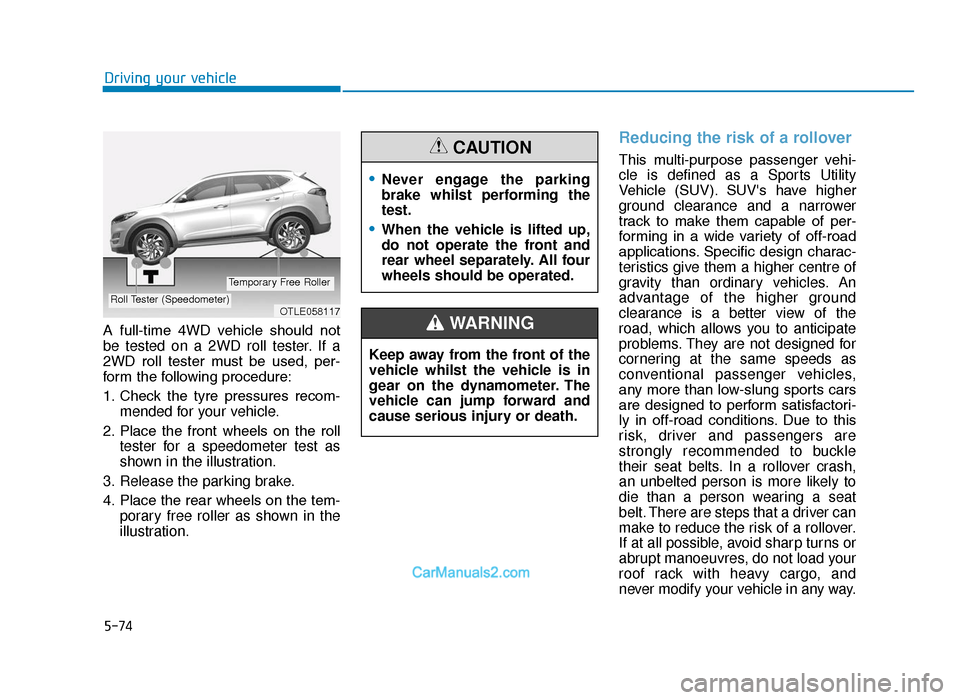
A full-time 4WD vehicle should not
be tested on a 2WD roll tester. If a
2WD roll tester must be used, per-
form the following procedure:
1. Check the tyre pressures recom- mended for your vehicle.
2. Place the front wheels on the roll tester for a speedometer test as
shown in the illustration.
3. Release the parking brake.
4. Place the rear wheels on the tem- porary free roller as shown in the
illustration.
Reducing the risk of a rollover
This multi-purpose passenger vehi-
cle is defined as a Sports Utility
Vehicle (SUV). SUV's have higher
ground clearance and a narrower
track to make them capable of per-
forming in a wide variety of off-road
applications. Specific design charac-
teristics give them a higher centre of
gravity than ordinary vehicles. An
advantage of the higher ground
clearance is a better view of the
road, which allows you to anticipate
problems. They are not designed for
cornering at the same speeds as
conventional passenger vehicles,
any more than low-slung sports cars
are designed to perform satisfactori-
ly in off-road conditions. Due to this
risk, driver and passengers are
strongly recommended to buckle
their seat belts. In a rollover crash,
an unbelted person is more likely to
die than a person wearing a seat
belt. There are steps that a driver can
make to reduce the risk of a rollover.
If at all possible, avoid sharp turns or
abrupt manoeuvres, do not load your
roof rack with heavy cargo, and
never modify your vehicle in any way.
OTLE058117Roll Tester (Speedometer)
Temporary Free Roller
•Never engage the parking
brake whilst performing the
test.
•When the vehicle is lifted up,
do not operate the front and
rear wheel separately. All four
wheels should be operated.
CAUTION
Keep away from the front of the
vehicle whilst the vehicle is in
gear on the dynamometer. The
vehicle can jump forward and
cause serious injury or death.
WARNING
TLe UK 5.qxp 5/10/2018 12:23 PM Page 74
Page 400 of 685
5-76
Driving your vehicle
The ISG system is to reduce the fuel
consumption by automatically shut-
ting down the engine, when the vehi-
cle is at a standstill (i.e. red stop light,
stop sign, and traffic jam).
The engine is automatically started
upon satisfying the starting condi-
tions.
The ISG system is always active,
when the engine is running.
Information
When the engine is automatically
started by the ISG system, some warn-
ing lights (i.e. ABS, ESC, ESC OFF,
EPS, and parking brake warning
light) may illuminate for a few sec-
onds due to the low battery voltage.
However, it does not indicate a mal-
function with the ISG system.
To activate the ISG system
Prerequisite for activation
The ISG system operates in the fol-
lowing situations.
- The driver's seatbelt is fastened.
- The driver's door and the bonnet are closed.
- The brake vacuum pressure is adequate.
- The battery is sufficiently charged.
- The outside temperature is between -10 °C and 35 °C (14 °F and 95 °F).
- The engine coolant temperature is not too low.
- The system is not in the diagnostic mode.
- The steering wheel is not steered excessively. (for automatic
transaxle vehicle)
- The vehicle is driven on a steep incline. (for automatic transaxle
vehicle)
Information
• The ISG system is not activated,when the prerequisites to activate
the ISG system are unsatisfied. In
this case, the ISG OFF button indi-
cator illuminates, and the auto stop
indicator ( ) illuminates in yellow
on the instrument cluster.
• When the above indicator remains illuminated on the instrument clus-
ter, we recommend that you have
the ISG system checked by a
HYUNDAI authorised repairer.
i
i
IDLE STOP AND GO (ISG) SYSTEM (IF EQUIPPED)
WTF-444
TLe UK 5.qxp 5/10/2018 12:23 PM Page 76
Page 470 of 685
5-146
Driving your vehicle
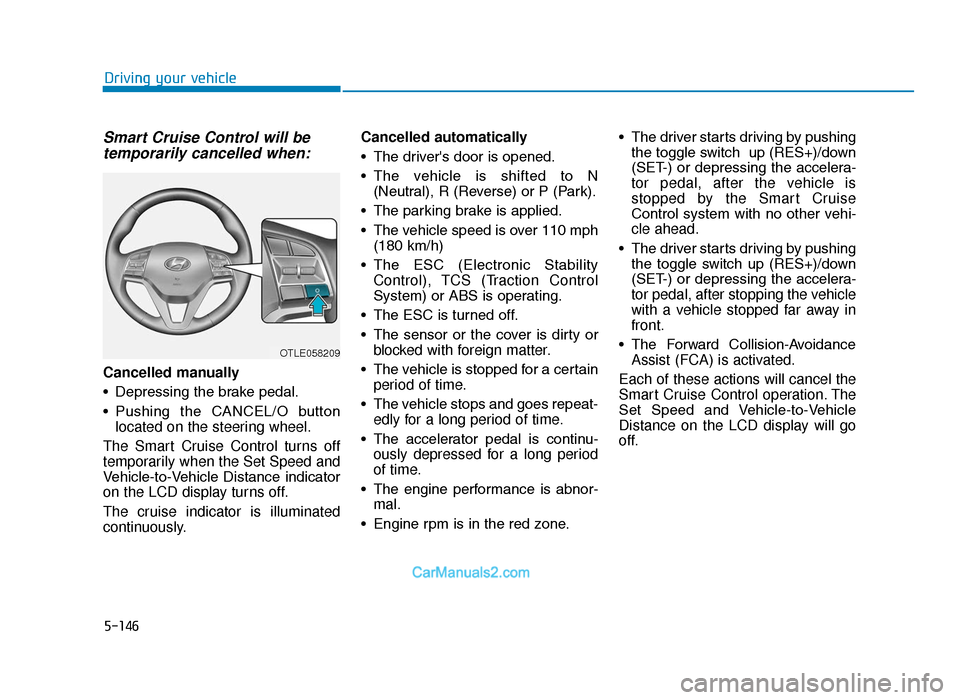
Smart Cruise Control will betemporarily cancelled when:
Cancelled manually
• Depressing the brake pedal.
• Pushing the CANCEL/O button
located on the steering wheel.
The Smart Cruise Control turns off
temporarily when the Set Speed and
Vehicle-to-Vehicle Distance indicator
on the LCD display turns off.
The cruise indicator is illuminated
continuously. Cancelled automatically
• The driver's door is opened.
• The vehicle is shifted to N
(Neutral), R (Reverse) or P (Park).
• The parking brake is applied.
• The vehicle speed is over 110 mph (180 km/h)
• The ESC (Electronic Stability Control), TCS (Traction Control
System) or ABS is operating.
• The ESC is turned off.
• The sensor or the cover is dirty or blocked with foreign matter.
• The vehicle is stopped for a certain period of time.
• The vehicle stops and goes repeat- edly for a long period of time.
• The accelerator pedal is continu- ously depressed for a long period
of time.
• The engine performance is abnor- mal.
• Engine rpm is in the red zone. • The driver starts driving by pushing
the toggle switch up (RES+)/down
(SET-) or depressing the accelera-
tor pedal, after the vehicle is
stopped by the Smart Cruise
Control system with no other vehi-
cle ahead.
• The driver starts driving by pushing the toggle switch up (RES+)/down
(SET-) or depressing the accelera-
tor pedal, after stopping the vehicle
with a vehicle stopped far away in
front.
• The Forward Collision-Avoidance Assist (FCA) is activated.
Each of these actions will cancel the
Smart Cruise Control operation. The
Set Speed and Vehicle-to-Vehicle
Distance on the LCD display will go
off.
OTLE058209
TLe UK 5.qxp 5/10/2018 12:30 PM Page 146
Page 473 of 685
5-149
Driving your vehicle
5
Smart Cruise Control Vehicle-
to-Vehicle Distance
To set Vehicle-to-VehicleDistance
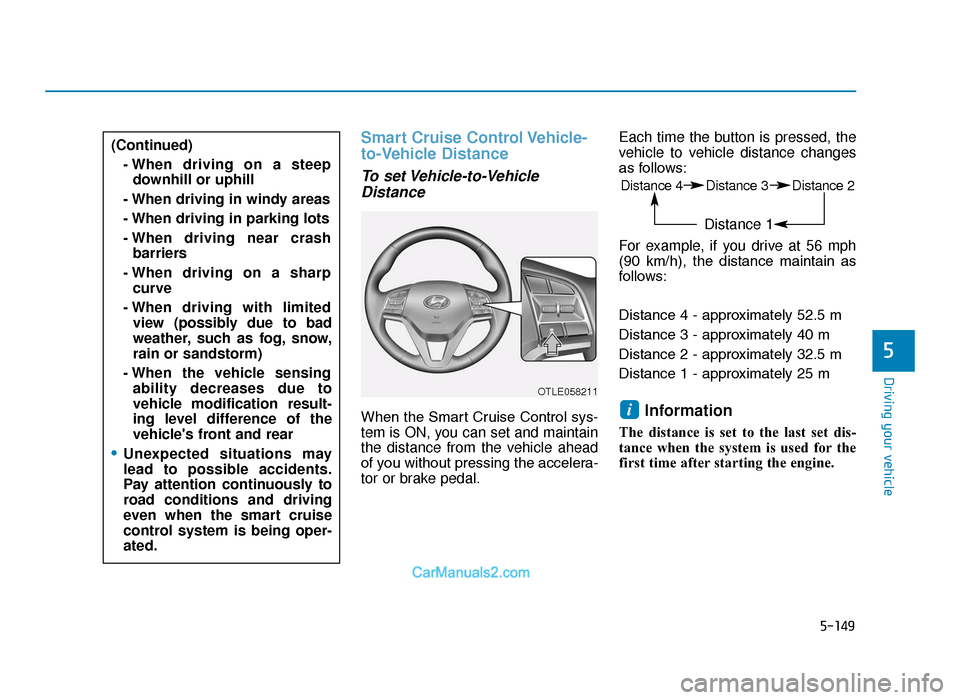
When the Smart Cruise Control sys-
tem is ON, you can set and maintain
the distance from the vehicle ahead
of you without pressing the accelera-
tor or brake pedal. Each time the button is pressed, the
vehicle to vehicle distance changes
as follows:
For example, if you drive at 56 mph
(90 km/h), the distance maintain as
follows:
Distance 4 - approximately 52.5 m
Distance 3 - approximately 40 m
Distance 2 - approximately 32.5 m
Distance 1 - approximately 25 mInformation
The distance is set to the last set dis-
tance when the system is used for the
first time after starting the engine.
i
(Continued)
- When driving on a steepdownhill or uphill
- When driving in windy areas
- When driving in parking lots
- When driving near crash barriers
- When driving on a sharp curve
- When driving with limited view (possibly due to bad
weather, such as fog, snow,
rain or sandstorm)
- When the vehicle sensing ability decreases due to
vehicle modification result-
ing level difference of the
vehicle's front and rear
•Unexpected situations may
lead to possible accidents.
Pay attention continuously to
road conditions and driving
even when the smart cruise
control system is being oper-
ated.
Distance 4 Distance 3 Distance 2
Distance 1
OTLE058211
TLe UK 5.qxp 5/10/2018 12:31 PM Page 149
Page 476 of 685
5-152
Driving your vehicle
• If you push the smart cruise control toggle switch (RES+ or SET-)
whilst Auto Hold and advanced
smart cruise control is operating
the Auto Hold will be released
regardless of accelerator pedal
operation and the vehicle will start
to move. The AUTO HOLD indica-
tor changes from green to white. (if
equipped with EPB (Electronic
Parking Brake))
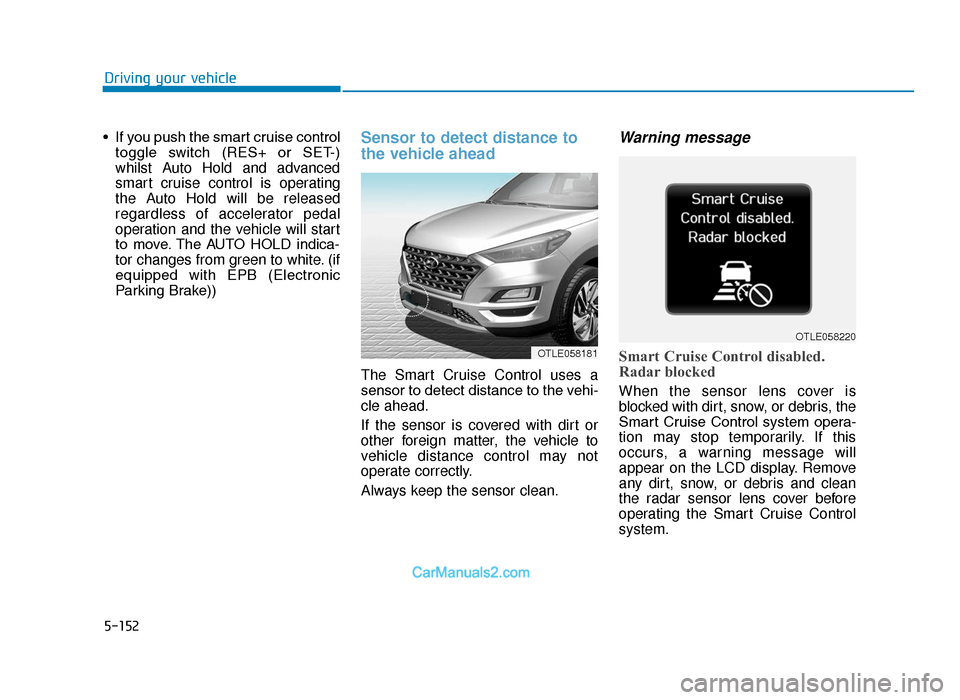
Sensor to detect distance to
the vehicle ahead
The Smart Cruise Control uses a
sensor to detect distance to the vehi-
cle ahead.
If the sensor is covered with dirt or
other foreign matter, the vehicle to
vehicle distance control may not
operate correctly.
Always keep the sensor clean.
Warning message
Smart Cruise Control disabled.
Radar blocked
When the sensor lens cover is
blocked with dirt, snow, or debris, the
Smart Cruise Control system opera-
tion may stop temporarily. If this
occurs, a warning message will
appear on the LCD display. Remove
any dirt, snow, or debris and clean
the radar sensor lens cover before
operating the Smart Cruise Control
system.
OTLE058181
OTLE058220
TLe UK 5.qxp 5/10/2018 12:31 PM Page 152
Page 490 of 685
5-166
Driving your vehicle
Chain Installation
When installing tyre chains, follow
the manufacturer's instructions and
mount them as tightly possible. Drive
slowly (less than 20 mph (30 km/h))
with chains installed. If you hear the
chains contacting the body or chas-
sis, stop and tighten them. If they still
make contact, slow down until the
noise stops. Remove the tyre chains
as soon as you begin driving on
cleared roads.
When mounting snow chains, park
the vehicle on level ground away
from traffic. Turn on the vehicle
Hazard Warning Flasher and place a
triangular emergency warning device
behind the vehicle (if available).
Always place the vehicle in P (Park),
apply the parking brake and turn off
the engine before installing snow
chains.When using tyre chains:
• Wrong size chains or improperly
installed chains can damage
your vehicle's brake lines, sus-
pension, body and wheels.
• Use SAE “S” class or wire chains.
• If you hear noise caused by chains contacting the body,
retighten the chain to prevent
contact with the vehicle body.
• To prevent body damage, retight- en the chains after driving 0.3~0.6
miles (0.5~1.0 km).
• Do not use tyre chains on vehi- cles equipped with aluminium
wheels. If unavoidable, use a
wire type chain.
• Use wire chains less than 15 mm (0.59 in) wide to prevent damage
to the chain’s connection.
Winter Precautions
Use high quality ethylene glycol
coolant
Your vehicle is delivered with high
quality ethylene glycol coolant in the
cooling system. It is the only type of
coolant that should be used because
it helps prevent corrosion in the cool-
ing system, lubricates the water
pump and prevents freezing. Be sure
to replace or replenish your coolant
in accordance with the maintenance
schedule. Before winter, have your
coolant tested to assure that its
freezing point is sufficient for the
temperatures anticipated during the
winter.
NOTICE
TLe UK 5.qxp 5/10/2018 12:32 PM Page 166
Page 492 of 685
5-168
Driving your vehicle
Do not let your parking brake
freeze
Under some conditions your parking
brake can freeze in the engaged
position. This is most likely to hap-
pen when there is an accumulation
of snow or ice around or near the
rear brakes or if the brakes are wet.
When there is the risk that your park-
ing brake may freeze, temporarily
apply it with the shift lever in P
(Park). Also, block the rear wheels in
advance, so the vehicle may not roll.
Then, release the parking brake. Do not let ice and snow accumu-
late underneath
Under some conditions, snow and
ice can build up under the fenders
and interfere with the steering. When
driving in such conditions during the
severe winter, you should check
underneath the vehicle on a regular
basis, so that moving the front
wheels and the steering components
is unblocked.
Carry emergency equipment
In accordance with weather condi-
tions, you should carry appropriate
emergency equipment, whilst driv-
ing. Some of the items you may want
to carry include tyre chains, tow
straps or chains, flashlight, emer-
gency flares, sand, shovel, jumper
cables, window scraper, gloves,
ground cloth, coveralls, blanket, etc.Do not place objects or materials
in the engine compartment
Putting objects or materials in the
engine compartment may cause an
engine failure or combustion,
because those may block the engine
cooling. Such damage will not be
covered by the manufacturer’s war-
ranty.
TLe UK 5.qxp 5/10/2018 12:32 PM Page 168
Page 501 of 685
5-177
Driving your vehicle
5
Parking on hills
Generally, if you have a trailer
attached to your vehicle, you should
not park your vehicle on a hill.
However, if you ever have to park
your trailer on a hill, here's how to do
it:
1. Pull the vehicle into the parkingspace.
Turn the steering wheel in the direction of the kerb (left if headed
down hill, right if headed up hill).
2. Shift the vehicle to P (Park, for automatic transaxle/dual clutch
transmission vehicle) or neutral
(for manual transaxle vehicle).
3. Set the parking brake and shut off the vehicle.
4. Place wheel chocks under the trailer wheels on the down hill side
of the wheels.
5. Start the vehicle, hold the brakes, shift to neutral, release the park-
ing brake and slowly release the
brakes until the trailer chocks
absorb the load. 6. Reapply the brakes and parking
brakes.
7. Move the shift lever to P (Park, for automatic transaxle/dual clutch
transmission vehicle) or 1st gear
when the vehicle is parked on a
uphill grade and in R (Reverse) on
a downhill (for manual transaxle
vehicle).
8. Shut off the vehicle and release the vehicle brakes but leave the
parking brake set.
Ready to leave after parking ona hill
1. With the shift lever to P (Park, for
automatic transaxle/dual clutch
transmission vehicle) or neutral (for
manual transaxle vehicle), apply
your brakes and hold the brake
pedal down whilst you:
• Start your engine;
• Shift into gear; and
• Release the parking brake.
2. Slowly remove your foot from the brake pedal.
3. Drive slowly until the trailer is clear of the chocks.
4. Stop and have someone pick up and store the chocks.
To prevent serious or fatal
injury:
•Do not get out of the vehicle
without the parking brake
firmly set. If you have left the
engine running, the vehicle
can move suddenly. You and
others could be seriously or
fatally injured.
•Do not apply the accelerator
pedal to hold the vehicle on
an uphill.
WARNING
TLe UK 5.qxp 5/10/2018 12:33 PM Page 177
Page 506 of 685
6-3
What to do in an emergency
If the engine stalls at a cross-
road or crossing
If the engine stalls at a crossroad or
crossing, if safe to do so, move the
shift lever to the N (Neutral) position
and then push the vehicle to a safe
location.
If you have a flat tyre whilst
driving
If a tyre goes flat whilst you are driv-
ing:
• Take your foot off the acceleratorpedal and let the vehicle slow
down whilst driving straight ahead.
Do not apply the brakes immedi-
ately or attempt to pull off the road
as this may cause loss of vehicle
control resulting in an accident.
When the vehicle has slowed to
such a speed that it is safe to do
so, brake carefully and pull off the
road. Drive off the road as far as
possible and park on firm, level
ground. If you are on a divided
highway, do not park in the median
area between the two traffic lanes. • When the vehicle is stopped, press
the hazard warning flasher button,
move the shift lever into P (Park,
for automatic transaxle/dual clutch
transmission vehicle) or neutral (for
manual transaxle vehicle), apply the
parking brake, and place the ignition
switch in the LOCK/OFF position.
• Have all passengers get out of the vehicle. Be sure they all get out on
the side of the vehicle that is away
from traffic.
• When changing a flat tyre, follow the instructions provided later in
this chapter.
6
TLe UK 6.qxp 5/10/2018 1:20 PM Page 3