HYUNDAI VELOSTER 2013 Owners Manual
Manufacturer: HYUNDAI, Model Year: 2013, Model line: VELOSTER, Model: HYUNDAI VELOSTER 2013Pages: 372, PDF Size: 22.04 MB
Page 141 of 372
465
Features of your vehicle
Self-diagnosis (if equipped)
When you shift the gear to the R
(Reverse) position and if one or more of
the below occurs you may have a mal-
function in the rear parking assist sys-
tem.
You don't hear an audible warning
sound or if the buzzer sounds intermit-
tently.
If this occurs, have your vehicle checked
by an authorized HYUNDAI dealer as
soon as possible.
WARNING
Your new vehicle warranty does not
cover any accidents or damage to
the vehicle or injuries to its occu-
pants due to a rear parking assist
system malfunction. Always drive
safely and cautiously.
Page 142 of 372
Features of your vehicle
66 4
REAR VIEW CAMERA (IF EQUIPPED)
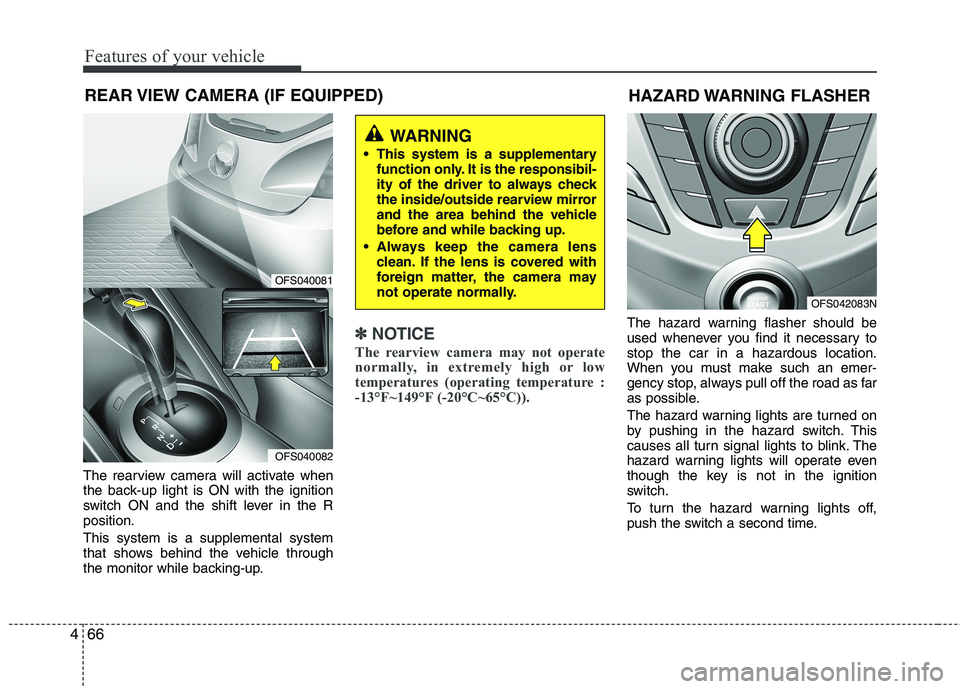
The rearview camera will activate when
the back-up light is ON with the ignition
switch ON and the shift lever in the R
position.
This system is a supplemental system
that shows behind the vehicle through
the monitor while backing-up.
✽ ✽
NOTICE
The rearview camera may not operate
normally, in extremely high or low
temperatures (operating temperature :
-13°F~149°F (-20°C~65°C)).
The hazard warning flasher should be
used whenever you find it necessary to
stop the car in a hazardous location.
When you must make such an emer-
gency stop, always pull off the road as far
as possible.
The hazard warning lights are turned on
by pushing in the hazard switch. This
causes all turn signal lights to blink. The
hazard warning lights will operate even
though the key is not in the ignition
switch.
To turn the hazard warning lights off,
push the switch a second time.
WARNING
This system is a supplementary
function only. It is the responsibil-
ity of the driver to always check
the inside/outside rearview mirror
and the area behind the vehicle
before and while backing up.
Always keep the camera lens
clean. If the lens is covered with
foreign matter, the camera may
not operate normally.
HAZARD WARNING FLASHER
OFS040081
OFS040082
OFS042083N
Page 143 of 372
467
Features of your vehicle
LIGHTING
Battery saver function
The purpose of this feature is to pre-
vent the battery from being dis-
charged. The system automatically
turns off the parking lights when the
driver removes the ignition key (smart
key : turns off the engine) and opens
the driver-side door.
With this feature, the parking lights will
be turned off automatically if the driver
parks on the side of road at night.
If necessary, to keep the lights on
when the ignition key is removed
(smart key : turns off the engine), per-
form the following:
1) Open the driver-side door.
2) Turn the parking lights OFF and ON
again using the light switch on the
steering column.
Headlamp delay (if equipped)
If you turn the ignition switch to the ACC
or OFF position with the headlights ON,
the headlights remain on for about 20
minutes. However, if the driver’s door is
opened and closed, the headlights are
turned off after 30 seconds.
The headlights can be turned off by
pressing the lock button on the transmit-
ter (or smart key) twice or turning the
light switch to the OFF or Auto position.
However, if you turn the light switch to the
Auto position when it is dark outside, the
headlights will not be turned off.
Headlamp welcome function
(if equipped)
When the headlight switch is in the ON or
AUTO position and all doors (and tail-
gate) are closed and locked, if you press
the door unlock button on the transmitter
(or smart key), the headlights will come
on for about 15 seconds.
If the headlight switch is in the AUTO
position, the function can only operate at
night.
At this time, if you press the door unlock
button again or door lock button on the
transmitter (or smart key), the headlights
will turn off immediately.
CAUTION
If the driver gets out of the vehicle
through other doors (other than the
driver's door), the battery saver
function does not operate and the
headlamp delay does not turn off
automatically. This will cause the
battery to be discharged. In this
case, make sure to turn off the lamp
before getting out of the vehicle.
Page 144 of 372
Features of your vehicle
68 4
Lighting control
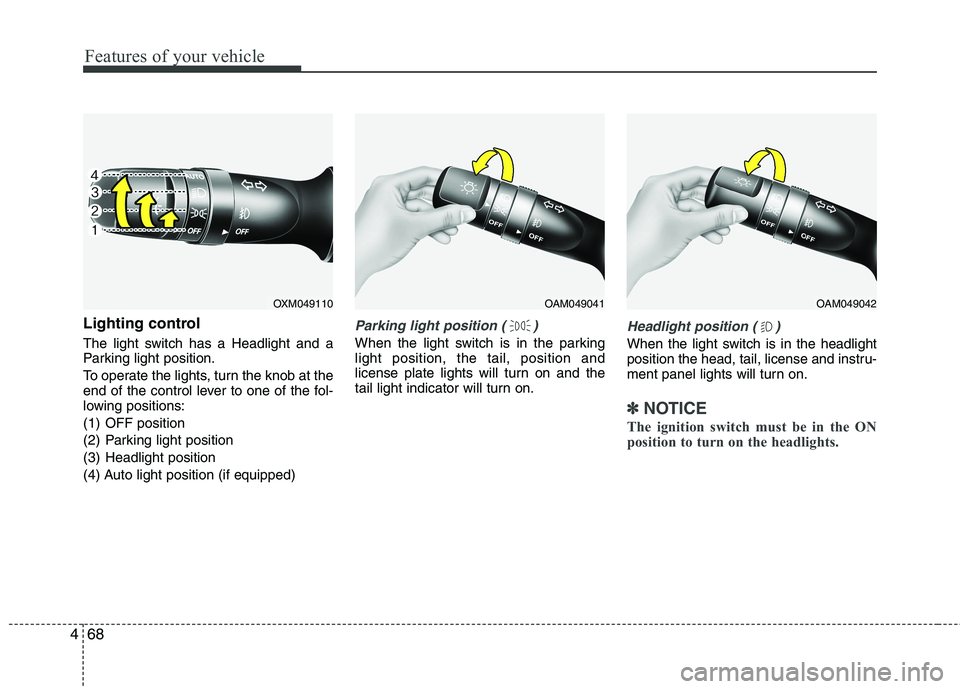
The light switch has a Headlight and a
Parking light position.
To operate the lights, turn the knob at the
end of the control lever to one of the fol-
lowing positions:
(1) OFF position
(2) Parking light position
(3) Headlight position
(4) Auto light position (if equipped)
Parking light position ( )
When the light switch is in the parking
light position, the tail, position and
license plate lights will turn on and the
tail light indicator will turn on.
Headlight position ( )
When the light switch is in the headlight
position the head, tail, license and instru-
ment panel lights will turn on.
✽ ✽
NOTICE
The ignition switch must be in the ON
position to turn on the headlights.
OXM049110OAM049041OAM049042
Page 145 of 372
469
Features of your vehicle
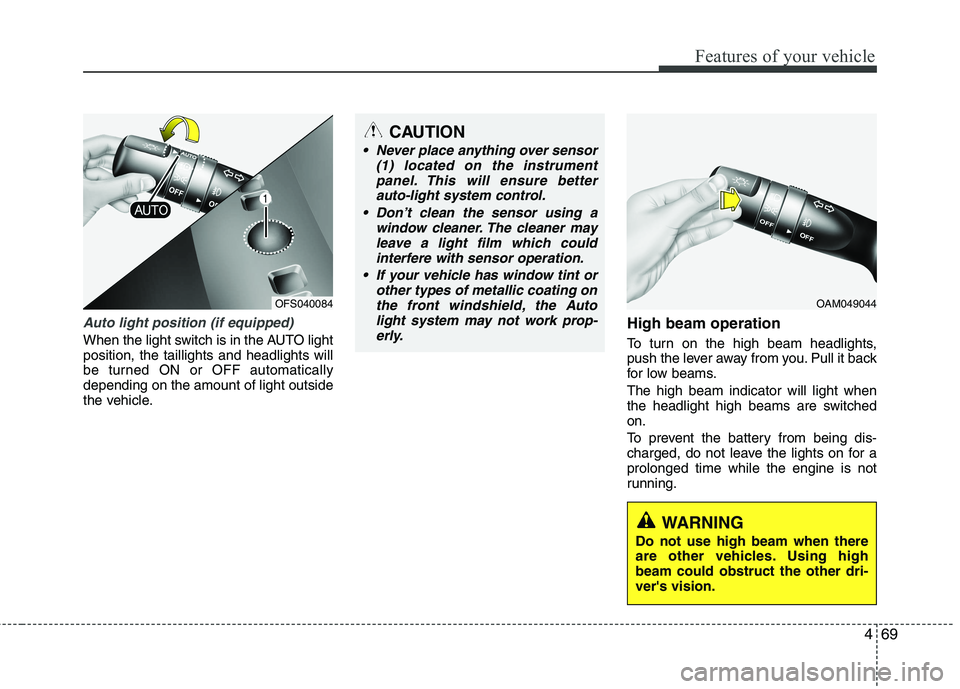
Auto light position (if equipped)
When the light switch is in the AUTO light
position, the taillights and headlights will
be turned ON or OFF automatically
depending on the amount of light outside
the vehicle.
High beam operation
To turn on the high beam headlights,
push the lever away from you. Pull it back
for low beams.
The high beam indicator will light when
the headlight high beams are switched
on.
To prevent the battery from being dis-
charged, do not leave the lights on for a
prolonged time while the engine is not
running.
CAUTION
Never place anything over sensor
(1) located on the instrument
panel. This will ensure better
auto-light system control.
Don’t clean the sensor using a
window cleaner. The cleaner may
leave a light film which could
interfere with sensor operation.
If your vehicle has window tint or
other types of metallic coating on
the front windshield, the Auto
light system may not work prop-
erly.
OAM049044
WARNING
Do not use high beam when there
are other vehicles. Using high
beam could obstruct the other dri-
ver's vision.
OFS040084
Page 146 of 372
Features of your vehicle
70 4
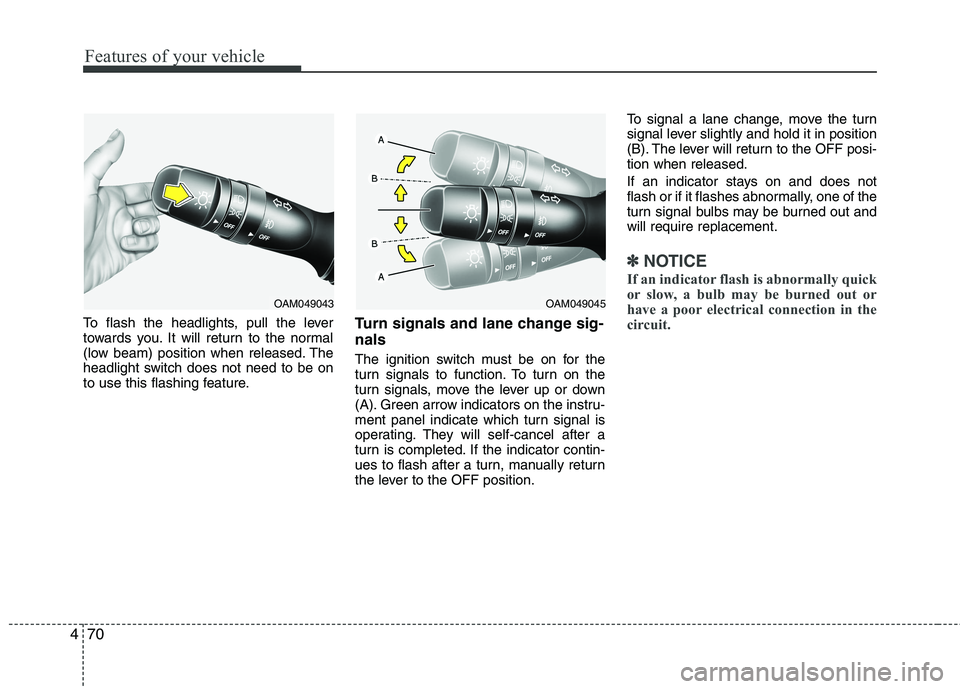
To flash the headlights, pull the lever
towards you. It will return to the normal
(low beam) position when released. The
headlight switch does not need to be on
to use this flashing feature.Turn signals and lane change sig-
nals
The ignition switch must be on for the
turn signals to function. To turn on the
turn signals, move the lever up or down
(A). Green arrow indicators on the instru-
ment panel indicate which turn signal is
operating. They will self-cancel after a
turn is completed. If the indicator contin-
ues to flash after a turn, manually return
the lever to the OFF position.To signal a lane change, move the turn
signal lever slightly and hold it in position
(B). The lever will return to the OFF posi-
tion when released.
If an indicator stays on and does not
flash or if it flashes abnormally, one of the
turn signal bulbs may be burned out and
will require replacement.
✽ ✽
NOTICE
If an indicator flash is abnormally quick
or slow, a bulb may be burned out or
have a poor electrical connection in the
circuit.
OAM049043OAM049045
Page 147 of 372
471
Features of your vehicle
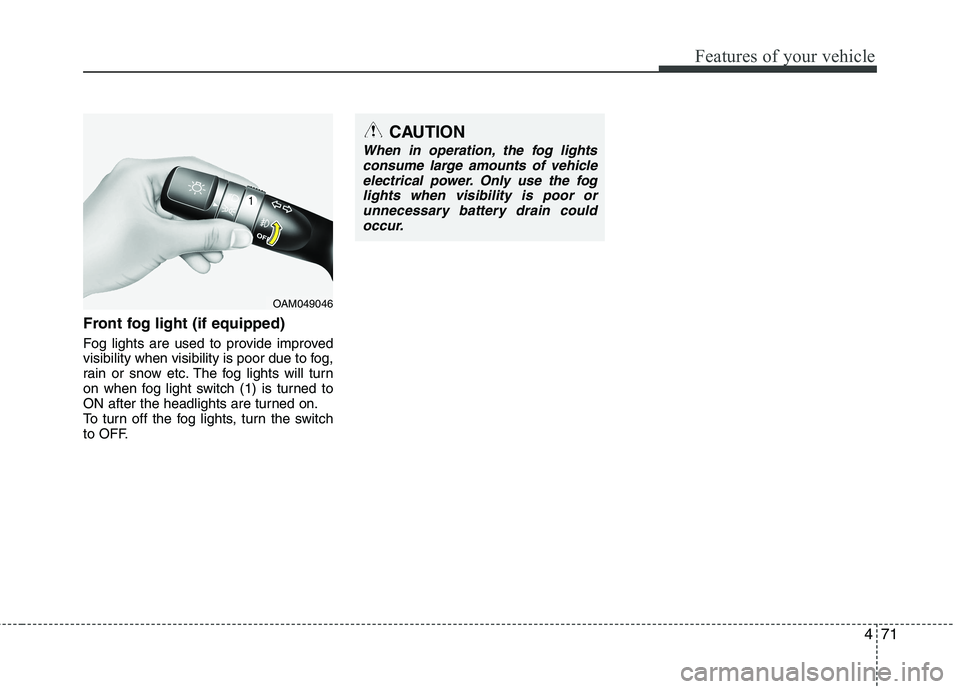
Front fog light (if equipped)
Fog lights are used to provide improved
visibility when visibility is poor due to fog,
rain or snow etc. The fog lights will turn
on when fog light switch (1) is turned to
ON after the headlights are turned on.
To turn off the fog lights, turn the switch
to OFF.
CAUTION
When in operation, the fog lights
consume large amounts of vehicle
electrical power. Only use the fog
lights when visibility is poor or
unnecessary battery drain could
occur.
OAM049046
Page 148 of 372
Features of your vehicle
72 4
WIPERS AND WASHERS
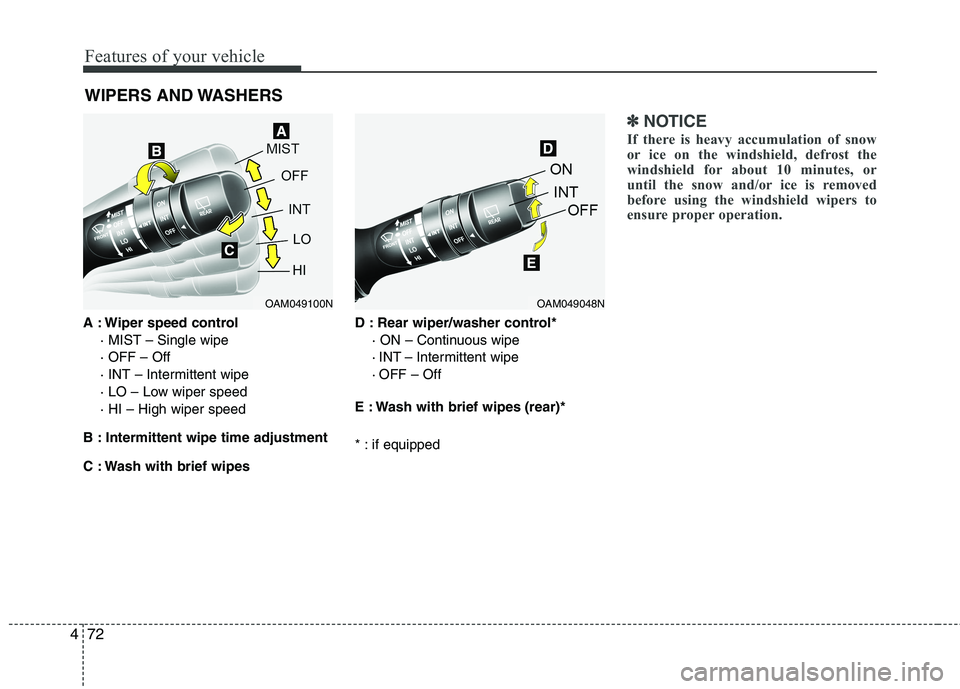
A : Wiper speed control
· MIST – Single wipe
· OFF – Off
· INT – Intermittent wipe
· LO – Low wiper speed
· HI – High wiper speed
B : Intermittent wipe time adjustment
C : Wash with brief wipesD : Rear wiper/washer control*
· ON – Continuous wipe
· INT – Intermittent wipe
· OFF – Off
E : Wash with brief wipes (rear)*
* : if equipped
✽ ✽
NOTICE
If there is heavy accumulation of snow
or ice on the windshield, defrost the
windshield for about 10 minutes, or
until the snow and/or ice is removed
before using the windshield wipers to
ensure proper operation.
OAM049100NOAM049048N
Page 149 of 372
473
Features of your vehicle
Windshield washers (front)
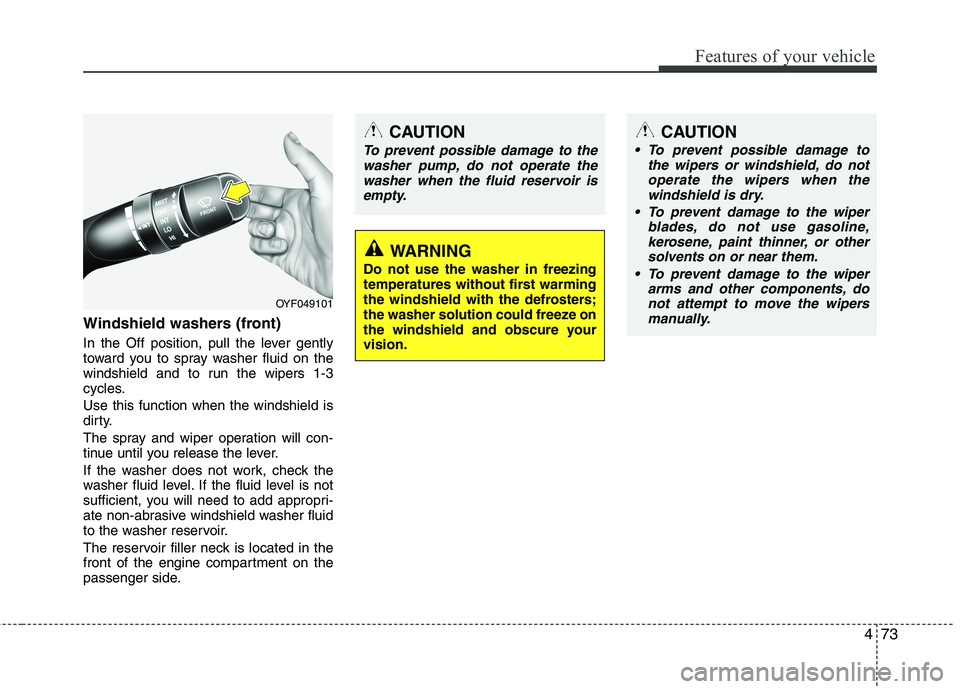
In the Off position, pull the lever gently
toward you to spray washer fluid on the
windshield and to run the wipers 1-3
cycles.
Use this function when the windshield is
dirty.
The spray and wiper operation will con-
tinue until you release the lever.
If the washer does not work, check the
washer fluid level. If the fluid level is not
sufficient, you will need to add appropri-
ate non-abrasive windshield washer fluid
to the washer reservoir.
The reservoir filler neck is located in the
front of the engine compartment on the
passenger side.
OYF049101
WARNING
Do not use the washer in freezing
temperatures without first warming
the windshield with the defrosters;
the washer solution could freeze on
the windshield and obscure your
vision.
CAUTION
To prevent possible damage to the
washer pump, do not operate the
washer when the fluid reservoir is
empty.
CAUTION
To prevent possible damage to
the wipers or windshield, do not
operate the wipers when the
windshield is dry.
To prevent damage to the wiper
blades, do not use gasoline,
kerosene, paint thinner, or other
solvents on or near them.
To prevent damage to the wiper
arms and other components, do
not attempt to move the wipers
manually.
Page 150 of 372
Features of your vehicle
74 4
Rear window wiper and washer
switch (if equipped)
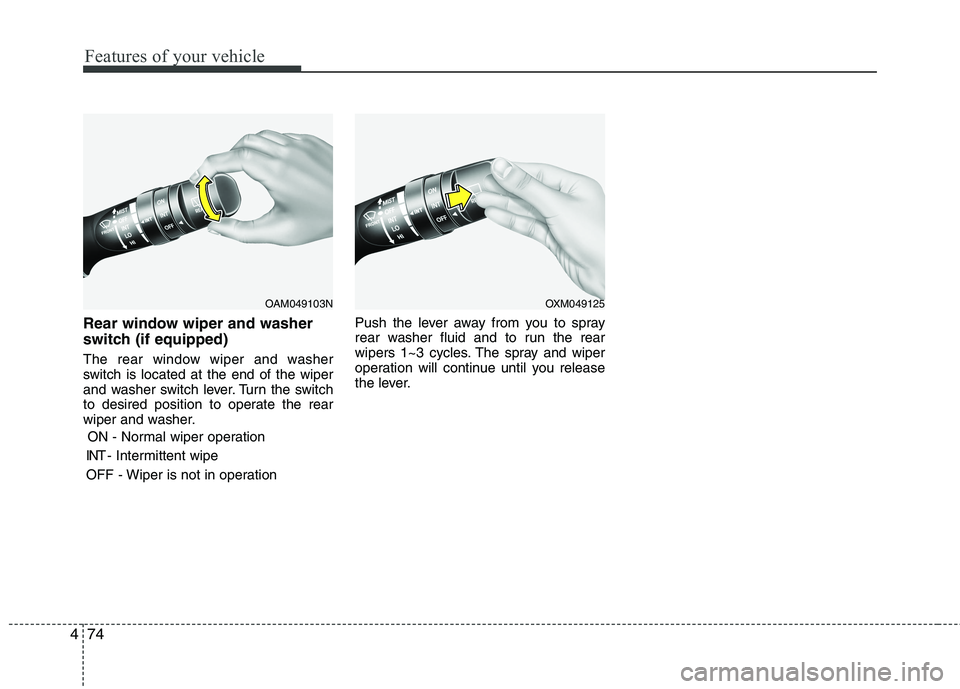
The rear window wiper and washer
switch is located at the end of the wiper
and washer switch lever. Turn the switch
to desired position to operate the rear
wiper and washer.
ON - Normal wiper operation
INT - Intermittent wipe
OFF - Wiper is not in operationPush the lever away from you to spray
rear washer fluid and to run the rear
wipers 1~3 cycles. The spray and wiper
operation will continue until you release
the lever.
OAM049103NOXM049125