change time INFINITI FX 2012 User Guide
[x] Cancel search | Manufacturer: INFINITI, Model Year: 2012, Model line: FX, Model: INFINITI FX 2012Pages: 522, PDF Size: 3.51 MB
Page 139 of 522
2-68Instruments and controls
PROGRAMMING TROUBLE-DIAGNO-
SIS
If HomeLink®does not quickly learn the
hand-held transmitter information:
. replace the hand-held transmitter bat-
teries with new batteries.
. position the hand-held transmitter with
its battery area facing away from the
HomeLink
®surface.
. push and hold both the HomeLink®and
hand-held transmitter buttons without
interruption.
. position the hand-held transmitter 2 to
5 in (50 to 127 mm) away from the
HomeLink
®surface. Hold the transmit-
ter in that position for up to 15
seconds. If HomeLink
®is not pro-
grammed within that time, try holding
the transmitter in another position -
keeping the indicator light in view at all
times.
If you continue to have programming
difficulties, please contact the INFINITI
Consumer Affairs Department. The phone
numbers are located in the Foreword of
this Owner’s Manual.
CLEARING THE PROGRAMMED IN-
FORMATION
Individual buttons cannot be cleared,
however to clear all programming, push
and hold the two outside buttons and
release when the indicator light begins to
flash (in approximately 20 seconds).
REPROGRAMMING A SINGLE
HomeLink®BUTTON
To reprogram a HomeLink®Universal
Transceiver button, complete the following.
1. Push and hold the desired HomeLink
®
button. Do notrelease the button until
step 4 has been completed.
2. When the indicator light begins to flash slowly (after 20 seconds), position the
hand-held transmitter 2 to 5 in (50 to
127 mm) away from the HomeLink
®
surface.
3. Push and hold the hand-held transmit- ter button.
4. The HomeLink
®indicator light will
flash, first slowly and then rapidly.
When the indicator light begins to flash
rapidly, release both buttons.
The HomeLink
®Universal Transceiver but-
ton has now been reprogrammed. The new device can be activated by pushing the
HomeLink
®button that was just pro-
grammed. This procedure will not affect
any other programmed HomeLink
®but-
tons.
IF YOUR VEHICLE IS STOLEN
If your vehicle is stolen, you should change
the codes of any non-rolling code device
that has been programmed into
HomeLink
®. Consult the Owner’s Manual
of each device or call the manufacturer or
retailer of those devices for additional
information.
When your vehicle is recovered, you will
need to reprogram the HomeLink
®Uni-
versal Transceiver with your new transmit-
ter information.
FCC Notice:
For USA:
This device complies with Part 15 of the
FCC Rules. Operation is subject to the
following two conditions: (1) This device
may not cause harmful interference, and
(2) this device must accept any interfer-
ence received, including interference that
may cause undesired operation.
Page 164 of 522
6. Push and hold the power lift gateswitch
*2on the lower part of the lift
gate for 3 seconds to set the user
selected open position. A chime will
sound when setting is successful.
7. Fully close the lift gate.
The lift gate will open and stop at the user
selected position.
CAUTION
. Do not lean against a partially opened
lift gate. The lift gate may close un-
expectedly and may result in personal
injury.
. If the vehicle was driven by another
person, confirm the garage mode func-
tion before opening the lift gate in a
location with low clearance. The lift gate
can be damaged if the previous driver
changed or canceled the setting.
. If the switch is pressed two times
quickly (1 second or less) when opening
the lift gate from the fully closed
position, the system may not recognize
the second switch press. The lift gate
will continue to open. This is normal
operation and does not indicate a mal- function. However, this may result in
minor personal injury if someone is
behind the vehicle when the switch is
activated, or damage to the lift gate.
NOTE:
.
To avoid damaging the lift gate system,
do not manually force the lift gate to
open or close when the lift gate is
moving. When manually operating the
lift gate from the full close or full open
position, do not use excessive force.
Using excessive force may damage the
system.
. Do not install accessories such as bike
racks onto the lift gate. The additional
weight of these accessories may cause
the lift gate to operate slowly or to not
open completely. This is a normal
operation and does not indicate a
malfunction. The lift gate will operate
normally when the accessory is re-
moved.
. If the lift gate is opened when the
vehicle is parked on a steep slope, the
lift gate may not open to the expected
position. This is a normal operation
and does not indicate a malfunction. .
If the automatic lift gate is operated
continuously for approximately 180
seconds, the system automatically
turns off to prevent overheating. The
lift gate cannot be opened using the
switches. The system resets and opera-
tion returns to normal after approxi-
mately 180 seconds. This is a normal
operation and does not indicate a
malfunction.
. The lift gate may automatically reverse
direction if the lift gate is operating
and passengers enter/exit the vehicle.
This is a normal operation and does
not indicate a malfunction.
. The lift gate must be operated manually
if the battery is disconnected or
discharged.
. If the lift gate is not activated due to a
low voltage (less than approximately
11V), operate the lift gate with the
engine running.
Manual mode
If power operation is not available, the lift
gate can be operated manually. Power
operation may not be available if multiple
obstacles have been detected in a single
power cycle or if the battery voltage is low.
Pre-driving checks and adjustments3-23
Page 200 of 522
stop the vehicle in a safe location and
apply the parking brake.
SAA2492
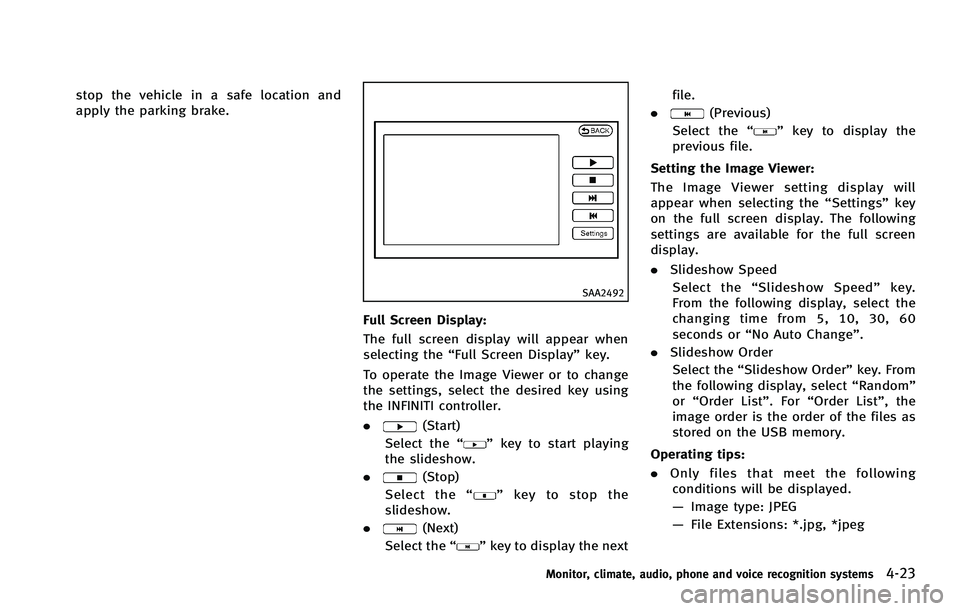
Full Screen Display:
The full screen display will appear when
selecting the“Full Screen Display” key.
To operate the Image Viewer or to change
the settings, select the desired key using
the INFINITI controller.
.
(Start)
Select the “
”key to start playing
the slideshow.
.
(Stop)
Select the “
”key to stop the
slideshow.
.
(Next)
Select the “
”key to display the next file.
.
(Previous)
Select the “
”key to display the
previous file.
Setting the Image Viewer:
The Image Viewer setting display will
appear when selecting the “Settings”key
on the full screen display. The following
settings are available for the full screen
display.
. Slideshow Speed
Select the “Slideshow Speed” key.
From the following display, select the
changing time from 5, 10, 30, 60
seconds or “No Auto Change”.
. Slideshow Order
Select the “Slideshow Order” key. From
the following display, select “Random”
or “Order List”. For “Order List”, the
image order is the order of the files as
stored on the USB memory.
Operating tips:
. Only files that meet the following
conditions will be displayed.
— Image type: JPEG
— File Extensions: *.jpg, *jpeg
Monitor, climate, audio, phone and voice recognition systems4-23
Page 207 of 522

4-30Monitor, climate, audio, phone and voice recognition systems
PREDICTIVE COURSE LINE SETTINGS
To turn ON or OFF the predictive course line
display, push theSETTINGbutton, select
the “Camera” key and push the ENTER
button.
Predictive Course Lines:
When this item is turned on, the predicted
course lines will be displayed on the
monitor when the selector lever is in the
R (Reverse) position.
HOW TO ADJUST SCREEN
To adjust the Display ON/OFF, Brightness,
Tint, Color, Contrast and Black Level of the
rearview monitor, push the SETTINGbutton
with the rearview monitor on, select the
“Display” key on the screen and select the
item key and adjust the level using the
INFINITI controller.
Do not adjust the Brightness, Tint, Color,
Contrast and Black Level of the rearview
monitor while the vehicle is moving. Make
sure the parking brake is firmly applied
and the engine is not running.
OPERATING TIPS
. When the selector lever is shifted to the
R (Reverse) position, the monitor
screen automatically changes to the
rearview monitor mode.
. It may take some time until the rearview
monitor is displayed after the selector
lever has been shifted to R from
another position or to another position
from R. Objects may be distorted
momentarily until the rearview monitor
screen is displayed completely.
. When the temperature is extremely high
or low, the screen may not clearly
display objects. This is not a malfunc-
tion.
. When strong light directly enters the
camera, objects may not be displayed
clearly. This is not a malfunction.
. Vertical lines may be seen in objects on
the screen. This is due to strong
reflected light from the bumper. This
is not a malfunction.
. The screen may flicker under fluores-
cent light. This is not a malfunction.
. The colors of objects on the rearview
monitor may differ somewhat from
those of the actual object. .
Objects on the monitor may not be clear
in a dark place or at night. This is not a
malfunction.
. If dirt, rain or snow attaches to the
camera, the rearview monitor may not
clearly display objects. Clean the cam-
era.
. Do not use alcohol, benzine or thinner
to clean the camera. This will cause
discoloration. To clean the camera,
wipe with a cloth dampened with
diluted mild cleaning agent and then
wipe with a dry cloth.
. Do not damage the camera as the
monitor screen may be adversely af-
fected.
. Do not use wax on the camera window.
Wipe off any wax with a clean cloth
dampened with mild detergent diluted
with water.
Page 226 of 522
AUDIO OPERATION PRECAUTIONS
Radio
Push the ignition switch to the ACC or ON
position and push the radio band select
button to turn on the radio. If you listen to
the radio with the engine not running, the
ignition switch should be pushed to the
ACC position.
Radio reception is affected by station
signal strength, distance from radio trans-
mitter, buildings, bridges, mountains and
other external influences. Intermittent
changes in reception quality normally are
caused by these external influences.
Using a cellular phone in or near the
vehicle may influence radio reception
quality.
Radio reception:
Your INFINITI radio system is equipped with
state-of-the-art electronic circuits to en-
hance radio reception. These circuits are
designed to extend reception range, and to
enhance the quality of that reception.
However there are some general character-
istics of both FM and AM radio signals that
can affect radio reception quality in a
moving vehicle, even when the finestequipment is used. These characteristics
are completely normal in a given reception
area, and do not indicate any malfunction
in your INFINITI radio system.
Reception conditions will constantly
change because of vehicle movement.
Buildings, terrain, signal distance and
interference from other vehicles can work
against ideal reception. Described below
are some of the factors that can affect your
radio reception.
Some cellular phones or other devices may
cause interference or a buzzing noise to
come from the audio system speakers.
Storing the device in a different location
may reduce or eliminate the noise.
SAA0306
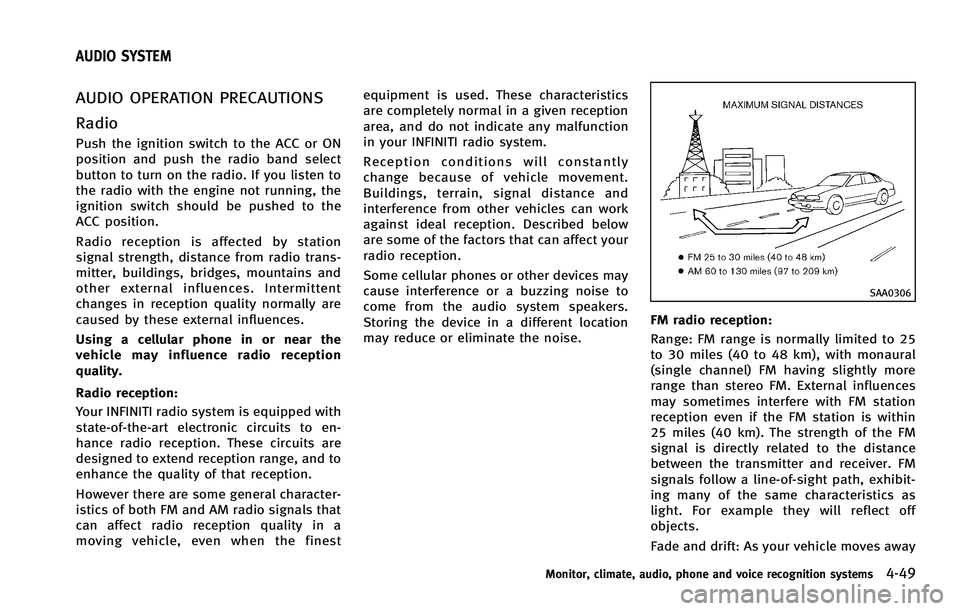
FM radio reception:
Range: FM range is normally limited to 25
to 30 miles (40 to 48 km), with monaural
(single channel) FM having slightly more
range than stereo FM. External influences
may sometimes interfere with FM station
reception even if the FM station is within
25 miles (40 km). The strength of the FM
signal is directly related to the distance
between the transmitter and receiver. FM
signals follow a line-of-sight path, exhibit-
ing many of the same characteristics as
light. For example they will reflect off
objects.
Fade and drift: As your vehicle moves away
Monitor, climate, audio, phone and voice recognition systems4-49
AUDIO SYSTEM
Page 227 of 522
4-50Monitor, climate, audio, phone and voice recognition systems
from a station transmitter, the signals will
tend to fade and/or drift.
Static and flutter: During signal interfer-
ence from buildings, large hills or due to
antenna position, usually in conjunction
with increased distance from the station
transmitter, static or flutter can be heard.
This can be reduced by lowering the treble
setting to reduce the treble response.
Multipath reception: Because of the reflec-
tive characteristics of FM signals, direct
and reflected signals reach the receiver at
the same time. The signals may cancel
each other, resulting in momentary flutter
or loss of sound.
AM radio reception:
AM signals, because of their low frequency,
can bend around objects and skip along
the ground. In addition, the signals can be
bounced off the ionosphere and bent back
to earth. Because of these characteristics.
AM signals are also subject to interference
as they travel from transmitter to receiver.
Fading: Occurs while the vehicle is passing
through freeway underpasses or in areas
with many tall buildings. It can also occur
for several seconds during ionospheric
turbulence even in areas where no obsta-cles exist.
Static: Caused by thunderstorms, electrical
power lines, electric signs and even traffic
lights.
Satellite radio reception:
When the satellite radio is used for the first
time or the battery has been replaced, the
satellite radio may not work properly. This
is not a malfunction. Wait more than 10
minutes with the satellite radio ON and the
vehicle outside of any metal or large
building for the satellite radio to receive
all of the necessary data.
The satellite radio mode requires an active
XM Satellite Radio
®subscription. The
satellite radio is not available in Alaska,
Hawaii and Guam.
The satellite radio performance may be
affected if cargo carried on the roof blocks
the satellite radio signal.
If possible, do not put cargo near the
satellite antenna.
A build up of ice on the satellite radio
antenna can affect satellite radio perfor-
mance. Remove the ice to restore satellite
radio reception.
SAA0480
Compact Disc (CD) player
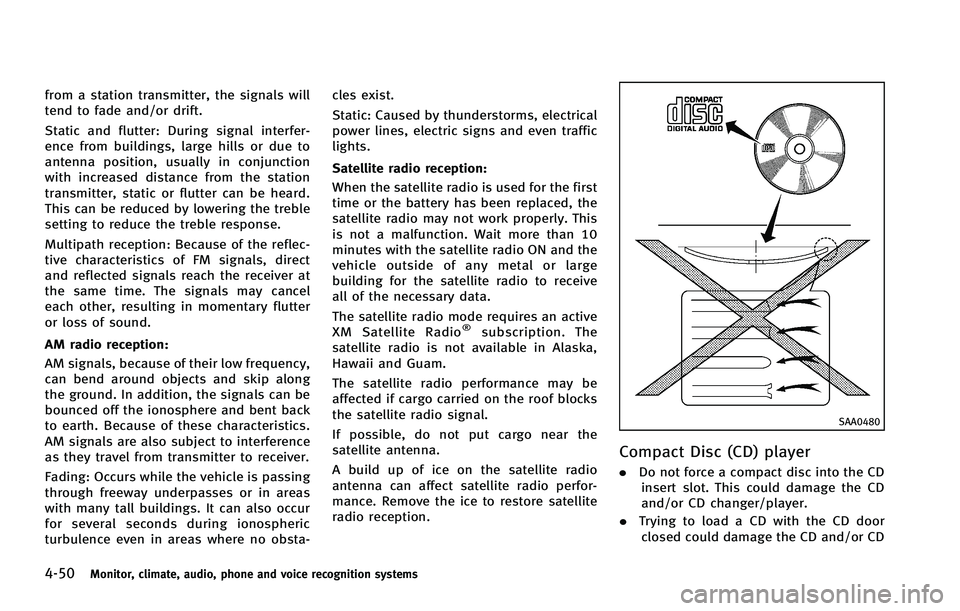
. Do not force a compact disc into the CD
insert slot. This could damage the CD
and/or CD changer/player.
. Trying to load a CD with the CD door
closed could damage the CD and/or CD
Page 228 of 522
changer.
. During cold weather or rainy days, the
player may malfunction due to the
humidity. If this occurs, remove the
CD and dehumidify or ventilate the
player completely.
. The player may skip while driving on
rough roads.
. The CD player sometimes cannot func-
tion when the passenger compartment
temperature is extremely high. De-
crease the temperature before use.
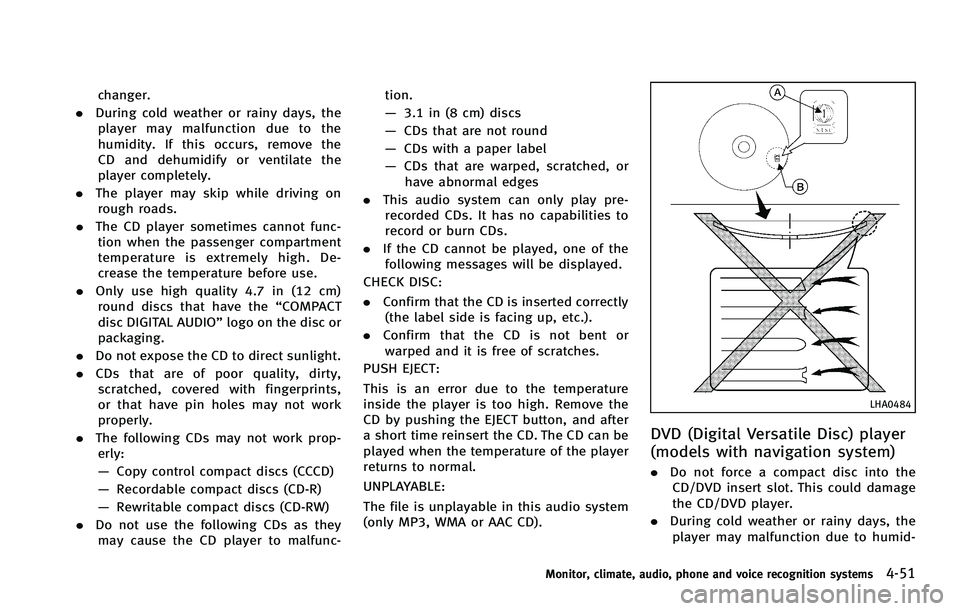
. Only use high quality 4.7 in (12 cm)
round discs that have the “COMPACT
disc DIGITAL AUDIO” logo on the disc or
packaging.
. Do not expose the CD to direct sunlight.
. CDs that are of poor quality, dirty,
scratched, covered with fingerprints,
or that have pin holes may not work
properly.
. The following CDs may not work prop-
erly:
— Copy control compact discs (CCCD)
— Recordable compact discs (CD-R)
— Rewritable compact discs (CD-RW)
. Do not use the following CDs as they
may cause the CD player to malfunc- tion.
—
3.1 in (8 cm) discs
— CDs that are not round
— CDs with a paper label
— CDs that are warped, scratched, or
have abnormal edges
. This audio system can only play pre-
recorded CDs. It has no capabilities to
record or burn CDs.
. If the CD cannot be played, one of the
following messages will be displayed.
CHECK DISC:
. Confirm that the CD is inserted correctly
(the label side is facing up, etc.).
. Confirm that the CD is not bent or
warped and it is free of scratches.
PUSH EJECT:
This is an error due to the temperature
inside the player is too high. Remove the
CD by pushing the EJECT button, and after
a short time reinsert the CD. The CD can be
played when the temperature of the player
returns to normal.
UNPLAYABLE:
The file is unplayable in this audio system
(only MP3, WMA or AAC CD).
LHA0484
DVD (Digital Versatile Disc) player
(models with navigation system)
. Do not force a compact disc into the
CD/DVD insert slot. This could damage
the CD/DVD player.
. During cold weather or rainy days, the
player may malfunction due to humid-
Monitor, climate, audio, phone and voice recognition systems4-51
Page 231 of 522
4-54Monitor, climate, audio, phone and voice recognition systems
.An iPod nano®(1st generation) may
remain in fast forward or rewind mode
if it is connected during a seek opera-
tion. In this case, please manually reset
the iPod
®.
. An iPod nano®(2nd generation) will
continue to fast forward or rewind if it
is disconnected during a seek opera-
tion.
. An incorrect song title may appear when
the Play Mode is changed while using
the iPod nano
®(2nd generation)
iPod®and iPod nano®are a trademark of
Apple Inc., registered in the U.S. and other
countries.
Compressed Audio Files (MP3/
WMA/AAC/ATRAC3)
Explanation of terms:
. MP3 —MP3 is short for Moving Pictures
Experts Group Audio Layer 3. MP3 is
the most well known compressed
digital audio file format. This format
allows for near “CD quality”sound, but
at a fraction of the size of normal audio
files. MP3 conversion of an audio track
can reduce the file size by approxi-
mately a 10:1 ratio (Sampling: 44.1
kHz, Bit rate: 128 kbps) with virtually no perceptible loss in quality. The
compression reduces certain parts of
sound that seem inaudible to most
people.
. WMA —Windows Media Audio (WMA) is
a compressed audio format created by
Microsoft as an alternative to MP3. The
WMA codec offers greater file compres-
sion than the MP3 codec, enabling
storage of more digital audio tracks in
the same amount of space when
compared to MP3s at the same level
of quality.
. AAC/M4A —Advanced Audio Coding
(AAC) is a lossy audio compression
format. Audio files that have been
encoded with AAC are generally smaller
in size and deliver a higher quality of
sound than MP3.
. Bit rate —Bit rate denotes the number
of bits per second used by a digital
music file. The size and quality of a
compressed digital audio file is deter-
mined by the bit rate used when
encoding the file.
. Sampling frequency —Sampling fre-
quency is the rate at which the samples
of a signal are converted from analog to
digital (A/D conversion) per second. .
Multisession —Multisession is one of
the methods for writing data to media.
Writing data once to the media is called
a single session, and writing more than
once is called a multisession.
. ID3/WMA Tag —The ID3/WMA tag is the
part of the encoded MP3 or WMA file
that contains information about the
digital music file such as song title,
artist, album title, encoding bit rate,
track time duration, etc. ID3 tag in-
formation is displayed on the Album/
Artist/Track title line on the display.
* Windows
®and Windows Media®are
registered trademarks or trademarks of
Microsoft Corporation in the United States
of America and/or other countries.
Page 240 of 522
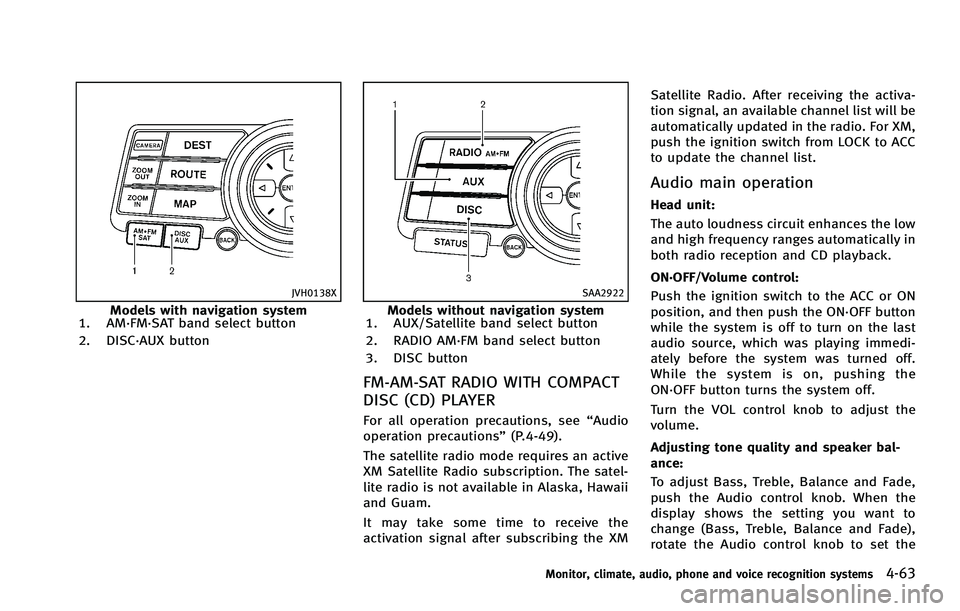
JVH0138X
Models with navigation system
1. AM·FM·SAT band select button
2. DISC·AUX button
SAA2922
Models without navigation system
1. AUX/Satellite band select button
2. RADIO AM·FM band select button
3. DISC button
FM-AM-SAT RADIO WITH COMPACT
DISC (CD) PLAYER
For all operation precautions, see “Audio
operation precautions” (P.4-49).
The satellite radio mode requires an active
XM Satellite Radio subscription. The satel-
lite radio is not available in Alaska, Hawaii
and Guam.
It may take some time to receive the
activation signal after subscribing the XM Satellite Radio. After receiving the activa-
tion signal, an available channel list will be
automatically updated in the radio. For XM,
push the ignition switch from LOCK to ACC
to update the channel list.
Audio main operation
Head unit:
The auto loudness circuit enhances the low
and high frequency ranges automatically in
both radio reception and CD playback.
ON·OFF/Volume control:
Push the ignition switch to the ACC or ON
position, and then push the ON·OFF button
while the system is off to turn on the last
audio source, which was playing immedi-
ately before the system was turned off.
While the system is on, pushing the
ON·OFF button turns the system off.
Turn the VOL control knob to adjust the
volume.
Adjusting tone quality and speaker bal-
ance:
To adjust Bass, Treble, Balance and Fade,
push the Audio control knob. When the
display shows the setting you want to
change (Bass, Treble, Balance and Fade),
rotate the Audio control knob to set the
Monitor, climate, audio, phone and voice recognition systems4-63
Page 245 of 522

4-68Monitor, climate, audio, phone and voice recognition systems
death.
CAUTION
.Only operate the DVD while the vehicle
engine is running. Operating the DVD for
extended periods of time with the
engine OFF can discharge the vehicle
battery.
. Do not allow the system to get wet.
Excessive moisture such as spilled
liquids may cause the system to mal-
function.
. While playing VIDEO-CD media, this DVD
player does not guarantee complete
functionality of all VIDEO-CD formats.
SAA3650
DVD drive
The DVD slot is located on the center
INFINITI control panel. Insert a DVD into the
slot with the label side facing up. The DVD
will be guided automatically into the slot.
When ejecting the DVD, push the EJECT
button
*1.
Display settings
To adjust the front display mode, push the
SETTING button while the DVD is being
played, select the “Others”key and then
select the “Display”key.
To adjust the display ON/OFF, brightness, tint, color and contrast, select the
“Display
Adjustment” key and then select each key.
Then you can adjust each item using the
INFINITI controller. After changes have
been made push the BACK button to save
the setting.