ECU INFINITI FX 2012 Owner's Guide
[x] Cancel search | Manufacturer: INFINITI, Model Year: 2012, Model line: FX, Model: INFINITI FX 2012Pages: 522, PDF Size: 3.51 MB
Page 102 of 522
SIC2045
How to arm the vehicle security
system
1. Close all windows.The system can be armed even if the
windows are open.
2. Push the ignition switch to the OFF position.
3. Remove the Intelligent Key from the vehicle.
4. Close all doors, hood and lift gate. Lock all doors. The doors can be locked with
the Intelligent Key, door handle request
switch, power door lock switch or
mechanical key. 5. Confirm that the security indicator light
comes on. The security indicator light
stays on for about 30 seconds. The
vehicle security system is now pre-
armed. After about 30 seconds the
vehicle security system automatically
shifts into the armed phase. The
security light begins to flash once every
approximately 3 seconds. If, during this
30-second pre-arm time period, the
door is unlocked, or the ignition switch
is pushed to ACC or ON, the system will
not arm.
Even when the driver and/or passengers
are in the vehicle, the system will activate
with all doors, hood, and lift gate locked
with the ignition switch in the LOCK
position. When pushing the ignition switch
to the ACC or ON position, the system will
be released.
Vehicle security system activation
The vehicle security system will give the
following alarm:
. The headlights blink and the horn
sounds intermittently.
. The alarm automatically turns off after
approximately 50 seconds. However,
the alarm reactivates if the vehicle is tampered with again.
The alarm is activated by:
. Unlocking the door or opening the lift
gate without using the button on the
Intelligent Key, the door handle request
switch or the mechanical key. (Even if
the door is opened by releasing the
door inside lock knob, the alarm will
activate.)
. Opening the hood.
How to stop an activated alarm
The alarm will stop when a door is
unlocked by pushing the unlock button or
power lift gate button (if so equipped) on
the Intelligent Key, the door handle request
switch or using the mechanical key, or
when the ignition switch is pushed to the
ACC or ON position.
If the system does not operate as de-
scribed above, have it checked by an
INFINITI retailer.
Instruments and controls2-31
Page 103 of 522
2-32Instruments and controls
INFINITI VEHICLE IMMOBILIZER
SYSTEM
The INFINITI Vehicle Immobilizer System
will not allow the engine to start without
the use of the registered Intelligent Key.
Never leave these keys in the vehicle.
This device complies with Part 15 of FCC
Rules and RSS-Gen of IC Rules. Operation
is subject to the following two conditions:
(1) this device may not cause interference,
and (2) this device must accept any
interference, including interference that
may cause undesired operation of this
device.
SIC2045
Security indicator light
The security indicator light is located on
the meter panel. It indicates the status of
the INFINITI Vehicle Immobilizer System.
The light blinks after the ignition switch
was in the ACC, OFF and LOCK position.
This function indicates the security sys-
tems equipped on the vehicle are opera-
tional.
If the INFINITI Vehicle Immobilizer System
is malfunctioning, this light will remain on
while the ignition switch is in the ON
position.If the light still remains on and/or the
engine will not start, see an INFINITI
retailer for INFINITI Vehicle Immobilizer
System service as soon as possible.
Please bring all Intelligent Keys that you
have when visiting an INFINITI retailer for
service.
Page 125 of 522

2-54Instruments and controls
SIC3849
CARGO HOOKS (if so equipped)
WARNING
.Always make sure that the cargo is
properly secured. Use the suitable ropes
and hooks.
. Unsecured cargo can become dangerous
in an accident or sudden stop.
CAUTION
Do not apply a total load of more than 22 lb
(10 kg) to a single hook.
SIC3850
CARGO NET (if so equipped)
The cargo net helps keep packages in the
cargo area from moving around while your
vehicle is driven.
To install the cargo net, attach the hooks to
the retainers.
WARNING
.Properly secure all cargo to help prevent
it from sliding or shifting. Do not place
cargo higher than the seatbacks. In a
sudden stop or collision, unsecured
cargo could cause personal injury.
Page 126 of 522

.Be sure to secure all four hooks into the
retainers. The cargo restrained in the net
must not exceed 30 lb (13.6 kg) or the
net may not stay secured.
SIC3841
CARGO COVER (if so equipped)
The cargo cover keeps the contents in the
cargo area hidden from the outside.
To use the cargo cover, unfold the flap as
illustrated.
SIC3842
Instruments and controls2-55
Page 127 of 522

2-56Instruments and controls
To remove the cargo cover,
1. Return the rear seatback to the fullupright position.
2. Fold the flap
*1.
3. Lift up the rear side of the cargo cover
*2to unlatch the rear side of the cargo
cover
*Afrom the hanger bars.
4. Then, tilt up the cargo cover and slightly slide it forward
*3to unhook
the front side of the cargo cover
*Bfrom the hanger bars.
5. Incline the cargo cover above the hanger bars towards the front of the
vehicle
*4and lower the cargo cover.
6. Pull either side of the cargo cover and remove the cargo cover
*5.
When attaching the cargo cover, be sure to
return the rear seatback to the upright
position and make sure that the cargo
cover is latched securely.
SIC3865
The rear cargo cover*1can be removed
from the lift gate.
To remove the rear cargo cover, open the
lift gate then remove the clips
*2with a
suitable tool.
WARNING
. Never put anything on the cargo cover,
no matter how small. Any object on it
could cause an injury in an accident or
sudden stop.
. Do not leave the cargo cover in the
vehicle with it disengaged from the holder.
. Properly secure all cargo with ropes or
straps to help prevent it from sliding or
shifting. Do not place cargo higher than
the seatbacks. In a sudden stop or
collision, unsecured cargo could cause
personal injury.
. If the cargo cover contacts the top tether
strap when it is attached to the top
tether anchor, remove the cargo cover
from the vehicle or secure it on the cargo
floor below its attachment location. If
the cargo cover is not removed, it may
damage the top tether strap during a
collision. Your child could be seriously
injured or killed in a collision if the child
restraint top tether strap is damaged.
. Do not allow cargo to contact the top
tether strap when it is attached to the
top tether anchor. Properly secure the
cargo so it does not contact the top
tether strap. Cargo that is not properly
secured or cargo that contacts the top
tether strap may damage the top tether
strap during a collision. Your child could
be seriously injured or killed in a
collision if the child restraint top tether
strap is damaged.
Page 128 of 522
.Do not leave the cargo cover in the
vehicle with the rear half of the flap
folded up while driving. You may not be
able to see out the rear window, which
may cause an accident.
. Do not use the cargo cover if the rear
seats are folded down.
SIC3845
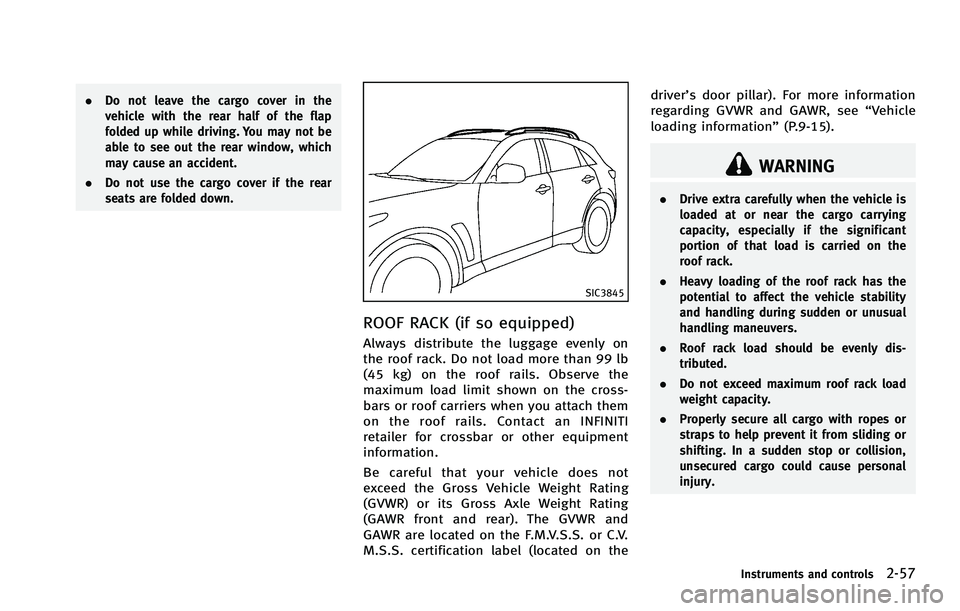
ROOF RACK (if so equipped)
Always distribute the luggage evenly on
the roof rack. Do not load more than 99 lb
(45 kg) on the roof rails. Observe the
maximum load limit shown on the cross-
bars or roof carriers when you attach them
on the roof rails. Contact an INFINITI
retailer for crossbar or other equipment
information.
Be careful that your vehicle does not
exceed the Gross Vehicle Weight Rating
(GVWR) or its Gross Axle Weight Rating
(GAWR front and rear). The GVWR and
GAWR are located on the F.M.V.S.S. or C.V.
M.S.S. certification label (located on the driver’s door pillar). For more information
regarding GVWR and GAWR, see “Vehicle
loading information” (P.9-15).
WARNING
.Drive extra carefully when the vehicle is
loaded at or near the cargo carrying
capacity, especially if the significant
portion of that load is carried on the
roof rack.
. Heavy loading of the roof rack has the
potential to affect the vehicle stability
and handling during sudden or unusual
handling maneuvers.
. Roof rack load should be evenly dis-
tributed.
. Do not exceed maximum roof rack load
weight capacity.
. Properly secure all cargo with ropes or
straps to help prevent it from sliding or
shifting. In a sudden stop or collision,
unsecured cargo could cause personal
injury.
Instruments and controls2-57
Page 133 of 522
2-62Instruments and controls
switch.
Depending on the environment or driving
conditions, the auto reverse function may
be activated if an impact or load similar to
something being caught in the moonroof
occurs.
If the moonroof does not operate
If the moonroof does not operate properly,
perform the following procedure to initi-
alize the moonroof operation system.
1. If the moonroof is open, close it fully byrepeatedly pushing the CLOSE
*1side
of the moonroof switch.
2. Push and hold the CLOSE
*1side of
the moonroof switch to tilt the moon-
roof up.
3. Release the moonroof switch after the moonroof moves slightly up and down.
4. Push and hold the OPEN
*2side of the
moonroof switch to fully tilt the moon-
roof down.
5. Check if the moonroof switch operates normally.
If the moonroof does not operate properly
after performing the procedure above, have
your vehicle checked by an INFINITI retailer.
SIC3642
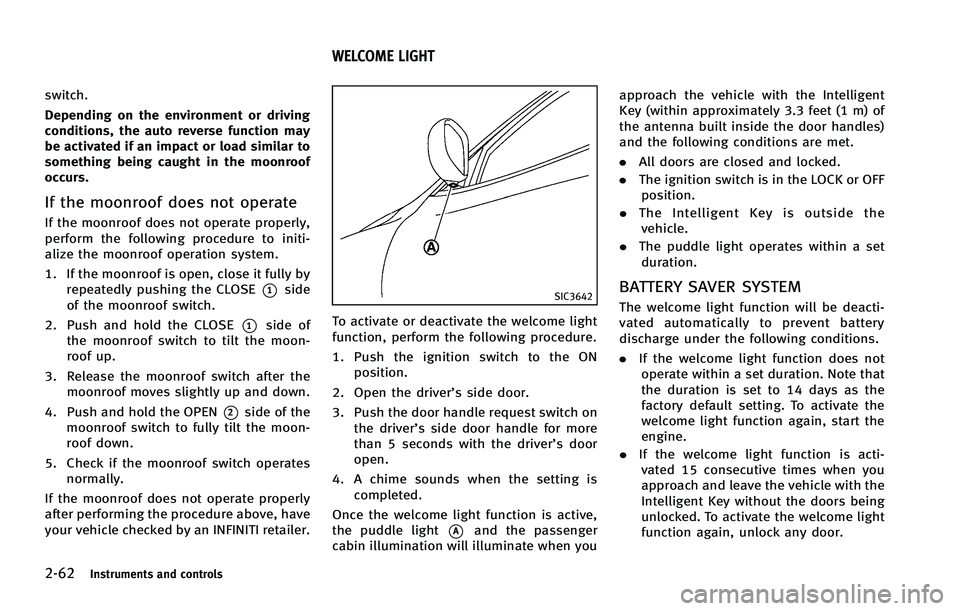
To activate or deactivate the welcome light
function, perform the following procedure.
1. Push the ignition switch to the ON position.
2. Open the driver’s side door.
3. Push the door handle request switch on the driver’s side door handle for more
than 5 seconds with the driver’s door
open.
4. A chime sounds when the setting is completed.
Once the welcome light function is active,
the puddle light
*Aand the passenger
cabin illumination will illuminate when you approach the vehicle with the Intelligent
Key (within approximately 3.3 feet (1 m) of
the antenna built inside the door handles)
and the following conditions are met.
.
All doors are closed and locked.
. The ignition switch is in the LOCK or OFF
position.
. The Intelligent Key is outside the
vehicle.
. The puddle light operates within a set
duration.
BATTERY SAVER SYSTEM
The welcome light function will be deacti-
vated automatically to prevent battery
discharge under the following conditions.
. If the welcome light function does not
operate within a set duration. Note that
the duration is set to 14 days as the
factory default setting. To activate the
welcome light function again, start the
engine.
. If the welcome light function is acti-
vated 15 consecutive times when you
approach and leave the vehicle with the
Intelligent Key without the doors being
unlocked. To activate the welcome light
function again, unlock any door.
WELCOME LIGHT
Page 136 of 522
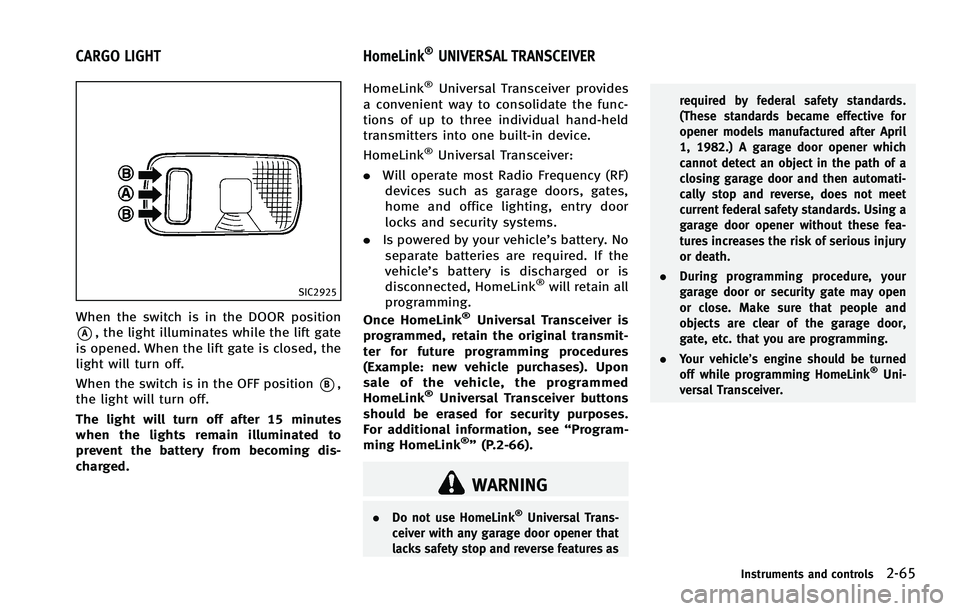
SIC2925
When the switch is in the DOOR position
*A, the light illuminates while the lift gate
is opened. When the lift gate is closed, the
light will turn off.
When the switch is in the OFF position
*B,
the light will turn off.
The light will turn off after 15 minutes
when the lights remain illuminated to
prevent the battery from becoming dis-
charged. HomeLink
®Universal Transceiver provides
a convenient way to consolidate the func-
tions of up to three individual hand-held
transmitters into one built-in device.
HomeLink
®Universal Transceiver:
. Will operate most Radio Frequency (RF)
devices such as garage doors, gates,
home and office lighting, entry door
locks and security systems.
. Is powered by your vehicle’s battery. No
separate batteries are required. If the
vehicle’s battery is discharged or is
disconnected, HomeLink
®will retain all
programming.
Once HomeLink
®Universal Transceiver is
programmed, retain the original transmit-
ter for future programming procedures
(Example: new vehicle purchases). Upon
sale of the vehicle, the programmed
HomeLink
®Universal Transceiver buttons
should be erased for security purposes.
For additional information, see “Program-
ming HomeLink
®” (P.2-66).
WARNING
. Do not use HomeLink®Universal Trans-
ceiver with any garage door opener that
lacks safety stop and reverse features as required by federal safety standards.
(These standards became effective for
opener models manufactured after April
1, 1982.) A garage door opener which
cannot detect an object in the path of a
closing garage door and then automati-
cally stop and reverse, does not meet
current federal safety standards. Using a
garage door opener without these fea-
tures increases the risk of serious injury
or death.
. During programming procedure, your
garage door or security gate may open
or close. Make sure that people and
objects are clear of the garage door,
gate, etc. that you are programming.
. Your vehicle’s engine should be turned
off while programming HomeLink
®Uni-
versal Transceiver.
Instruments and controls2-65
CARGO LIGHT HomeLink®UNIVERSAL TRANSCEIVER
Page 150 of 522
SPA2074
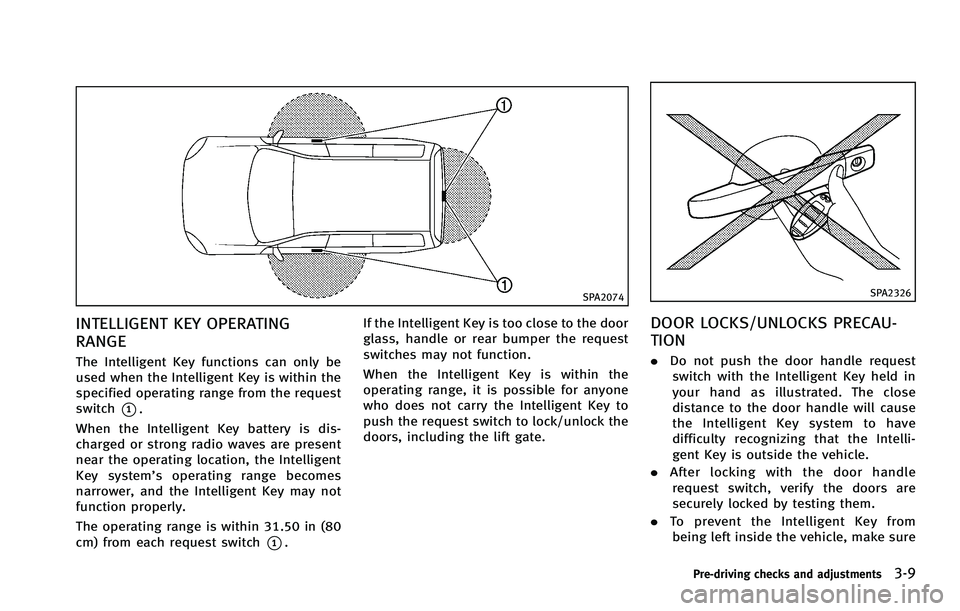
INTELLIGENT KEY OPERATING
RANGE
The Intelligent Key functions can only be
used when the Intelligent Key is within the
specified operating range from the request
switch
*1.
When the Intelligent Key battery is dis-
charged or strong radio waves are present
near the operating location, the Intelligent
Key system’ s operating range becomes
narrower, and the Intelligent Key may not
function properly.
The operating range is within 31.50 in (80
cm) from each request switch
*1. If the Intelligent Key is too close to the door
glass, handle or rear bumper the request
switches may not function.
When the Intelligent Key is within the
operating range, it is possible for anyone
who does not carry the Intelligent Key to
push the request switch to lock/unlock the
doors, including the lift gate.
SPA2326
DOOR LOCKS/UNLOCKS PRECAU-
TION
.
Do not push the door handle request
switch with the Intelligent Key held in
your hand as illustrated. The close
distance to the door handle will cause
the Intelligent Key system to have
difficulty recognizing that the Intelli-
gent Key is outside the vehicle.
. After locking with the door handle
request switch, verify the doors are
securely locked by testing them.
. To prevent the Intelligent Key from
being left inside the vehicle, make sure
Pre-driving checks and adjustments3-9
Page 152 of 522
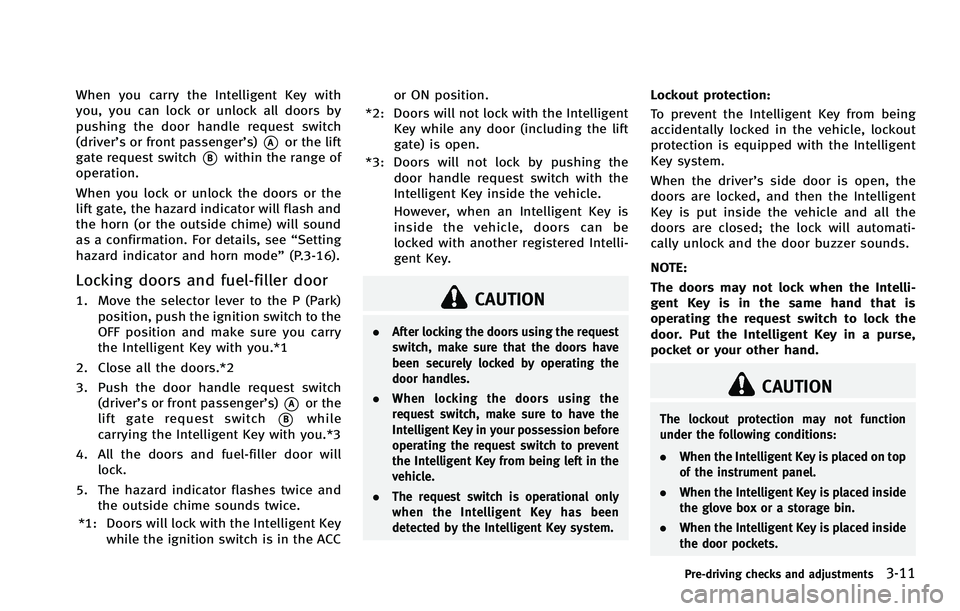
When you carry the Intelligent Key with
you, you can lock or unlock all doors by
pushing the door handle request switch
(driver’s or front passenger’s)
*Aor the lift
gate request switch
*Bwithin the range of
operation.
When you lock or unlock the doors or the
lift gate, the hazard indicator will flash and
the horn (or the outside chime) will sound
as a confirmation. For details, see “Setting
hazard indicator and horn mode” (P.3-16).
Locking doors and fuel-filler door
1. Move the selector lever to the P (Park)
position, push the ignition switch to the
OFF position and make sure you carry
the Intelligent Key with you.*1
2. Close all the doors.*2
3. Push the door handle request switch (driver’s or front passenger’s)
*Aor the
lift gate request switch
*Bwhile
carrying the Intelligent Key with you.*3
4. All the doors and fuel-filler door will lock.
5. The hazard indicator flashes twice and the outside chime sounds twice.
*1: Doors will lock with the Intelligent Key while the ignition switch is in the ACC or ON position.
*2: Doors will not lock with the Intelligent Key while any door (including the lift
gate) is open.
*3: Doors will not lock by pushing the door handle request switch with the
Intelligent Key inside the vehicle.
However, when an Intelligent Key is
inside the vehicle, doors can be
locked with another registered Intelli-
gent Key.
CAUTION
.After locking the doors using the request
switch, make sure that the doors have
been securely locked by operating the
door handles.
. When locking the doors using the
request switch, make sure to have the
Intelligent Key in your possession before
operating the request switch to prevent
the Intelligent Key from being left in the
vehicle.
. The request switch is operational only
when the Intelligent Key has been
detected by the Intelligent Key system.
Lockout protection:
To prevent the Intelligent Key from being
accidentally locked in the vehicle, lockout
protection is equipped with the Intelligent
Key system.
When the driver’s side door is open, the
doors are locked, and then the Intelligent
Key is put inside the vehicle and all the
doors are closed; the lock will automati-
cally unlock and the door buzzer sounds.
NOTE:
The doors may not lock when the Intelli-
gent Key is in the same hand that is
operating the request switch to lock the
door. Put the Intelligent Key in a purse,
pocket or your other hand.
CAUTION
The lockout protection may not function
under the following conditions:
.When the Intelligent Key is placed on top
of the instrument panel.
. When the Intelligent Key is placed inside
the glove box or a storage bin.
. When the Intelligent Key is placed inside
the door pockets.
Pre-driving checks and adjustments3-11