check transmission fluid INFINITI FX35 2008 Owner's Guide
[x] Cancel search | Manufacturer: INFINITI, Model Year: 2008, Model line: FX35, Model: INFINITI FX35 2008Pages: 3924, PDF Size: 81.37 MB
Page 268 of 3924

TROUBLE DIAGNOSIS FOR SYMPTOMSAT-195
< SERVICE INFORMATION >
DE
F
G H
I
J
K L
M A
B
AT
N
O P
Is any malfunction detected by self-diagnostic results?
YES >> Check the malfuncti oning system. Refer to AT-84, "CONSULT-III Function (TRANSMISSION)",
AT-91, "
Diagnosis Procedure without CONSULT-III".
NO >> GO TO 3.
3.CHECK A/T FLUID CONDITION
1. Remove oil pan. Refer to AT-215, "
Control Valve with TCM and A/T Fluid Temperature Sensor 2".
2. Check A/T fluid condition. Refer to AT-49, "
Inspections Before
Trouble Diagnosis".
OK or NG
OK >> GO TO 4.
NG >> GO TO 7.
4.DETECT MALFUNCTIONING ITEM
Check the malfunction items. If any items are dam aged, repair or replace damaged parts. Refer to AT-59,
"Symptom Chart" (Symptom No.72).
OK or NG
OK >> GO TO 5.
NG >> Repair or replace damaged parts.
5.CHECK SYMPTOM
Check again. Refer to AT-53, "
Road Test".
OK or NG
OK >> INSPECTION END
NG >> GO TO 6.
6.CHECK TCM
1. Check TCM input/output signals. Refer to AT-83, "
TCM Input/Output Signal Reference Value".
2. If NG, recheck A/T assembly harness connector terminals for damage or loose connection with harness
connector.
OK or NG
OK >> INSPECTION END
NG >> Repair or replace damaged parts.
7.DETECT MALFUNCTIONING ITEM
Check the malfunction items. If any items are dam aged, repair or replace damaged parts. Refer to AT-59,
"Symptom Chart" (Symptom No.72).
OK or NG
OK >> GO TO 5.
NG >> Repair or replace damaged parts.
Cannot Be Changed to Manual ModeINFOID:0000000001327377
SYMPTOM:
Does not change to manual mode when manual shift gate is used.
DIAGNOSTIC PROCEDURE
1.CHECK MANUAL MODE SWITCH
Check the manual mode switch. Refer to AT-155
.
OK or NG
OK >> GO TO 2.
SCIA5199E
3AA93ABC3ACD3AC03ACA3AC03AC63AC53A913A773A893A873A873A8E3A773A983AC73AC93AC03AC3
3A893A873A873A8F3A773A9D3AAF3A8A3A8C3A863A9D3AAF3A8B3A8C
Page 269 of 3924

AT-196
< SERVICE INFORMATION >
TROUBLE DIAGNOSIS FOR SYMPTOMS
NG >> Repair or replace damaged parts.
2.CHECK SELF-DIAGNOSIS RESULTS
With CONSULT-III
Perform self-diagnosis.
Without CONSULT-III
Perform self-diagnosis. Refer to AT-91, "
Diagnosis Procedure without CONSULT-III".
Is any malfunction detected by self-diagnostic results?
YES >> Check the malfunctioning system. Refer to AT-84, "CONSULT-III Function (TRANSMISSION)",
AT-91, "
Diagnosis Procedure without CONSULT-III".
NO >> INSPECTION END
A/T Does Not Shift: 5th Gear → 4th GearINFOID:0000000001327378
SYMPTOM:
When shifted from M5 to M4 position in manual mode, does not downshift from 5th to 4th gear.
DIAGNOSTIC PROCEDURE
1.CHECK SELF-DIAGNOSTIC RESULTS
With CONSULT-III
Perform self-diagnosis.
Without CONSULT-III
Perform self-diagnosis. Refer to AT-91, "
Diagnosis Procedure without CONSULT-III".
Is any malfunction detected by self-diagnostic results?
YES >> Check the malfunctioning system. Refer to AT-84, "CONSULT-III Function (TRANSMISSION)",
AT-91, "
Diagnosis Procedure without CONSULT-III".
NO >> GO TO 2.
2.CHECK A/T FLUID LEVEL
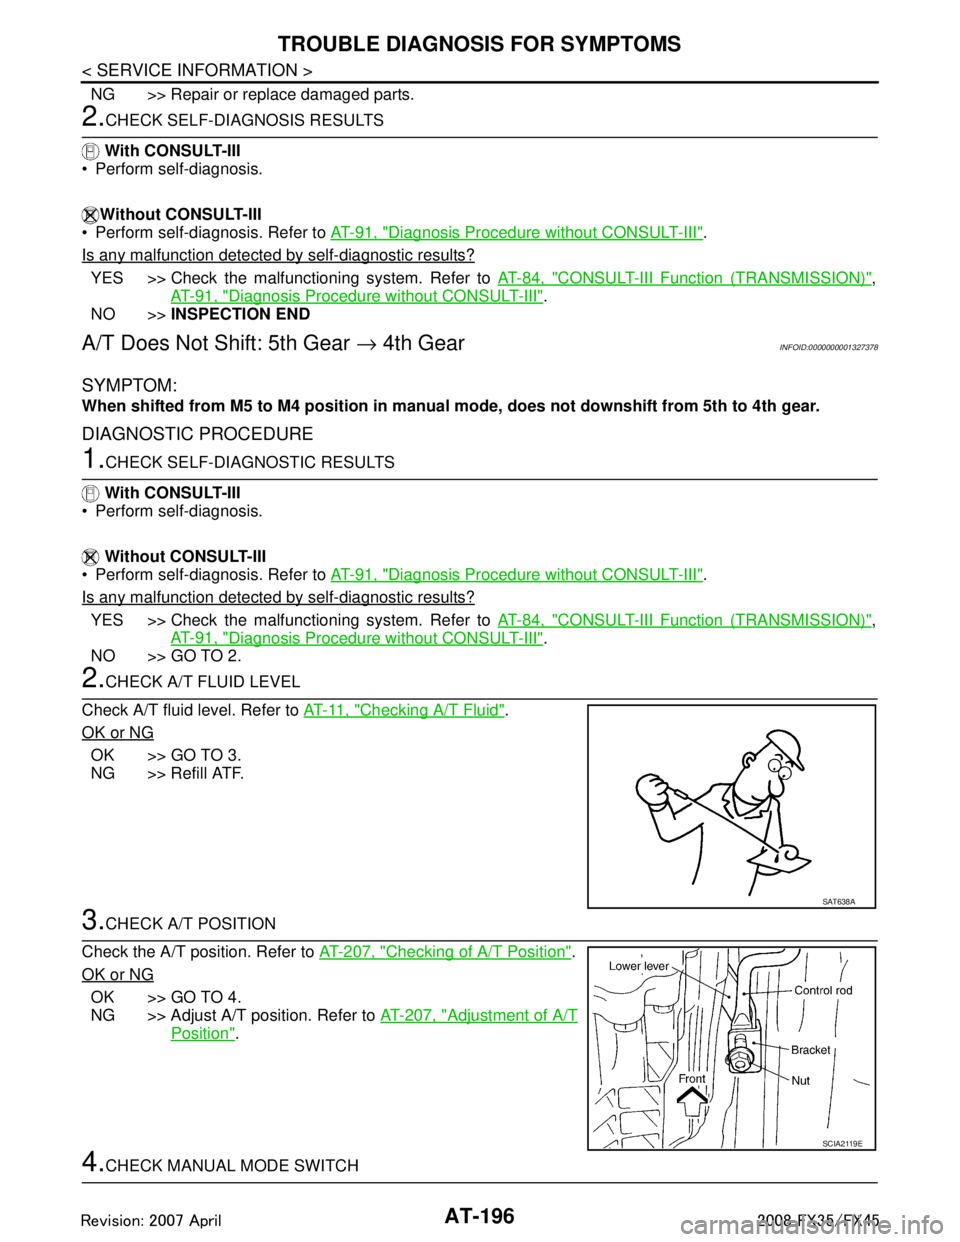
Check A/T fluid level. Refer to AT- 11 , "
Checking A/T Fluid".
OK or NG
OK >> GO TO 3.
NG >> Refill ATF.
3.CHECK A/T POSITION
Check the A/T position. Refer to AT-207, "
Checking of A/T Position".
OK or NG
OK >> GO TO 4.
NG >> Adjust A/T position. Refer to AT-207, "
Adjustment of A/T
Position".
4.CHECK MANUAL MODE SWITCH
SAT638A
SCIA2119E
3AA93ABC3ACD3AC03ACA3AC03AC63AC53A913A773A893A873A873A8E3A773A983AC73AC93AC03AC3
3A893A873A873A8F3A773A9D3AAF3A8A3A8C3A863A9D3AAF3A8B3A8C
Page 271 of 3924

AT-198
< SERVICE INFORMATION >
TROUBLE DIAGNOSIS FOR SYMPTOMS
Without CONSULT-III
Perform self-diagnosis. Refer to AT-91, "
Diagnosis Procedure without CONSULT-III".
Is any malfunction detected by self-diagnostic results?
YES >> Check the malfunctioning system. Refer to AT-84, "CONSULT-III Function (TRANSMISSION)",
AT-91, "
Diagnosis Procedure without CONSULT-III".
NO >> GO TO 2.
2.CHECK A/T FLUID LEVEL
Check A/T fluid level. Refer to AT- 11 , "
Checking A/T Fluid".
OK or NG
OK >> GO TO 3.
NG >> Refill ATF.
3.CHECK A/T POSITION
Check the A/T position. Refer to AT-207, "
Checking of A/T Position".
OK or NG
OK >> GO TO 4.
NG >> Adjust A/T position. Refer to AT-207, "
Adjustment of A/T
Position".
4.CHECK MANUAL MODE SWITCH
Check the manual mode switch. Refer to AT-155
.
OK or NG
OK >> GO TO 5.
NG >> Repair or replace damaged parts.
5.CHECK A/T FLUID CONDITION
1. Remove oil pan. Refer to AT-215, "
Control Valve with TCM and A/T Fluid Temperature Sensor 2".
2. Check A/T fluid condition. Refer to AT-49, "
Inspections Before
Trouble Diagnosis".
OK or NG
OK >> GO TO 6.
NG >> GO TO 9.
6.DETECT MALFUNCTIONING ITEM
Check the malfunction items. If any items are damaged, repair or replace damaged parts. Refer to AT-59,
"Symptom Chart" (Symptom No.48).
OK or NG
OK >> GO TO 7.
SAT638A
SCIA2119E
SCIA5199E
3AA93ABC3ACD3AC03ACA3AC03AC63AC53A913A773A893A873A873A8E3A773A983AC73AC93AC03AC3
3A893A873A873A8F3A773A9D3AAF3A8A3A8C3A863A9D3AAF3A8B3A8C
Page 272 of 3924

TROUBLE DIAGNOSIS FOR SYMPTOMSAT-199
< SERVICE INFORMATION >
DE
F
G H
I
J
K L
M A
B
AT
N
O P
NG >> Repair or replace damaged parts.
7.CHECK SYMPTOM
Check again. Refer to AT-53, "
Road Test".
OK or NG
OK >> INSPECTION END
NG >> GO TO 8.
8.CHECK TCM
1. Check TCM input/output signals. Refer to AT-83, "
TCM Input/Output Signal Reference Value".
2. If NG, recheck A/T assembly harness connector terminals for damage or loose connection with harness
connector.
OK or NG
OK >> INSPECTION END
NG >> Repair or replace damaged parts.
9.DETECT MALFUNCTIONING ITEM
Check the malfunction items. If any items are dam aged, repair or replace damaged parts. Refer to AT-59,
"Symptom Chart" (Symptom No.48).
OK or NG
OK >> GO TO 7.
NG >> Repair or replace damaged parts.
A/T Does Not Shift: 3rd Gear → 2nd GearINFOID:0000000001327380
SYMPTOM:
When shifted from M3 to M2 position in manual mode, does not downshift from 3rd to 2nd gear.
DIAGNOSTIC PROCEDURE
1.CHECK SELF-DIAGNOSTIC RESULTS
With CONSULT-III
Perform self-diagnosis.
Without CONSULT-III
Perform self-diagnosis. Refer to AT-91, "
Diagnosis Procedure without CONSULT-III".
Is any malfunction detected by self-diagnostic results?
YES >> Check the malfuncti oning system. Refer to AT-84, "CONSULT-III Function (TRANSMISSION)",
AT-91, "
Diagnosis Procedure without CONSULT-III".
NO >> GO TO 2.
2.CHECK A/T FLUID LEVEL
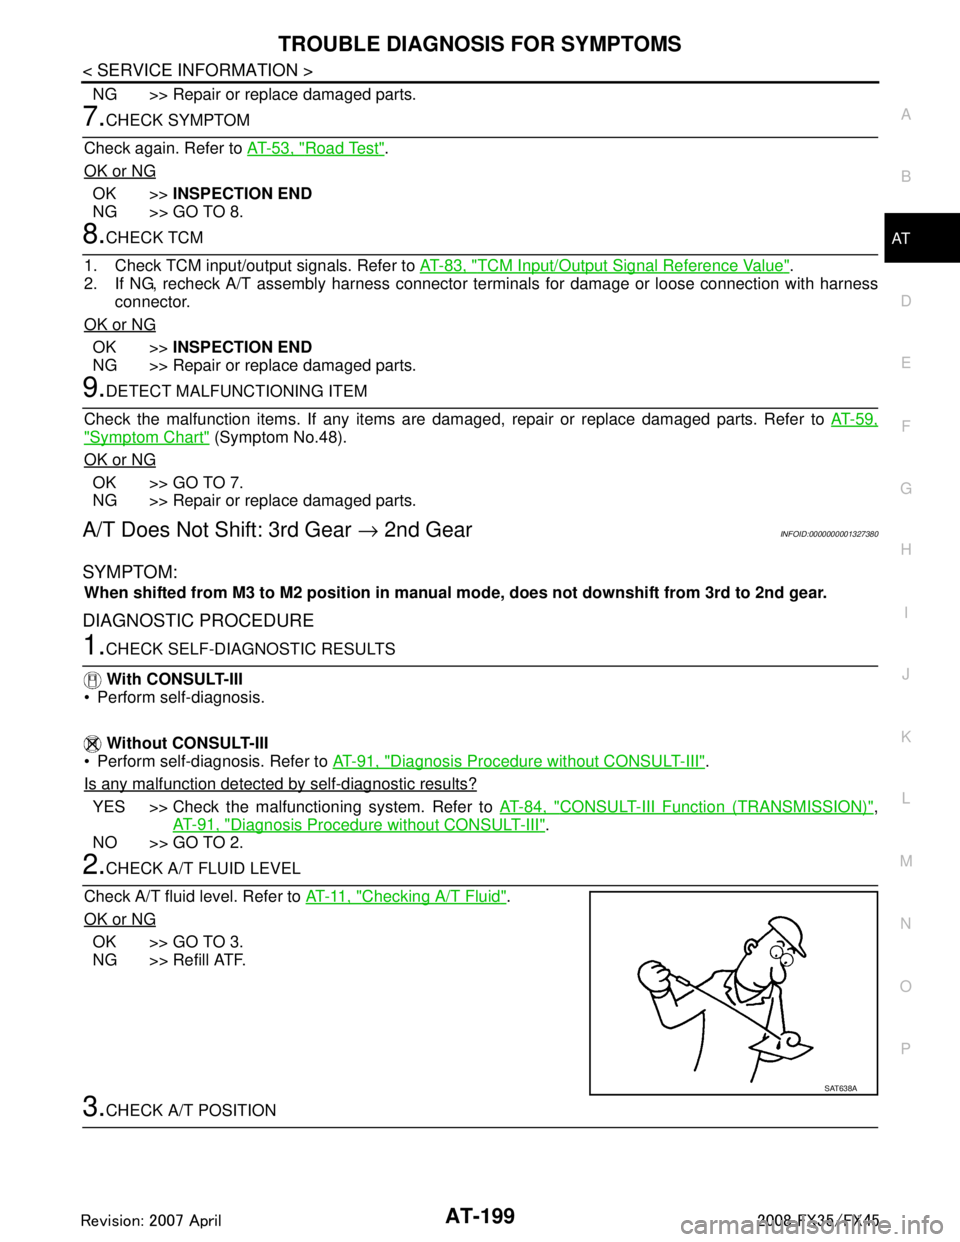
Check A/T fluid level. Refer to AT- 11 , "
Checking A/T Fluid".
OK or NG
OK >> GO TO 3.
NG >> Refill ATF.
3.CHECK A/T POSITION
SAT638A
3AA93ABC3ACD3AC03ACA3AC03AC63AC53A913A773A893A873A873A8E3A773A983AC73AC93AC03AC3
3A893A873A873A8F3A773A9D3AAF3A8A3A8C3A863A9D3AAF3A8B3A8C
Page 274 of 3924

TROUBLE DIAGNOSIS FOR SYMPTOMSAT-201
< SERVICE INFORMATION >
DE
F
G H
I
J
K L
M A
B
AT
N
O P
NG >> Repair or replace damaged parts.
A/T Does Not Shift: 2nd Gear → 1st GearINFOID:0000000001327381
SYMPTOM:
When shifted from M2 to M1 position in manual mode, does not downshift from 2nd to 1st gear.
DIAGNOSTIC PROCEDURE
1.CHECK SELF-DIAGNOSTIC RESULTS
With CONSULT-III
Perform self-diagnosis.
Without CONSULT-III
Perform self-diagnosis. Refer to AT-91, "
Diagnosis Procedure without CONSULT-III".
Is any malfunction detected by self-diagnostic results?
YES >> Check the malfuncti oning system. Refer to AT-84, "CONSULT-III Function (TRANSMISSION)",
AT-91, "
Diagnosis Procedure without CONSULT-III".
NO >> GO TO 2.
2.CHECK A/T FLUID LEVEL
Check A/T fluid level. Refer to AT- 11 , "
Checking A/T Fluid".
OK or NG
OK >> GO TO 3.
NG >> Refill ATF.
3.CHECK A/T POSITION
Check the A/T position. Refer to AT-207, "
Checking of A/T Position".
OK or NG
OK >> GO TO 4.
NG >> Adjust A/T position. Refer to AT-207, "
Adjustment of A/T
Position".
4.CHECK MANUAL MODE SWITCH
Check the manual mode switch. Refer to AT-155
.
OK or NG
OK >> GO TO 5.
NG >> Repair or replace damaged parts.
5.CHECK A/T FLUID CONDITION
1. Remove oil pan. Refer to AT-215, "
Control Valve with TCM and A/T Fluid Temperature Sensor 2".
SAT638A
SCIA2119E
3AA93ABC3ACD3AC03ACA3AC03AC63AC53A913A773A893A873A873A8E3A773A983AC73AC93AC03AC3
3A893A873A873A8F3A773A9D3AAF3A8A3A8C3A863A9D3AAF3A8B3A8C
Page 275 of 3924

AT-202
< SERVICE INFORMATION >
TROUBLE DIAGNOSIS FOR SYMPTOMS
2. Check A/T fluid condition. Refer to AT-49, "Inspections Before
Trouble Diagnosis".
OK or NG
OK >> GO TO 6.
NG >> GO TO 9.
6.DETECT MALFUNCTIONING ITEM
Check the malfunction items. If any items are damaged, repair or replace damaged parts. Refer to AT-59,
"Symptom Chart" (Symptom No.50).
OK or NG
OK >> GO TO 7.
NG >> Repair or replace damaged parts.
7.CHECK SYMPTOM
Check again. Refer to AT-53, "
Road Test".
OK or NG
OK >> INSPECTION END
NG >> GO TO 8.
8.CHECK TCM
1. Check TCM input/output signals. Refer to AT-83, "
TCM Input/Output Signal Reference Value".
2. If NG, recheck A/T assembly harness connector terminals for damage or loose connection with harness
connector.
OK or NG
OK >> INSPECTION END
NG >> Repair or replace damaged parts.
9.DETECT MALFUNCTIONING ITEM
Check the malfunction items. If any items are damaged, repair or replace damaged parts. Refer to AT-59,
"Symptom Chart" (Symptom No.50).
OK or NG
OK >> GO TO 7.
NG >> Repair or replace damaged parts.
Vehicle Does Not Decele rate by Engine BrakeINFOID:0000000001327382
SYMPTOM:
No engine brake is applied when the gear is shifted from the 2nd to 1st gear.
DIAGNOSTIC PROCEDURE
1.CHECK SELF-DIAGNOSTIC RESULTS
With CONSULT-III
Perform self-diagnosis.
Without CONSULT-III
Perform self-diagnosis. Refer to AT-91, "
Diagnosis Procedure without CONSULT-III".
Is any malfunction detected by self-diagnostic results?
YES >> Check the malfunctioning system. Refer to AT-84, "CONSULT-III Function (TRANSMISSION)",
AT-91, "
Diagnosis Procedure without CONSULT-III".
NO >> GO TO 2.
SCIA5199E
3AA93ABC3ACD3AC03ACA3AC03AC63AC53A913A773A893A873A873A8E3A773A983AC73AC93AC03AC3
3A893A873A873A8F3A773A9D3AAF3A8A3A8C3A863A9D3AAF3A8B3A8C
Page 308 of 3924

ON-VEHICLE SERVICEAT-235
< SERVICE INFORMATION >
DE
F
G H
I
J
K L
M A
B
AT
N
O P
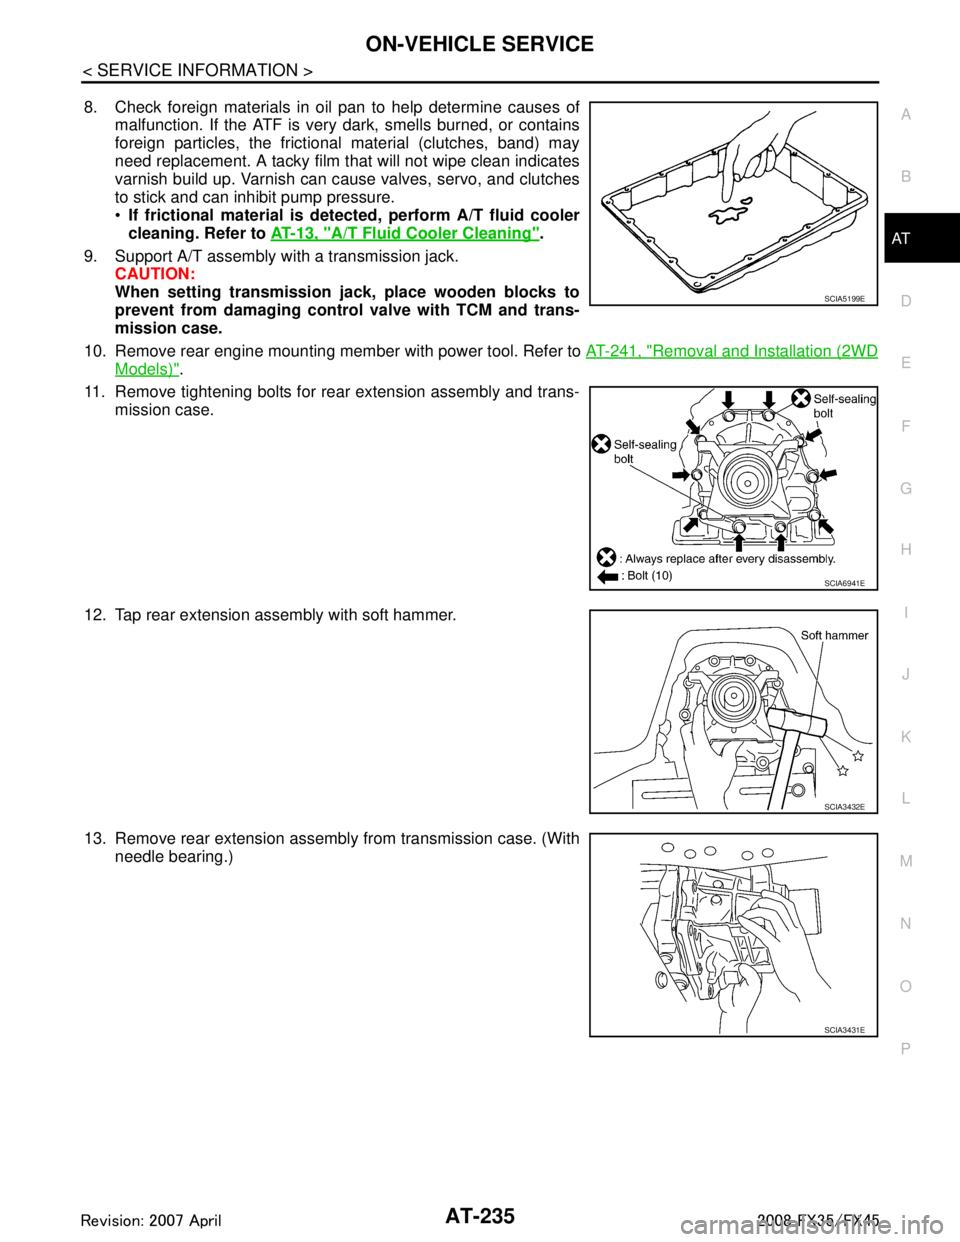
8. Check foreign materials in oil pan to help determine causes of malfunction. If the ATF is very dark, smells burned, or contains
foreign particles, the frictional material (clutches, band) may
need replacement. A tacky film that will not wipe clean indicates
varnish build up. Varnish can c ause valves, servo, and clutches
to stick and can inhibit pump pressure.
If frictional material is detected, perform A/T fluid cooler
cleaning. Refer to AT-13, "
A/T Fluid Cooler Cleaning".
9. Support A/T assembly with a transmission jack. CAUTION:
When setting transmission jack, place wooden blocks to
prevent from damaging control valve with TCM and trans-
mission case.
10. Remove rear engine mounting member with power tool. Refer to AT-241, "
Removal and Installation (2WD
Models)".
11. Remove tightening bolts for rear extension assembly and trans- mission case.
12. Tap rear extension assembly with soft hammer.
13. Remove rear extension assembly from transmission case. (With needle bearing.)
SCIA5199E
SCIA6941E
SCIA3432E
SCIA3431E
3AA93ABC3ACD3AC03ACA3AC03AC63AC53A913A773A893A873A873A8E3A773A983AC73AC93AC03AC3
3A893A873A873A8F3A773A9D3AAF3A8A3A8C3A863A9D3AAF3A8B3A8C
Page 309 of 3924

AT-236
< SERVICE INFORMATION >
ON-VEHICLE SERVICE
14. Disconnect revolution sensor connector.CAUTION:
Be careful not to damage connector
15. Straighten terminal clip to free revolution sensor harness.
16. Remove revolution sensor from transmission case. CAUTION:
Do not subject it to impact by dropping or hitting it.
Do not disassemble.
Do not allow metal filings, etc. to get on the sensor's front
edge magnetic area.
Do not place in an area affected by magnetism.
INSTALLATION
CAUTION:
After completing installation, check A/T position , A/T fluid leakage and A/F fluid level. Refer to AT-207,
"Checking of A/T Position", AT- 11 , "Checking A/T Fluid".
1. Install revolution sensor in transmission case, and then tighten revolution sensor mounting bolt to the specified torque. Refer to
"COMPONENTS".
CAUTION:
Do not subject it to impact by dropping or hitting it.
Do not disassemble.
Do not allow metal filings, etc. to get on the sensor's front
edge magnetic area.
Do not place in an area affected by magnetism.
SCIA7524E
SCIA7525E
SCIA3997E
SCIA3997E
3AA93ABC3ACD3AC03ACA3AC03AC63AC53A913A773A893A873A873A8E3A773A983AC73AC93AC03AC3
3A893A873A873A8F3A773A9D3AAF3A8A3A8C3A863A9D3AAF3A8B3A8C
Page 315 of 3924

AT-242
< SERVICE INFORMATION >
TRANSMISSION ASSEMBLY
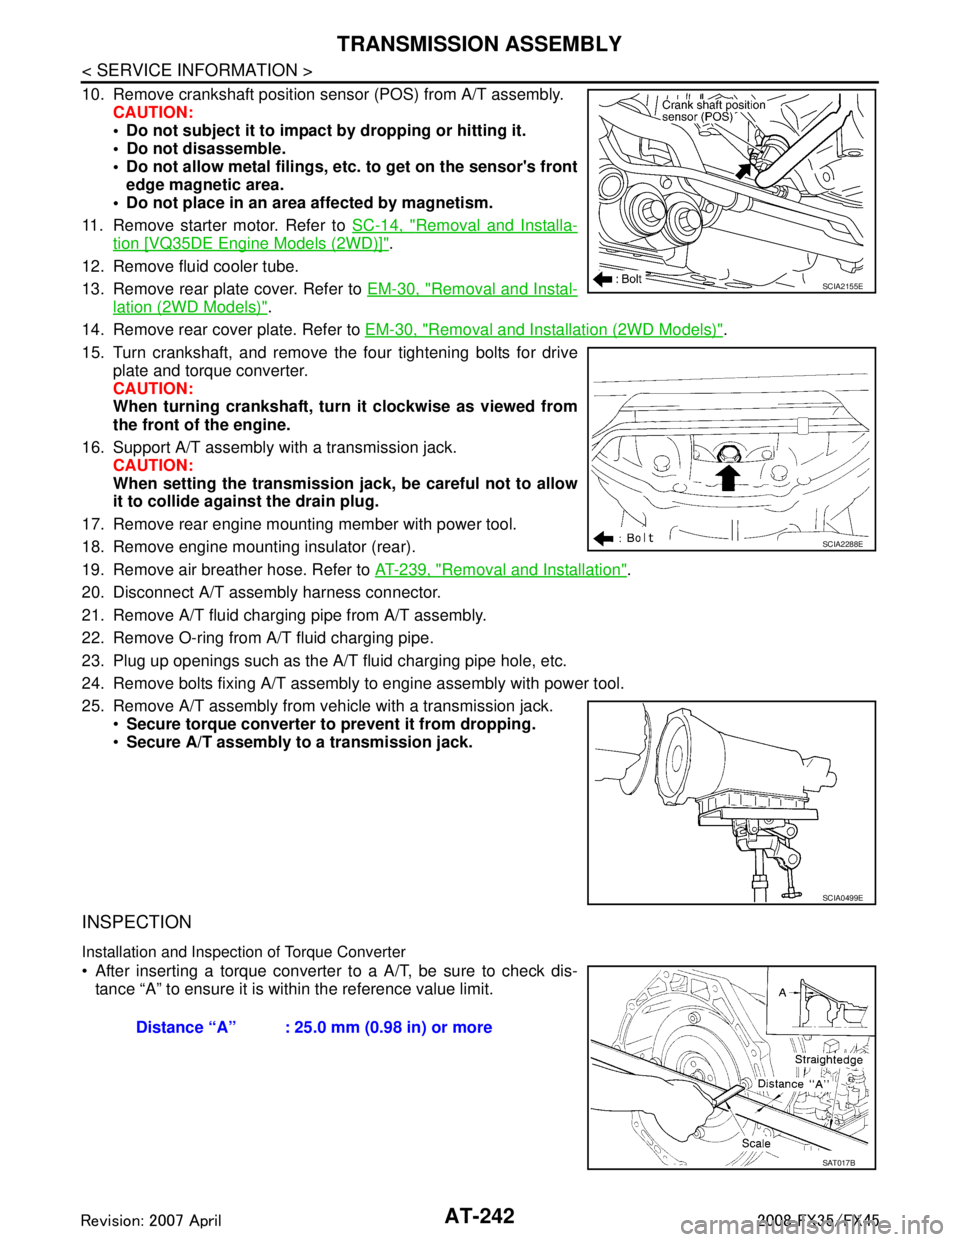
10. Remove crankshaft position sensor (POS) from A/T assembly.CAUTION:
Do not subject it to impact by dropping or hitting it.
Do not disassemble.
Do not allow metal filings, etc. to get on the sensor's front
edge magnetic area.
Do not place in an area affected by magnetism.
11. Remove starter motor. Refer to SC-14, "
Removal and Installa-
tion [VQ35DE Engine Models (2WD)]".
12. Remove fluid cooler tube.
13. Remove rear plate cover. Refer to EM-30, "
Removal and Instal-
lation (2WD Models)".
14. Remove rear cover plate. Refer to EM-30, "
Removal and Installation (2WD Models)".
15. Turn crankshaft, and remove the four tightening bolts for drive plate and torque converter.
CAUTION:
When turning crankshaft, turn it clockwise as viewed from
the front of the engine.
16. Support A/T assembly with a transmission jack. CAUTION:
When setting the transmission j ack, be careful not to allow
it to collide agai nst the drain plug.
17. Remove rear engine mounting member with power tool.
18. Remove engine mounting insulator (rear).
19. Remove air breather hose. Refer to AT-239, "
Removal and Installation".
20. Disconnect A/T assembly harness connector.
21. Remove A/T fluid charging pipe from A/T assembly.
22. Remove O-ring from A/T fluid charging pipe.
23. Plug up openings such as the A/T fluid charging pipe hole, etc.
24. Remove bolts fixing A/T assembly to engine assembly with power tool.
25. Remove A/T assembly from vehicle with a transmission jack. Secure torque converter to prevent it from dropping.
Secure A/T assembly to a transmission jack.
INSPECTION
Installation and Inspection of Torque Converter
After inserting a torque converter to a A/T, be sure to check dis-
tance “A” to ensure it is within the reference value limit.
SCIA2155E
SCIA2288E
SCIA0499E
Distance “A” : 25.0 mm (0.98 in) or more
SAT017B
3AA93ABC3ACD3AC03ACA3AC03AC63AC53A913A773A893A873A873A8E3A773A983AC73AC93AC03AC3
3A893A873A873A8F3A773A9D3AAF3A8A3A8C3A863A9D3AAF3A8B3A8C
Page 316 of 3924

TRANSMISSION ASSEMBLYAT-243
< SERVICE INFORMATION >
DE
F
G H
I
J
K L
M A
B
AT
N
O P
INSTALLATION
Install the removed parts in the reverse order of the removal, while paying attention to the following work.
When installing A/T assembly to the engine assembly, attach the fixing bolts in accordance with the following standard.
Align the positions of tightening bo lts for drive plate with those of
the torque converter, and temporarily tighten the bolts. Then,
tighten the bolts with the specified torque. Refer to "COMPO-
NENTS".
CAUTION:
Do not reuse O-ring and copper washers.
When turning crankshaft, turn it clockwise as viewed from the
front of the engine.
When tightening the tightening bolts for the torque converter
after fixing the crankshaft pulley bolts, be sure to confirm the
tightening torque of the cr ankshaft pulley mounting bolts.
Refer to EM-65, "
Removal and Installation".
After converter is installed to drive plate, rota te crankshaft several turns and check to be sure that
transmission rotates freely without binding.
Install crankshaft position sensor (POS). Refer to EM-30, "
Removal and Installation (2WD Models)".
After completing installation, check A/T fluid leakage, A/T fluid level, and the A/T positions of A/T. Refer to
AT- 11 , "
Checking A/T Fluid", AT-207, "Checking of A/T Position".
Removal and Installation (AWD Models)INFOID:0000000001327399
COMPONENTS (FOR VQ35DE)
Bolt No. 1234
Number of bolts1522
Bolt length
“”mm (in) 55 (2.17) 65 (2.56) 65 (2.56) 35 (1.38)
Tightening torque
N·m (kg-m, ft-lb) 75
(7.7, 55) 55
(5.6, 41) 47
(4.8, 35)
SCIA3949E
SCIA2288E
3AA93ABC3ACD3AC03ACA3AC03AC63AC53A913A773A893A873A873A8E3A773A983AC73AC93AC03AC3
3A893A873A873A8F3A773A9D3AAF3A8A3A8C3A863A9D3AAF3A8B3A8C