warning INFINITI G CONVERTIBLE 2013 Repair Manual
[x] Cancel search | Manufacturer: INFINITI, Model Year: 2013, Model line: G CONVERTIBLE, Model: INFINITI G CONVERTIBLE 2013Pages: 466
Page 102 of 466

GUID-7DBA5951-7A07-431B-9E38-2EEF2D178DF7
SIC3239
To defog/defrost the rear window glass
and outside mirrors, start the engine and
push the switch
*1on. The indicator light
*2will come on. Push the switch again to
turn the defroster off.
It will automatically turn off in approxi-
mately 15 minutes.
CAUTION
When cleaning the inner side of the rear
window, be careful not to scratch or damage
the rear window defroster.
GUID-B880B927-0D4A-4166-BD8D-A23B5CA4EDFD
XENON HEADLIGHTSGUID-B40150F6-DD79-4915-B6F1-208ABCF3DCF8
WARNING
HIGH VOLTAGE
. When xenon headlights are on, they
produce a high voltage. To prevent an
electric shock, never attempt to modify
or disassemble. Always have your xenon
headlights replaced at an INFINITI retai-
ler.
. Xenon headlights provide considerably
more light than conventional headlights.
If they are not correctly aimed, they
might temporarily blind an oncoming
driver or the driver ahead of you and
cause a serious accident. If headlights
are not aimed correctly, immediately
take your vehicle to an INFINITI retailer
and have the headlights adjusted cor-
rectly.
When the xenon headlight is initially
turned on, its brightness or color varies
slightly. However, the color and brightness
will soon stabilize.
.The life of xenon headlights will be
shortened by frequent on-off operation. It is generally desirable not to turn off
the headlights for short intervals (for
example, when the vehicle stops at a
traffic signal). Even when the daytime
running lights are active (Canada only),
the xenon headlights do not turn on.
This way the life of the xenon head-
lights is not reduced.
. If the xenon headlight bulb is close to
burning out, the brightness will dras-
tically decrease, the light will start
blinking, or the color of the light will
become reddish. If one or more of the
above signs appear, contact an INFINITI
retailer.
Instruments and controls2-33
REAR WINDOW AND OUTSIDE MIRROR
DEFROSTER SWITCH HEADLIGHT AND TURN SIGNAL SWITCH
Page 107 of 466

2-38Instruments and controls
SIC3272
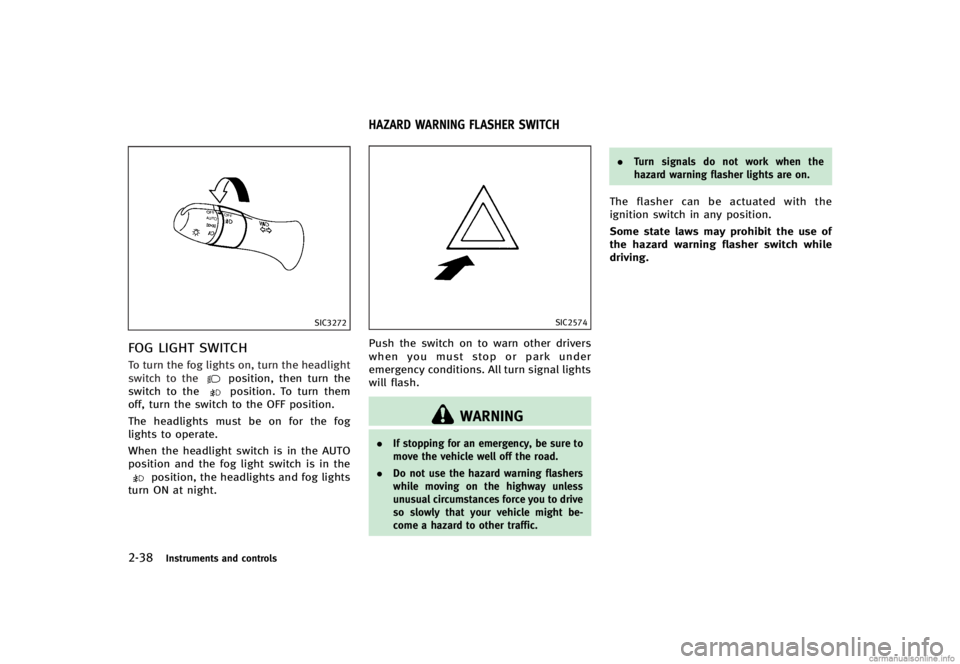
FOG LIGHT SWITCHGUID-68AA7C2A-9996-4CFA-A902-0702C250C7CCTo turn the fog lights on, turn the headlight
switch to theposition, then turn the
switch to theposition. To turn them
off, turn the switch to the OFF position.
The headlights must be on for the fog
lights to operate.
When the headlight switch is in the AUTO
position and the fog light switch is in the
position, the headlights and fog lights
turn ON at night.
GUID-04921CB0-1CCD-4C7F-8AB7-03840CFD9788
SIC2574
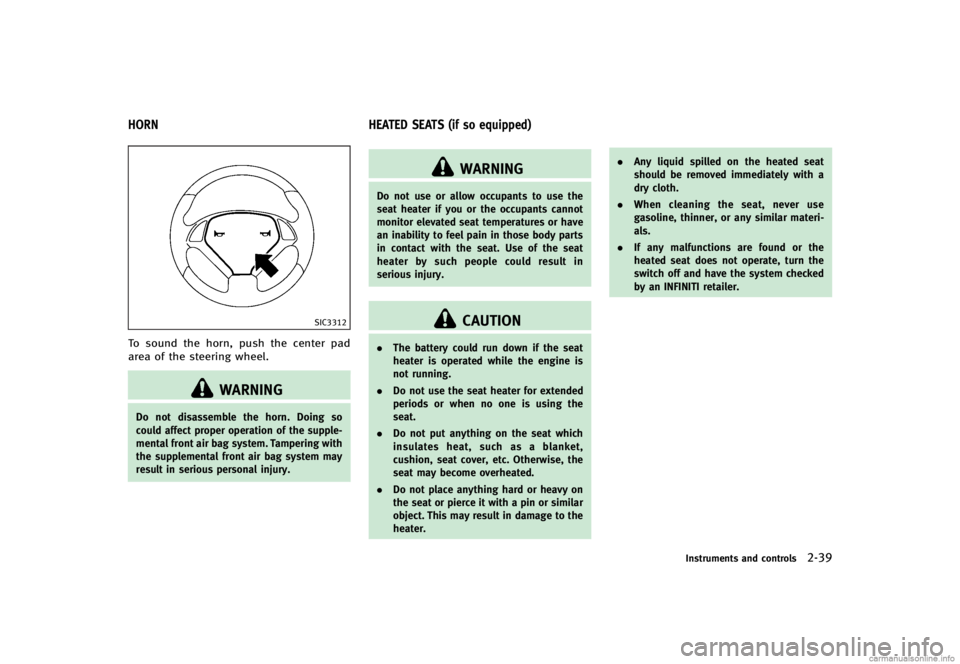
Push the switch on to warn other drivers
when you must stop or park under
emergency conditions. All turn signal lights
will flash.
WARNING
. If stopping for an emergency, be sure to
move the vehicle well off the road.
. Do not use the hazard warning flashers
while moving on the highway unless
unusual circumstances force you to drive
so slowly that your vehicle might be-
come a hazard to other traffic. .
Turn signals do not work when the
hazard warning flasher lights are on.
The flasher can be actuated with the
ignition switch in any position.
Some state laws may prohibit the use of
the hazard warning flasher switch while
driving.
HAZARD WARNING FLASHER SWITCH
Page 108 of 466

GUID-E7A43C51-4F83-42C0-AD74-E095C4A99974
SIC3312
To sound the horn, push the center pad
area of the steering wheel.
WARNING
Do not disassemble the horn. Doing so
could affect proper operation of the supple-
mental front air bag system. Tampering with
the supplemental front air bag system may
result in serious personal injury.
GUID-8B0A3392-90EF-49C4-8FB3-1F12F07F6C36
WARNING
Do not use or allow occupants to use the
seat heater if you or the occupants cannot
monitor elevated seat temperatures or have
an inability to feel pain in those body parts
in contact with the seat. Use of the seat
heater by such people could result in
serious injury.
CAUTION
.The battery could run down if the seat
heater is operated while the engine is
not running.
. Do not use the seat heater for extended
periods or when no one is using the
seat.
. Do not put anything on the seat which
insulates heat, such as a blanket,
cushion, seat cover, etc. Otherwise, the
seat may become overheated.
. Do not place anything hard or heavy on
the seat or pierce it with a pin or similar
object. This may result in damage to the
heater. .
Any liquid spilled on the heated seat
should be removed immediately with a
dry cloth.
. When cleaning the seat, never use
gasoline, thinner, or any similar materi-
als.
. If any malfunctions are found or the
heated seat does not operate, turn the
switch off and have the system checked
by an INFINITI retailer.
Instruments and controls2-39
HORN HEATED SEATS (if so equipped)
Page 110 of 466

will illuminate.
3. Adjust the desired amount of the air using the control knob
*A.
4. When the vehicle’s interior is warmed or cooled, and/or before you leave the
vehicle, be sure to turn the control
knob to the OFF position (center). The
indicator light
*Bon the control knob
goes off at the OFF position.
To check the air filter for the climate
controlled seat, contact an INFINITI
retailer.
WARNING
Do not use or allow occupants to use the
climate controlled seats if you or the
occupants cannot monitor seat tempera-
tures or have an inability to feel pain in
those body parts in contact with the seat.
Use of the climate controlled seats by such
people could result in serious injury.
CAUTION
. Do not place objects in front of the
intake inlet located behind the front seat. Doing so could cause improper
operation or interruption of the opera-
tion.
. The battery could run down if the climate
controlled seat is operated while the
engine is not running.
. Do not use the climate controlled seat
for extended periods or when no one is
using the seat.
. Do not put anything on the seat which
insulates heat, such as a blanket,
cushion, seat cover, etc. Otherwise, the
seat may become overheated.
. Do not place anything hard or heavy on
the seat or pierce it with a pin or similar
object. This may result in damage to the
climate controlled seat.
. Any liquid spilled on the seat should be
removed immediately with a dry cloth.
. The climate controlled seat has air
filters. Do not operate the climate con-
trolled seat without the air filters. This
may result in damage to the system.
. When cleaning the seat, never use
gasoline, thinner, or any similar materi-
als. .
If any malfunctions are found or the
climate controlled seat does not operate,
turn the switch off and have the system
checked by an INFINITI retailer.
Instruments and controls2-41
Page 115 of 466

2-46Instruments and controls
SIC4173
Manual transmission models—Console
box
To open the console boxes, push the knob
*Aand pull up the lid.
To close, push the lid down until the lock
latches.
SIC4041
Soft bottle holderGUID-B31EE3BB-5590-4544-AEF3-94E43091F3E9
CAUTION
. Do not use bottle holder for any other
objects that could be thrown about in
the vehicle and possibly injure people
during sudden braking or an accident.
. Do not use bottle holder for open liquid
containers.
SIC3469
GLOVE BOXGUID-E453FEBC-BD31-4A48-B189-0D51A9EA10D1
WARNING
Keep glove box lid closed while driving to
help prevent injury in an accident or a
sudden stop.
To open the glove box, pull the handle*1.
To close, push the lid in until the lock
latches.
To lock
*2/unlock*3the glove box, use
the mechanical key. For the mechanical key
usage, see “Keys”(P.3-3).
Page 117 of 466

2-48Instruments and controls
Removing the console lid (Manual
transmission model)
GUID-A53D915F-F446-4F96-8D50-C6839EA91870To remove the console lid:
1. Remove the hinge mask
*Ausing a
screwdriver wrapped with a cloth.
2. Loosen four screws, and remove the lid.
3. Tighten the two outside screws
*B.
4. Install the removed hinge mask
*Ato
the original position.
SIC4308
STORAGE BOX (if so equipped)GUID-2E751CDA-6485-4B18-B1B1-472F9441C982To open, push the storage box lid*1as
illustrated.
Do not use the storage box as an ashtray.
GUID-EBB66581-7986-4619-9A20-CC742608F014
POWER WINDOWSGUID-54BA5557-B313-41DB-90B2-0F6E374F28AA
WARNING
. Make sure that all passengers have their
hands, etc. inside the vehicle while it is
in motion and before closing the win-
dows. Use the window lock switch to
prevent unexpected use of the power
windows.
. Do not leave children unattended inside
the vehicle. They could unknowingly
activate switches or controls and be-
come trapped in the window. Unat-
tended children could become involved
in serious accidents.
The power windows operate when the
ignition switch is in the ON position or for
about 45 seconds after the ignition switch
is pushed to the OFF position. If the
driver’s or front passenger’s door is
opened during this period of about 45
seconds, power to the windows is can-
celed.
WINDOWS
Page 119 of 466

2-50Instruments and controls
SIC3289
Automatic operation (for front door
windows)
GUID-7673A5D8-462F-4988-A8F4-4875A54F367FTo fully open or close the window, com-
pletely push down or pull up the switch
and release it; it need not be held. The
window will automatically open or close all
the way. To stop the window, just push or
lift the switch in the opposite direction.
A light push or pull on the switch will cause
the window to open or close until the
switch is released.
The rear window automatic operation is for
the opening function only.
Simultaneous operation of all four
windows
GUID-FA6C7C9F-AD5D-41C5-900C-30DEC8C4A209
WARNING
Make sure that all passengers have their
hands, etc. inside the vehicle before closing
the windows.
When the driver’s and passenger’s door
window switches are pushed down or
pulled up simultaneously, all four windows
are opened or closed.
Auto reverse functionGUID-0B4A3267-C122-477F-8069-1C68D02BC904
WARNING
There are some small distances immediately
before the closed position which cannot be
detected. Make sure that all passengers
have their hands, etc., inside the vehicle
before closing the window.
If the control unit detects something
caught in the window as it is closing, the
window will be immediately lowered.
The auto reverse function can be activatedwhen the window is closed by automatic
operation when the ignition switch is in the
ON position or for 45 seconds after the
ignition switch is pushed to the OFF
position.
Depending on the environment or driving
conditions, the auto reverse function may
be activated if an impact or load similar to
something being caught in the window
occurs.
Automatic adjusting functionGUID-2870CF42-5EEE-4B1A-8161-CB27BD2B51B1
CAUTION
When the battery cable is removed from the
battery terminal, do not close either of the
front doors. The automatic window adjust-
ing function will not work and the side roof
panel may be damaged.
The power window has an automatic
adjusting function. When the door is being
opened, the window is automatically low-
ered slightly to avoid contact between the
window and the side roof panel. When the
door is closed, the window is automatically
raised slightly.
Page 122 of 466

GUID-4484307A-0FCE-4814-A07A-E38E85571698
SIC2064
The light on the vanity mirror will turn on
when the cover on the vanity mirror is
opened.
When the cover is closed, the light will turn
off.
The lights will also turn off after a period
of time when the lights remain illuminated
to prevent the battery from becoming
discharged.
GUID-72061EB4-A8B3-4DFE-9B75-C349404905D6The light illuminates when the trunk lid is
opened. When the trunk lid is closed, the
light will turn off.
The light will also turn off after a period of
time when the light remains illuminated
after the ignition switch has been pushed
to the OFF or LOCK position to prevent the
battery from becoming discharged.GUID-5446BCD8-B2FA-4E23-A9C5-EE0CC97655DFThe HomeLink®Universal Transceiver pro-
vides a convenient way to consolidate the
functions of up to three individual hand-
held transmitters into one built-in device.
HomeLink
®Universal Transceiver:
. Will operate most Radio Frequency (RF)
devices such as garage doors, gates,
home and office lighting, entry door
locks and security systems.
. Is powered by your vehicle’s battery. No
separate batteries are required. If the
vehicle’s battery is discharged or is
disconnected, HomeLink
®will retain all
programming.
When the HomeLink
®Universal Transcei-
ver is programmed, retain the original
transmitter for future programming proce-
dures (Example: new vehicle purchases).
Upon sale of the vehicle, the programmed
HomeLink
®Universal Transceiver buttons
should be erased for security purposes.
For additional information, refer to “Pro-
gramming HomeLink
®” (P.2-54).
WARNING
. Do not use the HomeLink®Universal
Transceiver with any garage door opener
that lacks safety stop and reverse
Instruments and controls2-53
VANITY MIRROR LIGHTS TRUNK LIGHT HomeLink®UNIVERSAL TRANSCEIVER (if so
equipped)
Page 128 of 466

3 Pre-driving checks and adjustments
Keys...
.................................................................... 3-3
Intelligent Key ...
................................................. 3-3
Valet hand-off ...
.................................................. 3-4
Doors ...
.................................................................. 3-5
Locking with mechanical key ...
........................... 3-5
Opening and closing windows with the
mechanical key ...
................................................ 3-5
Locking with inside lock knob ...
......................... 3-6
Locking with power door lock switch ...
............... 3-6
Automatic door locks ...
....................................... 3-6
Intelligent Key system ...
......................................... 3-7
Intelligent Key operating range ...
........................ 3-9
Door locks/unlocks precaution ...
........................ 3-9
Intelligent Key operation ...
............................... 3-10
Battery saver system ...
..................................... 3-12
Warning signals ...
............................................. 3-12
Troubleshooting guide ...
................................... 3-13
Remote keyless entry system ...
............................. 3-14
How to use remote keyless entry system ...
....... 3-14
Hood ...
................................................................. 3-17
Retractable hard top ...
.......................................... 3-18
Before operating the retractable hard top ...
...... 3-18
When operating the retractable hard top ...
....... 3-20
Indicators for the retractable hard top ...
........... 3-22
Opening the retractable hard top ...
.................. 3-23 Closing the retractable hard top
...
.................. 3-24
If the retractable hard top does not open or
close electrically ...
.......................................... 3-24
Operating the retractable hard top using the
intelligent key (if so equipped) ...
.................... 3-25
Initializing of the retractable hard top ...
.......... 3-25
Troubleshooting guide ...
................................. 3-26
Trunk lid ...
........................................................... 3-28
Trunk lid release switch ...
............................... 3-28
Trunk open request switch ...
........................... 3-28
Auto closure ...
................................................ 3-29
Trunk release power cancel switch ...
............... 3-29
Interior trunk lid release ...
.............................. 3-30
Unique rear parts (INFINITI Performance
Line model) ...
....................................................... 3-30
Fuel-filler door ...
................................................... 3-31
Opening the fuel-filler door ...
.......................... 3-31
Fuel-filler cap ...
............................................... 3-32
Tilt/telescopic steering ...
...................................... 3-34
Manual operation (if so equipped) ...
............... 3-34
Electric operation (if so equipped) ...
............... 3-34
Sun visors ...
......................................................... 3-35
Mirrors ...
.............................................................. 3-35
Inside mirror ...
................................................ 3-35
Outside mirrors ...
............................................ 3-36
Page 132 of 466

GUID-D1700013-773E-4812-BA0D-7B828402E838
WARNING
.Always have the doors locked while
driving. Along with the use of seat belts,
this provides greater safety in the event
of an accident by helping to prevent
persons from being thrown from the
vehicle. This also helps keep children
and others from unintentionally opening
the doors, and will help keep out
intruders.
. Before opening any door, always look for
and avoid oncoming traffic.
. Do not leave children unattended inside
the vehicle. They could unknowingly
activate switches or controls. Unat-
tended children could become involved
in serious accidents.
SPA2626
LOCKING WITH MECHANICAL KEYGUID-0664C43A-E4B3-44F4-8486-FA160F98A5F6The power door lock system allows you to
lock or unlock all doors simultaneously
using the mechanical key.
.Turning the driver’s door key cylinder to
the rear of the vehicle
*1will lock all
doors.
. Turning the driver’s door key cylinder
once to the front of the vehicle
*2will
unlock the driver’s door. After returning
the key to the neutral position
*3,
turning it to the front again within 5
seconds will unlock all doors. .
You can switch the lock system to the
mode that allows you to open all the
doors when the key is turned once.
(See “How to use SETTING button” (P.4-
13).)
OPENING AND CLOSING WINDOWS
WITH THE MECHANICAL KEY
GUID-611D6011-59D5-49AF-8BBF-7973BCE9D47FThe driver’s door key operation also allows
you to open and close the window that is
equipped with the automatic open/close
function. (See “Power windows” (P.2-48).)
To open the window, turn the driver’s door
key cylinder to the rear of the vehicle for
longer than 1 second. The door is unlocked
and the window keeps opening while
turning the key.
This function can also be performed by
pushing and holding the UNLOCK button
on the Intelligent Key. (See “Remote key-
less entry system” (P.3-14).)
To close the windows, turn the driver’s
door key cylinder to the front of the vehicle
for longer than 1 second. The door is
locked and the window keeps closing while
turning the key.
Pre-driving checks and adjustments3-5
DOORS