warning INFINITI Q50 2014 Infiniti Intouch
[x] Cancel search | Manufacturer: INFINITI, Model Year: 2014, Model line: Q50, Model: INFINITI Q50 2014Pages: 274, PDF Size: 1.43 MB
Page 66 of 274
iPod PLAYER
Connecting iPod
WARNING!
Do not connect, disconnect or operate the
USB device while driving. Doing so can be a
distraction. If distracted you could lose
control of your vehicle and cause an accident
or serious injury.
CAUTION!
.Do not force the USB device into the USB
port. Inserting the USB device tilted or
up-side-down into the port may damage
the port. Make sure that the USB device
is connected correctly into the USB port.
. Do not grab the USB port cover (if
equipped) when pulling the USB device
out of the port. This could damage the
port and the cover.
. Do not leave the USB cable in a place
where it can be pulled unintentionally.
Pulling the cable may damage the port.
Refer to your device manufacture’s owner information regarding the proper use and
care of the device.
Two USB connectors are located in the
center console box.
“Media Hub”
(page 2-6)
The battery of the iPod will be charged
while the device is connected to the vehicle
if the iPod supports charging via a USB
connection.
Depending on the model and firmware
version of the iPod, the display on the iPod
shows an INFINITI or Accessory Attached
screen when the connection is completed.
When the iPod is connected to the vehicle,
the iPod music library can only be operated
by the vehicle audio controls.
Compatibility:
Made for . iPod touch (5th generation)
. iPod touch (4th generation)
. iPod touch (3rd generation)
. iPod touch (2nd generation)
. iPod touch (1st generation) .
iPod touch
. iPod with video
. iPod classic
. iPod nano (7th generation)
. iPod nano (6th generation)
. iPod nano (5th generation)
. iPod nano (4th generation)
. iPod nano (3rd generation)
. iPod nano (2nd generation)
. iPod nano (1st generation)
. iPhone 5
. iPhone 4S
. iPhone 4
. iPhone 3GS
. iPhone 3G
. iPhone
. iPad mini
INFO:
.
Make sure that the iPod firmware is
updated.
4. Audio system
4-23
Page 69 of 274
![INFINITI Q50 2014 Infiniti Intouch 4. Audio system
4-26
Changing play mode:
Touch [Shuffle] or [Repeat] from the iPod
menu to select the play mode.
Skipping songs:
Push<SEEK·CAT·TRACK> or tilt up/down
<
/OK> briefly to skip to the ne INFINITI Q50 2014 Infiniti Intouch 4. Audio system
4-26
Changing play mode:
Touch [Shuffle] or [Repeat] from the iPod
menu to select the play mode.
Skipping songs:
Push<SEEK·CAT·TRACK> or tilt up/down
<
/OK> briefly to skip to the ne](/img/42/34966/w960_34966-68.png)
4. Audio system
4-26
Changing play mode:
Touch [Shuffle] or [Repeat] from the iPod
menu to select the play mode.
Skipping songs:
Push
<
/OK> briefly to skip to the next or the
previous song.
INFO:
.
Even when iPods or iPhones are inserted
into both of the two USB connectors, the
system recognizes only one of the con-
nected iPods or iPhones at a time.
.Only one the two connected USB devices
can be operated by the voice recognition
system.
BLUETOOTH®STREAMING AUDIO
Your vehicle is equipped with Bluetooth®
Streaming Audio.
If you have a compatible Bluetooth®device
with streaming audio (A2DP profile), you
can set up a wireless connection between
your Bluetooth
®device and the in-vehicle
audio system. This connection allows you
to listen to the audio from the Bluetooth
®
device using your vehicle speakers. It also may allow basic control of the device for
playing and skipping audio files using the
AVRCP Bluetooth
®profile. Not all Blue-
tooth®devices have the same level of
controls for AVRCP. Please consult the
manual for your Bluetooth
®device for
more details.
Wireless LAN (Wi-Fi) and the Bluetooth
®
functions share the same frequency band
(2.4 GHz). Using the Bluetooth®and the
wireless LAN functions at the same time
may slow down or disconnect the commu-
nication and cause undesired noise. It is
recommended that you turn off the wire-
less LAN (Wi-Fi) when using the Bluetooth
®
functions.
Regulatory information
FCC Regulatory information:
FCC ID: HYQDNNS085
NOTE
This device compiles with part 15 of the
FCC Rules. Operation is subject to the
following two conditions: (1) This device
may not cause harmful interference, and
(2) this device must accept any interference
received, including interference that may
cause undesired operation. FCC WARNING
Changes or modifications not expressly
approved by the party responsible for
compliance could void the user’s authority
to operate the equipment.
CAUTION:
Radio Frequency Radiation Ex-
posure
This equipment complies with FCC radia-
tion exposure limits set forth for uncon-
trolled environment and meets the FCC
radio frequency (RF) Exposure Guidelines
in Supplement C to OET65. This equipment
has very low levels of RF energy that it
deemed to comply without maximum
permissive exposure evaluation (MPE).
But it is desirable that it should be
installed and operated with at least 20
cm and more between the radiator and
person’ s body (excluding extremities:
hands, wrists, feet and ankles).
Co-location: This transmitter must not be
co-located or operated in conjunction with
any other antenna or transmitter.
IC Regulatory information:
The antenna cannot be removed (and
changed) by user.
This device complies with Industry Canada
Page 81 of 274
5. Hands-Free Phone
5-2
BLUETOOTH®HANDS-FREE PHONE SYS-
TEM
WARNING!
. Use a phone after stopping your vehicle
in a safe location. If you have to use a
phone while driving, exercise extreme
caution at all times so full attention may
be given to vehicle operation.
. If you find yourself unable to devote full
attention to vehicle operation while
talking on the phone, pull off the road
to a safe location and stop your vehicle
before doing so.
CAUTION!
To avoid draining the vehicle battery, use a
phone after starting the engine or the hybrid
system.
Your vehicle is equipped with Bluetooth®
Hands-Free Phone System. If you are an
owner of a compatible Bluetooth®enabled
cellular phone, you can set up the wireless
connection between your cellular phone
and the in-vehicle phone module. With Bluetooth
®wireless technology, you can
make or receive a telephone call with your
cellular phone in your pocket.
Once a cellular phone is connected to the
in-vehicle phone module, the procedure for
connecting the phone does not need to be
performed again. Your phone is automati-
cally selected with the in-vehicle phone
module when the ignition switch is pushed
to the “ON”position with the selected
cellular phone turned on and carried in the
vehicle.
You can register up to 5 different Blue-
tooth
®cellular phones in the in-vehicle
phone module. However, you can talk on
only one cellular phone at a time.
The Voice Recognition system supports
phone commands, so dialing a phone
number using your voice is possible.
“10. Voice recognition”
Before using the Bluetooth®Hands-Free
Phone System, refer to the following notes.
. Wireless LAN (Wi-Fi) and the Bluetooth
®
functions share the same frequency
band (2.4 GHz). Using the Bluetooth®
and the wireless LAN functions at the
same time may slow down or discon-
nect the communication and cause undesired noise. It is recommended
that you turn off the wireless LAN (Wi-
Fi) when using the Bluetooth
®func-
tions.
. Set up the wireless connection between
a compatible cellular phone and the in-
vehicle phone module before using the
Bluetooth
®Hands-Free Phone System.
. Some Bluetooth
®enabled cellular
phones may not be recognized by the
in-vehicle phone module.
Please visit www.infinitiusa.com/blue-
tooth/search for a recommended
phone list.
. You will not be able to use a hands-free
phone under the following conditions:
—
Your vehicle is outside of the telephone
service area.
—Your vehicle is in an area where it isdifficult to receive radio waves; such as
in a tunnel, in an underground parking
garage, behind a tall building or in a
mountainous area.
—Your cellular phone is locked in order toprevent dialing.
Page 85 of 274
5. Hands-Free Phone
5-6
HANDS-FREE TEXT MESSAGING AS-
SISTANT
WARNING!
Use the text messaging feature after parking
your vehicle in a safe location. If you have to
use the feature while driving, exercise
extreme caution at all times so full attention
may be given to vehicle operation.
CAUTION!
This feature is disabled if the connected
device does not support the Message Access
Profile (MAP). See the phone’s Owner’s
Manual for details and instructions.
Laws in some jurisdictions may restrict the
use of “Text-to-Speech.” Check local reg-
ulations before using this feature.
The system allows for the sending and
receiving of text messages through the
vehicle interface.
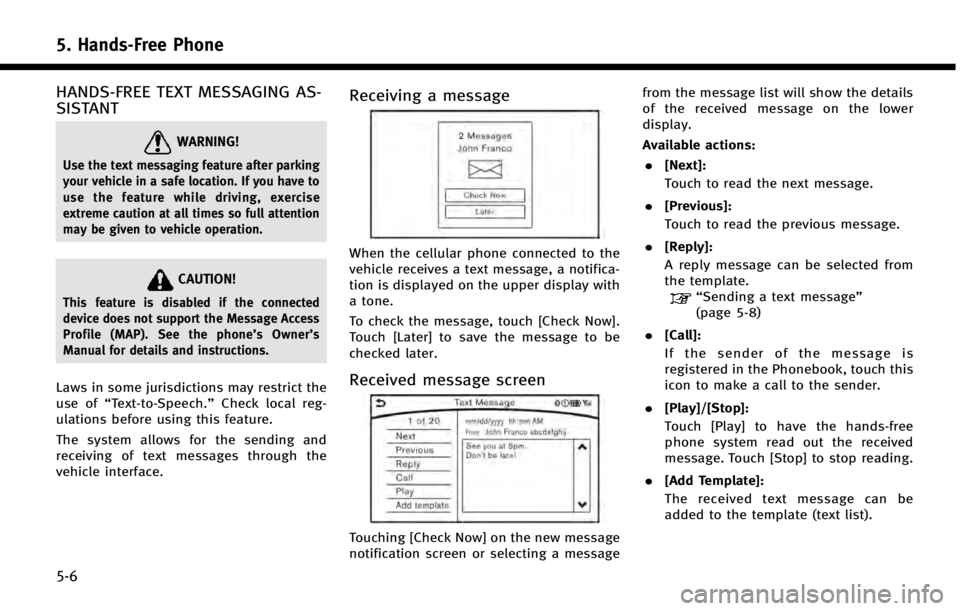
Receiving a message
When the cellular phone connected to the
vehicle receives a text message, a notifica-
tion is displayed on the upper display with
a tone.
To check the message, touch [Check Now].
Touch [Later] to save the message to be
checked later.
Received message screen
Touching [Check Now] on the new message
notification screen or selecting a message from the message list will show the details
of the received message on the lower
display.
Available actions:
. [Next]:
Touch to read the next message.
. [Previous]:
Touch to read the previous message.
. [Reply]:
A reply message can be selected from
the template.
“Sending a text message”
(page 5-8)
. [Call]:
If the sender of the message is
registered in the Phonebook, touch this
icon to make a call to the sender.
. [Play]/[Stop]:
Touch [Play] to have the hands-free
phone system read out the received
message. Touch [Stop] to stop reading.
. [Add Template]:
The received text message can be
added to the template (text list).
Page 99 of 274
6. Infiniti InTouch Apps
6-6
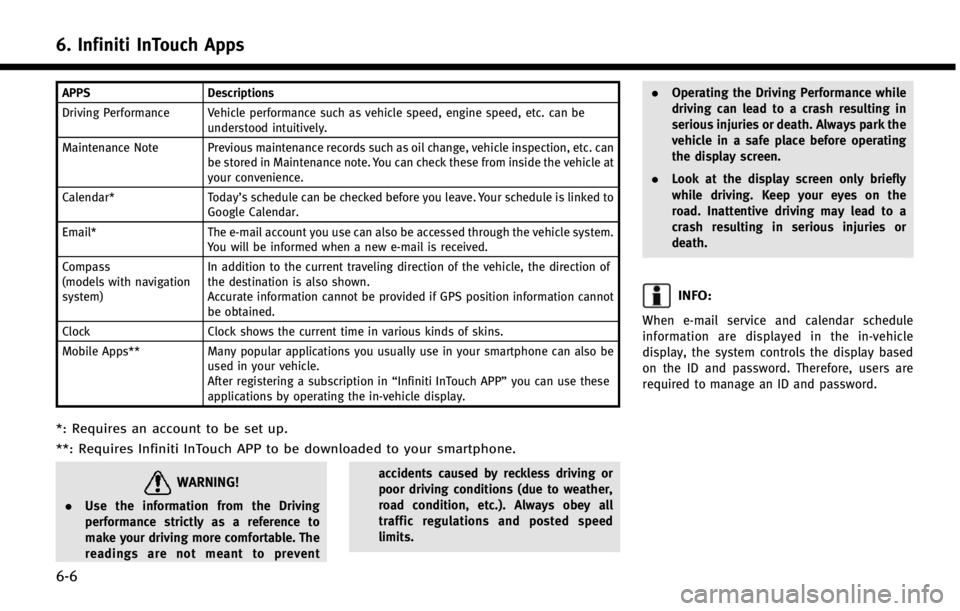
APPSDescriptions
Driving Performance Vehicle performance such as vehicle speed, engine speed, etc. can be understood intuitively.
Maintenance Note Previous maintenance records such as oil change, vehicle inspection, etc. can be stored in Maintenance note. You can check these from inside the vehicle at
your convenience.
Calendar* Today’s schedule can be checked before you leave. Your schedule is linked to
Google Calendar.
Email* The e-mail account you use can also be accessed through the vehicle system.
You will be informed when a new e-mail is received.
Compass
(models with navigation
system) In addition to the current traveling direction of the vehicle, the direction of
the destination is also shown.
Accurate information cannot be provided if GPS position information cannot
be obtained.
Clock Clock shows the current time in various kinds of skins.
Mobile Apps** Many popular applications you usually use in your smartphone can also be
used in your vehicle.
After registering a subscription in “Infiniti InTouch APP”you can use these
applications by operating the in-vehicle display.
*: Requires an account to be set up.
**: Requires Infiniti InTouch APP to be downloaded to your smartphone.
WARNING!
. Use the information from the Driving
performance strictly as a reference to
make your driving more comfortable. The
readings are not meant to prevent accidents caused by reckless driving or
poor driving conditions (due to weather,
road condition, etc.). Always obey all
traffic regulations and posted speed
limits..
Operating the Driving Performance while
driving can lead to a crash resulting in
serious injuries or death. Always park the
vehicle in a safe place before operating
the display screen.
. Look at the display screen only briefly
while driving. Keep your eyes on the
road. Inattentive driving may lead to a
crash resulting in serious injuries or
death.
INFO:
When e-mail service and calendar schedule
information are displayed in the in-vehicle
display, the system controls the display based
on the ID and password. Therefore, users are
required to manage an ID and password.
Page 105 of 274
7. Monitor system
7-2
REARVIEW MONITOR (if so equipped)
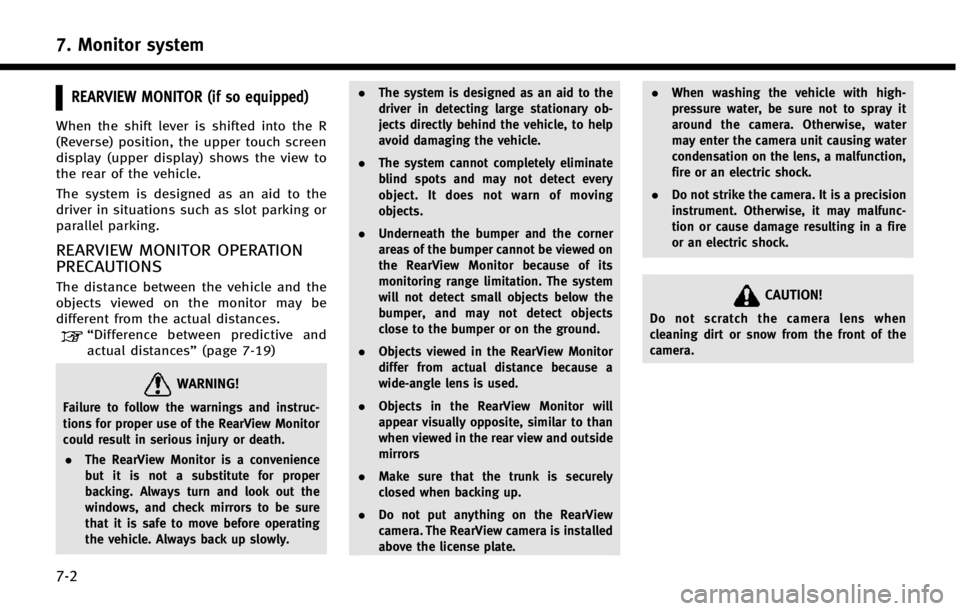
When the shift lever is shifted into the R
(Reverse) position, the upper touch screen
display (upper display) shows the view to
the rear of the vehicle.
The system is designed as an aid to the
driver in situations such as slot parking or
parallel parking.
REARVIEW MONITOR OPERATION
PRECAUTIONS
The distance between the vehicle and the
objects viewed on the monitor may be
different from the actual distances.
“Difference between predictive and
actual distances” (page 7-19)
WARNING!
Failure to follow the warnings and instruc-
tions for proper use of the RearView Monitor
could result in serious injury or death.
. The RearView Monitor is a convenience
but it is not a substitute for proper
backing. Always turn and look out the
windows, and check mirrors to be sure
that it is safe to move before operating
the vehicle. Always back up slowly. .
The system is designed as an aid to the
driver in detecting large stationary ob-
jects directly behind the vehicle, to help
avoid damaging the vehicle.
. The system cannot completely eliminate
blind spots and may not detect every
object. It does not warn of moving
objects.
. Underneath the bumper and the corner
areas of the bumper cannot be viewed on
the RearView Monitor because of its
monitoring range limitation. The system
will not detect small objects below the
bumper, and may not detect objects
close to the bumper or on the ground.
. Objects viewed in the RearView Monitor
differ from actual distance because a
wide-angle lens is used.
. Objects in the RearView Monitor will
appear visually opposite, similar to than
when viewed in the rear view and outside
mirrors
. Make sure that the trunk is securely
closed when backing up.
. Do not put anything on the RearView
camera. The RearView camera is installed
above the license plate. .
When washing the vehicle with high-
pressure water, be sure not to spray it
around the camera. Otherwise, water
may enter the camera unit causing water
condensation on the lens, a malfunction,
fire or an electric shock.
. Do not strike the camera. It is a precision
instrument. Otherwise, it may malfunc-
tion or cause damage resulting in a fire
or an electric shock.
CAUTION!
Do not scratch the camera lens when
cleaning dirt or snow from the front of the
camera.
Page 106 of 274
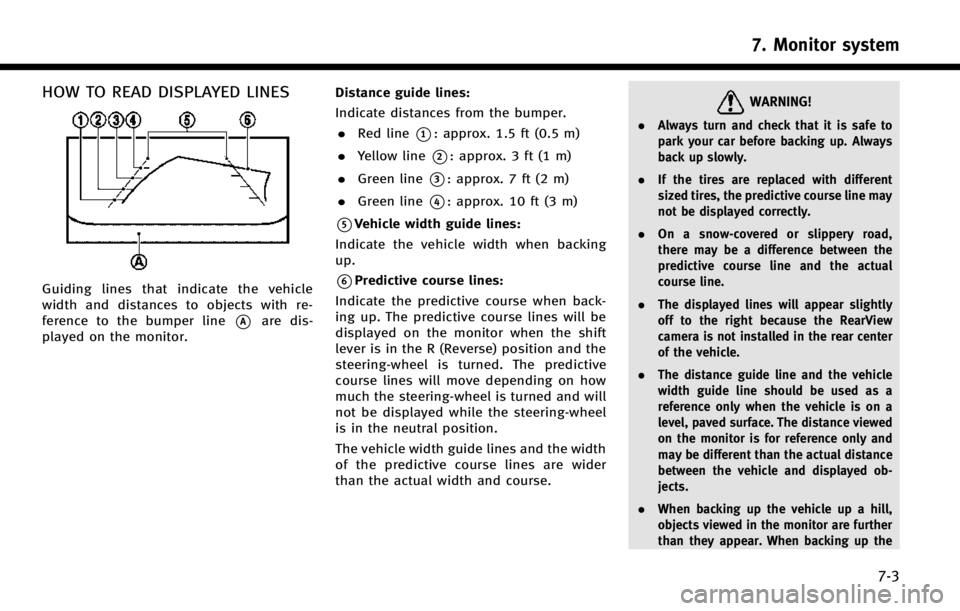
HOW TO READ DISPLAYED LINES
Guiding lines that indicate the vehicle
width and distances to objects with re-
ference to the bumper line
*Aare dis-
played on the monitor. Distance guide lines:
Indicate distances from the bumper.
. Red line
*1: approx. 1.5 ft (0.5 m)
. Yellow line
*2: approx. 3 ft (1 m)
. Green line
*3: approx. 7 ft (2 m)
. Green line
*4: approx. 10 ft (3 m)
*5Vehicle width guide lines:
Indicate the vehicle width when backing
up.
*6Predictive course lines:
Indicate the predictive course when back-
ing up. The predictive course lines will be
displayed on the monitor when the shift
lever is in the R (Reverse) position and the
steering-wheel is turned. The predictive
course lines will move depending on how
much the steering-wheel is turned and will
not be displayed while the steering-wheel
is in the neutral position.
The vehicle width guide lines and the width
of the predictive course lines are wider
than the actual width and course.
WARNING!
. Always turn and check that it is safe to
park your car before backing up. Always
back up slowly.
. If the tires are replaced with different
sized tires, the predictive course line may
not be displayed correctly.
. On a snow-covered or slippery road,
there may be a difference between the
predictive course line and the actual
course line.
. The displayed lines will appear slightly
off to the right because the RearView
camera is not installed in the rear center
of the vehicle.
. The distance guide line and the vehicle
width guide line should be used as a
reference only when the vehicle is on a
level, paved surface. The distance viewed
on the monitor is for reference only and
may be different than the actual distance
between the vehicle and displayed ob-
jects.
. When backing up the vehicle up a hill,
objects viewed in the monitor are further
than they appear. When backing up the
7. Monitor system
7-3
Page 109 of 274
7. Monitor system
7-6
AROUND VIEW®MONITOR (AVM) (if so
equipped)
When you push the
INFINITI Controller or shift the shift lever
into the R (Reverse) position while the
ignition switch is in the ON position, the
Around View Monitor operates with the
sonar system. The upper touch screen
display (upper display) shows the view to
the Around View Monitor. The Around View
Monitor shows various views of the posi-
tion of the vehicle.
Available views:
. Bird-Eye View
The surrounding view of the vehicle.
. Front-Side View
The view around and ahead of the front
passenger’s side wheel.
. Front View
An approximately 150-degree view of
the front of the vehicle.
. Front-Wide View
An approximately 180-degree view of
the front of the vehicle. .
Rear View
An approximately 150-degree view of
the rear of the vehicle.
. Rear-Wide View
An approximately 180-degree view of
the rear of the vehicle.
AROUND VIEW MONITOR OPERA-
TION PRECAUTIONS
The system is designed as an aid to the
driver in situations such as slot parking or
parallel parking.
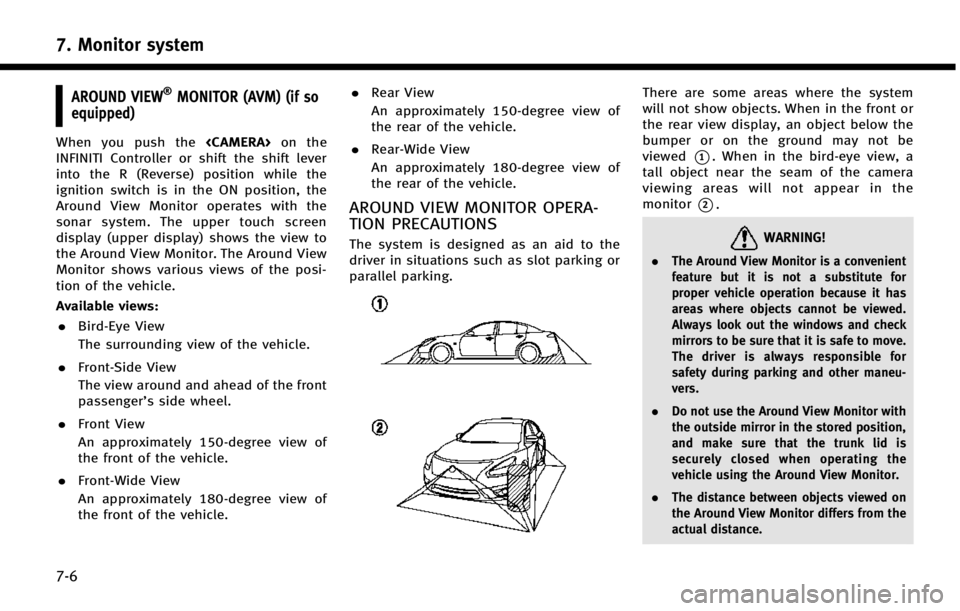
There are some areas where the system
will not show objects. When in the front or
the rear view display, an object below the
bumper or on the ground may not be
viewed
*1. When in the bird-eye view, a
tall object near the seam of the camera
viewing areas will not appear in the
monitor
*2.
WARNING!
. The Around View Monitor is a convenient
feature but it is not a substitute for
proper vehicle operation because it has
areas where objects cannot be viewed.
Always look out the windows and check
mirrors to be sure that it is safe to move.
The driver is always responsible for
safety during parking and other maneu-
vers.
. Do not use the Around View Monitor with
the outside mirror in the stored position,
and make sure that the trunk lid is
securely closed when operating the
vehicle using the Around View Monitor.
. The distance between objects viewed on
the Around View Monitor differs from the
actual distance.
Page 111 of 274
7. Monitor system
7-8
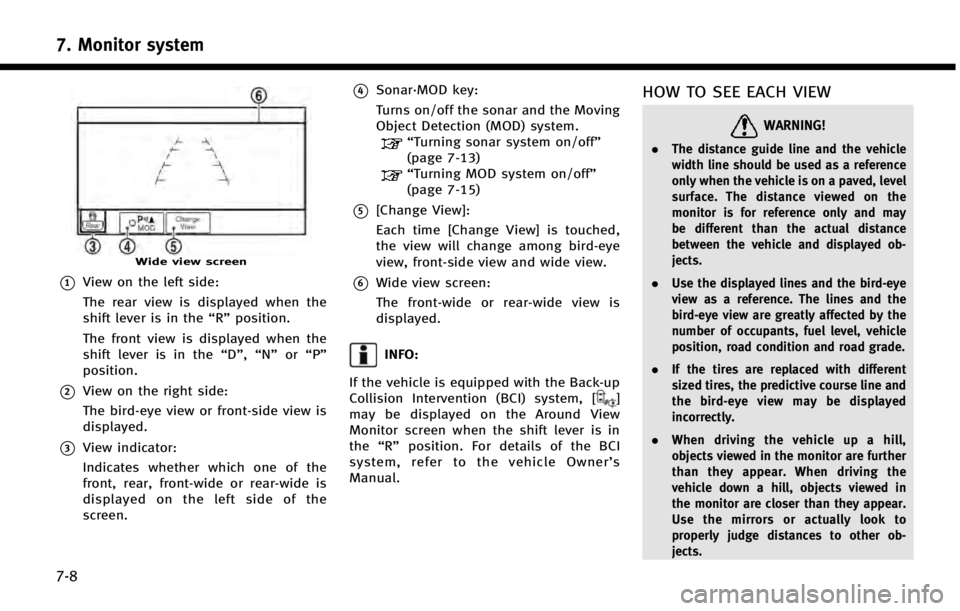
Wide view screen
*1View on the left side:
The rear view is displayed when the
shift lever is in the“R”position.
The front view is displayed when the
shift lever is in the “D”,“N”or“P”
position.
*2View on the right side:
The bird-eye view or front-side view is
displayed.
*3View indicator:
Indicates whether which one of the
front, rear, front-wide or rear-wide is
displayed on the left side of the
screen.
*4Sonar·MOD key:
Turns on/off the sonar and the Moving
Object Detection (MOD) system.
“Turning sonar system on/off”
(page 7-13)
“Turning MOD system on/off”
(page 7-15)
*5[Change View]:
Each time [Change View] is touched,
the view will change among bird-eye
view, front-side view and wide view.
*6Wide view screen:
The front-wide or rear-wide view is
displayed.
INFO:
If the vehicle is equipped with the Back-up
Collision Intervention (BCI) system, [
]
may be displayed on the Around View
Monitor screen when the shift lever is in
the “R” position. For details of the BCI
system, refer to the vehicle Owner’ s
Manual.
HOW TO SEE EACH VIEW
WARNING!
. The distance guide line and the vehicle
width line should be used as a reference
only when the vehicle is on a paved, level
surface. The distance viewed on the
monitor is for reference only and may
be different than the actual distance
between the vehicle and displayed ob-
jects.
. Use the displayed lines and the bird-eye
view as a reference. The lines and the
bird-eye view are greatly affected by the
number of occupants, fuel level, vehicle
position, road condition and road grade.
. If the tires are replaced with different
sized tires, the predictive course line and
the bird-eye view may be displayed
incorrectly.
. When driving the vehicle up a hill,
objects viewed in the monitor are further
than they appear. When driving the
vehicle down a hill, objects viewed in
the monitor are closer than they appear.
Use the mirrors or actually look to
properly judge distances to other ob-
jects.
Page 113 of 274
7. Monitor system
7-10
INFO:
When the monitor displays the front view and
the steering-wheel turns about 90 degrees or
less from the neutral position, both the right
and left predictive course lines
*6are dis-
played. When the steering-wheel turns about 90
degrees or more, a line is displayed only on the
opposite side of the turn.
Bird-eye view
WARNING!
. Objects in the bird-eye view will appear
further than the actual distance because
the bird-eye view is a pseudo view that is
processed by combining the views from
the cameras on the outside mirrors, the
front and the rear of the vehicle.
. Tall objects, such as a curb or vehicle,
may be misaligned or not displayed at
the seam of the views.
. Objects that are above the camera cannot
be displayed.
. The view for the bird-eye view may be
misaligned when the camera position
alters. .
A line on the ground may be misaligned
and is not seen as being straight at the
seam of the views. The misalignment will
increase as the line proceeds away from
the vehicle.
. The tire angle display does not indicate
the actual tire angle
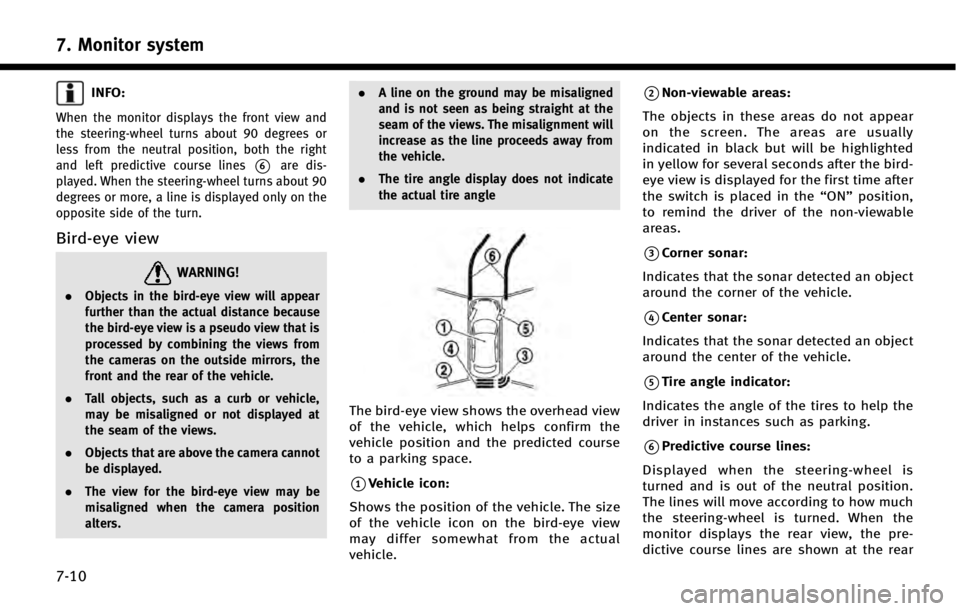
The bird-eye view shows the overhead view
of the vehicle, which helps confirm the
vehicle position and the predicted course
to a parking space.
*1Vehicle icon:
Shows the position of the vehicle. The size
of the vehicle icon on the bird-eye view
may differ somewhat from the actual
vehicle.
*2Non-viewable areas:
The objects in these areas do not appear
on the screen. The areas are usually
indicated in black but will be highlighted
in yellow for several seconds after the bird-
eye view is displayed for the first time after
the switch is placed in the “ON”position,
to remind the driver of the non-viewable
areas.
*3Corner sonar:
Indicates that the sonar detected an object
around the corner of the vehicle.
*4Center sonar:
Indicates that the sonar detected an object
around the center of the vehicle.
*5Tire angle indicator:
Indicates the angle of the tires to help the
driver in instances such as parking.
*6Predictive course lines:
Displayed when the steering-wheel is
turned and is out of the neutral position.
The lines will move according to how much
the steering-wheel is turned. When the
monitor displays the rear view, the pre-
dictive course lines are shown at the rear