window INFINITI Q50 2019 Owner's Manual
[x] Cancel search | Manufacturer: INFINITI, Model Year: 2019, Model line: Q50, Model: INFINITI Q50 2019Pages: 468, PDF Size: 2.15 MB
Page 149 of 468
.You can switch the lock system to the
mode that allows you to open all the
doors when the key is turned once. (See
the INFINITI InTouch
TMOwner’s Manual
for details.)
OPENING AND CLOSING WIN-
DOWS WITH MECHANICAL KEY
(if so equipped)
The driver’s door key operation also allows
you to open and close the window that is
equipped with the automatic open/close
function. (See “Power windows” (P.2-51).)
To open the window, turn the driver’s door
key cylinder to the rear of the vehicle for
longer than 1 second. The door is unlocked
and the window keeps opening while turning
the key.
This function can also be performed by
pushing and holding the UNLOCK button
on the Intelligent Key. (See “Remote keyless
entry system” (P.3-16).)
To close the window, turn the driver’s door
key cylinder to the front of the vehicle for
longer than 1 second. The door is locked and
the window keeps closing while turning the
key.
SPA2726
LOCKING WITH INSIDE LOCK
KNOB
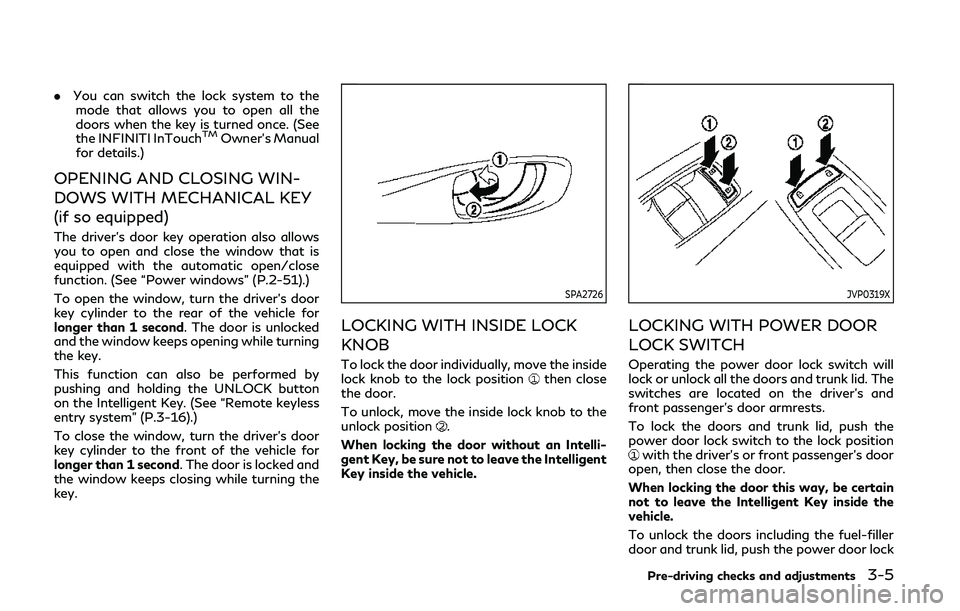
To lock the door individually, move the inside
lock knob to the lock positionthen close
the door.
To unlock, move the inside lock knob to the
unlock position
.
When locking the door without an Intelli-
gent Key, be sure not to leave the Intelligent
Key inside the vehicle.
JVP0319X
LOCKING WITH POWER DOOR
LOCK SWITCH
Operating the power door lock switch will
lock or unlock all the doors and trunk lid. The
switches are located on the driver’s and
front passenger’s door armrests.
To lock the doors and trunk lid, push the
power door lock switch to the lock position
with the driver’s or front passenger’s door
open, then close the door.
When locking the door this way, be certain
not to leave the Intelligent Key inside the
vehicle.
To unlock the doors including the fuel-filler
door and trunk lid, push the power door lock
Pre-driving checks and adjustments3-5
Page 160 of 468
3-16Pre-driving checks and adjustments
LOG-IN FUNCTION
After setting up the user information, the
system will automatically recognize the user
upon turning on the vehicle.
There will be a personalized welcome greet-
ing and screen prompt to log-in.
This feature allows 4 drivers to use their
own registration, drive mode, driving posi-
tion, air conditioner, and auto settings and
memorizes these custom settings.
The log-in user can be changed on the
welcome greeting screen or the User List
screen. For more details, see the INFINITI
InTouch
TMOwner’s Manual.
The log-in function is linked to the following
items:
. Meter
. Audio
. Navigation system display (if so
equipped)
. Navigation settings (if so equipped)
. Air conditioner
. Automatic drive positioner (if so
equipped)
. Engine/Transmission
. Steering
. Suspension (if so equipped) .
Active trace control system
. Driver assistance* (if so equipped)
. Body Control Module (BCM)
*: except for the Forward Emergency Brak-
ing (FEB) system
WARNING
The Intelligent Key transmits radio
waves when the buttons are pushed.
The FAA advises that the radio waves
may affect aircraft navigation and com-
munication systems. Do not operate the
Intelligent Key while on an airplane.
Make sure the buttons are not operated
unintentionally when the unit is stored
during a flight.
It is possible to lock/unlock all doors and
fuel-filler door, open the trunk lid, activate
the panic alarm and open the windows by
pushing the buttons on the Intelligent Key
from outside the vehicle.
Before locking the doors, make sure the
Intelligent Key is not left in the vehicle.
The remote keyless entry function can
operate at a distance of approximately 33
ft (10 m) from the vehicle. (The effective
distance depends upon the conditions
around the vehicle.)
As many as 4 Intelligent Keys can be used
with one vehicle. For information concerning
the purchase and use of additional Intelli-
gent Keys, contact an INFINITI retailer.
The buttons on the Intelligent Key will not
REMOTE KEYLESS ENTRY SYSTEM
Page 162 of 468
3-18Pre-driving checks and adjustments
Unlocking doors, trunk lid and fuel-
filler door
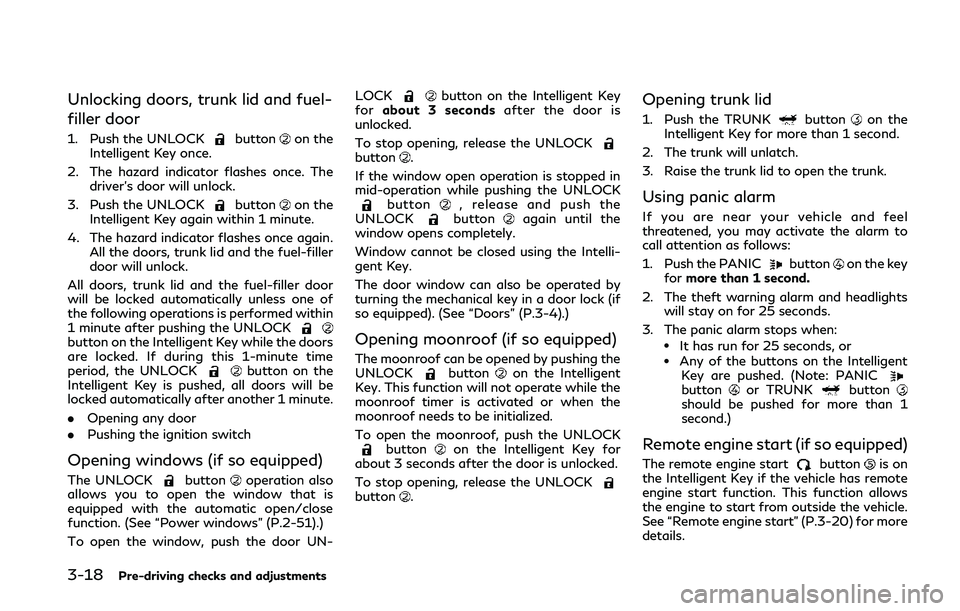
1. Push the UNLOCKbuttonon the
Intelligent Key once.
2. The hazard indicator flashes once. The driver’s door will unlock.
3. Push the UNLOCK
buttonon the
Intelligent Key again within 1 minute.
4. The hazard indicator flashes once again. All the doors, trunk lid and the fuel-filler
door will unlock.
All doors, trunk lid and the fuel-filler door
will be locked automatically unless one of
the following operations is performed within
1 minute after pushing the UNLOCK
button on the Intelligent Key while the doors
are locked. If during this 1-minute time
period, the UNLOCK
button on the
Intelligent Key is pushed, all doors will be
locked automatically after another 1 minute.
. Opening any door
. Pushing the ignition switch
Opening windows (if so equipped)
The UNLOCKbuttonoperation also
allows you to open the window that is
equipped with the automatic open/close
function. (See “Power windows” (P.2-51).)
To open the window, push the door UN- LOCK
button on the Intelligent Key
for about 3 seconds after the door is
unlocked.
To stop opening, release the UNLOCK
button.
If the window open operation is stopped in
mid-operation while pushing the UNLOCK
button, release and push the
UNLOCKbuttonagain until the
window opens completely.
Window cannot be closed using the Intelli-
gent Key.
The door window can also be operated by
turning the mechanical key in a door lock (if
so equipped). (See “Doors” (P.3-4).)
Opening moonroof (if so equipped)
The moonroof can be opened by pushing the
UNLOCKbuttonon the Intelligent
Key. This function will not operate while the
moonroof timer is activated or when the
moonroof needs to be initialized.
To open the moonroof, push the UNLOCK
buttonon the Intelligent Key for
about 3 seconds after the door is unlocked.
To stop opening, release the UNLOCK
button.
Opening trunk lid
1. Push the TRUNKbuttonon the
Intelligent Key for more than 1 second.
2. The trunk will unlatch.
3. Raise the trunk lid to open the trunk.
Using panic alarm
If you are near your vehicle and feel
threatened, you may activate the alarm to
call attention as follows:
1. Push the PANIC
buttonon the key
for more than 1 second.
2. The theft warning alarm and headlights will stay on for 25 seconds.
3. The panic alarm stops when:
.It has run for 25 seconds, or.Any of the buttons on the Intelligent Key are pushed. (Note: PANIC
buttonor TRUNKbuttonshould be pushed for more than 1
second.)
Remote engine start (if so equipped)
The remote engine startbuttonis on
the Intelligent Key if the vehicle has remote
engine start function. This function allows
the engine to start from outside the vehicle.
See “Remote engine start” (P.3-20) for more
details.
Page 165 of 468
remote engine start will not work” (P.3-22).
Other conditions can affect the performance
of the Intelligent Key transmitter. See “In-
telligent Key system” (P.3-7) for additional
information.
REMOTE ENGINE START OPER-
ATING RANGE
The remote engine start function can only be
used when the Intelligent Key is within the
specified operating range from the vehicle.
When the Intelligent Key battery is dis-
charged or other strong radio wave sources
are present near the operating location, the
Intelligent Key operating range becomes
narrower, and the Intelligent Key may not
function properly.
The remote engine start operating range is
approximately 197 ft (60 m) from the
vehicle.
REMOTE STARTING THE ENGINE
To use the remote start function to start the
engine, perform the following:
1. Aim the Intelligent Key at the vehicle.
2. Push the LOCK
button to lock all
doors.
3. Within 5 seconds push and hold the remote engine start
button until
the turn signal lights flash and the tail lights illuminate. If the vehicle is not
within view, push and hold the remote
engine start
button for at least 2
seconds.
The following events will occur when the
engine starts:
. The front parking lights will turn on and
remain on as long as the engine is
running.
. The doors will be locked and the air
conditioner system may turn on.
. The engine will continue to run for about
10 minutes. Repeat the steps to extend
the time for an additional 10 minutes.
See “Extending engine run time” (P.3-
21).
. The rear window glass and outside mirror
defroster may turn on automatically
when the outside air temperature, the
interior temperature and the engine
coolant temperature are low.
Depress and hold the brake pedal, then place
the ignition switch in the ON position before
driving. For further instructions, see “Driving
the vehicle” (P.5-16).
EXTENDING ENGINE RUN TIME
The remote engine start function can be
extended one time by performing the steps
listed in “Remote starting the engine” (P.3-
21). Run time will be calculated as follows:
. The first 10 minute run time will start
when the remote engine start function is
performed.
. The second 10 minutes will start imme-
diately when the remote engine start
function is performed. For example, if
the engine has been running for 5
minutes, and 10 minutes are added, the
engine will run for a total of 15 minutes.
. Extending engine run time will count
towards the two remote engine start
limit.
A maximum of two remote engine starts, or
a single start with an extension, are allowed
between ignition cycles.
The ignition switch must be cycled to the ON
position and then back to the OFF position
before the remote engine start procedure
can be used again.
Pre-driving checks and adjustments3-21
Page 175 of 468

SPA2450-A
Automatic anti-glare type
The inside mirror is designed so that it
automatically changes reflection according
to the intensity of the headlights of the
following vehicle.
The anti-glare system will be automatically
turned on when the ignition switch is pushed
to the ON position.
The anti-glare system also operates for the
outside mirrors (if so equipped).
When the anti-glare system is turned on, the
indicator light
will illuminate and excessive
glare from the headlights of the vehicle
behind you will be reduced.
Push the “*” switch
to make the inside mirror operate normally. The indicator light
will turn off. Push the “I” switch
to turn the
system on.
Do not allow any object to cover the sensors
or apply glass cleaner on them. Doing so
will reduce the sensitivity of the sensor,
resulting in improper operation.
For the HomeLink
®Universal Transceiver
operation, see “HomeLink®Universal Trans-
ceiver” (P.2-58).
OUTSIDE MIRRORS
WARNING
Objects viewed in the outside mirror on
the passenger side are closer than they
appear. Be careful when moving to the
right. Using only this mirror could cause
an accident. Use the inside mirror or
glance over your shoulder to properly
judge distances to other objects.
JVP0246X
Adjusting outside mirrors
The outside mirror control switch is located
on the driver’s armrest.
The outside mirror will operate only when
the ignition switch is in the ACC or ON
position.
Move the switch
right or left to select the
right or left side mirror, then adjust using the
control switch
.
Defrosting outside mirrors
The outside mirrors will be heated when the
rear window defroster switch is operated.
If the engine is started using the remote start
function (if so equipped) when the outside
Pre-driving checks and adjustments3-31
Page 176 of 468

3-32Pre-driving checks and adjustments
air temperature, the interior temperature
and the engine coolant temperature are
low, the rear window glass and outside
mirror defroster may turn on automatically.
For additional information about the remote
engine start function, see “Remote engine
start” (P.3-20).
SPA1829
Foldable outside mirrors
Fold the outside mirror by pushing it toward
the rear of the vehicle.
Reverse tilt-down feature (if so
equipped)
When backing up the vehicle, the right and
left outside mirrors will turn downward
automatically to provide better rear visibility.
1. Push the ignition switch to the ONposition.
2. Move the shift lever to the R (Reverse) position.
3. Select the right or left side mirror by operating the outside mirror control switch.
4. The outside mirror surface moves down- ward.
When one of the following conditions has
occurred, the outside mirror surface will
return to its original position.
. The shift lever is moved to any position
other than R (Reverse).
. The outside mirror control switch is set to
the center position.
. The ignition switch is pushed to the OFF
position.
Automatic anti-glare (if so
equipped)
The outside mirrors are designed so that
they automatically change reflection ac-
cording to the intensity of the headlights of
the vehicle following you.
The anti-glare system will be automatically
turned on when the ignition switch is placed
in the ON position.
Page 181 of 468
4 Monitor, climate, audio, phone and voice re-cognition systems
INFINITI InTouchTMOwner’s Manual ........................ 4-2
Ventilators ........................................................................\
.. 4-2 Center ventilators ....................................................... 4-2
Side ventilators ............................................................ 4-2
Rear ventilators ........................................................... 4-3 Antenna ........................................................................\
...... 4-3
Window antenna ....................................................... 4-3
Satellite antenna ....................................................... 4-3
Car phone or CB radio ................................................... 4-4
Page 183 of 468
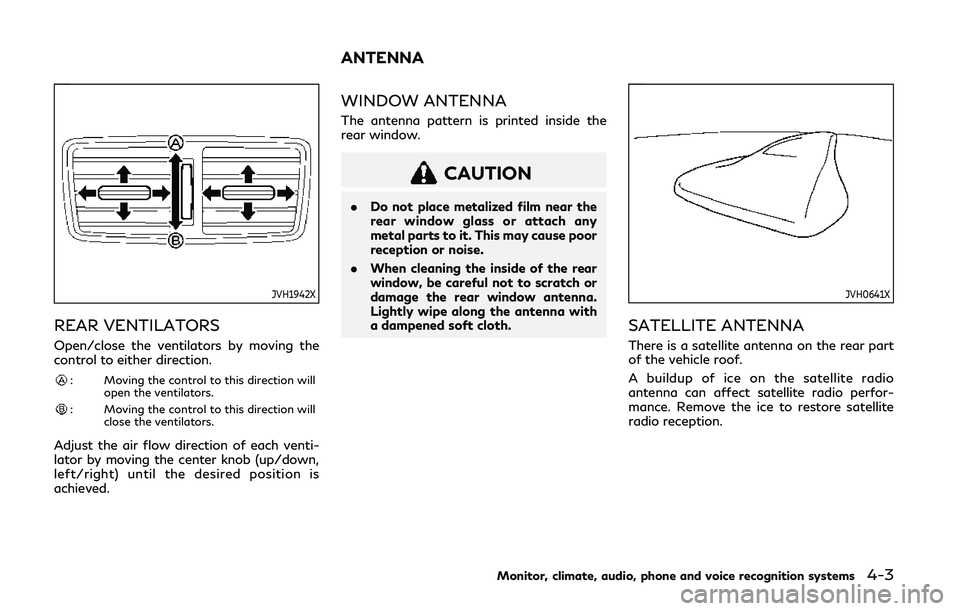
JVH1942X
REAR VENTILATORS
Open/close the ventilators by moving the
control to either direction.
: Moving the control to this direction willopen the ventilators.
: Moving the control to this direction willclose the ventilators.
Adjust the air flow direction of each venti-
lator by moving the center knob (up/down,
left/right) until the desired position is
achieved.
WINDOW ANTENNA
The antenna pattern is printed inside the
rear window.
CAUTION
.Do not place metalized film near the
rear window glass or attach any
metal parts to it. This may cause poor
reception or noise.
. When cleaning the inside of the rear
window, be careful not to scratch or
damage the rear window antenna.
Lightly wipe along the antenna with
a dampened soft cloth.
JVH0641X
SATELLITE ANTENNA
There is a satellite antenna on the rear part
of the vehicle roof.
A buildup of ice on the satellite radio
antenna can affect satellite radio perfor-
mance. Remove the ice to restore satellite
radio reception.
Monitor, climate, audio, phone and voice recognition systems4-3
ANTENNA
Page 188 of 468
5-4Starting and driving
WARNING
.Do not leave children or adults who
would normally require the support
of others alone in your vehicle. Pets
should not be left alone either. They
could accidentally injure themselves
or others through inadvertent opera-
tion of the vehicle. Also, on hot,
sunny days, temperatures in a closed
vehicle could quickly become high
enough to cause severe or possibly
fatal injuries to people or animals.
. Closely supervise children when they
are around cars to prevent them from
playing and becoming locked in the
trunk where they could be seriously
injured. Keep the car locked, with the
rear seatback and trunk lid securely
latched when not in use, and prevent
children’s access to car keys.
EXHAUST GAS (carbon monoxide)
WARNING
.Do not breathe exhaust gases; they
contain colorless and odorless carbon
monoxide. Carbon monoxide is dan-
gerous. It can cause unconsciousness
or death.
. If you suspect that exhaust fumes are
entering the vehicle, drive with all
windows fully open, and have the
vehicle inspected immediately.
. Do not run the engine in closed spaces
such as a garage.
. Do not park the vehicle with the
engine running for any extended
length of time.
. Keep the trunk lid closed while driv-
ing, otherwise exhaust gases could be
drawn into the passenger compart-
ment. If you must drive with the
trunk lid open, follow these precau-
tions:
1) Open all the windows.
2) Set the air recirculation to off and the fan control to high to circulate
the air. .
If electrical wiring or other cable
connections must pass to a trailer
through the seal on the trunk lid or
the body, follow the manufacturer’s
recommendation to prevent carbon
monoxide entry into the vehicle.
. The exhaust system and body should
be inspected by a qualified mechanic
whenever:
— The vehicle is raised for service.
— You suspect that exhaust fumes are entering into the passenger
compartment.
— You notice a change in the sound of the exhaust system.
— You have had an accident invol- ving damage to the exhaust sys-
tem, underbody, or rear of the
vehicle.
PRECAUTIONS WHEN STARTING
AND DRIVING
Page 191 of 468
WARNING
.Radio waves could adversely affect
electric medical equipment. Those
who use a pacemaker should contact
the electric medical equipment man-
ufacturer for the possible influences
before use.
. If the low tire pressure warning light
illuminates while driving, avoid sud-
den steering maneuvers or abrupt
braking, reduce vehicle speed, pull
off the road to a safe location and
stop the vehicle as soon as possible.
Driving with under-inflated tires may
permanently damage the tires and
increase the likelihood of tire failure.
Serious vehicle damage could occur
and may lead to an accident and
could result in serious personal injury.
Check the tire pressure for all four
tires. Adjust the tire pressure to the
recommended COLD tire pressure
shown on the Tire and Loading
Information label to turn the low tire
pressure warning light OFF. If the
light still illuminates while driving
after adjusting the tire pressure, a
tire may be flat or the TPMS may be
malfunctioning. If you have a flat tire,
replace it with a spare tire (if so equipped) as soon as possible. If no
tire is flat and all tires are properly
inflated, it is recommended you con-
sult an INFINITI retailer.
. For models with run-flat tires,
although you can continue driving
with a punctured run-flat tire, re-
member that vehicle handling stabi-
lity is reduced, which could lead to an
accident and personal injury. Also,
driving a long distance at high speeds
may damage the tires.
— Do not drive at speeds above 50 MPH (80 km/h) and do not drive
more than approximately 93 miles
(150 km) with a punctured run-
flat tire. The actual distance the
vehicle can be driven on a flat tire
depends on outside temperature,
vehicle load, road conditions and
other factors.
— If you detect any unusual sounds or vibrations while driving with a
punctured run-flat tire, pull off
the road to a safe location and
stop the vehicle as soon as possi-
ble. The tire may be seriously
damaged and need to be replaced.
. Since the spare tire is not equipped
with the TPMS, when a spare tire is
mounted or a wheel is replaced, the TPMS will not function and the low
tire pressure warning light will flash
for approximately 1 minute. The light
will remain on after 1 minute. Have
your tires replaced and/or TPMS
system reset as soon as possible. It
is recommended you visit an INFINITI
retailer for these services.
. Replacing tires with those not origin-
ally specified by INFINITI could affect
the proper operation of the TPMS.
. Do not inject any tire liquid or aerosol
tire sealant into the tires, as this may
cause a malfunction of the tire pres-
sure sensors.
CAUTION
.The TPMS may not function properly
when the wheels are equipped with
tire chains or the wheels are buried in
snow.
. Do not place metalized film or any
metal parts (antenna, etc.) on the
windows. This may cause poor recep-
tion of the signals from the tire
pressure sensors, and the TPMS will
not function properly.
Starting and driving5-7