instrument panel INFINITI Q50 HYBRID 2015 Quick Reference Guide
[x] Cancel search | Manufacturer: INFINITI, Model Year: 2015, Model line: Q50 HYBRID, Model: INFINITI Q50 HYBRID 2015Pages: 32, PDF Size: 2.78 MB
Page 5 of 32
3
Maintenance Alert – Receive notification of a vehicle system malfunct\
ion that triggers
instrument panel warning lights.
Destination Assistance – Receive point-of-interest assistance via gui\
ded IVR (Interactive
Voice Response) or a Response Specialist by pressing the key on the map screen or the
INFINITI Connection™ web portal.
Destination Send-to-Vehicle – Find and download point-of interest inf\
ormation from
Google Maps™. To access, go to the INFINITI Connection menu and select “Sync All
Information Feeds”. Then go to the feeds menu page and download the d\
esired
destination information.
Connected Search – Select “Connected Search” from the Destinati\
on menu on the vehicle’s
navigation system to conduct a point-of-interest search within a certain\
distance of the
vehicle’s location.
Drive Zone – Monitor the movement of your vehicle within a specified \
region. Set up
boundaries in the Monitoring section of the INFINITI Connection web port\
al.
Max Speed Alert – Set up a maximum speed on the INFINITI Connection w\
eb portal. You
will receive notifications if your vehicle exceeds the max speed setting\
.
Mobile Information Service – Receive the latest news headlines, stock\
quotes and sports
scores by setting up preferences on the Mobile Information Service page \
in the INFINITI
Connection web portal.
Valet Alert – Use Valet Alert to set up a 0.2 mile radius around your\
vehicle.
• Activate alerts by pressing the “Connect to Voice Menu” button on \
the INFINITI
Connection screen or by pressing the key on the map screen.
• At the prompt, say “Valet Alert” and then “Activate” or “\
Deactivate”.
For more information, refer to the “Viewing technical information (section 7)” of your Navigation System Owner’s Manual.
Approaching Vehicle Sound for Pedestrians (VSP) System
The VSP system helps alert pedestrians to the presence of the vehicle wh\
en it is being driven at a low speed.
When the vehicle starts to move, it produces a sound. The sound stops wh\
en the vehicle speed reaches approximately 19 mph (30 km/h) while accelerating.
This sound will activate again when decelerating to a speed less than 16\
mph (25 km/h).
For more information, refer to the “Hybrid System Overview” section of your Owner’s Manual.
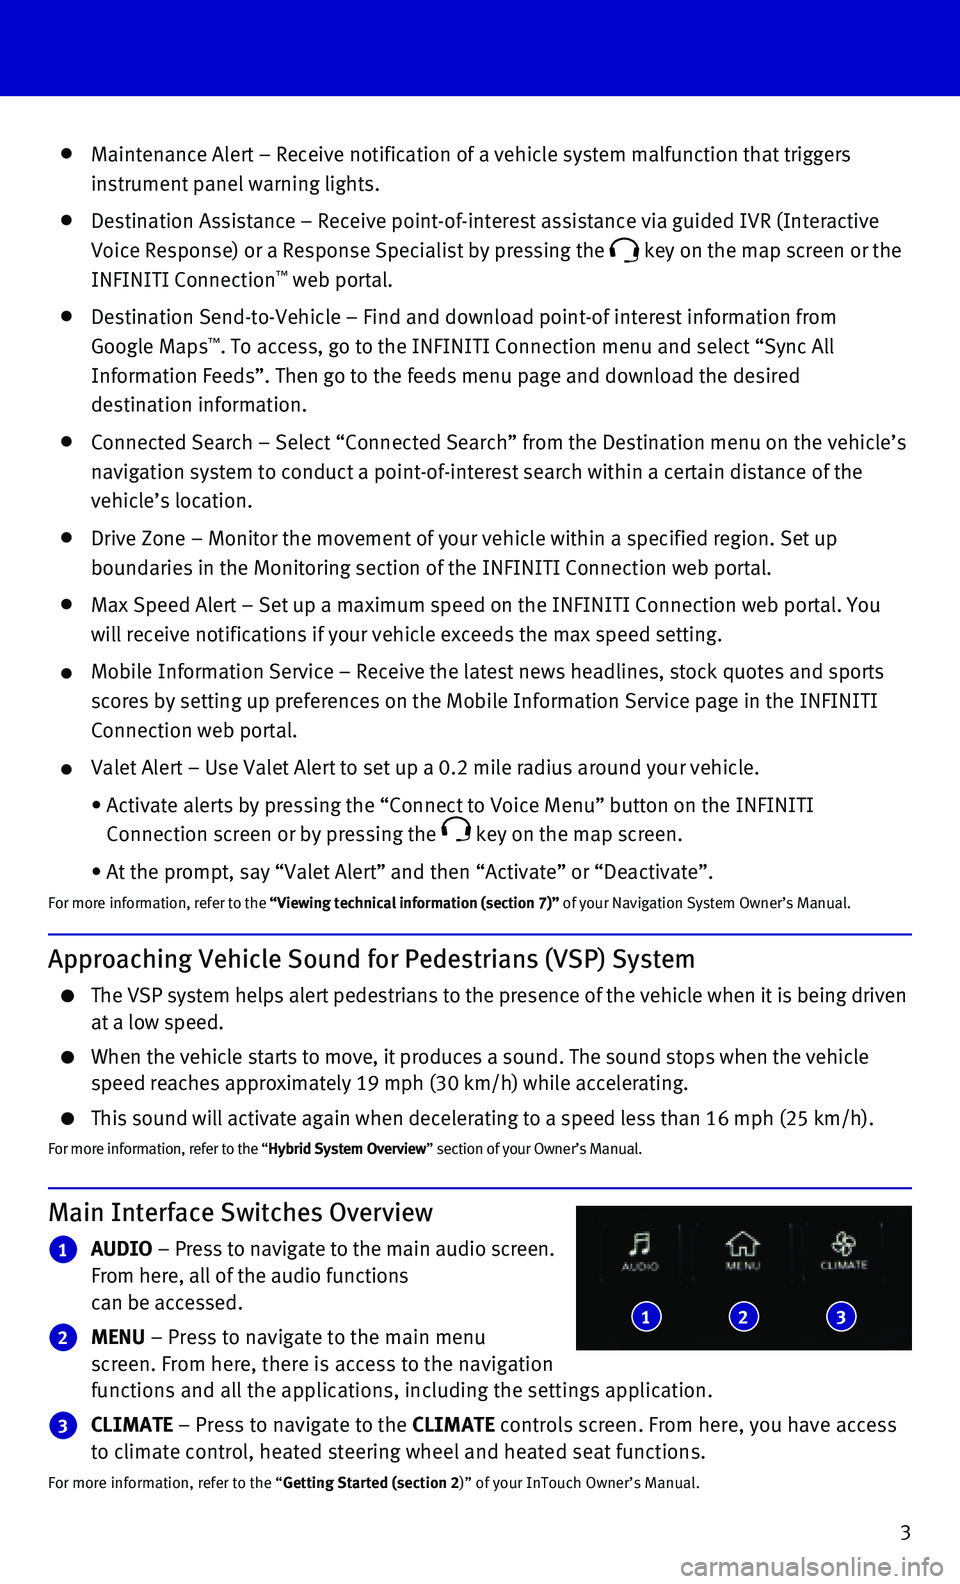
Main Interface Switches Overview
1 AUDIO – Press to navigate to the main audio screen. From here, all of the audio functions can be accessed.
2 MENU – Press to navigate to the main menu screen. From here, there is access to the navigation functions and all the applications, including the settings application.
3 CLIMATE – Press to navigate to the CLIMATE controls screen. From here, you have access to climate control, heated steering wheel and heated seat functions.
For more information, refer to the “Getting Started (section 2)” of your InTouch Owner’s Manual.
123
Page 14 of 32
12
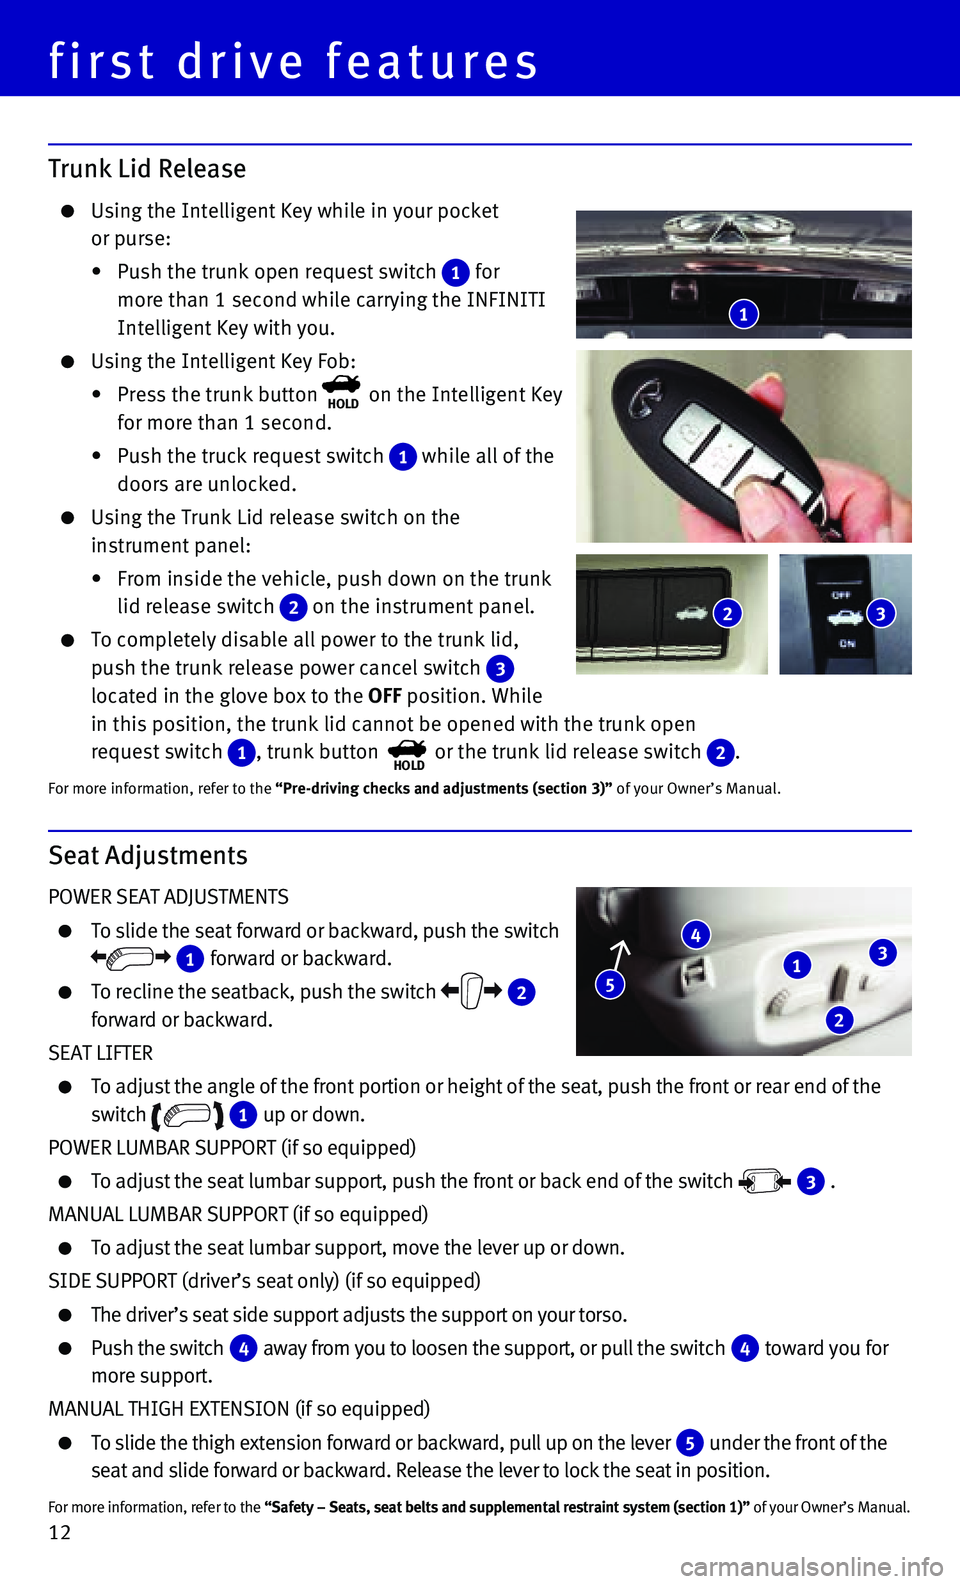
Trunk Lid Release
Using the Intelligent Key while in your pocket
or purse:
• Push the trunk open request switch 1 for
more than 1 second while carrying the INFINITI
Intelligent Key with you.
Using the Intelligent Key Fob:
• Press the trunk buttonHOLD on the Intelligent Key
for more than 1 second.
• Push the truck request switch 1 while all of the
doors are unlocked.
Using the Trunk Lid release switch on the
instrument panel:
• From inside the vehicle, push down on the trunk
lid release switch 2 on the instrument panel.
To completely disable all power to the trunk lid,
push the trunk release power cancel switch 3 located in the glove box to the OFF position. While
in this position, the trunk lid cannot be opened with the trunk open
request switch 1, trunk button HOLD or the trunk lid release switch 2.
For more information, refer to the “Pre-driving checks and adjustments (section 3)” of your Owner’s Manual.
Seat Adjustments
POWER SEAT ADJUSTMENTS
To slide the seat forward or backward, push the switch
1 forward or backward.
To recline the seatback, push the switch 2 forward or backward.
SEAT LIFTER
To adjust the angle of the front portion or height of the seat, push the\
front or rear end of the
switch 1 up or down.
POWER LUMBAR SUPPORT (if so equipped)
To adjust the seat lumbar support, push the front or back end of the swi\
tch 3 .
MANUAL LUMBAR SUPPORT (if so equipped)
To adjust the seat lumbar support, move the lever up or down.
SIDE SUPPORT (driver’s seat only) (if so equipped)
The driver’s seat side support adjusts the support on your torso.
Push the switch 4 away from you to loosen the support, or pull the switch 4 toward you for
more support.
MANUAL THIGH EXTENSION (if so equipped)
To slide the thigh extension forward or backward, pull up on the lever 5 under the front of the
seat and slide forward or backward. Release the lever to lock the seat i\
n position.
For more information, refer to the “Safety – Seats, seat belts and supplemental restraint system (se\
ction 1)” of your Owner’s Manual.
1
4
2
3
5
1
2 3
first drive features
Page 17 of 32
15
Headlight Control Switch
HEADLIGHT CONTROL
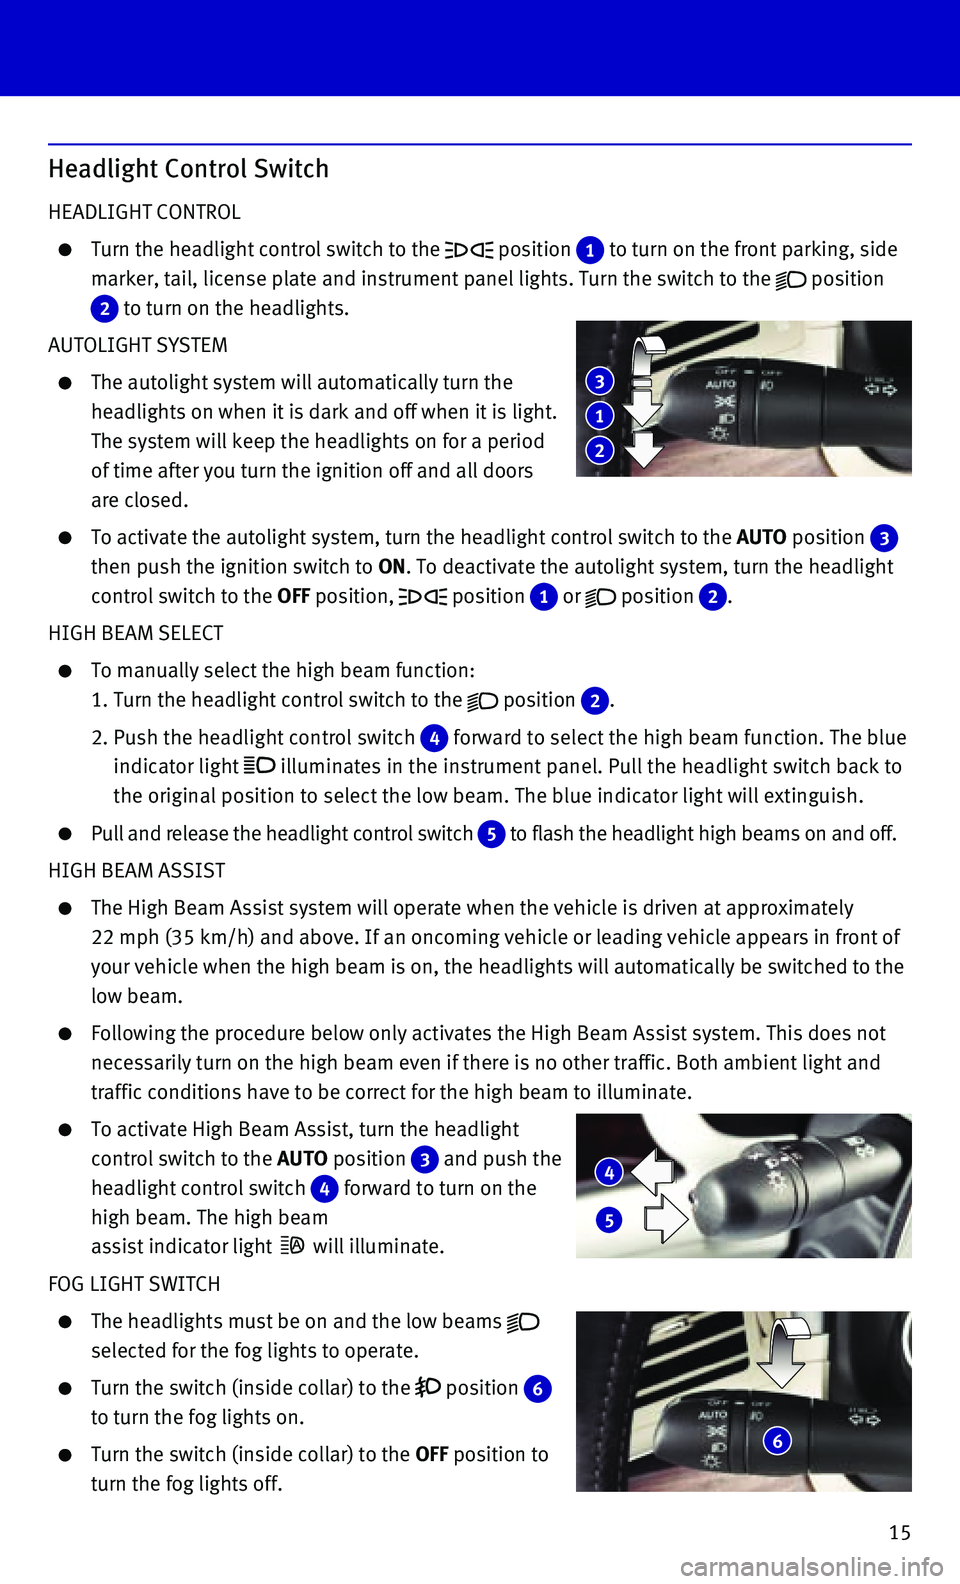
Turn the headlight control switch to the position 1 to turn on the front parking, side
marker, tail, license plate and instrument panel lights. Turn the switch\
to the position 2 to turn on the headlights.
AUTOLIGHT SYSTEM
The autolight system will automatically turn the
headlights on when it is dark and off when it is light.
The system will keep the headlights on for a period
of time after you turn the ignition off and all doors
are closed.
To activate the autolight system, turn the headlight control switch to t\
he AUTO position 3
then push the ignition switch to ON. To deactivate the autolight system, turn the headlight
control switch to the OFF position, position 1 or position 2.
HIGH BEAM SELECT
To manually select the high beam function:
1. Turn the headlight control switch to the position 2.
2. Push the headlight control switch 4 forward to select the high beam function. The blue
indicator light illuminates in the instrument panel. Pull the headlight switch back to \
the original position to select the low beam. The blue indicator light w\
ill extinguish.
Pull and release the headlight control switch 5 to flash the headlight high beams on and off.
HIGH BEAM ASSIST
The High Beam Assist system will operate when the vehicle is driven at a\
pproximately
22 mph (35 km/h) and above. If an oncoming vehicle or leading vehicle \
appears in front of
your vehicle when the high beam is on, the headlights will automatically\
be switched to the
low beam.
Following the procedure below only activates the High Beam Assist system\
. This does not
necessarily turn on the high beam even if there is no other traffic. Bot\
h ambient light and
traffic conditions have to be correct for the high beam to illuminate.
To activate High Beam Assist, turn the headlight
control switch to the AUTO position 3 and push the
headlight control switch 4 forward to turn on the
high beam. The high beam
assist indicator light will illuminate.
FOG LIGHT SWITCH
The headlights must be on and the low beams selected for the fog lights to operate.
Turn the switch (inside collar) to the position 6 to turn the fog lights on.
Turn the switch (inside collar) to the OFF position to
turn the fog lights off.
6
4
5
1
3
2
Page 22 of 32
20
USB (Universal Serial Bus) Connection Port/iPod® Interface
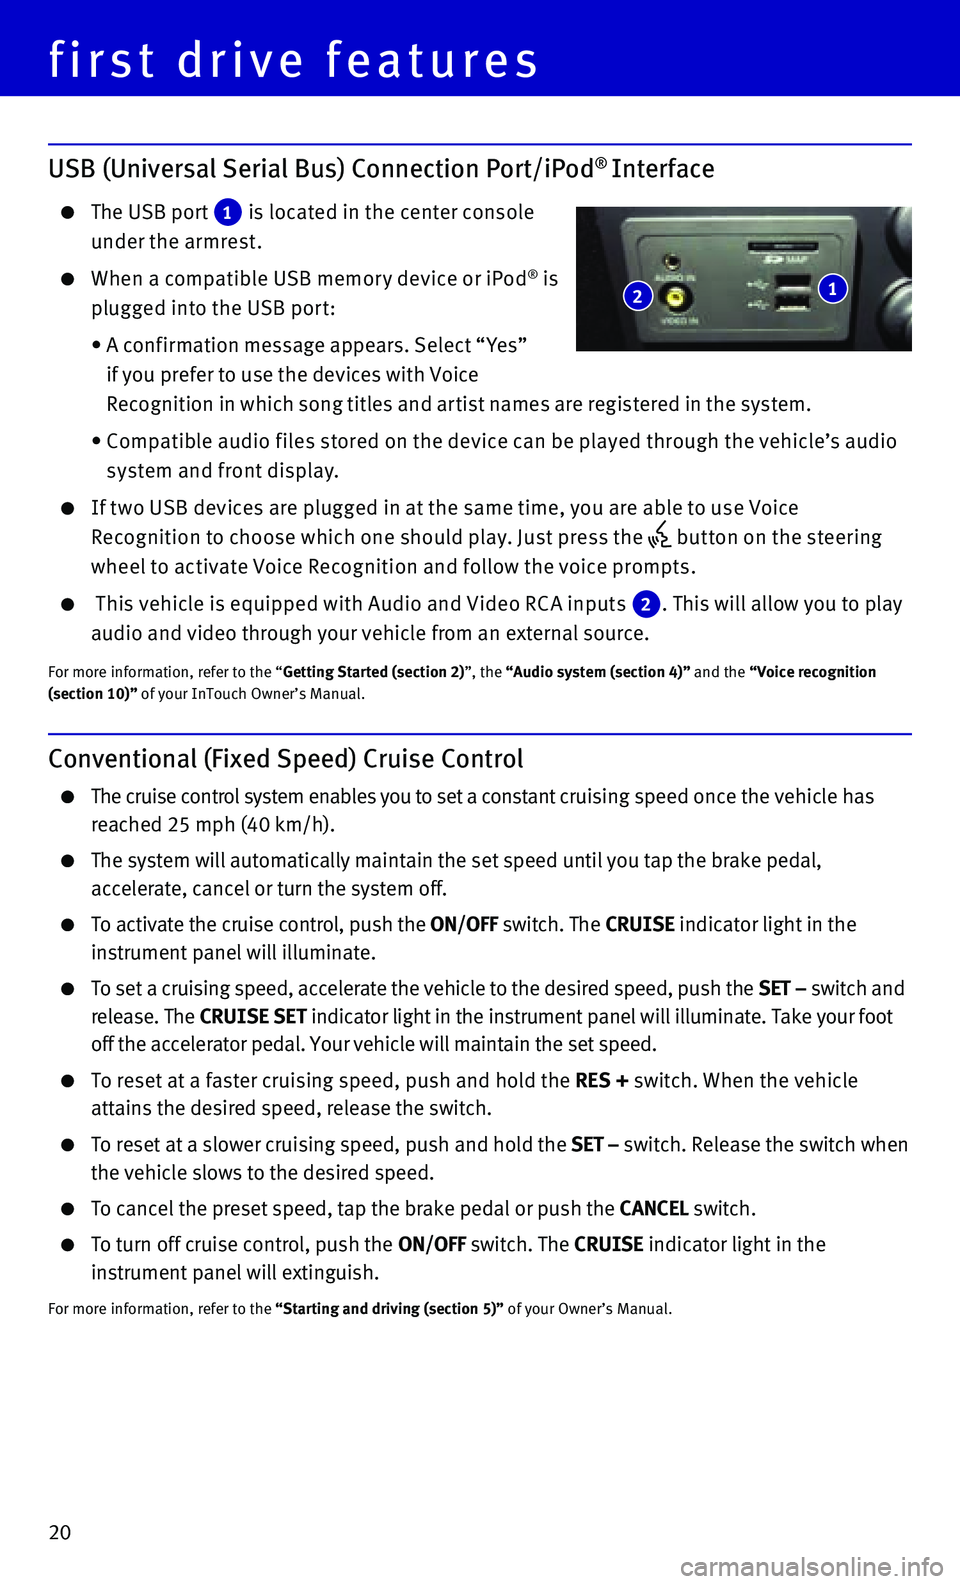
The USB port 1 is located in the center console
under the armrest.
When a compatible USB memor y device or iPod® is
plugged into the USB por t:
• A conf irmation message appears. Select “ Yes”
if you prefer to use the devices with Voice
Recognition in which song titles and ar tist names are registered in the system.
• Compatible audio f iles stored on the device can be played through the vehicle’s audio
system and front display.
If t wo USB devices are plugged in at the same time, you are able to use Voice
Recognition to choose which one should play. Just press the but ton on the steering
wheel to activate Voice Recognition and follow the voice prompts.
This vehicle is equipped with Audio and Video RC A inputs 2. This will allow you to play
audio and video through your vehicle from an external source.
For more information, refer to the “Getting Started (section 2)”, the “Audio system (section 4)” and the “Voice recognition (section 10)” of your InTouch Owner’s Manual.
Conventional (Fixed Speed) Cruise Control
The cruise control system enables you to set a constant cruising speed once the vehicle has
reached 25 mph (40 km/h).
The system will automatically maintain the set speed until you tap the b\
rake pedal,
accelerate, cancel or turn the system off.
To activate the cruise control, push the ON/OFF switch. The CRUISE indicator light in the
instrument panel will illuminate.
To set a cruising speed, accelerate the vehicle to the desired speed, pu\
sh the SET – switch and
release. The CRUISE SET indicator light in the instrument panel will illuminate. Take your foot
off the accelerator pedal. Your vehicle will maintain the set speed.
To reset at a faster cruising speed, push and hold the RES + switch. When the vehicle
attains the desired speed, release the switch.
To reset at a slower cruising speed, push and hold the SET – switch. Release the switch when
the vehicle slows to the desired speed.
To cancel the preset speed, tap the brake pedal or push the CANCEL switch.
To turn off cruise control, push the ON/OFF switch. The CRUISE indicator light in the
instrument panel will extinguish.
For more information, refer to the “Starting and driving (section 5)” of your Owner’s Manual.
1 2
first drive features
Page 23 of 32
21
2
5
6
Intelligent Cruise Control (ICC) System (if so equipped)
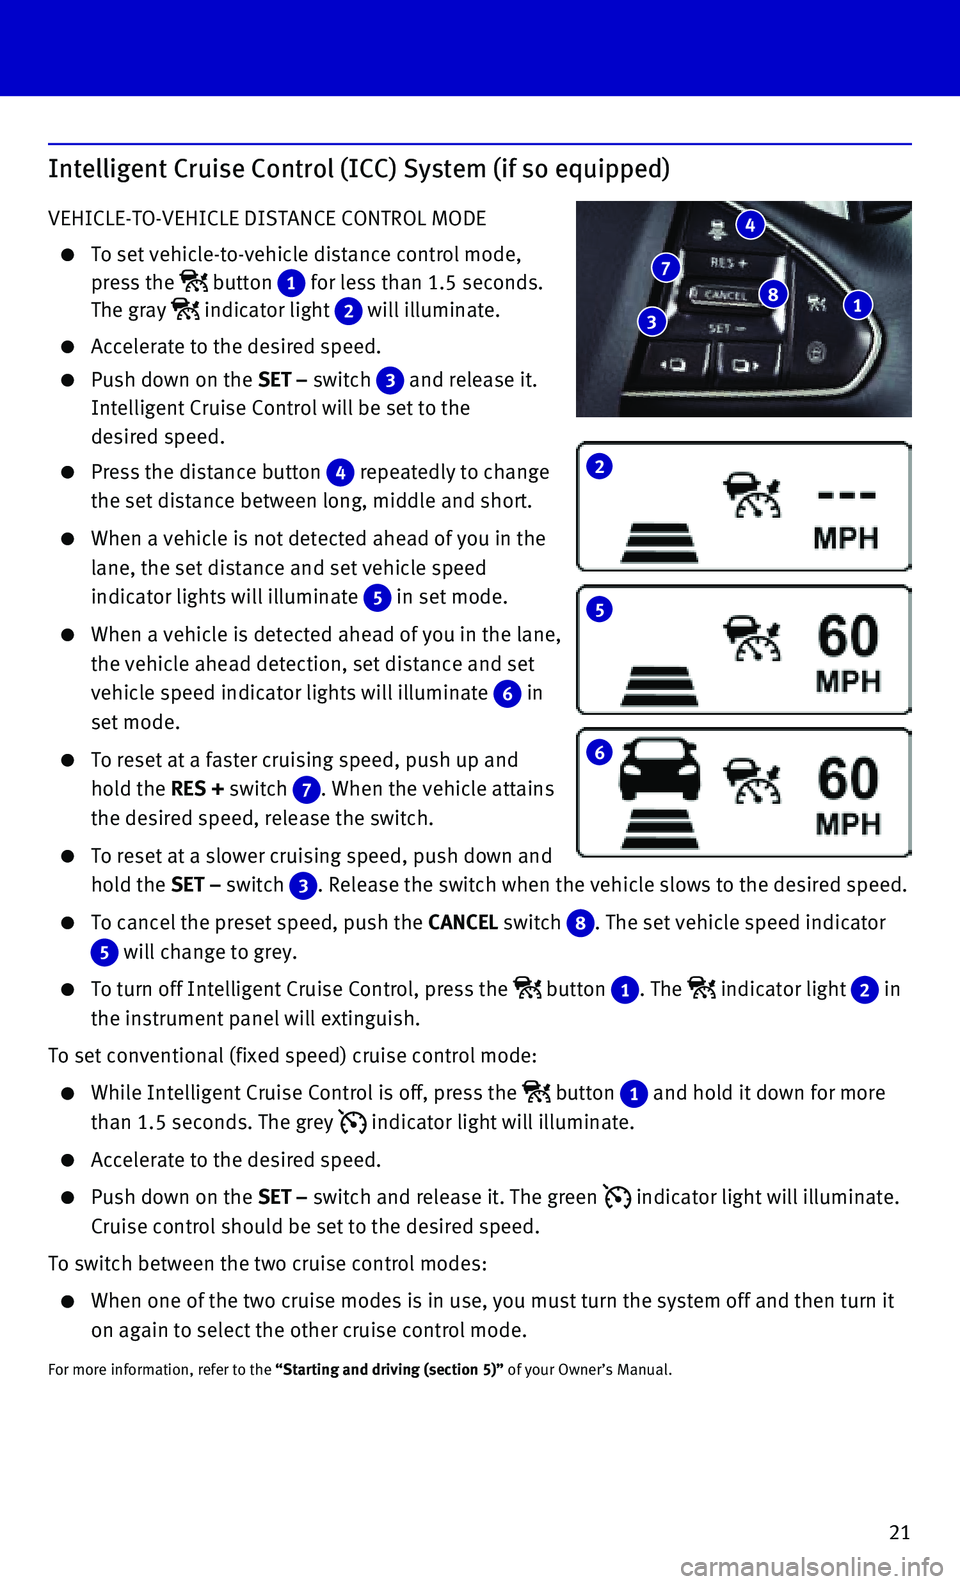
VEHICLE-TO-VEHICLE DISTANCE CONTROL MODE
To set vehicle-to-vehicle distance control mode,
press the button 1 for less than 1.5 seconds.
The gray indicator light 2 will illuminate.
Accelerate to the desired speed.
Push down on the SET – switch 3 and release it.
Intelligent Cruise Control will be set to the
desired speed.
Press the distance button 4 repeatedly to change
the set distance between long, middle and short.
When a vehicle is not detected ahead of you in the
lane, the set distance and set vehicle speed
indicator lights will illuminate 5 in set mode.
When a vehicle is detected ahead of you in the lane,
the vehicle ahead detection, set distance and set
vehicle speed indicator lights will illuminate 6 in
set mode.
To reset at a faster cruising speed, push up and
hold the RES + switch 7. When the vehicle attains
the desired speed, release the switch.
To reset at a slower cruising speed, push down and
hold the SET – switch 3. Release the switch when the vehicle slows to the desired speed.
To cancel the preset speed, push the CANCEL switch 8. The set vehicle speed indicator
5 will change to grey.
To turn off Intelligent Cruise Control, press the button 1. The indicator light 2 in
the instrument panel will extinguish.
To set conventional (fixed speed) cruise control mode:
While Intelligent Cruise Control is off, press the button 1 and hold it down for more
than 1.5 seconds. The grey indicator light will illuminate.
Accelerate to the desired speed.
Push down on the SET – switch and release it. The green indicator light will illuminate.
Cruise control should be set to the desired speed.
To switch between the two cruise control modes:
When one of the two cruise modes is in use, you must turn the system off\
and then turn it
on again to select the other cruise control mode.
For more information, refer to the “Starting and driving (section 5)” of your Owner’s Manual.
1 8
4
7
3