navigation screen INFINITI QX50 2017 Navigation Manual
[x] Cancel search | Manufacturer: INFINITI, Model Year: 2017, Model line: QX50, Model: INFINITI QX50 2017Pages: 268, PDF Size: 11.86 MB
Page 37 of 268
![INFINITI QX50 2017 Navigation Manual 3. After the tone sounds and the icon onthe screen changes from [
]to[],
speak a command.
4. Continue to follow the voice menu prompts and speak after the tone
sounds until the operation is com-
plete INFINITI QX50 2017 Navigation Manual 3. After the tone sounds and the icon onthe screen changes from [
]to[],
speak a command.
4. Continue to follow the voice menu prompts and speak after the tone
sounds until the operation is com-
plete](/img/42/35071/w960_35071-36.png)
3. After the tone sounds and the icon onthe screen changes from [
]to[],
speak a command.
4. Continue to follow the voice menu prompts and speak after the tone
sounds until the operation is com-
pleted.
Operating tips
.Speak a command after the tone.
. Commands that are available are al-
ways shown on the display and spoken
through voice menu prompts. Com-
mands other than those that are dis-
played are not accepted. Please follow
the prompts given by the system.
. If the command is not recognized, the
system announces, “Please say again”.
Repeat the command in a clear voice.
. Push
previous screen.
. Push and hold
command. The message, “Voice recog-
nition is canceled” will be announced.
. Push
prompt and give the command at once.
Remember to wait for the tone before speaking.
. To adjust the volume of the system
feedback, push the volume control
buttons <+>or<−> on the steering
wheel or use the audio system volume
control knob while the system is mak-
ing an announcement.
VOICE COMMAND EXAMPLES
To use the voice recognition system,
speaking one command is sometimes
sufficient, but at other times it is necessary
to speak two or more commands. As
examples, some additional basic opera-
tions that can be performed by voice
commands are described here.
Example 1: Placing call to phone number
800-662-6200
1. Push
wheel.
2. The system announces, “Would you like
to access Phone, Navigation, Informa-
tion, Audio or Help?”.
3. Speak “Phone”.
4. Speak“Dial Number”.
5. Speak“800”.
2. Getting started
2-29
Page 53 of 268
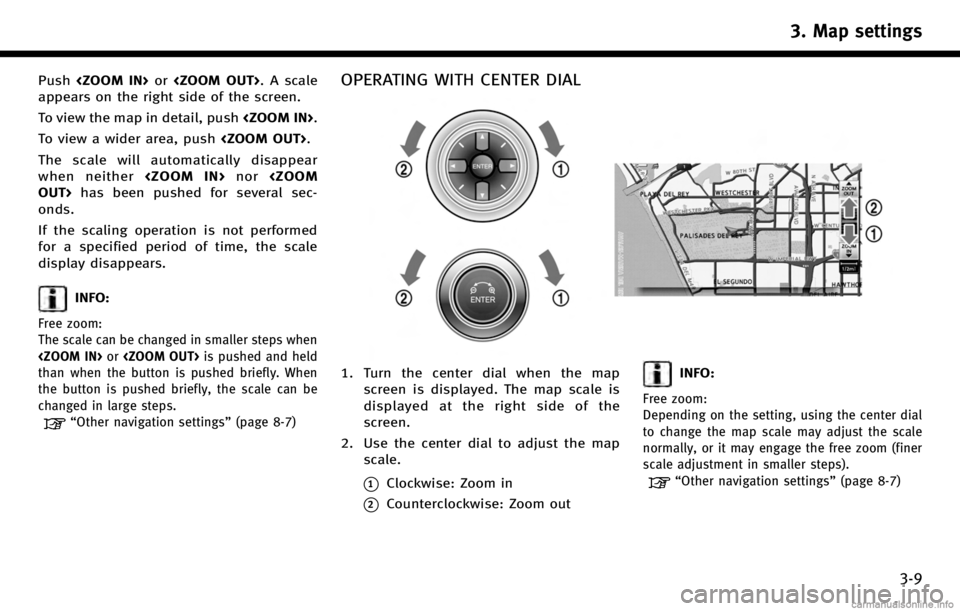
Push
appears on the right side of the screen.
To view the map in detail, push
To view a wider area, push
The scale will automatically disappear
when neither
onds.
If the scaling operation is not performed
for a specified period of time, the scale
display disappears.
INFO:
Free zoom:
The scale can be changed in smaller steps when
than when the button is pushed briefly. When
the button is pushed briefly, the scale can be
changed in large steps.
“Other navigation settings” (page 8-7)
OPERATING WITH CENTER DIAL
1. Turn the center dial when the map
screen is displayed. The map scale is
displayed at the right side of the
screen.
2. Use the center dial to adjust the map scale.
*1Clockwise: Zoom in
*2Counterclockwise: Zoom out
INFO:
Free zoom:
Depending on the setting, using the center dial
to change the map scale may adjust the scale
normally, or it may engage the free zoom (finer
scale adjustment in smaller steps).
“Other navigation settings” (page 8-7)
3. Map settings
3-9
Page 56 of 268
![INFINITI QX50 2017 Navigation Manual 3. Map settings
3-12
3. Highlight [Change View] and push theright button of the directional buttons
or push the slide switch to the right.
4. Highlight the preferred map view and push <ENTER>. The ind INFINITI QX50 2017 Navigation Manual 3. Map settings
3-12
3. Highlight [Change View] and push theright button of the directional buttons
or push the slide switch to the right.
4. Highlight the preferred map view and push <ENTER>. The ind](/img/42/35071/w960_35071-55.png)
3. Map settings
3-12
3. Highlight [Change View] and push theright button of the directional buttons
or push the slide switch to the right.
4. Highlight the preferred map view and push
selected map view illuminates.
5. The display automatically returns to the map screen.
Available views . [2D Map]:
Switches to the 2D map.
. [Birdview (3D)]:
Switches to the Birdview
TMmap.
. [Split: 2D Map]:
Changes to the split screen mode and
both halves display maps in 2D.
. [Split: Birdview Map]:
Changes to the split screen mode and the left half displays the map in 2D and
the right half displays the map in
Birdview
TM.
INFO:
.
When the split screen mode is selected, the
map settings for the left screen can be
changed independently.
“Setting left screen display”
(page 3-17)
.If the split screen mode is selected, the
normal map scrolling and scale adjustment
are set in the right screen.
.The map direction or scale for each screen
can be adjusted independently by touching
an icon on the map.
Split: 2D Map
Split: BirdviewTMMap
OTHER SETTINGS
The map view can also be set by perform-
ing the following procedure.
1. Push
2. Highlight [Navigation] and push
3. Highlight [Map View] and push
4. Highlight [Change View] and push
Page 58 of 268
![INFINITI QX50 2017 Navigation Manual 3. Map settings
3-14
.[Long Range]:
Sets the long range map view display
on/off.
“Settings long range map view”
(page 3-15)
. [Map Color]:
Changes the map color.
“Setting map color” (page 3-16 INFINITI QX50 2017 Navigation Manual 3. Map settings
3-14
.[Long Range]:
Sets the long range map view display
on/off.
“Settings long range map view”
(page 3-15)
. [Map Color]:
Changes the map color.
“Setting map color” (page 3-16](/img/42/35071/w960_35071-57.png)
3. Map settings
3-14
.[Long Range]:
Sets the long range map view display
on/off.
“Settings long range map view”
(page 3-15)
. [Map Color]:
Changes the map color.
“Setting map color” (page 3-16)
. [Birdview Angle]:
Changes the Birdview
TMangle.
“Changing BirdviewTMangle”
(page 3-16)
. [Left Split Map Settings]:
Sets the map settings for the left screen
of the split map.
“Setting left screen display”
(page 3-17)
. [Show all Freeway Exits on Route]/
[Auto. Show Turn List on Freeway]:
Sets the display of the freeway exit
information on/off.
“Show exit information on free-
ways” (page 5-11)
Other settings
The orientation of the map can also be set
by performing the following procedure.
1. Push
2. Highlight [Navigation] and push
3. Highlight [Map View] and push
SETTING MAP ORIENTATION
The map direction (orientation) can also be
changed in the 2D map. These settings are
available only in the 2D map or 2D/2D split
map.
1. Highlight [Map Orientation] and push
2. Highlight the preferred map orientation
and push
selected map orientation illuminates.
3. Push
Page 63 of 268
INFO:
If they are registered in the map data, the brand
icons will be displayed on the map instead of
the general map icons listed below.
Map icons that can be displayed
The following map items can be displayed..
Restaurant
.
Gas Station
.
Hotel
.
AT M
.
Rest Area
Other settings
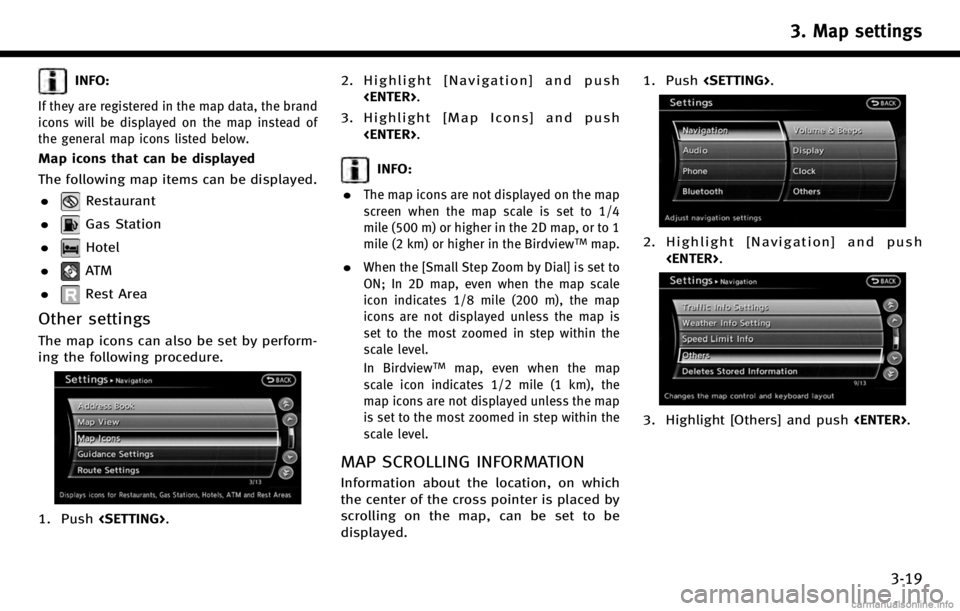
The map icons can also be set by perform-
ing the following procedure.
1. Push
3. Highlight [Map Icons] and push
INFO:
.
The map icons are not displayed on the map
screen when the map scale is set to 1/4
mile (500 m) or higher in the 2D map, or to 1
mile (2 km) or higher in the Birdview
TMmap.
.When the [Small Step Zoom by Dial] is set to
ON; In 2D map, even when the map scale
icon indicates 1/8 mile (200 m), the map
icons are not displayed unless the map is
set to the most zoomed in step within the
scale level.
In Birdview
TMmap, even when the map
scale icon indicates 1/2 mile (1 km), the
map icons are not displayed unless the map
is set to the most zoomed in step within the
scale level.
MAP SCROLLING INFORMATION
Information about the location, on which
the center of the cross pointer is placed by
scrolling on the map, can be set to be
displayed. 1. Push
2. Highlight [Navigation] and push
3. Highlight [Others] and push
3. Map settings
3-19
Page 68 of 268
4. Setting destination
4-2
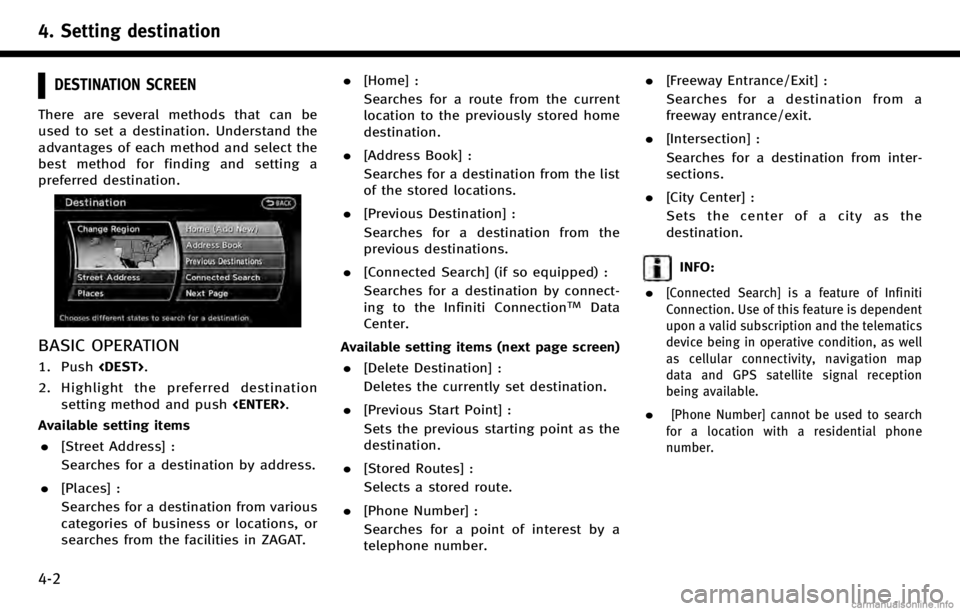
DESTINATION SCREEN
There are several methods that can be
used to set a destination. Understand the
advantages of each method and select the
best method for finding and setting a
preferred destination.
BASIC OPERATION
1. Push
2. Highlight the preferred destination setting method and push
Available setting items . [Street Address] :
Searches for a destination by address.
. [Places] :
Searches for a destination from various
categories of business or locations, or
searches from the facilities in ZAGAT. .
[Home] :
Searches for a route from the current
location to the previously stored home
destination.
. [Address Book] :
Searches for a destination from the list
of the stored locations.
. [Previous Destination] :
Searches for a destination from the
previous destinations.
. [Connected Search] (if so equipped) :
Searches for a destination by connect-
ing to the Infiniti Connection
TMData
Center.
Available setting items (next page screen) . [Delete Destination] :
Deletes the currently set destination.
. [Previous Start Point] :
Sets the previous starting point as the
destination.
. [Stored Routes] :
Selects a stored route.
. [Phone Number] :
Searches for a point of interest by a
telephone number. .
[Freeway Entrance/Exit] :
Searches for a destination from a
freeway entrance/exit.
. [Intersection] :
Searches for a destination from inter-
sections.
. [City Center] :
Sets the center of a city as the
destination.
INFO:
.
[Connected Search] is a feature of Infiniti
Connection. Use of this feature is dependent
upon a valid subscription and the telematics
device being in operative condition, as well
as cellular connectivity, navigation map
data and GPS satellite signal reception
being available.
.[Phone Number] cannot be used to search
for a location with a residential phone
number.
Page 71 of 268
![INFINITI QX50 2017 Navigation Manual 2. Enter the house number, highlight [OK]and push <ENTER>. If the house number
is not available, highlight [No House #]
and push <ENTER>. A street name input
screen is displayed.
3. Enter the name of INFINITI QX50 2017 Navigation Manual 2. Enter the house number, highlight [OK]and push <ENTER>. If the house number
is not available, highlight [No House #]
and push <ENTER>. A street name input
screen is displayed.
3. Enter the name of](/img/42/35071/w960_35071-70.png)
2. Enter the house number, highlight [OK]and push
is not available, highlight [No House #]
and push
screen is displayed.
3. Enter the name of the street. After
finishing the entry, highlight [List] and
push
displayed.
INFO:
When [City] is highlighted and
pushed, a city can be specified by typing the
city name.
“Specifying city” (page 4-3)
4. Highlight the correct street of the
destination from the list and push
INFO:
In some cases, when a street name has
been entered, the number of matching
destinations in the “Matches”column may
be different from the number displayed on
the list screen. If this occurs, enter more
characters to further reduce the number of
matches.
5. The entire route is shown on the map. Highlight [Start] after confirming the
location of the displayed destination,
and push
destination to the selected location and
starts calculating a route.
INFO:
Even after setting a destination, the location
of the destination can be adjusted, the route
can be stored, etc.
“Procedures after setting destination”
(page 5-2)
Voice command
1. Push
wheel.
2. After the tone sounds, speak a com- mand.
To set the destination from a street
address:
“Navigation”“ Address”(Standard
Mode)
“Address” (Alternate Command Mode)
4. Setting destination
4-5
Page 73 of 268
![INFINITI QX50 2017 Navigation Manual 5. The entire route is shown on the map.Highlight [Start] after confirming the
location of the displayed destination,
and push <ENTER>. The system sets the
destination to the selected location and
sta INFINITI QX50 2017 Navigation Manual 5. The entire route is shown on the map.Highlight [Start] after confirming the
location of the displayed destination,
and push <ENTER>. The system sets the
destination to the selected location and
sta](/img/42/35071/w960_35071-72.png)
5. The entire route is shown on the map.Highlight [Start] after confirming the
location of the displayed destination,
and push
destination to the selected location and
starts calculating a route.
INFO:
.
If there is a route already set, the newly
selected location can substitute a previously
set destination or can be added to a route
already set.
.To review the destination location again,
highlight [Move Location] and push
Other settings:
The destination can also be set by pushing
map screen and selecting [Nearby Places].
Voice command
1. Push
wheel.
2. After the tone sounds, speak a com- mand.
To display the nearby category list and
select the destination from it:
“Navigation”“ Places”(Standard Mode)
“Places” (Alternate Command Mode)
Searching by other methods
1. Push
2. Highlight [Places] and push
3. Highlight [All Categories or Name] and
push
4. Setting destination
4-7
Page 78 of 268
4. Setting destination
4-12
INFO:
If the home location is not stored yet, the
system will automatically display a screen
for storing it.
“Storing location”(page 6-2)
4. The entire route to the home location is
shown on the map. Highlight [Start]
after confirming the location of the
displayed destination, and push
tion to the selected location and starts
calculating a route.
Voice command
1. Push
wheel.
2. After the tone sounds, speak a com- mand.
To set the home location as the destination:
“
Navigation”“ Destination Home”
(Standard Mode)
“ Destination Home” (Alternate Com-
mand Mode)
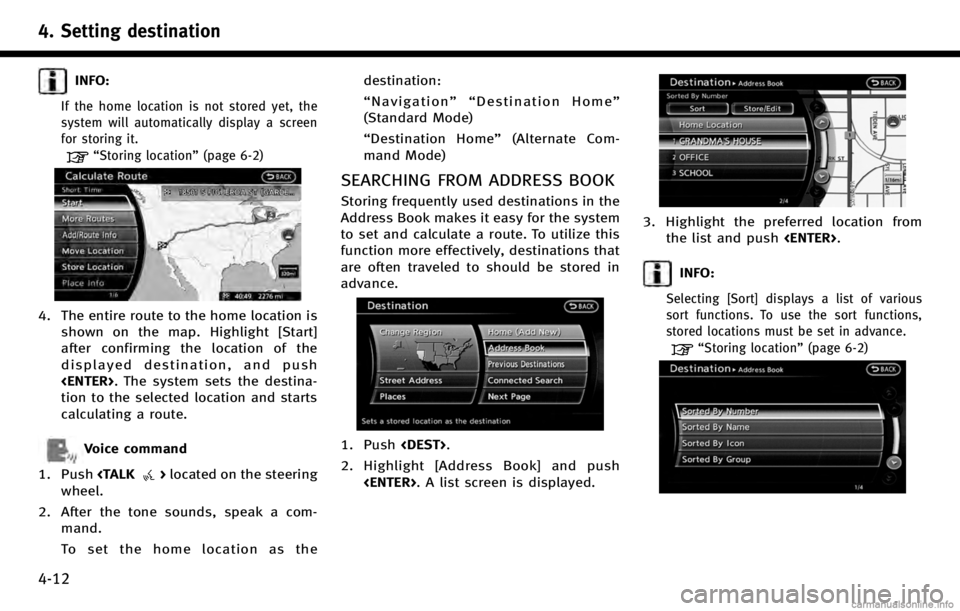
SEARCHING FROM ADDRESS BOOK
Storing frequently used destinations in the
Address Book makes it easy for the system
to set and calculate a route. To utilize this
function more effectively, destinations that
are often traveled to should be stored in
advance.
1. Push
2. Highlight [Address Book] and push
3. Highlight the preferred location fromthe list and push
INFO:
Selecting [Sort] displays a list of various
sort functions. To use the sort functions,
stored locations must be set in advance.
“Storing location” (page 6-2)
Page 79 of 268
INFO:
.Sorted By Number:The Address Book entries are displayed
in ascending numerical order.
.Sorted By Name:The Address Book entries are displayed
in alphabetic order.
.Sorted By Icon:By selecting a particular icon, a list that
contains only the Address Book entries
associated with that icon is displayed.
.Sorted By Group:By selecting a particular group (family,
friends, leisure, etc.), the selected group
is displayed at the top of the list.
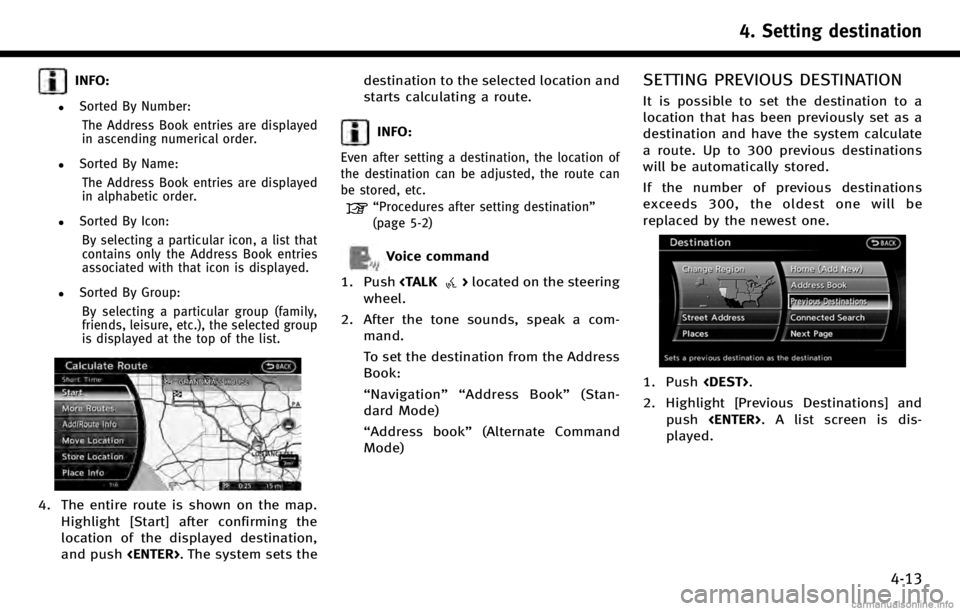
4. The entire route is shown on the map. Highlight [Start] after confirming the
location of the displayed destination,
and push
starts calculating a route.
INFO:
Even after setting a destination, the location of
the destination can be adjusted, the route can
be stored, etc.
“Procedures after setting destination”
(page 5-2)
Voice command
1. Push
wheel.
2. After the tone sounds, speak a com- mand.
To set the destination from the Address
Book:
“Navigation”“ Address Book” (Stan-
dard Mode)
“Address book” (Alternate Command
Mode)
SETTING PREVIOUS DESTINATION
It is possible to set the destination to a
location that has been previously set as a
destination and have the system calculate
a route. Up to 300 previous destinations
will be automatically stored.
If the number of previous destinations
exceeds 300, the oldest one will be
replaced by the newest one.
1. Push
2. Highlight [Previous Destinations] and push
played.
4. Setting destination
4-13