engine INFINITI QX50 2022 Workshop Manual
[x] Cancel search | Manufacturer: INFINITI, Model Year: 2022, Model line: QX50, Model: INFINITI QX50 2022Pages: 540, PDF Size: 6.58 MB
Page 191 of 540

2. To open the fuel-filler door, push the rightside of the fuel-filler door to release.
To lock, close the fuel-filler door securely and
lock the doors.
FUEL-FILLER CAP
WARNING
• Gasoline is extremely flammable and
highly explosive under certain condi-
tions. You could be burned or seriously
injured if it is misused or mishandled. Al-
ways stop the engine and do not smoke
or allow open flames or sparks near the
vehicle when refueling.
• Do not attempt to top off the fuel tank
after the fuel pump nozzle shuts off au-
tomatically. Continued refueling may
cause fuel overflow, resulting in fuel
spray and possibly a fire.
• Use only an original equipment type fuel-
filler cap as a replacement. It has a
built-in safety valve needed for proper
operation of the fuel system and emis-
sion control system. An incorrect cap can
result in a serious malfunction and pos-
sible injury. It could also cause the
Malfunction Indicator Light (MIL) to
come on. •
Never pour fuel into the throttle body to
attempt to start your vehicle.
• Do not fill a portable fuel container in the
vehicle or trailer. Static electricity can
cause an explosion of flammable liquid,
vapor or gas in any vehicle or trailer. To
reduce the risk of serious injury or death
when filling portable fuel containers:
– Always place the container on the
ground when filling.
– Do not use electronic devices when
filling.
– Keep the pump nozzle in contact with
the container while you are filling it.
– Use only approved portable fuel con-
tainers for flammable liquid.
CAUTION
• Do not use a fuel containing more than
15% ethanol in your vehicle. For addi-
tional information, see “Fuel recommen-
dation” (P. 10-4). •
The Loose Fuel Cap warning message
will be displayed if the fuel-filler cap is
not properly tightened. It may take a few
driving trips for the message to be dis-
played. Failure to tighten the fuel-filler
cap properly after the Loose Fuel Cap
warning is displayed may cause the Mal-
function Indicator Light (MIL) to
illuminate.
• Failure to tighten the fuel-filler cap
properly may cause the
Malfunc-
tion Indicator Light (MIL) to illuminate.
If the
light illuminates because the
fuel-filler cap is loose or missing, tighten
or install the cap and continue to drive
the vehicle. The
light should turn off
after a few driving trips. If thelight
does not turn off after a few driving
trips, have the vehicle inspected. It is rec-
ommended that you visit an INFINITI re-
tailer for this service.
• For additional information, see “Mal-
function Indicator Light (MIL)”
(P. 2-15).
• If fuel is spilled on the vehicle body, flush
it away with water to avoid paint
damage.
Pre-driving checks and adjustments3-29
Page 206 of 540

•The system is designed as an aid to the
driver in showing large stationary ob-
jects directly behind the vehicle, to help
avoid damaging the vehicle.
• The distance guide line and the vehicle
width line should be used as a reference
only when the vehicle is on a level paved
surface. The distance viewed on the
monitor is for reference only and may be
different than the actual distance be-
tween the vehicle and displayed objects.
CAUTION
Do not scratch the camera lens when clean-
ing dirt or snow from the front of the
camera.
The RearView Monitor system automatically
shows a rear view of the vehicle in the upper
touch-screen display (upper display) when
the shift lever is shifted into the R (Reverse)
position. When activating the RearView
Monitor, the guide lines, the icons and the
messages may not be displayed immediately.
The radio can still be heard while the Rear-
View Monitor is active. To display the rear view, the RearView Moni-
tor system uses a camera located just above
the vehicle’s license plate
O1.
REARVIEW MONITOR SYSTEM
OPERATION
With the engine running, move the shift lever
to the R (Reverse) position to operate the
RearView Monitor. When activating the
RearView Monitor, the guide lines, the icons
and the messages may not be displayed
immediately.
HOW TO READ THE DISPLAYED
LINES
Guiding lines which indicate the vehicle width
and distances to objects with reference to
the vehicle body line
OAare displayed on the
monitor.
Distance guide lines
Indicate distances from the vehicle body.
• Red line
O1: approx. 1.5 ft (0.5 m)
LHA4552LHA4805
4-4Monitor, climate, audio, phone and voice recognition systems
Page 209 of 540

when backing up to the positionOAif the
object projects over the actual backing up
course.
HOW TO PARK WITH
PREDICTED COURSE LINES
WARNING
• If the tires are replaced with different
sized tires, the predicted course lines
may be displayed incorrectly.
• On a snow-covered or slippery road,
there may be a difference between the
predicted course line and the actual
course line.
• If the battery is disconnected or becomes
discharged, the predicted course lines
may be displayed incorrectly. If this oc-
curs, please perform the following
procedures:
– Turn the steering wheel from lock to
lock while the engine is running.
– Drive the vehicle on a straight road
for more than 5 minutes.
• When the steering wheel is turned with
the ignition switch in the ON position,
the predicted course lines may be dis-
played incorrectly. 1. Visually check that the parking space is
safe before parking your vehicle. 2. The rear view of the vehicle is displayed on
the screen
OAwhen the shift lever is
moved to the R (Reverse) position. When
activating the RearView Monitor, the
guide lines, the icons and the messages
may not be displayed immediately.
LHA5043
Monitor, climate, audio, phone and voice recognition systems4-7
Page 214 of 540

WARNING
• Failure to follow the warnings and in-
structions for the proper use of the
Around View® Monitor system could re-
sult in serious injury or death.
• The Around View® Monitor is a conve-
nience feature and is not a substitute for
proper vehicle operation because it has
areas where objects cannot be viewed.
The four corners of the vehicle in particu-
lar, are areas where objects do not al-
ways appear in the bird’s-eye, front, or
rear views. Always check your surround-
ings to be sure that it is safe to move
before operating the vehicle. Always op-
erate the vehicle slowly.
• The driver is always responsible for
safety during parking and other
maneuvers.
CAUTION
Do not scratch the camera lens when clean-
ing dirt or snow from the front of the
camera. The Around View® Monitor system is de-
signed as an aid to the driver in situations
such as slot parking or parallel parking.
The monitor displays various views of the
position of the vehicle in a split screen format.
Not all views are available at all times.
Available views:
• Front View
An approximately 150–degree view of the
front of the vehicle.
• Rear View An approximately 150–degree view of the
rear of the vehicle.
• Bird's-Eye View The surrounding views of the vehicle from
above.
• Front-Side View The view around and ahead of the front
passenger's side wheel.
• Front-Wide View An approximately 180–degree view of the
front the vehicle.
• Rear-Wide View An approximately 180–degree view of the
rear of the vehicle. To display the multiple views, the Around
View® Monitor system uses cameras located
in the front grille, on the vehicle’s outside
mirrors and one just above the vehicle’s li-
cense plate
O1.
AROUND VIEW® MONITOR
SYSTEM OPERATION
With the engine running, move the shift lever
to the R (Reverse) position or press the
CAMERA button to operate the Around
View® Monitor. When activating the Around
View® Monitor, the guide lines, the icons and
the messages may not be displayed
immediately.
LHA4554
4-12Monitor, climate, audio, phone and voice recognition systems
Page 220 of 540

Backing up near a projecting object
The predicted course linesOAdo not touch
the object in the display. However, the vehicle
may hit the object if it projects over the actual
backing up course.
Backing up behind a projecting
object
The positionOCis shown farther than the
position
OBin the display. However, the po-
sition
OCis actually at the same distance as
the position
OA. The vehicle may hit the object when backing up to the position
OAif the
object projects over the actual backing up
course.
HOW TO PARK WITH
PREDICTED COURSE LINES
WARNING
• If the tires are replaced with different
sized tires, the predicted course lines
may be displayed incorrectly.
• On a snow-covered or slippery road,
there may be a difference between the
predicted course line and the actual
course line.
• If the battery is disconnected or becomes
discharged, the predicted course lines
may be displayed incorrectly. If this oc-
curs, please perform the following
procedures:
– Turn the steering wheel from lock to
lock while the engine is running.
– Drive the vehicle on a straight road
for more than 5 minutes.
• When the steering wheel is turned with
the ignition switch in the ON position,
the predicted course lines may be dis-
played incorrectly.
LHA4995LHA5289
4-18Monitor, climate, audio, phone and voice recognition systems
Page 222 of 540

4. Maneuver the steering wheel to make thevehicle width guide lines
ODparallel to the
parking space
OCwhile referring to the
predicted course lines.
5. When the vehicle is parked in the space completely, press the P (Park) button lo-
cated near the shift lever to place the
vehicle in the P (Park) position and apply
the parking brake.
HOW TO SWITCH THE DISPLAY
With the ignition switch in the ON position,
press theCAMERA button or with the
engine running, move the shift lever to the R
(Reverse) position to operate the Around
View® Monitor.
The Around View® Monitor displays differ-
ent split screen views depending on the posi-
tion of the shift lever. When activating the
Around View® Monitor, the guide lines, the
icons and the messages may not be displayed
immediately. Press the
CAMERA but-
ton or touch the “Change View” key to switch
between the available views. If the shift lever is in the R (Reverse) position,
the available views are:
• Rear view/bird’s-eye view split screen
• Rear view/front-side view split screen
• Rear-wide view
If the shift position is in the P (Park) or D
(Drive) position, the available views are:
• Front view/bird’s-eye view split screen
• Front view/front-side view split screen
• Front-wide view
The display will switch from the Around
View® Monitor screen when:
• The shift lever is in the D (Drive) position
and the vehicle speed increases above ap-
proximately 6 mph (10 km/h).
• A different screen is selected.
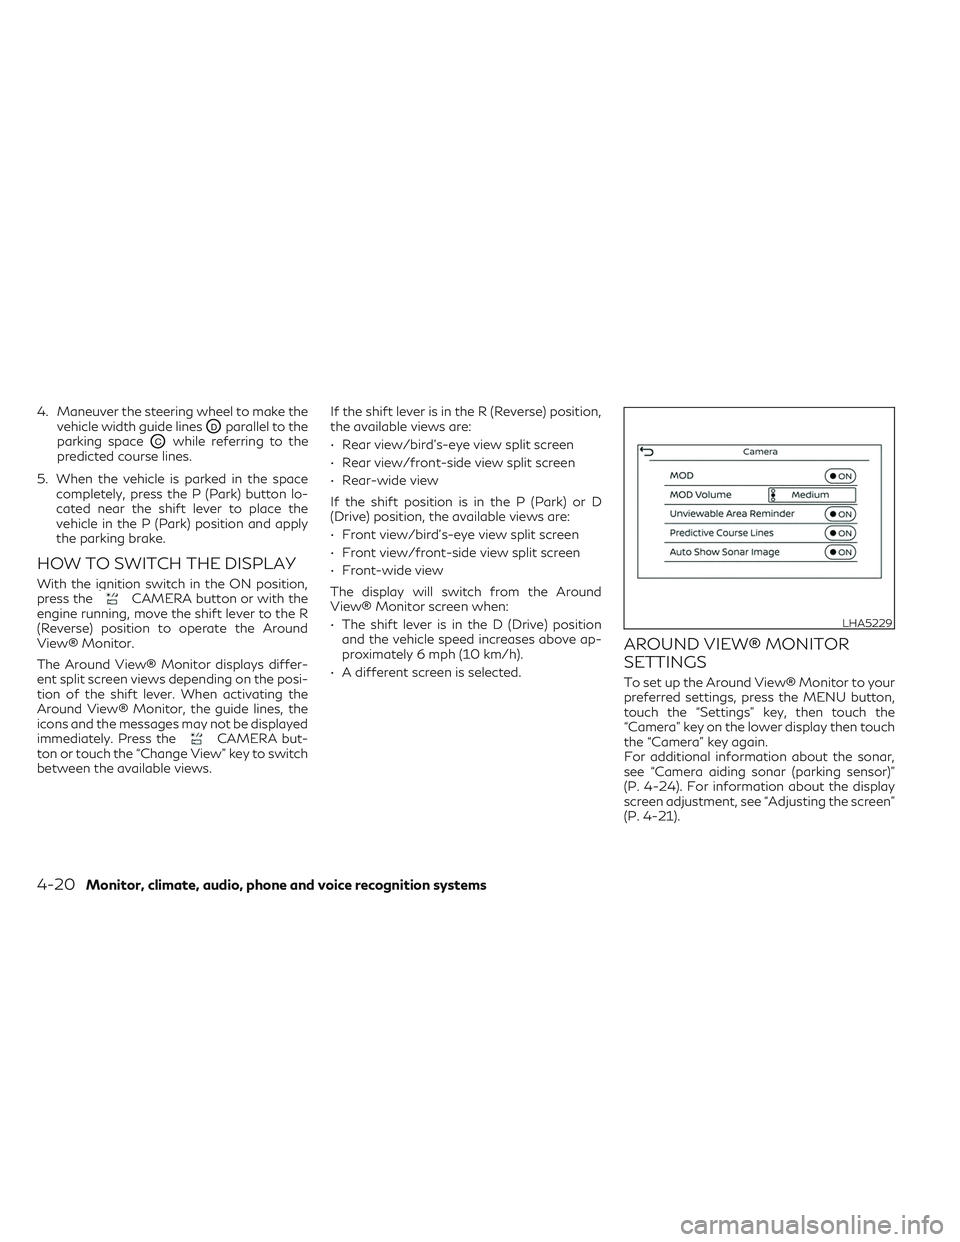
AROUND VIEW® MONITOR
SETTINGS
To set up the Around View® Monitor to your
preferred settings, press the MENU button,
touch the “Settings” key, then touch the
“Camera” key on the lower display then touch
the “Camera” key again.
For additional information about the sonar,
see “Camera aiding sonar (parking sensor)”
(P. 4-24). For information about the display
screen adjustment, see “Adjusting the screen”
(P. 4-21).
LHA5229
4-20Monitor, climate, audio, phone and voice recognition systems
Page 237 of 540

1. Lower touch-screen display (lower display)
2.Temperature control increase button
(passenger’s side)
3.
Temperature control decrease button
(passenger’s side)
4.
Air recirculation button
5.Front defroster button 6.
Rear window and outside mirror (if so
equipped) defroster switch
7. ON-OFF button
8.
Heated seat switches (if so equipped)
9.Climate controlled seat switches (if so
equipped)
10.
CLIMATE button
11.MENU button 12.
Manual air flow control button
13.Fan speed decrease button
14.Fan speed increase button
15. AUTO button
16.
Temperature control decrease button
(driver’s side)
17.
Temperature control increase button
(driver’s side)
WARNING
• The air conditioner cooling function op-
erates only when the engine is running.
• Do not leave children or adults who
would normally require the assistance of
others alone in your vehicle. Pets should
also not be left alone. They could acci-
dentally injure themselves or others
through inadvertent operation of the
vehicle. Also, on hot, sunny days, tem-
peratures in a closed vehicle could
quickly become high enough to cause se-
vere or possibly fatal injuries to people or
animals.
• Do not use the recirculation mode for
long periods as it may cause the interior
air to become stale and the windows to
fog up.
Start the engine and operate the controls to
activate the air conditioner.
LHA5475
HEATER AND AIR CONDITIONER
(automatic)
Monitor, climate, audio, phone and voice recognition systems4-35
Page 238 of 540

NOTE:
• Odors from inside and outside the vehiclecan build up in the air conditioner unit.
Odor can enter the passenger compart-
ment through the vents.
• When parking, set the heater and air con- ditioner controls to turn off air recircula-
tion to allow fresh air into the passenger
compartment. This should help reduce
odors inside the vehicle
AUTOMATIC OPERATION
Press the AUTO button to set the automatic
control mode that keeps the air distribution,
temperature and the fan speed
automatically.
Cooling and/or dehumidified
heating (AUTO)
This mode may be used all year round as the
system automatically works to keep a con-
stant temperature. Air flow distribution, air
intake control, and fan speed are also con-
trolled automatically.
1. Press the
CLIMATE button on the
lower display menu. The CLIMATE screen
will display on the lower display. 2. Press the AUTO button on. (The indicator
on the button will illuminate and AUTO
will be displayed on the CLIMATE screen.)
3. Press the
temperature control
buttons on the driver’s side to set the de-
sired temperature.
• The temperature of the passenger com- partment will be maintained automatically.
Air flow distribution, air intake control and
fan speed are also controlled automatically.
• A visible mist may be seen coming from the vents in hot, humid conditions as the air is
cooled rapidly. This does not indicate a
malfunction.
Dehumidified defrosting or
defogging
1. Press thefront defroster button on.
(The indicator light on the button will
come on.)
2. Operate the
temperature con-
trol buttons to set the desired
temperature.
• To quickly remove ice from the outside of the windows, use the
fan speed con-
trol button or the “” key to set the fan
speed to maximum. • As soon as possible after the windshield is
clean, press the AUTO button to return to
the automatic mode.
• When the
front defroster button is
pressed, the air conditioner will automati-
cally be turned on at outside temperatures
approximately 32°F (0°C) to defog the
windshield. The air recirculate mode auto-
matically turns off, allowing outside air to
be drawn into the passenger compartment
to further improve the defogging
performance.
Remote Engine Start with
Intelligent Climate Control (if so
equipped)
Vehicles equipped with automatic climate
controls and Remote Engine Start function
may go into automatic heating or cooling
mode when Remote Engine Start is activated
depending on outside and cabin tempera-
tures. During this period, the climate control
display and buttons will be inoperable until
the ignition switch is turned on. In Remote
Engine Start defrosting mode, the rear win-
dow defroster, heated seat (if so equipped)
and heated steering wheel (if so equipped)
may be activated automatically. In Remote
4-36Monitor, climate, audio, phone and voice recognition systems
Page 239 of 540

Engine Start cooling mode, the climate con-
trolled seat (if so equipped) may be activated
automatically.
Voice Recognition logic (if so
equipped)
When the climate control system is on, the
fan speed may be automatically lowered so
that commands are more easily recognized.
Fan speed can be adjusted using the
fan
speed decrease andincrease buttons, if
desired.
MANUAL OPERATION
Fan speed control
Press thefan speed increase andfan speed decrease buttons to manually con-
trol the fan speed. Fan speed can also be
controlled by touching the “
”or“”
keys on the lower display.
Press the AUTO button to return to auto-
matic control of the fan speed.
Temperature control
Press thetemperature control
buttons up or down to set the desired
temperature. The temperature can be set within the fol-
lowing range:
• For U.S.: 60 to 90°F (16 to 32°C)
• For Canada: 64 to 90°F (18 to 32°C)
Air recirculation
Press theair recirculation button to
recirculate interior air inside the vehicle. The
indicator light on the button will come
on.
The air recirculation cannot be activated
when the air conditioner is in the
front
defrosting mode.
When the outside temperature exceeds 70°F
(21°C), the air conditioning system may de-
fault to air recirculation mode automatically
to reduce overall power consumption. To exit
air recirculation mode, deselect the
air
recirculation button (indicator will turn off) to
enter fresh air mode.
Automatic intake air control
In the AUTO mode, the intake air will be
controlled automatically. To manually control
the intake air, press the
air recirculation
button. To return to the automatic control
mode, press and hold the
air recircula-
tion button for about 2 seconds. The indica- tor light will flash twice, and then the intake
air will be controlled automatically.
Air flow control
Press thebutton to manually control air
flow. Pressing the button repeatedly will
cycle through the available modes and dis-
play the corresponding icon on the lower dis-
play. Air flow can also be controlled by touch-
ing the “
” key on the lower display:
— Air flows from center and side
vents.
— Air flows from center and sidevents and foot outlets.
— Air flows mainly from foot outlets.— Air flows from defroster and footoutlets.
To turn system off
Press the ON-OFF button.
CLIMATE button
Press theCLIMATE button to show the
CLIMATE screen on the lower display.
Monitor, climate, audio, phone and voice recognition systems4-37
Page 240 of 540

Rear window and outside mirror (if
so equipped) defroster switch
For additional information, see “Rear window
defroster, outside mirror defroster, and wiper
deicer switch” (P. 2-35).
Heated seat switches (if so
equipped)
For additional information, see “Heated
seats” (P. 2-45).
Climate controlled seat switches (if
so equipped)
For additional information, see “Climate con-
trolled seat switches” (P. 2-44).
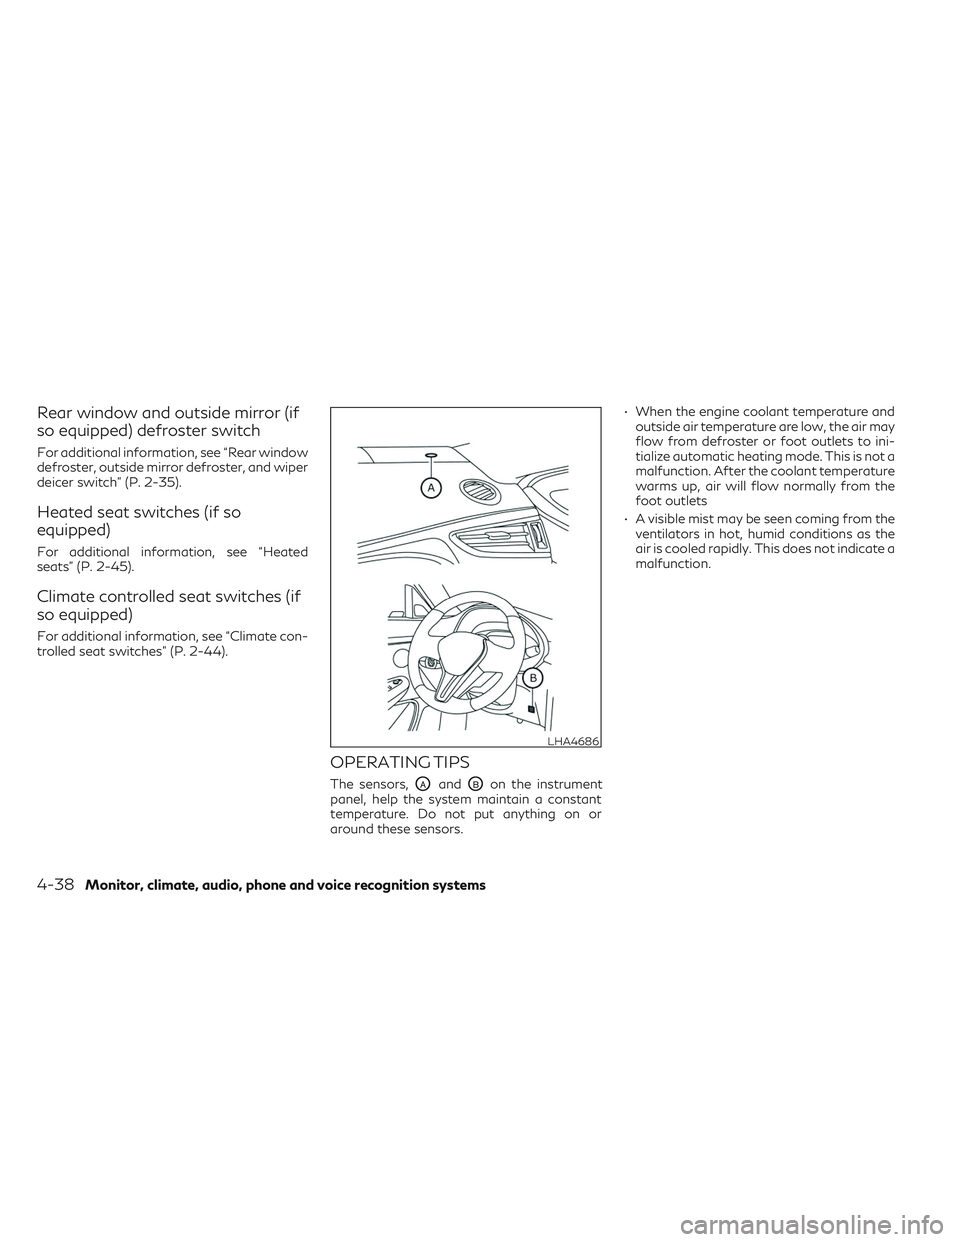
OPERATING TIPS
The sensors,OAandOBon the instrument
panel, help the system maintain a constant
temperature. Do not put anything on or
around these sensors. • When the engine coolant temperature and
outside air temperature are low, the air may
flow from defroster or foot outlets to ini-
tialize automatic heating mode. This is not a
malfunction. After the coolant temperature
warms up, air will flow normally from the
foot outlets
• A visible mist may be seen coming from the ventilators in hot, humid conditions as the
air is cooled rapidly. This does not indicate a
malfunction.
LHA4686
4-38Monitor, climate, audio, phone and voice recognition systems