service INFINITI QX56 2009 Factory Service Manual
[x] Cancel search | Manufacturer: INFINITI, Model Year: 2009, Model line: QX56, Model: INFINITI QX56 2009Pages: 4171, PDF Size: 84.65 MB
Page 1 of 4171

A
B
C
D
E
F
G
H
I
J
K
L
M
N
P
O
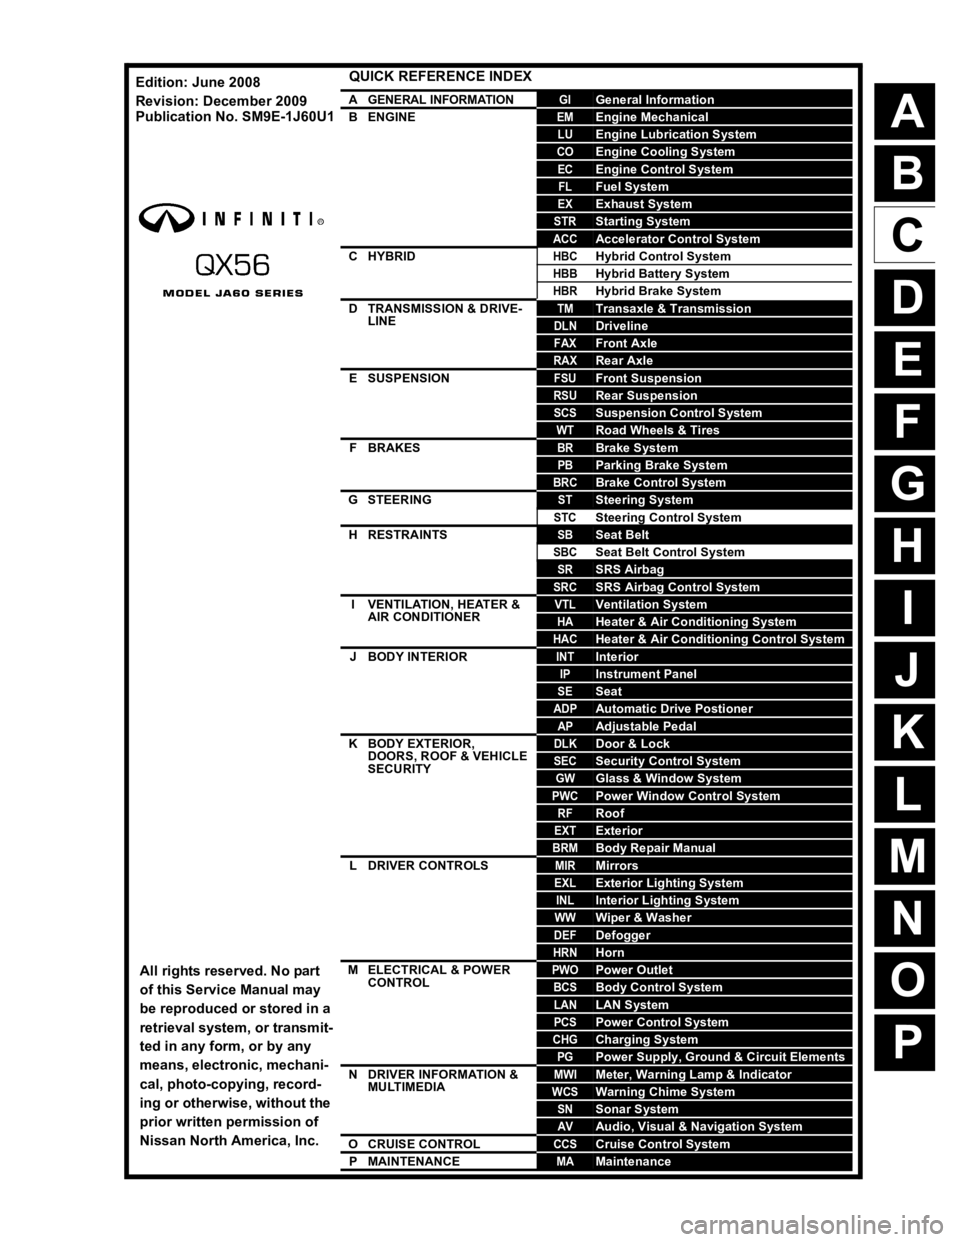
QUICK REFERENCE INDEX
AGENERAL INFORMATIONGIGeneral Information
BENGINEEMEngine Mechanical
LUEngine Lubrication System
COEngine Cooling System
ECEngine Control System
FLFuel System
EXExhaust System
STRStarting System
ACCAccelerator Control System
CHYBRIDHBCHybrid Control System
HBBHybrid Battery System
HBRHybrid Brake System
DTRANSMISSION & DRIVE-
LINETMTransaxle & Transmission
DLNDriveline
FAXFront Axle
RAXRear Axle
ESUSPENSIONFSUFront Suspension
RSURear Suspension
SCSSuspension Control System
WTRoad Wheels & Tires
FBRAKESBRBrake System
PBParking Brake System
BRCBrake Control System
GSTEERINGSTSteering System
STCSteering Control System
HRESTRAINTSSBSeat Belt
SBCSeat Belt Control System
SRSRS Airbag
SRCSRS Airbag Control System
IVENTILATION, HEATER &
AIR CONDITIONERVTLVentilation System
HAHeater & Air Conditioning System
HACHeater & Air Conditioning Control System
JBODY INTERIORINTInterior
IPInstrument Panel
SESeat
ADPAutomatic Drive Postioner
APAdjustable Pedal
KBODY EXTERIOR,
DOORS, ROOF & VEHICLE
SECURITYDLKDoor & Lock
SECSecurity Control System
GWGlass & Window System
PWCPower Window Control System
RFRoof
EXTExterior
BRMBody Repair Manual
LDRIVER CONTROLSMIRMirrors
EXLExterior Lighting System
INLInterior Lighting System
WWWiper & Washer
DEFDefogger
HRNHorn
MELECTRICAL & POWER
CONTROLPWOPower Outlet
BCSBody Control System
LANLAN System
PCSPower Control System
CHGCharging System
PGPower Supply, Ground & Circuit Elements
NDRIVER INFORMATION &
MULTIMEDIAMWIMeter, Warning Lamp & Indicator
WCSWarning Chime System
SNSonar System
AVAudio, Visual & Navigation System
OCRUISE CONTROLCCSCruise Control System
PMAINTENANCEMAMaintenance
All rights reserved. No part
of this Service Manual may
be reproduced or stored in a
retrieval system, or transmit-
ted in any form, or by any
means, electronic, mechani-
cal, photo-copying, record-
ing or otherwise, without the
prior written permission of
Nissan North America, Inc.
Edition: June 2008
Revision: December 2009
Publication No. SM9
E-1J60U1
Page 2 of 4171

FOREWORD
This manual contains maintenance and repair procedure for the 2009
INFINITI QX56.
In order to assure your safety and the efficient functioning of the vehicle,
this manual should be read thoroughly. It is especially important that the
PRECAUTIONS in the GI section be completely understood before starting
any repair task.
All information in this manual is based on the latest product information
at the time of publication. The right is reserved to make changes in specifi-
cations and methods at any time without notice.
IMPORTANT SAFETY NOTICE
The proper performance of service is essential for both the safety of
the technician and the efficient functioning of the vehicle.
The service methods in this Service Manual are described in such a
manner that the service may be performed safely and accurately.
Service varies with the procedures used, the skills of the technician
and the tools and parts available. Accordingly, anyone using service
procedures, tools or parts which are not specifically recommended
by NISSAN must first be completely satisfied that neither personal
safety nor the vehicle’s safety will be jeopardized by the service
method selected.
Page 3 of 4171

PLEASEHELPMAKETHISSERVICEMANUALBETTER!
YourcommentsareimportanttoINFINITIandwillhelpustoimproveourServiceManuals.
UsethisformtoreportanyissuesorcommentsyoumayhaveregardingourServiceManuals.
Pleaseprintthisformandtypeorwriteyourcommentsbelow.Mailorfaxto:
NissanNorthAmerica,Inc.
TechnicalServiceInformation
39001SunriseDrive,P.O.Box9200
FarmingtonHills,MIUSA48331
FAX:(248)488-3910
SERVICEMANUAL:Model:Year:
PUBLICATIONNO.(Refer to Quick Reference Index ):
Pleasedescribeany Service Manualissuesorproblemsindetail:
Pagenumber(s)Note:Pleaseincludeacopyofeachpage,markedwithyourcomments.
Arethetroublediagnosisprocedureslogicalandeasytouse?(circleyouranswer)YESNO
Ifno,whatpagenumber(s)?Note:Pleaseincludeacopyofeachpage,markedwithyourcomments.
Pleasedescribetheissueorproblemindetail:
Istheorganizationofthemanualclearandeasytofollow?(circleyouranswer)YESNO
Pleasecomment:
WhatinformationshouldbeincludedinINFINITIServiceManualstobettersupportyouinservicingor
repairingcustomervehicles?
DATE:YOURNAME:POSITION:
DEALER:DEALERNO.:ADDRESS:
CITY:STATE/PROV./COUNTRY:ZIP/POSTALCODE:
RINFINITI
Page 9 of 4171

ACC-1
ENGINE
C
DE
F
G H
I
J
K L
M
SECTION ACC
A
ACC
N
O P
CONTENTS
ACCELERATOR CONTROL SYSTEM
PRECAUTION ....... ........................................2
PRECAUTIONS .............................................. .....2
Precaution for Supplemental Restraint System
(SRS) "AIR BAG" and "SEAT BELT PRE-TEN-
SIONER" ............................................................. ......
2
Precaution Necessary for Steering Wheel Rota-
tion After Battery Disconnect ............................... ......
2
REMOVAL AND INSTALLATION ................4
ACCELERATOR CONTROL SYSTEM ..............4
Removal and Installation ..................................... .....4
SERVICE DATA AND SPECIFICATIONS
(SDS) ............... .......................................... ....
6
SERVICE DATA AND SPECIFICATIONS
(SDS) ..................................................................
6
Accelerator Control .............................................. .....6
Revision: December 20092009 QX56
Page 10 of 4171

ACC-2
< PRECAUTION >
PRECAUTIONS
PRECAUTION
PRECAUTIONS
Precaution for Supplemental Restraint System (SRS) "AIR BAG" and "SEAT BELT
PRE-TENSIONER"
INFOID:0000000005851830
The Supplemental Restraint System such as “A IR BAG” and “SEAT BELT PRE-TENSIONER”, used along
with a front seat belt, helps to reduce the risk or severity of injury to the driver and front passenger for certain
types of collision. This system includes seat belt switch inputs and dual stage front air bag modules. The SRS
system uses the seat belt switches to determine the front air bag deployment, and may only deploy one front
air bag, depending on the severity of a collision and w hether the front occupants are belted or unbelted.
Information necessary to service the system safely is included in the SR and SB section of this Service Man-
ual.
WARNING:
• To avoid rendering the SRS inopera tive, which could increase the risk of personal injury or death in
the event of a collision which would result in air bag inflation, all maintenance must be performed by
an authorized NISSAN/INFINITI dealer.
• Improper maintenance, including in correct removal and installation of the SRS, can lead to personal
injury caused by unintent ional activation of the system. For re moval of Spiral Cable and Air Bag
Module, see the SR section.
• Do not use electrical test equipmen t on any circuit related to the SRS unless instructed to in this
Service Manual. SRS wiring harn esses can be identified by yellow and/or orange harnesses or har-
ness connectors.
PRECAUTIONS WHEN USING POWER TOOLS (AIR OR ELECTRIC) AND HAMMERS
WARNING:
• When working near the Airbag Diagnosis Sensor Unit or other Airbag System sensors with the Igni-
tion ON or engine running, DO NOT use air or electri c power tools or strike near the sensor(s) with a
hammer. Heavy vibration could activate the sensor( s) and deploy the air bag(s), possibly causing
serious injury.
• When using air or electric power tools or hammers , always switch the Ignition OFF, disconnect the
battery, and wait at least 3 minu tes before performing any service.
Precaution Necessary for Steering W heel Rotation After Battery Disconnect
INFOID:0000000005851831
NOTE:
• This Procedure is applied only to models with Intelligent Key system and NATS (NISSAN ANTI-THEFT SYS-
TEM).
• Remove and install all control units after disconnecting both battery cables with the ignition knob in the
″LOCK ″ position.
• Always use CONSULT-III to perform self-diagnosis as a part of each function inspection after finishing work.
If DTC is detected, perform trouble diagnosis according to self-diagnostic results.
For models equipped with the Intelligent Key system and NATS, an electrically controlled steering lock mech-
anism is adopted on the key cylinder.
For this reason, if the battery is disconnected or if the battery is discharged, the steering wheel will lock and
steering wheel rotation will become impossible.
If steering wheel rotation is required when battery pow er is interrupted, follow the procedure below before
starting the repair operation.
OPERATION PROCEDURE
1. Connect both battery cables. NOTE:
Supply power using jumper cables if battery is discharged.
2. Use the Intelligent Key or mechanical key to turn the ignition switch to the ″ACC ″ position. At this time, the
steering lock will be released.
3. Disconnect both battery cables. The steering lock will remain released and the steering wheel can be rotated.
4. Perform the necessary repair operation.
Revision: December 20092009 QX56
Page 14 of 4171

ACC-6
< SERVICE DATA AND SPECIFICATIONS (SDS)
SERVICE DATA AND SPECIFICATIONS (SDS)
SERVICE DATA AND SPECIFICATIONS (SDS)
SERVICE DATA AND SPECIFICATIONS (SDS)
Accelerator ControlINFOID:0000000003771802
ADJUSTABLE ACCELERATOR PEDAL
Total Pedal Travel and StrokeUnit: mm (in)
Adjustable accelerator pedal - total pedal applied stroke48.3 (1.90)
Adjustable accelerator pedal - total pedal adjustment travel 73.2 (2.88)
Revision: December 20092009 QX56
Page 17 of 4171

ADP-3
C
DE
F
G H
I
K L
M A
B
ADP
N
O P
RECLINING SENSOR .................................... ....76
Description .......................................................... ....76
Component Function Check ..................................76
Diagnosis Procedure ..............................................76
LIFTING SENSOR (FRONT) ..............................78
Description .......................................................... ....78
Component Function Check ..................................78
Diagnosis Procedure ..............................................78
LIFTING SENSOR (REAR) ................................80
Description .......................................................... ....80
Component Function Check ..................................80
Diagnosis Procedure ..............................................80
TILT SENSOR ....................................................82
Description .......................................................... ....82
Component Function Check ..................................82
Diagnosis Procedure ..............................................82
PEDAL ADJUSTING SENSOR ..........................84
Description .......................................................... ....84
Component Function Check ..................................84
Diagnosis Procedure ..............................................84
MIRROR SENSOR .............................................86
DRIVER SIDE ........................................................ ....86
DRIVER SIDE : Description ....................................86
DRIVER SIDE : Component Function Check ........86
DRIVER SIDE : Diagnosis Procedure ....................86
PASSENGER SIDE ...................................................88
PASSENGER SIDE : Description ....................... ....88
PASSENGER SIDE :
Component Function Check ..................................
88
PASSENGER SIDE : Diagnosis Procedure ...........88
SLIDING MOTOR ...............................................90
Description .......................................................... ....90
Component Function Check ..................................90
Diagnosis Procedure ..............................................90
RECLINING MOTOR ..........................................92
Description .......................................................... ....92
Component Function Check ..................................92
Diagnosis Procedure ..............................................92
LIFTING MOTOR (FRONT) ................................94
Description .......................................................... ....94
Component Function Check ..................................94
Diagnosis Procedure ..............................................94
LIFTING MOTOR (REAR) ..................................96
Description .......................................................... ....96
Component Function Check ..................................96
Diagnosis Procedure ..............................................96
TILT MOTOR ......................................................98
Description .......................................................... ....98
Component Function Check ..................................98
Diagnosis Procedure ..............................................98
PEDAL ADJUSTING MOTOR ........................100
Description ........................................................... ..100
Component Function Check ................................100
Diagnosis Procedure ............................................100
DOOR MIRROR MOTOR ................................102
Description .............................................................102
Component Function Check ..................................102
Diagnosis Procedure .............................................102
Component Inspection ...........................................104
SEAT MEMORY INDICATOR LAMP ..............105
Description .............................................................105
Component Function Check ................................105
Diagnosis Procedure ............................................105
Component Inspection ...........................................106
ECU DIAGNOSIS .......................................107
DRIVER SEAT CONTROL UNIT ....................107
Reference Value .................................................. ..107
Wiring Diagram ......................................................112
Fail Safe ................................................................126
DTC Index .............................................................127
AUTOMATIC DRIVE POSITIONER CON-
TROL UNIT ......................................................
128
Reference Value ....................................................128
Wiring Diagram ......................................................131
BCM (BODY CONTROL MODULE) ...............146
Reference Value ....................................................146
Terminal Layout .....................................................148
Physical Values .....................................................148
Wiring Diagram ......................................................154
SYMPTOM DIAGNOSIS ............................159
ADP SYSTEM SYMPTOMS ............................159
Symptom Table ................................................... ..159
NORMAL OPERATING CONDITION .............161
Description .............................................................161
PRECAUTION ............................................162
PRECAUTIONS ...............................................162
Precaution for Supplemental Restraint System
(SRS) "AIR BAG" and "SEAT BELT PRE-TEN-
SIONER" ............................................................. ..
162
Precaution Necessary for Steering Wheel Rota-
tion After Battery Disconnect .................................
162
Precaution for Work ...............................................163
PREPARATION .........................................164
PREPARATION ...............................................164
Special Service Tool ............................................ ..164
Commercial Service Tool ......................................164
ON-VEHICLE REPAIR ...............................165
Revision: December 20092009 QX56
Page 61 of 4171

POWER SUPPLY AND GROUND CIRCUITADP-47
< COMPONENT DIAGNOSIS >
C
DE
F
G H
I
K L
M A
B
ADP
N
O P
DRIVER SEAT CONTROL UNIT : Diagnosis ProcedureINFOID:0000000003775549
NOTE:
Do not disconnect the battery negative terminal and the dr iver seat control unit connector until DTC is con-
firmed with CONSULT-III.
1. CHECK POWER SUPPLY CIRCUIT
1. Turn ignition switch OFF.
2. Disconeect driver seat control unit.
3. Check voltage between driver s eat control unit harness connec-
tor and ground.
Is the inspection result normal?
YES >> GO TO 2
NO >> Check the following. Repair or replace harness between driver seat control unit and fuse block (J/B).
Circuit breaker.
2. CHECK GROUND CIRCUIT
Check continuity between the driv er seat control unit harness con-
nector and ground.
Is the inspection result normal?
YES >> Driver seat control unit power supply and ground circuit are OK.
NO >> Repair or replace harness.
DRIVER SEAT CONTROL UNIT : Special Repair RequirementINFOID:0000000003775550
1. PERFORM ADDITIONAL SERVICE
Perform additional service when removing battery negative terminal.
>> Refer to Owner’s Manual.
AUTOMATIC DRIVE POSITIONER CONTROL UNIT
AUTOMATIC DRIVE POSITIONER CO NTROL UNIT : Diagnosis Procedure
INFOID:0000000003775551
NOTE:
Do not disconnect the battery negative terminal and the dr iver seat control unit connector until DTC is con-
firmed with CONSULT-III.
Te r m i n a l s
Power
source ConditionVoltage (V)
(Approx.)
(+)
(–)
Driver seat
control unit connector Terminal
B202 6 GroundSTART
power sup-
ply Ignition
switch
START Battery
voltage
B203 33 Battery
power sup-ply Ignition
switch OFF
40
LIIA1897E
Driver seat control unit
connector Te r m i n a l
Ground Continuity
B202 32 Ye s
B203 48
PIIA4542E
Revision: December 20092009 QX56
Page 62 of 4171

ADP-48
< COMPONENT DIAGNOSIS >
POWER SUPPLY AND GROUND CIRCUIT
1. CHECK POWER SUPPLY CIRCUIT
1. Turn ignition switch OFF.
2. Disconnect automatic drive positioner control unit.
3. Check voltage between automatic drive positioner control unit harness connector and ground.
Is the inspection result normal?
YES >> GO TO 2
NO >> Repair or replace harness.
2. CHECK GROUND CIRCUIT
Check continuity between the automat ic drive positioner control unit
harness connector and ground.
Is the inspection result normal?
YES >> Automatic drive positioner control unit power supply and ground circuit are OK.
NO >> Repair or replace harness.
AUTOMATIC DRIVE POSITIONER CONTROL UNIT : Special Repair Requirement
INFOID:0000000003775552
1. PERFORM ADDITIONAL SERVICE
Perform additional service when removing battery negative terminal.
>> Refer to Owner’s Manual.
Te r m i n a l s Voltage (V)(Approx.)
(+)
(–)
Automatic drive positioner
control unit connector Te r m i n a l
M34 34
Ground Battery voltage
39
PIIA4543E
Automatic drive positioner
control unit connector Te r m i n a l
GroundContinuity
M34 40
Ye s
48
PIIA4544E
Revision: December 20092009 QX56
Page 176 of 4171

ADP-162
< PRECAUTION >
PRECAUTIONS
PRECAUTION
PRECAUTIONS
Precaution for Supplemental Restraint System (SRS) "AIR BAG" and "SEAT BELT
PRE-TENSIONER"
INFOID:0000000005848468
The Supplemental Restraint System such as “A IR BAG” and “SEAT BELT PRE-TENSIONER”, used along
with a front seat belt, helps to reduce the risk or severi ty of injury to the driver and front passenger for certain
types of collision. This system includes seat belt switch inputs and dual stage front air bag modules. The SRS
system uses the seat belt switches to determine the front air bag deployment, and may only deploy one front
air bag, depending on the severity of a collision and w hether the front occupants are belted or unbelted.
Information necessary to service the system safely is included in the SR and SB section of this Service Man-
ual.
WARNING:
• To avoid rendering the SRS inopera tive, which could increase the risk of personal injury or death in
the event of a collision which would result in air bag inflation, all maintenance must be performed by
an authorized NISS AN/INFINITI dealer.
Improper maintenance, including in correct removal and installation of the SRS, can lead to personal
injury caused by unintent ional activation of the system. For re moval of Spiral Cable and Air Bag
Module, see the SR section.
Do not use electrical test equipmen t on any circuit related to the SRS unless instructed to in this
Service Manual. SRS wiring harnesses can be identi fied by yellow and/or orange harnesses or har-
ness connectors.
PRECAUTIONS WHEN USING POWER TOOLS (AIR OR ELECTRIC) AND HAMMERS
WARNING:
When working near the Airbag Diagnosis Sensor Unit or other Airbag System sensors with the Igni-
tion ON or engine running, DO NOT use air or electri c power tools or strike near the sensor(s) with a
hammer. Heavy vibration could activate the sensor( s) and deploy the air bag(s), possibly causing
serious injury.
When using air or electric power tools or hammers , always switch the Ignition OFF, disconnect the
battery, and wait at least 3 minu tes before performing any service.
Precaution Necessary for Steering W heel Rotation After Battery Disconnect
INFOID:0000000005851835
NOTE:
This Procedure is applied only to models with Intelli gent Key system and NATS (NISSAN ANTI-THEFT SYS-
TEM).
Remove and install all control units after disconnecting both battery cables with the ignition knob in the
″LOCK ″ position.
Always use CONSULT-III to perform self-diagnosis as a part of each function inspection after finishing work.
If DTC is detected, perform trouble diagnosis according to self-diagnostic results.
For models equipped with the Intelligent Key system and NATS, an electrically controlled steering lock mech-
anism is adopted on the key cylinder.
For this reason, if the battery is disconnected or if the battery is discharged, the steering wheel will lock and
steering wheel rotation will become impossible.
If steering wheel rotation is required when battery pow er is interrupted, follow the procedure below before
starting the repair operation.
OPERATION PROCEDURE
1. Connect both battery cables. NOTE:
Supply power using jumper cables if battery is discharged.
2. Use the Intelligent Key or mechanical key to turn the ignition switch to the ″ACC ″ position. At this time, the
steering lock will be released.
3. Disconnect both battery cables. The steering lock will remain released and the steering wheel can be
rotated.
4. Perform the necessary repair operation.
Revision: December 20092009 QX56