coolant level INFINITI QX56 2010 Factory Service Manual
[x] Cancel search | Manufacturer: INFINITI, Model Year: 2010, Model line: QX56, Model: INFINITI QX56 2010Pages: 4210, PDF Size: 81.91 MB
Page 6 of 4210

2010
QUICK REFERENCE CHART: QX56
Wheelarch Height (Unladen*
1)INFOID:0000000001842583
Unit: mm (in)
*1: Fuel, radiator coolant and engine oil full. Spare tire, jack, hand tools and mats in designated positions.
Brake SpecificationrakeINFOID:0000000001842585
Unit: mm (in)
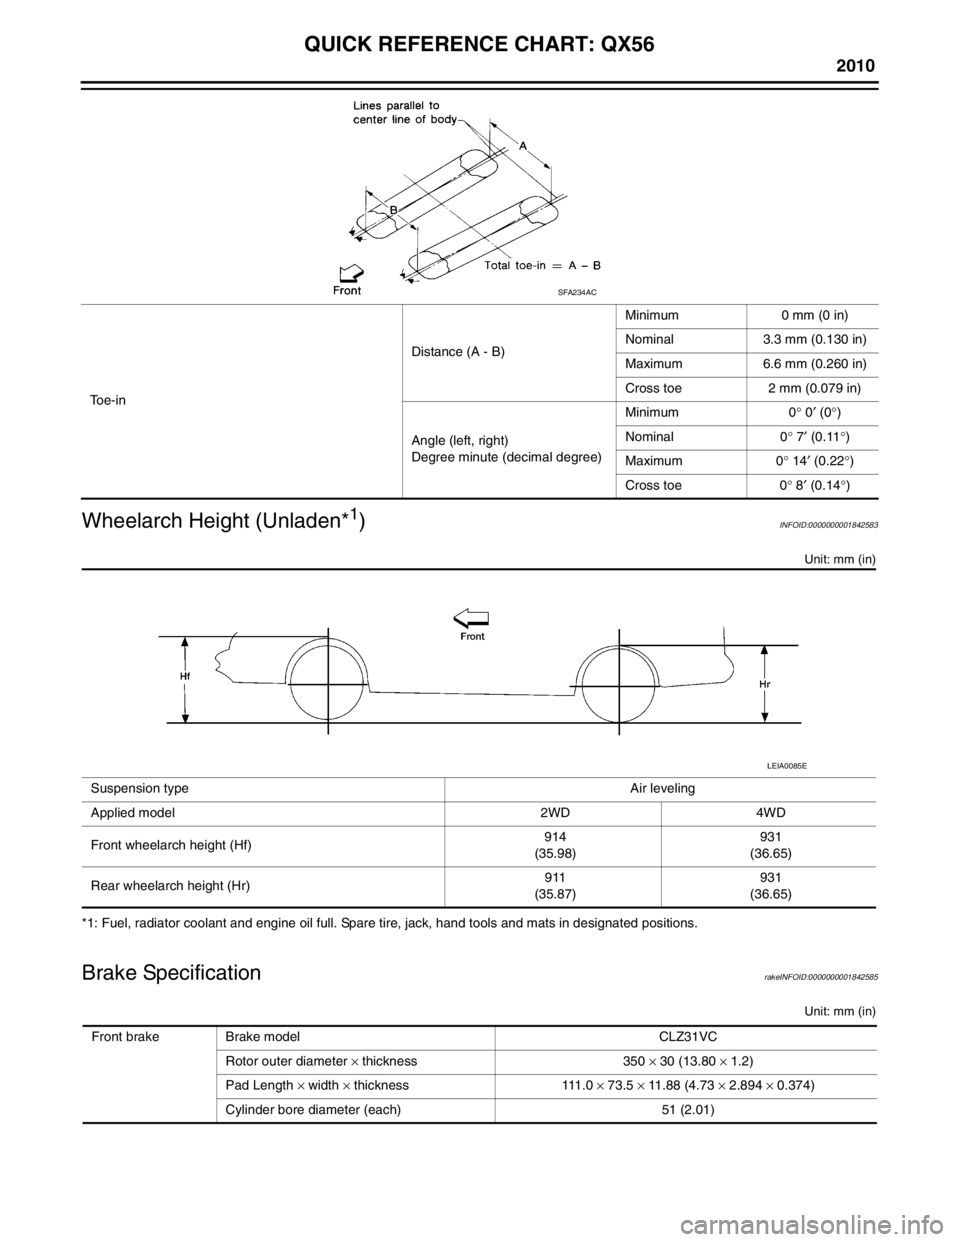
To e - i n Distance (A - B)
Minimum 0 mm (0 in)
Nominal 3.3 mm (0.130 in)
Maximum 6.6 mm (0.260 in)
Cross toe 2 mm (0.079 in)
Angle (left, right)
Degree minute (decimal degree) Minimum 0
° 0 ′ (0 °)
Nominal 0 ° 7 ′ (0.11 °)
Maximum 0 ° 14 ′ (0.22 °)
Cross toe 0 ° 8 ′ (0.14 °)
SFA234AC
Suspension type Air leveling
Applied model 2WD 4WD
Front wheelarch height (Hf) 914
(35.98) 931
(36.65)
Rear wheelarch height (Hr) 911
(35.87) 931
(36.65)
LEIA0085E
Front brake Brake model CLZ31VC
Rotor outer diameter × thickness 350 × 30 (13.80 × 1.2)
Pad Length × width × thickness 111.0 × 73.5 × 11.88 (4.73 × 2.894 × 0.374)
Cylinder bore diameter (each) 51 (2.01)
Page 674 of 4210

CCS
INSPECTION AND ADJUSTMENTCCS-5
< BASIC INSPECTION >
C
DE
F
G H
I
J
K L
M B
N P A
INSPECTION AND ADJUSTMENT
ADDITIONAL SERVICE WHEN REPLACING CONTROL UNIT
ADDITIONAL SERVICE WHEN REPL ACING CONTROL UNIT : Description
INFOID:0000000005145971
Always perform the laser beam aiming adjustment after repl acing the ICC unit. In addition, test the ICC sys-
tem operations to see if it functions normally.
ADDITIONAL SERVICE WHEN REPLACING CONTROL UNIT : Special Repair Re-
quirement
INFOID:0000000005145972
1.LASER BEAM AIMING ADJUSTMENT
Adjust laser beam aiming. Refer to CCS-5, "
LASER BEAM AIMING ADJUSTMENT : Outline of Laser Beam
Aiming Adjustment Procedure".
>> GO TO 2
2.ICC SYSTEM ACTION TEST
1. Perform the ICC system operation test. Refer to CCS-8, "
ACTION TEST : ICC System Running Test".
2. Check that the ICC system operates normally.
>> INSPECTION END.
LASER BEAM AIMI NG ADJUSTMENT
LASER BEAM AIMING ADJUSTMENT : Outlin e of Laser Beam Aiming Adjustment
Procedure
INFOID:0000000005145973
CAUTION:
• The laser beam aiming adjustment can not be performed without CONSULT-III.
• The laser beam aiming adjustment must be performed every time the ICC sensor is removed,
installed or has been moved as a result of a collision.
1. Prepare the vehicle and the work area.
2. Set up the ICC target board. For details, refer to Technical Service Bulletin.
3. Adjust the sensor following the procedure on CONSULT-III.
4. Check system operation after the adjustment.
LASER BEAM AIMING ADJU STMENT : PreparationINFOID:0000000005145974
• Place the vehicle on level ground. Shift the transmi ssion into "P" position and release the parking brake.
• Adjust the tire pressure to the specified value.
• See that there is no load in the vehicle. Coolant , engine oil and fuel should be filled to correct level.
• Check that the vehicle suspension has been adjusted to the standard height by the load leveling rear air sus-
pension system. Refer to SCS-7, "
CONSULT-III Function" .
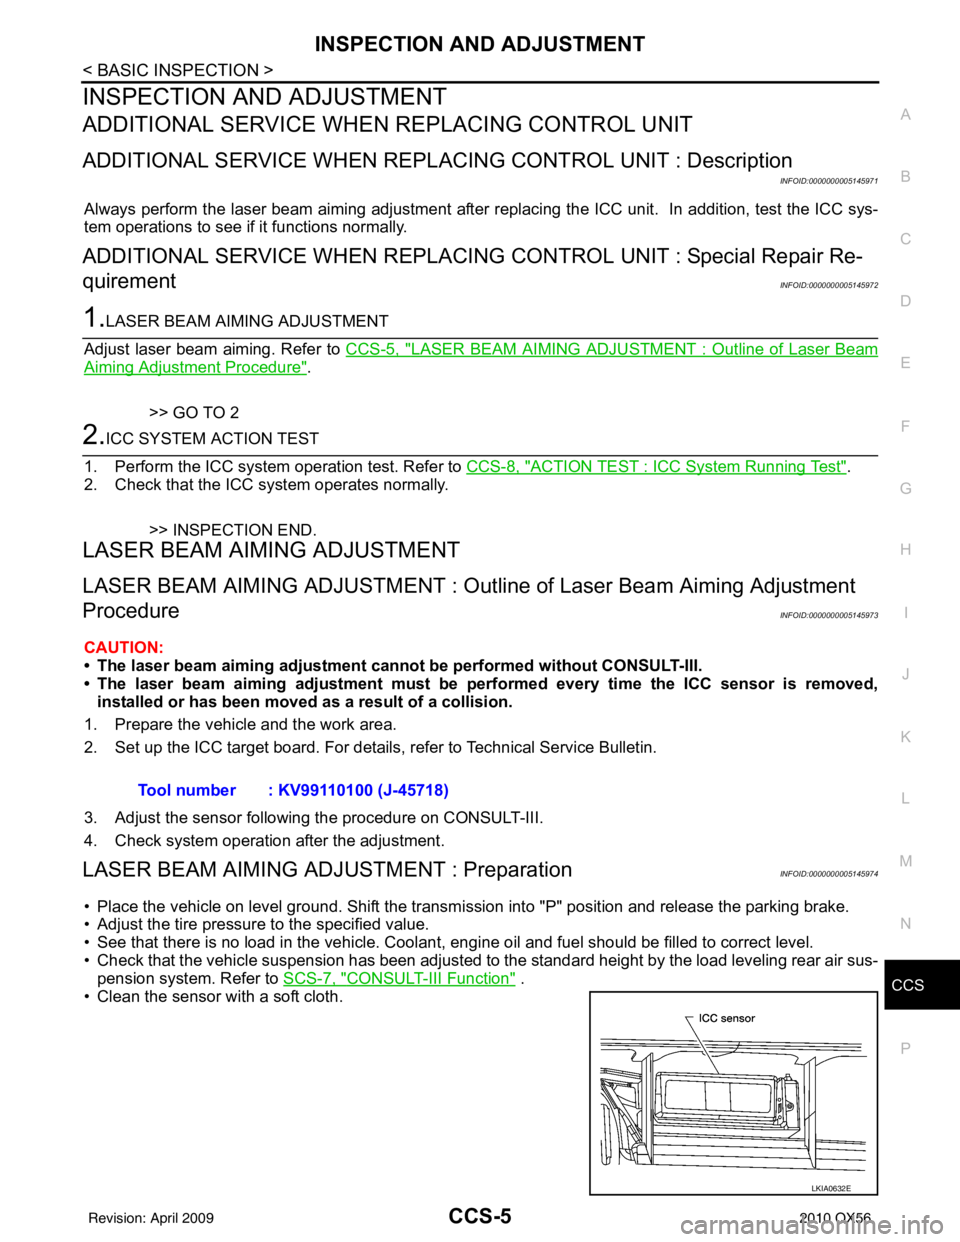
• Clean the sensor with a soft cloth. Tool number : KV99110100 (J-45718)
LKIA0632E
Revision: April 20092010 QX56
Page 774 of 4210

CO-10
< ON-VEHICLE MAINTENANCE >
ENGINE COOLANT
ON-VEHICLE MAINTENANCE
ENGINE COOLANT
InspectionINFOID:0000000005149041
LEVEL CHECK
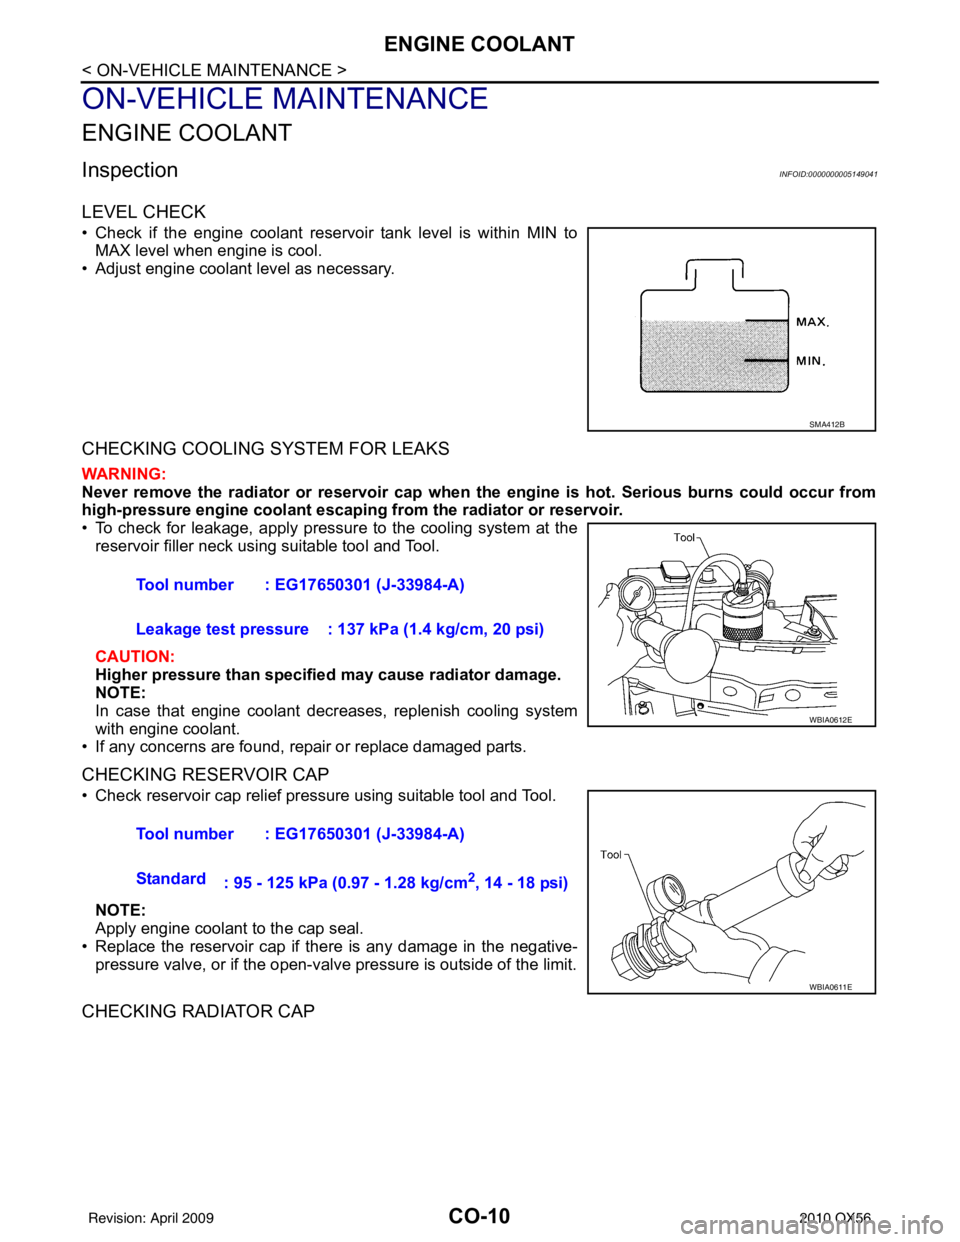
• Check if the engine coolant reservoir tank level is within MIN toMAX level when engine is cool.
• Adjust engine coolant level as necessary.
CHECKING COOLING SYSTEM FOR LEAKS
WARNING:
Never remove the radiator or reservoir cap when th e engine is hot. Serious burns could occur from
high-pressure engine coolant escaping from the radiator or reservoir.
• To check for leakage, apply pressure to the cooling system at the
reservoir filler neck using suitable tool and Tool.
CAUTION:
Higher pressure than specified may cause radiator damage.
NOTE:
In case that engine coolant decreases, replenish cooling system
with engine coolant.
• If any concerns are found, repair or replace damaged parts.
CHECKING RESERVOIR CAP
• Check reservoir cap relief pressure using suitable tool and Tool.
NOTE:
Apply engine coolant to the cap seal.
• Replace the reservoir cap if there is any damage in the negative- pressure valve, or if the open-valve pressure is outside of the limit.
CHECKING RADIATOR CAP
SMA412B
Tool number : EG17650301 (J-33984-A)
Leakage test pressure : 137 kPa (1.4 kg/cm, 20 psi)
WBIA0612E
Tool number : EG17650301 (J-33984-A)
Standard : 95 - 125 kPa (0.97 - 1.28 kg/cm
2, 14 - 18 psi)
WBIA0611E
Revision: April 20092010 QX56
Page 776 of 4210

CO-12
< ON-VEHICLE MAINTENANCE >
ENGINE COOLANT
5. Remove the reservoir tank to drain the engine coolant, then clean the reservoir tank before installing it.
6. Check the drained coolant for contaminants such as rust, corrosion or discoloration.
If the coolant is contaminated, flus h the engine cooling system. Refer to CO-11, "
Changing Engine Cool-
ant".
REFILLING ENGINE COOLANT
1. Close the radiator drain plug. Install the reservoir t ank, cylinder block drain plug, and the oil cooler hose, if
removed for a total system drain or for engine removal or repair.
• The radiator must be completely empty of coolant and water.
• Apply sealant to the threads of the cylinder bl ock drain plug. Use Genuine High Performance Thread
Sealant or equivalent. Refer to GI-15, "
Recommended Chemical Products and Sealants".
2. Set the vehicle heater controls to the full HOT and heat er ON position. Turn the vehicle ignition ON with
the engine OFF as necessary to activate the heater mode.
3. Remove the vented reservoir cap and replace it with a non-vented reservoir cap before filling the cooling
system.
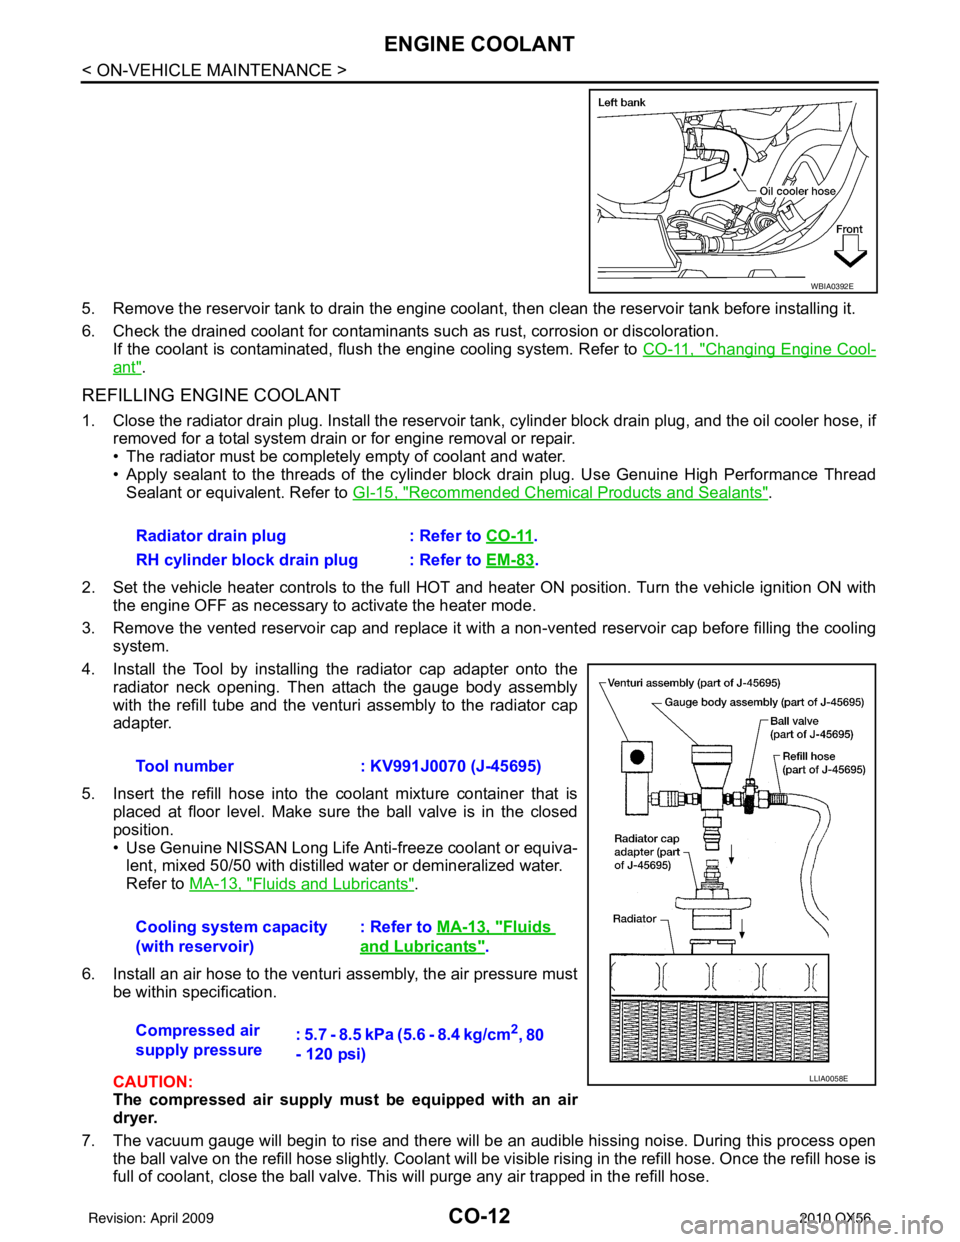
4. Install the Tool by installing the radiator cap adapter onto the radiator neck opening. Then attach the gauge body assembly
with the refill tube and the venturi assembly to the radiator cap
adapter.
5. Insert the refill hose into the coolant mixture container that is placed at floor level. Make sure the ball valve is in the closed
position.
• Use Genuine NISSAN Long Life Anti-freeze coolant or equiva-lent, mixed 50/50 with distilled water or demineralized water.
Refer to MA-13, "
Fluids and Lubricants".
6. Install an air hose to the venturi assembly, the air pressure must be within specification.
CAUTION:
The compressed air supply must be equipped with an air
dryer.
7. The vacuum gauge will begin to rise and there will be an audible hissing noise. During this process open the ball valve on the refill hose slightly. Coolant will be vi sible rising in the refill hose. Once the refill hose is
full of coolant, close the ball valve. This will purge any air trapped in the refill hose.
WBIA0392E
Radiator drain plug : Refer to CO-11.
RH cylinder block drain plug : Refer to EM-83
.
Tool number : KV991J0070 (J-45695)
Cooling system capacity
(with reservoir) : Refer to
MA-13, "
Fluids
and Lubricants".
Compressed air
supply pressure : 5.7 - 8.5 kPa (5.6 - 8.4 kg/cm
2, 80
- 120 psi)
LLIA0058E
Revision: April 20092010 QX56
Page 777 of 4210

ENGINE COOLANTCO-13
< ON-VEHICLE MAINTENANCE >
C
DE
F
G H
I
J
K L
M A
CO
NP
O
8. Continue to draw the vacuum until the gauge reaches 28 inches
of vacuum. The gauge may not reach 28 inches in high altitude
locations, use the vacuum specifications based on the altitude
above sea level.
9. When the vacuum gauge has reached the specified amount, disconnect the air hose and wait 20 seconds
to see if the system loses any vacuum. If the vacuum level drops, perform any necessary repairs to the
system and repeat steps 6 - 8 to br ing the vacuum to the specified amount. Recheck for any leaks.
10. Place the coolant container (with the refill hose inserted) at the same level as the top of the radiator. Then
open the ball valve on the refill hose so the coolant will be drawn up to fill the cooling system. The cooling
system is full when the vacuum gauge reads zero.
CAUTION:
Do not allow the coolant container to get too low when filling, to avoid air from being drawn into
the cooling system.
11. Remove the Tool from the radiator neck opening and install the radiator cap.
12. Remove the non-vented reservoir cap.
13. Fill the cooling system reservoir tank to the specified level. Run the engine to warm up the cooling system and top up the system as necessary befor e installing the vented reservoir cap.
FLUSHING COOLING SYSTEM
1. Drain the water from the engine cooling system. Refer to CO-11, "Changing Engine Coolant".
2. Fill the radiator and the reservoir tank (to the “MAX” line), with water. Reinstall the radiator cap and leave
the vented reservoir cap off.
3. Run the engine until it reaches normal operating temperature.
4. Press the engine accelerator two or three times under no-load.
5. Stop the engine and wait until it cools down.
6. Drain the water from the engine cooling system. Refer to CO-11, "
Changing Engine Coolant".
7. Repeat steps 2 through 6 until clear water begins to drain from the radiator. Altitude above sea level Vacuum gauge reading
0 - 100 m (328 ft) : 28 inches of vacuum
300 m (984 ft) : 27 inches of vacuum
500 m (1,641 ft) : 26 inches of vacuum
1,000 m (3,281 ft) : 24 - 25 inches of vacuum
LLIA0057E
Revision: April 20092010 QX56
Page 788 of 4210

CO-24
< SERVICE DATA AND SPECIFICATIONS (SDS)
SERVICE DATA AND SPECIFICATIONS (SDS)
SERVICE DATA AND SPECIFICATIONS (SDS)
SERVICE DATA AND SPECIFICATIONS (SDS)
Standard and LimitINFOID:0000000005149053
ENGINE COOLANT CAPACITY (APPROXIMATE)
Unit: (US qt, Imp qt)
THERMOSTAT
RADIATOR
Unit: kPa (kg/cm2, psi)
Engine coolant capacity with reservoir ("MAX" level)14.4 (15 1/4, 12 5/8)
Valve opening temperature80 - 84°C (176 - 183 °F)
Maximum valve lift More than 10 mm/95°C (0.39 in/203 °F)
Valve closing temperature 77°C (171 °F) or higher
Reservoir cap relief pressure Standard 95 - 125 (0.97- 1.28, 14 - 18)
Leakage test pressure 137 (1.4, 20)
Revision: April 20092010 QX56
Page 1401 of 4210
![INFINITI QX56 2010 Factory Service Manual EC-48
< FUNCTION DIAGNOSIS >[VK56DE]
ON BOARD DIAGNOSTIC (OBD) SYSTEM
• Sea level
• Flat road
• Ambient air temperature: 20 - 30
°C (68 - 86° F)
• Diagnosis is performed as quickly as possi INFINITI QX56 2010 Factory Service Manual EC-48
< FUNCTION DIAGNOSIS >[VK56DE]
ON BOARD DIAGNOSTIC (OBD) SYSTEM
• Sea level
• Flat road
• Ambient air temperature: 20 - 30
°C (68 - 86° F)
• Diagnosis is performed as quickly as possi](/img/42/57032/w960_57032-1400.png)
EC-48
< FUNCTION DIAGNOSIS >[VK56DE]
ON BOARD DIAGNOSTIC (OBD) SYSTEM
• Sea level
• Flat road
• Ambient air temperature: 20 - 30
°C (68 - 86° F)
• Diagnosis is performed as quickly as possible under normal conditions.
Under different conditions [For example: ambient air temperature other than 20 - 30 °C (68 - 86 °F)], diagno-
sis may also be performed.
Pattern 1:
• The engine is started at the engine coolant temperature of −10 to 35 °C (14 to 95 °F)
(where the voltage between the ECM te rminal 73 and ground is 3.0 - 4.3V).
• The engine must be operated at idle speed until the engine coolant temper ature is greater than 70°C
(158° F) (where the voltage between the ECM te rminal 73 and ground is lower than 1.4V).
• The engine is started at the fuel tank temperature of warmer than 0° C (32°F) (where the voltage
between the ECM terminal 107 and ground is less than 4.1V).
Pattern 2:
• When steady-state driving is performed again even after it is interrupted, each diagnosis can be conducted. In this case, the time required for diagnosis may be extended.
Pattern 3:
• Operate vehicle following the driving pattern shown in the figure.
• Release the accelerator pedal during decelerating vehicle speed from 90 km/h (56 MPH) to 0 km/h (0 MPH).
Pattern 4:
• The accelerator pedal must be held very steady during steady- state driving.
• If the accelerator pedal is moved, the test must be conducted all
over again.
*1: Depress the accelerator pedal until vehicle speed is 90 km/h (56
MPH), then release the accelerator pedal and keep it released for
more than 10 seconds. Depress the accelerator pedal until vehicle
speed is 90 km/h (56 MPH) again.
*2: Checking the vehicle speed with GST is advised.
Suggested Transmission Gear Position
Set the selector lever in the D position with the overdrive switch turned ON.
TEST VALUE AND TEST LIMIT
The following is the information specified in Service $06 of SAE J1979.
The test value is a parameter used to determine whether a system/circuit diagnostic test is OK or NG while
being monitored by the ECM during self-diagnosis. The test limit is a reference value which is specified as the
maximum or minimum value and is compared with the test value being monitored.
These data (test value and test limit) are specified by On Board Monitor ID(OBDMID), Test ID (TID), Unit and
Scaling ID and can be displayed on the GST screen.
The items of the test value and test limit will be di splayed with GST screen which items are provided by the
ECM. (eg., if the bank 2 is not applied on this v ehicle, only the items of the bank 1 is displayed)
PBIB2244E
Revision: April 20092010 QX56
Page 1417 of 4210
![INFINITI QX56 2010 Factory Service Manual EC-64
< FUNCTION DIAGNOSIS >[VK56DE]
ON BOARD DIAGNOSTIC (OBD) SYSTEM
ItemDIAGNOSTIC TEST MODE
WORK SUP-
PORT SELF-DIAGNOSTIC
RESULTS DATA
MONI-
TOR ACTIVE
TEST DTC & SRT
CONFIRMATION
DTC*1 FREEZE INFINITI QX56 2010 Factory Service Manual EC-64
< FUNCTION DIAGNOSIS >[VK56DE]
ON BOARD DIAGNOSTIC (OBD) SYSTEM
ItemDIAGNOSTIC TEST MODE
WORK SUP-
PORT SELF-DIAGNOSTIC
RESULTS DATA
MONI-
TOR ACTIVE
TEST DTC & SRT
CONFIRMATION
DTC*1 FREEZE](/img/42/57032/w960_57032-1416.png)
EC-64
< FUNCTION DIAGNOSIS >[VK56DE]
ON BOARD DIAGNOSTIC (OBD) SYSTEM
ItemDIAGNOSTIC TEST MODE
WORK SUP-
PORT SELF-DIAGNOSTIC
RESULTS DATA
MONI-
TOR ACTIVE
TEST DTC & SRT
CONFIRMATION
DTC*1 FREEZE
FRAME
DATA*2 SRT
STATUS DTC
WORK
SUP-
PORT
ENGINE CONTROL COMPONENT PARTS
INPUT
Crankshaft position sensor (POS) ×××
Camshaft position sensor (PHASE) ×××
Mass air flow sensor ××
Engine coolant temperature sensor ××××
Air fuel ratio (A/F) sensor 1 ××× ×
Heated oxygen sensor 2 ××× ×
Wheel sensor ×××
Accelerator pedal position sensor ××
Throttle position sensor ×××
Fuel tank temperature sensor ×××
EVAP control system pressure sen-
sor ××
Intake air temperature sensor ×××
Knock sensor ×
Refrigerant pressure sensor ×
Closed throttle position switch (ac-
celerator pedal position sensor sig-
nal) ×
Air conditioner switch ×
Park/neutral position (PNP) signal ××
Stop lamp switch ××
Power steering pressure sensor ××
Battery voltage ×
Load signal ×
Intake valve timing control position
sensor ××
Fuel level sensor ××
Battery current sensor ××
ICC steering switch ××
ASCD steering switch ××
ICC brake switch ××
ASCD brake switch ××
Revision: April 20092010 QX56
Page 1471 of 4210
![INFINITI QX56 2010 Factory Service Manual EC-118
< COMPONENT DIAGNOSIS >[VK56DE]
P0116 ECT SENSOR
P0116 ECT SENSOR
Component DescriptionINFOID:0000000005149126
The engine coolant temperature sensor is used to detect the engine
coolant tempera INFINITI QX56 2010 Factory Service Manual EC-118
< COMPONENT DIAGNOSIS >[VK56DE]
P0116 ECT SENSOR
P0116 ECT SENSOR
Component DescriptionINFOID:0000000005149126
The engine coolant temperature sensor is used to detect the engine
coolant tempera](/img/42/57032/w960_57032-1470.png)
EC-118
< COMPONENT DIAGNOSIS >[VK56DE]
P0116 ECT SENSOR
P0116 ECT SENSOR
Component DescriptionINFOID:0000000005149126
The engine coolant temperature sensor is used to detect the engine
coolant temperature. The sensor modifies a voltage signal from the
ECM. The modified signal returns to the ECM as the engine coolant
temperature input. The sensor uses
a thermistor which is sensitive to
the change in temperature. The elec trical resistance of the ther-
mistor decreases as temperature increases.
*: This data is reference value and is measured between ECM terminal 73 (Engine
coolant temperature sensor) and ground.
CAUTION:
Do not use ECM ground terminals when measuring input/output voltage. Doi ng so may result in dam-
age to the ECM's transistor. Use a ground ot her than ECM terminals, such as the ground.
On Board Diagnosis LogicINFOID:0000000005149127
NOTE:
If DTC P0116 is displayed with P0117 or P0118, first perform the trouble diagnosis for DTC P0117,
P0118. Refer to EC-122, "
DTC Confirmation Procedure".
DTC Confirmation ProcedureINFOID:0000000005149128
NOTE:
If DTC Confirmation Procedure has been previously conducted, always perform the following procedure
before conducting the next step.
• Turn ignition switch OFF and wait at least 10 seconds.
• Turn ignition switch ON.
• Turn ignition switch OFF and wait at least 10 seconds.
TESTING CONDITION:
Before performing the following pro cedure, do not fill with the fuel.
1. Start engine and warm it up to normal operating temperature.
2. Rev engine up to 2,000 rpm for more than10 minutes.
3. Move the vehicle to a cool place, then stop engine and turn ignition switch OFF.
4. Check resistance between “fuel level sensor and fuel pump” terminals 3 and 4.
SEF594K
Engine coolant
temperature °C ( °F)] Voltage* (V)
Resistance (kΩ)
− 10 (14) 4.47.0 - 11.4
20 (68) 3.52.1 - 2.9
50 (122) 2.20.68 - 1.00
90 (194) 0.90.236 - 0.260
SEF012P
DTC No. Trouble diagnosis name DTC detecting conditionPossible cause
P0116
0116 Engine coolant tempera-
ture sensor circuit range/
performance Engine coolant temperature signal from engine
coolant temperature sensor does not fluctuate,
even when some time has passed after starting
the engine with pre-warming up condition. • Harness or connectors
(High or low resistance in the circuit)
• Engine coolant temperature sensor
Revision: April 20092010 QX56
Page 1472 of 4210
![INFINITI QX56 2010 Factory Service Manual P0116 ECT SENSOREC-119
< COMPONENT DIAGNOSIS > [VK56DE]
C
D
E
F
G H
I
J
K L
M A
EC
NP
O
5. Soak the vehicle until the resistance between “fuel
level sensor and fuel pump” terminals 3 and 4
become INFINITI QX56 2010 Factory Service Manual P0116 ECT SENSOREC-119
< COMPONENT DIAGNOSIS > [VK56DE]
C
D
E
F
G H
I
J
K L
M A
EC
NP
O
5. Soak the vehicle until the resistance between “fuel
level sensor and fuel pump” terminals 3 and 4
become](/img/42/57032/w960_57032-1471.png)
P0116 ECT SENSOREC-119
< COMPONENT DIAGNOSIS > [VK56DE]
C
D
E
F
G H
I
J
K L
M A
EC
NP
O
5. Soak the vehicle until the resistance between “fuel
level sensor and fuel pump” terminals 3 and 4
becomes 0.5 k Ω higher than the value measured before soaking.
CAUTION:
Never turn ignition switch ON during the soaking time.
NOTE:
Soak time changes depending on ambient air temperature. It may take several hours.
6. Start engine and let it idle for 5 minutes.
7. Check 1st trip DTC.
8. If 1st trip DTC is detected, go to EC-119, "
Diagnosis Procedure".
Diagnosis ProcedureINFOID:0000000005149129
1.CHECK GROUND CONNECTIONS
1. Turn ignition switch OFF.
2. Loosen and retighten three ground screws on the body. Refer to EC-85, "
Ground Inspection".
OK or NG
OK >> GO TO 2.
NG >> Repair or replace ground connections.
2.CHECK ENGINE COOLANT TEMPERATURE SENSOR
Refer to EC-119, "
Component Inspection".
OK or NG
OK >> GO TO 3.
NG >> Replace engine coolant temperature sensor.
3.CHECK INTERMITTENT INCIDENT
Refer to GI-35, "
How to Check Terminal" and GI-38, "Intermittent Incident".
For Wiring Diagram, refer to EC-435, "
Wiring Diagram - ENGINE CONTROL SYSTEM -".
>> INSPECTION END
Component InspectionINFOID:0000000005149130
ENGINE COOLANT TEMPERATURE SENSOR
1. Check resistance between engine coolant temperature sensor
terminals 1 and 2 as shown in the figure.
BBIA0354E
PBIB2005E
Revision: April 20092010 QX56