Screen is off INFINITI QX60 2018 Infiniti Connection
[x] Cancel search | Manufacturer: INFINITI, Model Year: 2018, Model line: QX60, Model: INFINITI QX60 2018Pages: 284, PDF Size: 1.34 MB
Page 17 of 284

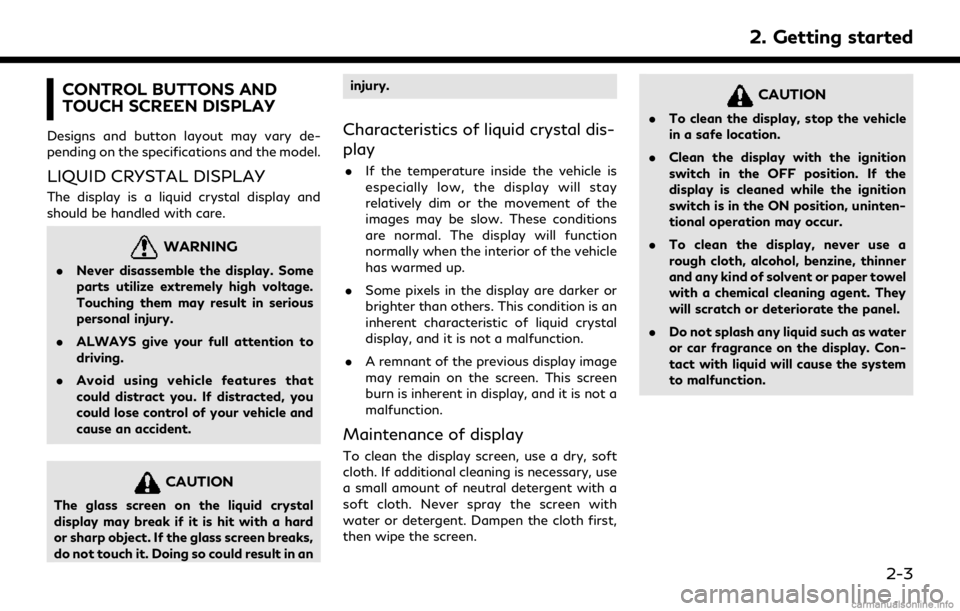
CONTROL BUTTONS AND
TOUCH SCREEN DISPLAY
Designs and button layout may vary de-
pending on the specifications and the model.
LIQUID CRYSTAL DISPLAY
The display is a liquid crystal display and
should be handled with care.
WARNING
.Never disassemble the display. Some
parts utilize extremely high voltage.
Touching them may result in serious
personal injury.
. ALWAYS give your full attention to
driving.
. Avoid using vehicle features that
could distract you. If distracted, you
could lose control of your vehicle and
cause an accident.
CAUTION
The glass screen on the liquid crystal
display may break if it is hit with a hard
or sharp object. If the glass screen breaks,
do not touch it. Doing so could result in an injury.
Characteristics of liquid crystal dis-
play
.
If the temperature inside the vehicle is
especially low, the display will stay
relatively dim or the movement of the
images may be slow. These conditions
are normal. The display will function
normally when the interior of the vehicle
has warmed up.
. Some pixels in the display are darker or
brighter than others. This condition is an
inherent characteristic of liquid crystal
display, and it is not a malfunction.
. A remnant of the previous display image
may remain on the screen. This screen
burn is inherent in display, and it is not a
malfunction.
Maintenance of display
To clean the display screen, use a dry, soft
cloth. If additional cleaning is necessary, use
a small amount of neutral detergent with a
soft cloth. Never spray the screen with
water or detergent. Dampen the cloth first,
then wipe the screen.
CAUTION
.To clean the display, stop the vehicle
in a safe location.
. Clean the display with the ignition
switch in the OFF position. If the
display is cleaned while the ignition
switch is in the ON position, uninten-
tional operation may occur.
. To clean the display, never use a
rough cloth, alcohol, benzine, thinner
and any kind of solvent or paper towel
with a chemical cleaning agent. They
will scratch or deteriorate the panel.
. Do not splash any liquid such as water
or car fragrance on the display. Con-
tact with liquid will cause the system
to malfunction.
2. Getting started
2-3
Page 19 of 284

The map can be scrolled by sliding this
switch.
Push to repeat the voice guidance for a
guide point.
Push to display the Information menu.
“Information menu” (page 5-2)
Push to access the system settings.
“System settings” (page 2-23)
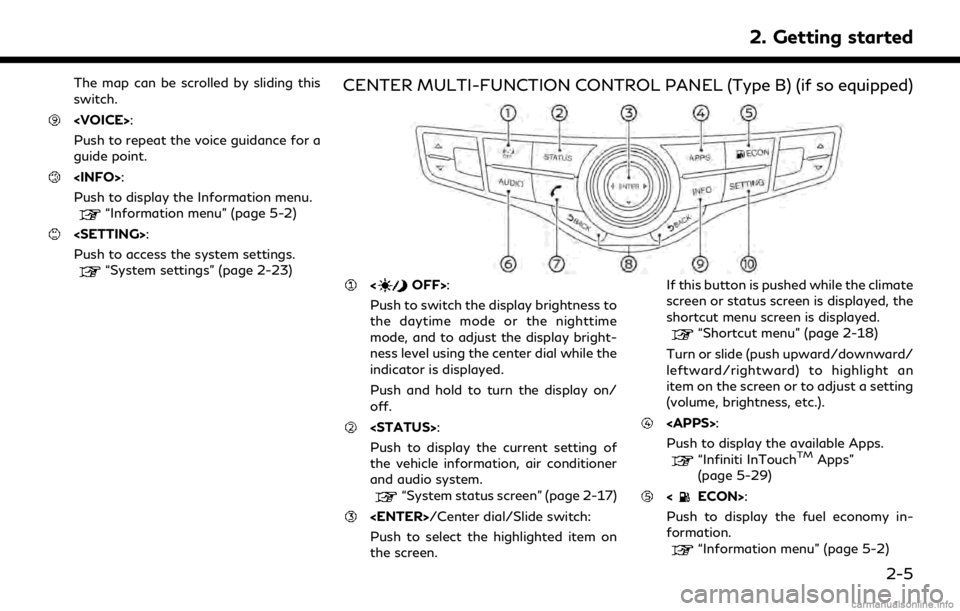
CENTER MULTI-FUNCTION CONTROL PANEL (Type B) (if so equipped)
Push to switch the display brightness to
the daytime mode or the nighttime
mode, and to adjust the display bright-
ness level using the center dial while the
indicator is displayed.
Push and hold to turn the display on/
off.
Push to display the current setting of
the vehicle information, air conditioner
and audio system.
“System status screen” (page 2-17)
Push to select the highlighted item on
the screen. If this button is pushed while the climate
screen or status screen is displayed, the
shortcut menu screen is displayed.
“Shortcut menu” (page 2-18)
Turn or slide (push upward/downward/
leftward/rightward) to highlight an
item on the screen or to adjust a setting
(volume, brightness, etc.).
Push to display the available Apps.
“Infiniti InTouchTMApps”
(page 5-29)
Push to display the fuel economy in-
formation.
“Information menu” (page 5-2)
2. Getting started
2-5
Page 23 of 284

screen.“MENU button operation (models
with INFINITI controller)”
(page 2-14)
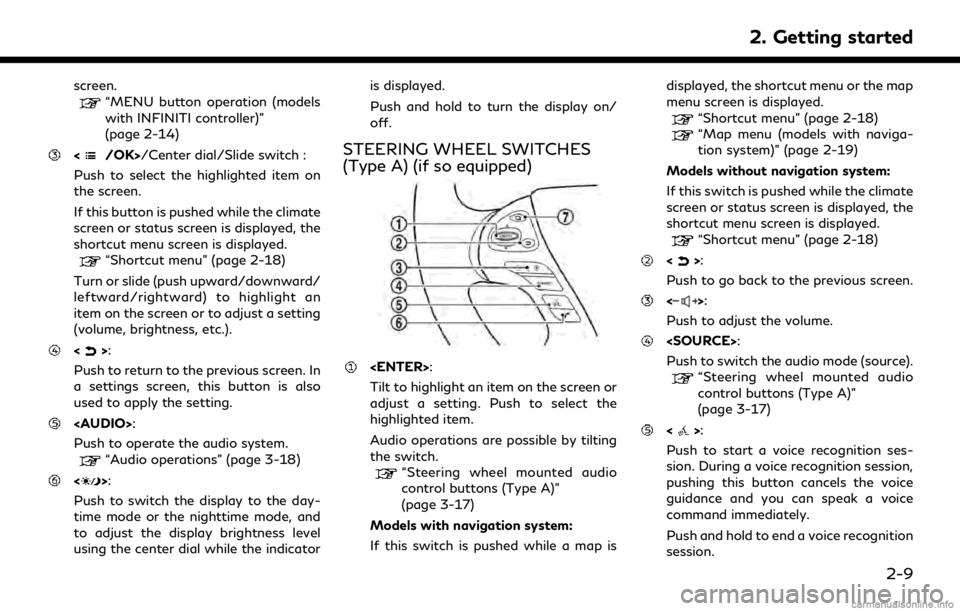
/Center dial/Slide switch :
Push to select the highlighted item on
the screen.
If this button is pushed while the climate
screen or status screen is displayed, the
shortcut menu screen is displayed.
“Shortcut menu” (page 2-18)
Turn or slide (push upward/downward/
leftward/rightward) to highlight an
item on the screen or to adjust a setting
(volume, brightness, etc.).
<>:
Push to return to the previous screen. In
a settings screen, this button is also
used to apply the setting.
Page 35 of 284

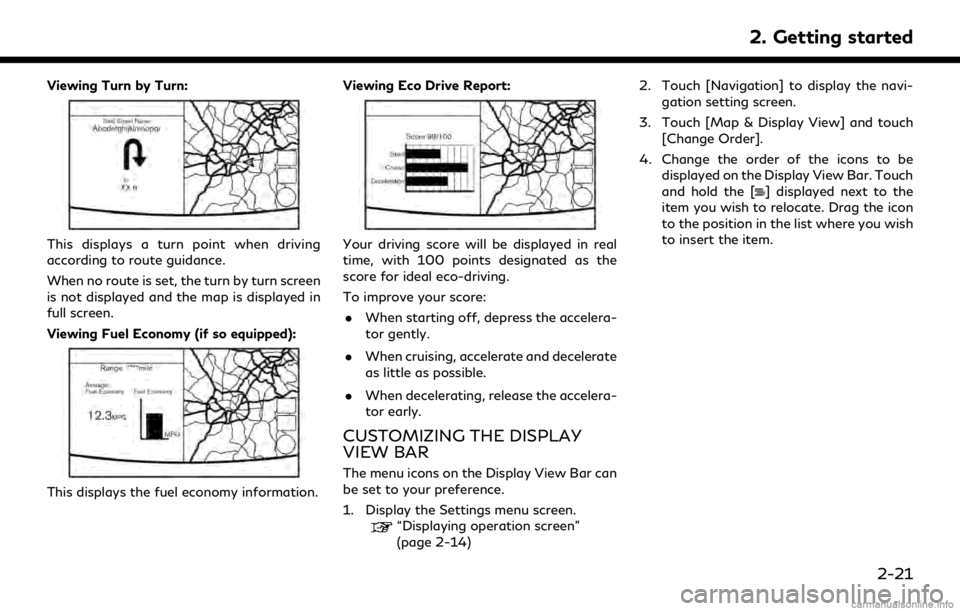
Viewing Turn by Turn:
This displays a turn point when driving
according to route guidance.
When no route is set, the turn by turn screen
is not displayed and the map is displayed in
full screen.
Viewing Fuel Economy (if so equipped):
This displays the fuel economy information.Viewing Eco Drive Report:
Your driving score will be displayed in real
time, with 100 points designated as the
score for ideal eco-driving.
To improve your score:
. When starting off, depress the accelera-
tor gently.
. When cruising, accelerate and decelerate
as little as possible.
. When decelerating, release the accelera-
tor early.
CUSTOMIZING THE DISPLAY
VIEW BAR
The menu icons on the Display View Bar can
be set to your preference.
1. Display the Settings menu screen.
“Displaying operation screen”
(page 2-14) 2. Touch [Navigation] to display the navi-
gation setting screen.
3. Touch [Map & Display View] and touch [Change Order].
4. Change the order of the icons to be displayed on the Display View Bar. Touch
and hold the [
] displayed next to the
item you wish to relocate. Drag the icon
to the position in the list where you wish
to insert the item.
2. Getting started
2-21
Page 38 of 284
![INFINITI QX60 2018 Infiniti Connection 2. Getting started
Setting itemResult
[Voice Recognition] Displays the voice recognition function setting screen.
“Voice Recognition settings” (page 7-14)
[Camera/Sonar] Displays the camera/sonar INFINITI QX60 2018 Infiniti Connection 2. Getting started
Setting itemResult
[Voice Recognition] Displays the voice recognition function setting screen.
“Voice Recognition settings” (page 7-14)
[Camera/Sonar] Displays the camera/sonar](/img/42/35074/w960_35074-37.png)
2. Getting started
Setting itemResult
[Voice Recognition] Displays the voice recognition function setting screen.
“Voice Recognition settings” (page 7-14)
[Camera/Sonar] Displays the camera/sonar system setting screen.
For additional information, refer to the vehicle Owner’s Manual.
[Drive Mode Enhancement] Displays the Drive Mode Enhancement setting screen.
For additional information, refer to the vehicle Owner’s Manual.
[Driver Assistance] Displays the Driver Assistance setting screen.
For additional information, refer to the vehicle Owner’s Manual.
[Other] [Language] Set the Language to your preferred settings.
“Language setting” (page 2-28)
[Language & Units] Displays the language and units setting screen.
“Language & Units settings” (page 2-29)
[Keyboard Type] Set the Keyboard Type to [ABC] or [QWERTY].
[Low on Fuel Alert] Set the fuel low notification to on/off.
[Software Information] Display the Software Information.
2-24
Page 39 of 284

Vehicle settings (if so equipped)
This menu turns the vehicle setting on/off.
Available setting items may vary depending on models and specifications.
1. Display the Settings menu screen.
“Displaying operation screen” (page 2-14)
2. Touch [Vehicle].
Setting item Result
[Lamp ON When Door Unlocks] When this item is set to on, the interior lights illuminate when any door is unlocked.
[Light Sensitivity] Sets the auto light sensitivity.
[Light Off Delay] Sets the auto light delay timer.
[Speed Sensing Wiper Interval] Sets the wiper interval to be adjusted automatically according to the vehicle speed.
[Selective Door Unlock] Sets the selective door unlock.
[Intelligent Key Lock/Unlock] When this item is turned on, door lock/unlock function by pushing the door handle request switch will
be activated.
[Lift Steering Wheel on Exit] Sets the lift steering wheel on exit.
[Slide Driver’s Seat Back on Exit] Sets the driver’s seat back on exit.
[Reset Settings] All vehicle setting values are returned to the default settings.
2. Getting started
2-25
Page 40 of 284

2. Getting started
Screen settings
This menu turns on/off the display and adjusts the image quality of the screen.
Available setting items may vary depending on models and specifications.
1. Display the Settings menu screen.
“Displaying operation screen” (page 2-14)
2. Touch [Screen].
Setting item Action
[Display Settings] [Brightness] Adjust the brightness.
[Contrast] Adjust the contrast.
[Black Level] Adjust the black level.
[Display OFF] Turn the screen on or off.
Push and hold
the display on.
[Day/Night] Adjust the display brightness. Toggle between the daytime screen and nighttime screen.
[Change Map Color] Toggle the map color between the daytime screen and nighttime screen.
[Reset Settings] This restores the display settings to the default settings.
2-26
Page 41 of 284

Volume settings
This menu turns on/off, as well as adjusts, the volume for various functions and system beeps.
Available setting items may vary depending on models and specifications.
1. Display the Settings menu screen.
“Displaying operation screen” (page 2-14)
2. Touch [Volume Adjustment].
Setting item Action
[Audio Volume] Adjust the volume level of the audio system.
[Voice Guidance] Sets on/off of the voice guidance.
[Guidance Volume] Adjust the volume level of guidance voice.
[Ringtone Volume] Adjust the volume level of the ringtone.
[Incoming Call Vol.] Adjust the incoming call volume.
[Outgoing Call Vol.] Adjust the outgoing call volume.
[RDS Volume] Adjusts the volume level of the RDS announcement.
[InTouch Services Vol] Adjust the volume level of the Infiniti InTouch™ Services information channel.
[Sonar Volume] Adjust the volume level of the sonar warning volume.
[Button Beep sound] Turn the button beep sound and alarm for a prohibited operation to on/off.
2. Getting started
2-27
Page 44 of 284

2. Getting started
Clock settings
This changes the clock settings.
Available setting items may vary depending on models and specifications.
1. Display the Settings menu screen.
“Displaying operation screen” (page 2-14)
2. Touch [Clock].
Menu item Action
[On-Screen Clock] Sets the clock display on/off. When this item is on, the clock display appears.
[Daylight Savings Time] Select the setting for the daylight saving time from ON or OFF. Each time by touching this item
changes the setting.
[Clock Format (24h)] Select the clock format between 12-hour and 24-hour times. When the indicator light illuminates, the
clock is set to the 24-hour format.
[Time Zone] Select an appropriate time zone from the list. When selecting [AUTO], the system selects the time
zone automatically.
Offset Adjustment Adjust the offset value (hour and minutes).
[>] [Time Adjustment] Adjusts the time by increasing or decreasing the value.
[Calendar Adjustment] Adjusts the year, month and day.
2-30
Page 45 of 284

PAIRING BLUETOOTH® DEVICE
Your vehicle is equipped with a Bluetooth®
Hands-Free Phone System and Bluetooth®
streaming audio. If you are an owner of a
compatible Bluetooth® enabled cellular
phone or Bluetooth® streaming audio mod-
ule, you can set up the wireless connection
between your cellular phone and the in-
vehicle phone module, or Bluetooth®
streaming audio device and the in-vehicle
audio module. With Bluetooth® wireless
technology, you can make or receive a
telephone call with your cellular phone in
your pocket and listen to music on your
Bluetooth® streaming audio device via the
in-vehicle system.
Pairing cellular phone/audio device
1. Display the Settings menu screen.“Displaying operation screen”
(page 2-14)
2. Touch [Settings].
3. Touch [Bluetooth] and touch [Connect Device].
4. Touch [Add New (X/5 Free)] to register a device.
5. When a PIN code appears on the screen, operate the compatible Bluetooth® cel- lular phone to enter the PIN code.
The pairing procedure of the cellular
phone varies according to each cellular
phone. See the cellular phone Owner’s
Manual for the details.
If the registered device has both audio
and phone function, the system displays
a message asking if you would like to
register the device for another function.
The procedure for connecting a cellular
phone/audio device varies according to
each Bluetooth® device. See the Blue-
tooth® device Owner’s Manual for de-
tails.
NOTE:
Some cellular phones or other devices may
cause interference or a buzzing noise to
come from the audio system speakers.
Storing the device in a different location
may reduce or eliminate the noise.
INFO:
You can also visit www.infinitiusa.com/
bluetooth or call INFINITI Consumer Affairs
Department for instructions on pairing
INFINITI recommended cellular phones or audio devices.
Bluetooth® settings
The Bluetooth® settings can be set in detail
according to the your preference.
1. Display the Settings menu screen.
“Displaying operation screen”
(page 2-14)
2. Touch [Settings].
3. Touch [Bluetooth].
4. Touch a preferred item.
. [Bluetooth]
Turn the Bluetooth® connection to the
vehicle on/off.
. [Connect Device]
Touch this item to connect to the Blue-
tooth® device. Also, you can delete a
registered device and display informa-
tion of registered device.
. [Select Phone]
Registered Bluetooth® Hands-Free
Phones are shown on the list. Select a
device from the list to disconnect or
connect a Bluetooth® device.
. [Select Audio Device]
Registered Bluetooth® streaming audio
2. Getting started
2-31