light INFINITI QX70 2017 Navigation Manual
[x] Cancel search | Manufacturer: INFINITI, Model Year: 2017, Model line: QX70, Model: INFINITI QX70 2017Pages: 268, PDF Size: 11.86 MB
Page 89 of 268
![INFINITI QX70 2017 Navigation Manual 6. The selected destination is displayed atthe center of the map. Highlight [Start]
after confirming the location of the
displayed destination, and push
<ENTER>.
The system sets the destination to the INFINITI QX70 2017 Navigation Manual 6. The selected destination is displayed atthe center of the map. Highlight [Start]
after confirming the location of the
displayed destination, and push
<ENTER>.
The system sets the destination to the](/img/42/35071/w960_35071-88.png)
6. The selected destination is displayed atthe center of the map. Highlight [Start]
after confirming the location of the
displayed destination, and push
The system sets the destination to the
selected location and starts calculating
a route.
INFO:
Even after setting a destination, the location
of the destination can be adjusted, the route
can be stored, etc.
“Procedures after setting destination”
(page 5-2)
SETTING POINT ON MAP
It is possible to set a location scrolled to
on the map as the destination and have the
system calculate a route.
1. Scroll the map, place the cross pointerover the preferred location, and push
INFO:
.The map scale should be adjusted to
search for a location more effectively.
.The point on the blinking road where thecenter of the cross pointer is located can
be set as a destination.
2. Highlight [New Dest.] and push
INFO:
For the items other than [New Dest.], refer to
“Map menu screen”.
“Scrolled location map screen”
(page 2-19)
3. The system sets the destination to the
selected location and starts calculating
a route.
4. Setting destination
4-23
Page 90 of 268
4. Setting destination
4-24
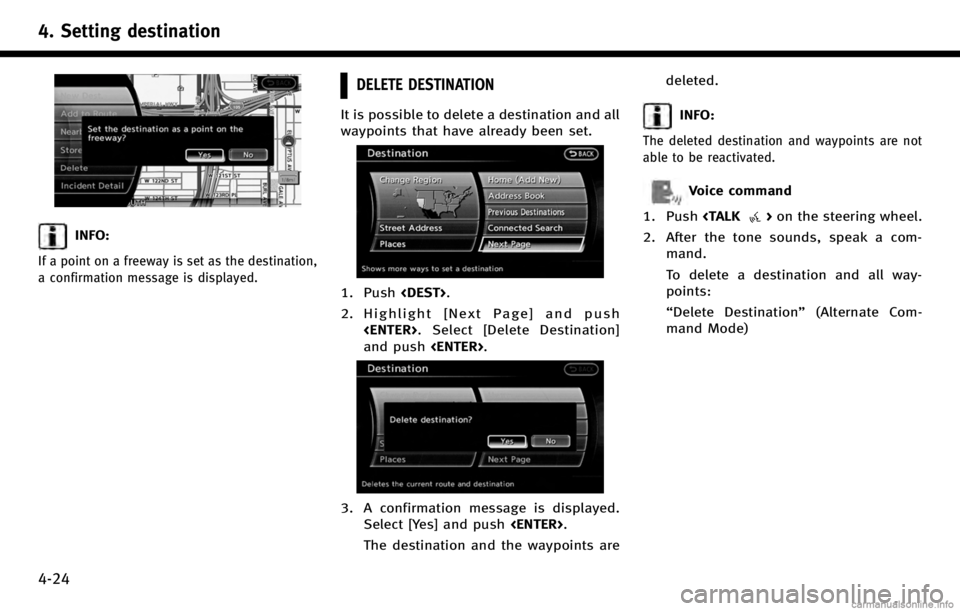
INFO:
If a point on a freeway is set as the destination,
a confirmation message is displayed.
DELETE DESTINATION
It is possible to delete a destination and all
waypoints that have already been set.
1. Push
2. Highlight [Next Page] and push
and push
3. A confirmation message is displayed.
Select [Yes] and push
The destination and the waypoints are deleted.
INFO:
The deleted destination and waypoints are not
able to be reactivated.
Voice command
1. Push
2. After the tone sounds, speak a com- mand.
To delete a destination and all way-
points:
“Delete Destination” (Alternate Com-
mand Mode)
Page 92 of 268
5. Route guidance
5-2
PROCEDURES AFTER SETTING DESTINA-
TION
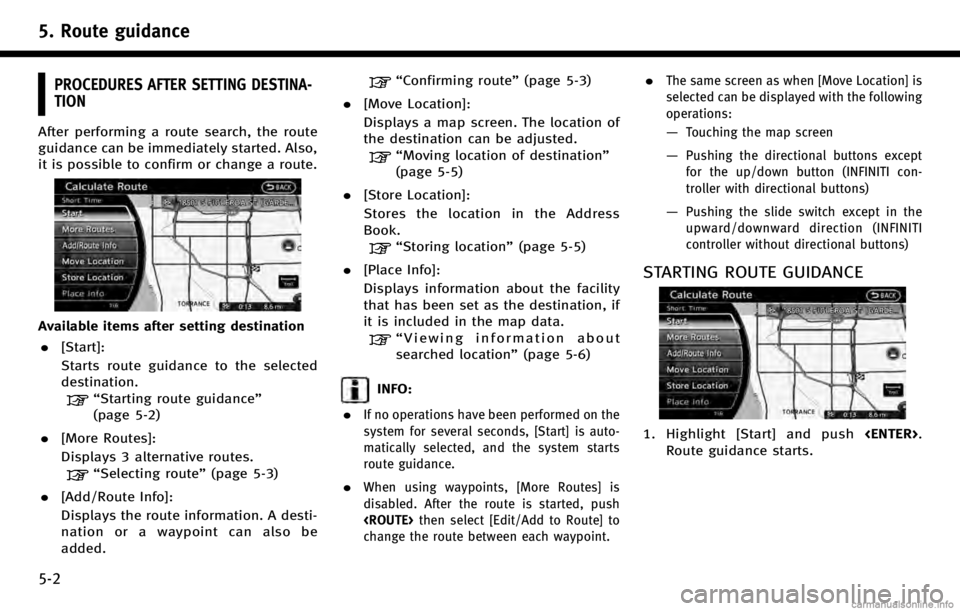
After performing a route search, the route
guidance can be immediately started. Also,
it is possible to confirm or change a route.
Available items after setting destination. [Start]:
Starts route guidance to the selected
destination.
“Starting route guidance”
(page 5-2)
. [More Routes]:
Displays 3 alternative routes.
“Selecting route” (page 5-3)
. [Add/Route Info]:
Displays the route information. A desti-
nation or a waypoint can also be
added.
“Confirming route” (page 5-3)
. [Move Location]:
Displays a map screen. The location of
the destination can be adjusted.
“Moving location of destination”
(page 5-5)
. [Store Location]:
Stores the location in the Address
Book.
“Storing location” (page 5-5)
. [Place Info]:
Displays information about the facility
that has been set as the destination, if
it is included in the map data.
“Viewing information about
searched location” (page 5-6)
INFO:
.
If no operations have been performed on the
system for several seconds, [Start] is auto-
matically selected, and the system starts
route guidance.
.When using waypoints, [More Routes] is
disabled. After the route is started, push
change the route between each waypoint.
.The same screen as when [Move Location] is
selected can be displayed with the following
operations:
—Touching the map screen
—Pushing the directional buttons except
for the up/down button (INFINITI con-
troller with directional buttons)
—Pushing the slide switch except in the
upward/downward direction (INFINITI
controller without directional buttons)
STARTING ROUTE GUIDANCE
1. Highlight [Start] and push
Route guidance starts.
Page 93 of 268
![INFINITI QX70 2017 Navigation Manual SELECTING ROUTE
1. Highlight [More Routes] and push<ENTER>.
2. Highlight the preferred route conditionand push <ENTER>.
3. The display automatically returns to the map screen. Available route conditio INFINITI QX70 2017 Navigation Manual SELECTING ROUTE
1. Highlight [More Routes] and push<ENTER>.
2. Highlight the preferred route conditionand push <ENTER>.
3. The display automatically returns to the map screen. Available route conditio](/img/42/35071/w960_35071-92.png)
SELECTING ROUTE
1. Highlight [More Routes] and push
2. Highlight the preferred route conditionand push
3. The display automatically returns to the map screen. Available route conditions
. [Short. Time] (purple):
Prioritizes by the shortest time.
. [Min. Freeway] (orange):
Minimizes the use of freeways.
. [Short. Dist.] (green):
Prioritizes by the shortest distance.
INFO:
.
When the route is selected, a preview is
displayed on the right side of the screen.
.The 3 routes may not always be different.
CONFIRMING ROUTE
1. Highlight [Add/Route Info] and push
2. Highlight the preferred information item and push
screen.
Available information
. [Turn List]:
Displays the details of the suggested
route.
“Using turn list” (page 5-20)
. [Preview]:
The system will trace the planned route
going forward or in reverse.
“Using route preview” (page 5-21)
. [Add Way Pt.]:
Edits the route by adding a waypoint or
a destination.
“Adding destination or waypoint”
(page 5-4)
. [Store Route]:
Stores a calculated route. A maximum
of 5 routes can be stored. Stored routes
5. Route guidance
5-3
Page 94 of 268
![INFINITI QX70 2017 Navigation Manual 5. Route guidance
5-4
can be easily retrieved and set as the
suggested route.
“Storing route”(page 6-5)
. [Map Scroll]:
Displays a map screen where the
location of the destination can be
confirmed INFINITI QX70 2017 Navigation Manual 5. Route guidance
5-4
can be easily retrieved and set as the
suggested route.
“Storing route”(page 6-5)
. [Map Scroll]:
Displays a map screen where the
location of the destination can be
confirmed](/img/42/35071/w960_35071-93.png)
5. Route guidance
5-4
can be easily retrieved and set as the
suggested route.
“Storing route”(page 6-5)
. [Map Scroll]:
Displays a map screen where the
location of the destination can be
confirmed.
The same screen as when [Map Scroll]
is touched can be displayed with the
following operations:
—
Touching the map screen.
—Pushing the directional buttons except
for the up/down button (INFINITI con-
troller with directional buttons).
—Pushing the slide switch except in theupward/downward direction (INFINITI
controller without directional buttons).
Adding destination or waypoint
Before starting route guidance, destina-
tions and/or waypoints can be added. A
total of 6 destinations or waypoints can be
set.
1. Highlight [Add Way Pt.] and push
2. Set additional destinations or way-
points and push
The method of searching for a location
is the same as the one for a destina-
tion.
“4. Setting destination”
3. Highlight [Add Destination] or [Add Waypoint] and push
4. The system starts calculating a route
that includes the added destination or
waypoint. When the calculation is
finished, the route is displayed.
INFO:
.
If a waypoint was added, [More Routes]
cannot be selected.
Page 95 of 268
.If a destination was added, the prior
destination becomes a waypoint.
MOVING LOCATION OF DESTINATION
The location of the destination can be
adjusted by moving the cross pointer
across the map.
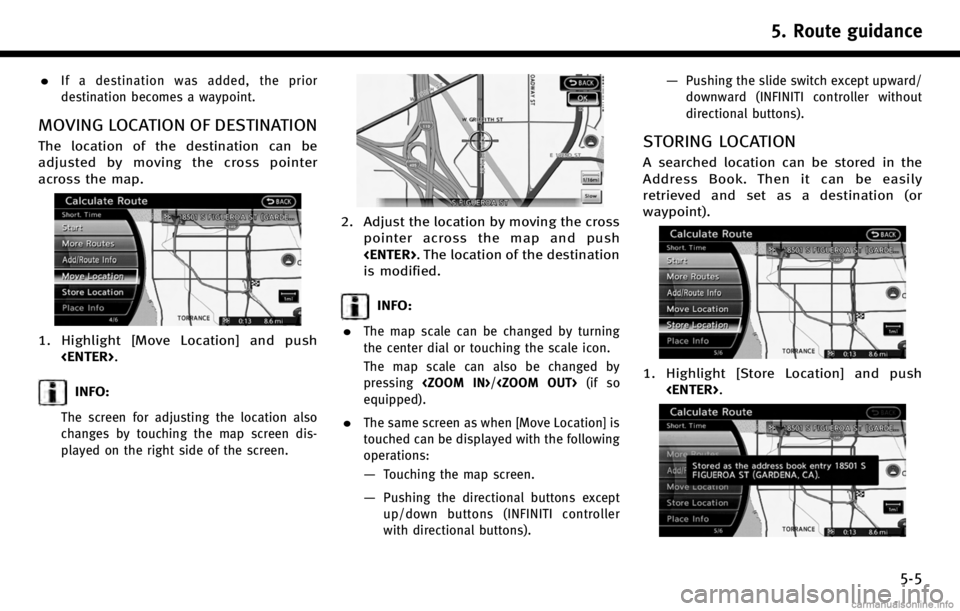
1. Highlight [Move Location] and push
INFO:
The screen for adjusting the location also
changes by touching the map screen dis-
played on the right side of the screen.
2. Adjust the location by moving the crosspointer across the map and push
is modified.
INFO:
.
The map scale can be changed by turning
the center dial or touching the scale icon.
The map scale can also be changed by
pressing
equipped).
.The same screen as when [Move Location] is
touched can be displayed with the following
operations:
—Touching the map screen.
—Pushing the directional buttons except
up/down buttons (INFINITI controller
with directional buttons).
—Pushing the slide switch except upward/
downward (INFINITI controller without
directional buttons).
STORING LOCATION
A searched location can be stored in the
Address Book. Then it can be easily
retrieved and set as a destination (or
waypoint).
1. Highlight [Store Location] and push
5. Route guidance
5-5
Page 100 of 268
5. Route guidance
5-10
Split screen settings
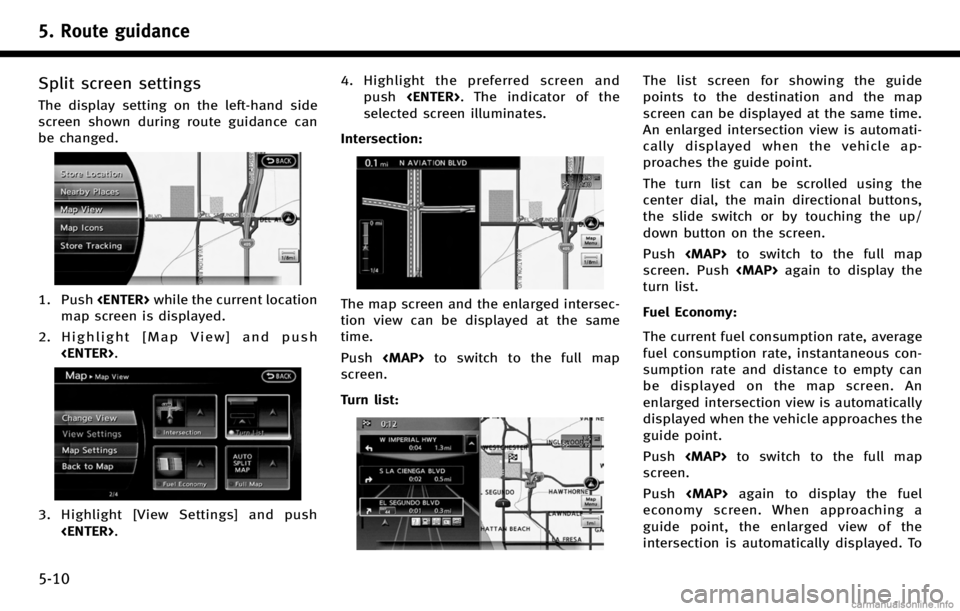
The display setting on the left-hand side
screen shown during route guidance can
be changed.
1. Push
map screen is displayed.
2. Highlight [Map View] and push
3. Highlight [View Settings] and push
push
selected screen illuminates.
Intersection:
The map screen and the enlarged intersec-
tion view can be displayed at the same
time.
Push
Page 101 of 268
display the fuel economy information,
push
To display the map screen, push
again.
NOTE:
Use the values displayed on the fuel economy
screen as a guide. When the fuel gauge
indicates empty or the low fuel warning light
illuminates even if the distance to empty
reading indicates a sufficient amount of fuel
remains, refuel the vehicle as soon as possible.
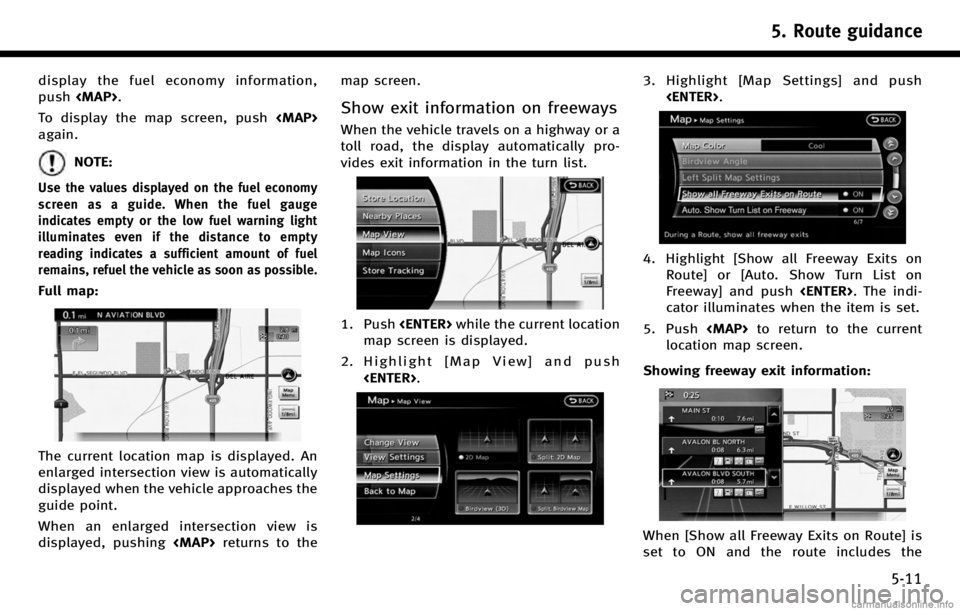
Full map:
The current location map is displayed. An
enlarged intersection view is automatically
displayed when the vehicle approaches the
guide point.
When an enlarged intersection view is
displayed, pushing
Show exit information on freeways
When the vehicle travels on a highway or a
toll road, the display automatically pro-
vides exit information in the turn list.
1. Push
map screen is displayed.
2. Highlight [Map View] and push
3. Highlight [Map Settings] and push
4. Highlight [Show all Freeway Exits onRoute] or [Auto. Show Turn List on
Freeway] and push
cator illuminates when the item is set.
5. Push
location map screen.
Showing freeway exit information:
When [Show all Freeway Exits on Route] is
set to ON and the route includes the
5. Route guidance
5-11
Page 102 of 268
5. Route guidance
5-12
freeway or toll road, all exits along the
route which have exit information will be
shown in the turn list. The exit information
is shown as icons.
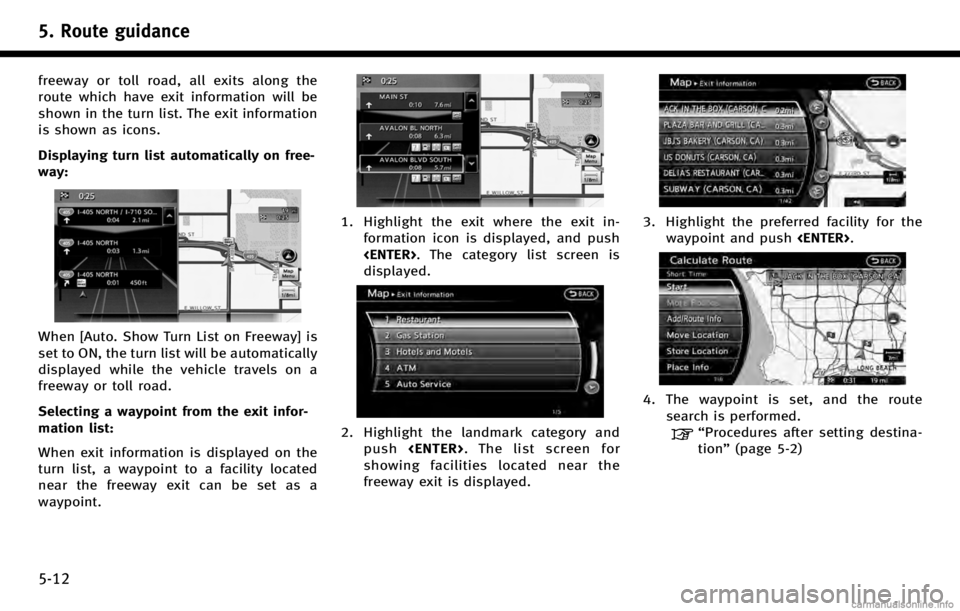
Displaying turn list automatically on free-
way:
When [Auto. Show Turn List on Freeway] is
set to ON, the turn list will be automatically
displayed while the vehicle travels on a
freeway or toll road.
Selecting a waypoint from the exit infor-
mation list:
When exit information is displayed on the
turn list, a waypoint to a facility located
near the freeway exit can be set as a
waypoint.
1. Highlight the exit where the exit in-formation icon is displayed, and push
displayed.
2. Highlight the landmark category andpush
showing facilities located near the
freeway exit is displayed.
3. Highlight the preferred facility for the waypoint and push
4. The waypoint is set, and the route
search is performed.
“Procedures after setting destina-
tion” (page 5-2)
Page 103 of 268
ROUTE SCREEN
WARNING!
Always stop the vehicle in a safe location
before modifying the route conditions.
Modifying the route conditions while driving
may cause an accident.
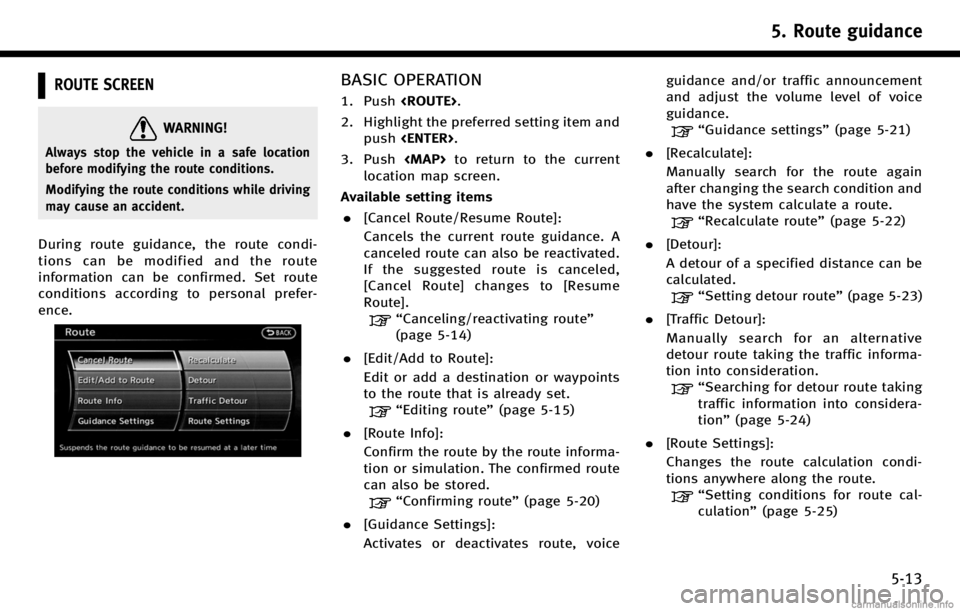
During route guidance, the route condi-
tions can be modified and the route
information can be confirmed. Set route
conditions according to personal prefer-
ence.
BASIC OPERATION
1. Push
2. Highlight the preferred setting item and push
3. Push
location map screen.
Available setting items . [Cancel Route/Resume Route]:
Cancels the current route guidance. A
canceled route can also be reactivated.
If the suggested route is canceled,
[Cancel Route] changes to [Resume
Route].
“Canceling/reactivating route”
(page 5-14)
. [Edit/Add to Route]:
Edit or add a destination or waypoints
to the route that is already set.
“Editing route” (page 5-15)
. [Route Info]:
Confirm the route by the route informa-
tion or simulation. The confirmed route
can also be stored.
“Confirming route” (page 5-20)
. [Guidance Settings]:
Activates or deactivates route, voice guidance and/or traffic announcement
and adjust the volume level of voice
guidance.
“Guidance settings”
(page 5-21)
. [Recalculate]:
Manually search for the route again
after changing the search condition and
have the system calculate a route.
“Recalculate route” (page 5-22)
. [Detour]:
A detour of a specified distance can be
calculated.
“Setting detour route” (page 5-23)
. [Traffic Detour]:
Manually search for an alternative
detour route taking the traffic informa-
tion into consideration.
“Searching for detour route taking
traffic information into considera-
tion” (page 5-24)
. [Route Settings]:
Changes the route calculation condi-
tions anywhere along the route.
“Setting conditions for route cal-
culation” (page 5-25)
5. Route guidance
5-13