headlights INFINITI QX80 2021 User Guide
[x] Cancel search | Manufacturer: INFINITI, Model Year: 2021, Model line: QX80, Model: INFINITI QX80 2021Pages: 529, PDF Size: 2.05 MB
Page 153 of 529
2-56Instruments and controls
.Usingswitch, a driver can select
“Disable Alert” to disable the horn alert
for the remainder of the current trip.
WARNING
. There may be times when there is an
object or passenger in the rear seat(s)
but the audible alert does not sound.
For example, this may occur if rear
seat passengers enter or exit the
vehicle during a trip.
. The system does not directly detect
objects or passengers in the rear seat
(s). Instead, it can detect when a rear
door is opened and closed, indicating
that there may be something in the
rear seat(s).
NOTE:
There may be times when the horn sounds
but there are no objects or passengers in the
rear seat(s).
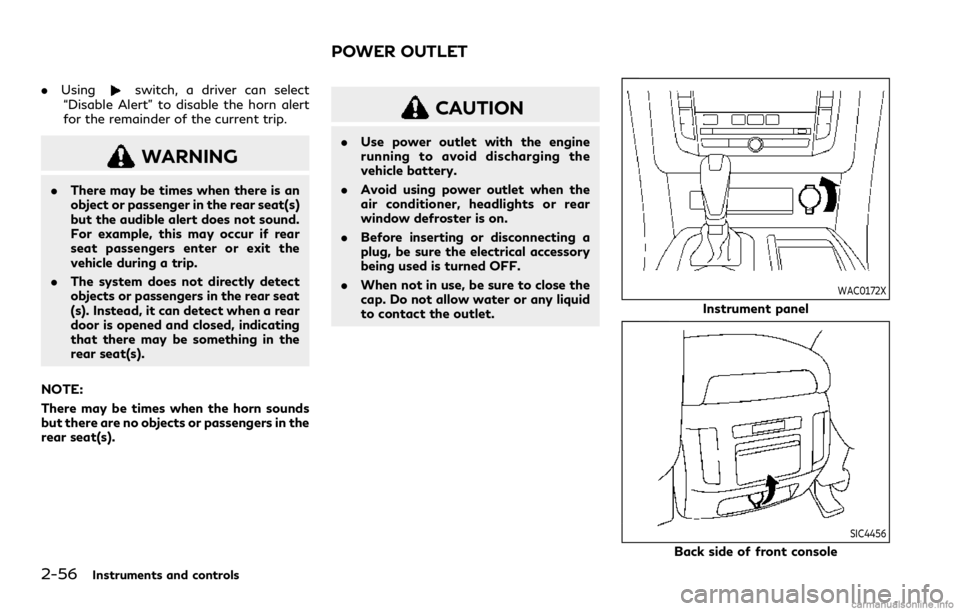
CAUTION
. Use power outlet with the engine
running to avoid discharging the
vehicle battery.
. Avoid using power outlet when the
air conditioner, headlights or rear
window defroster is on.
. Before inserting or disconnecting a
plug, be sure the electrical accessory
being used is turned OFF.
. When not in use, be sure to close the
cap. Do not allow water or any liquid
to contact the outlet.
WAC0172X
Instrument panel
SIC4456
Back side of front console
POWER OUTLET
Page 170 of 529

JVI0760X
INTERIOR LIGHT SWITCH
ON switch
When the ON switchis pushed in, the map
lights and rear personal lights will illuminate.
DOOR OFF switch
When the switchis not pushed in, the map
lights and rear personal lights will illuminate
for a period of time under the following
conditions:
. when the ignition switch is placed in the
OFF position.
. when doors are unlocked by pushing the
UNLOCK
button on the Intelligent
Key or door handle request switch with the ignition switch in the OFF position.
. when any door is opened and then closed
with the ignition switch in the OFF
position.
. when any door is opened with the
ignition switch in the ACC or ON posi-
tion.
— The lights will remain on while the
door is opened. When the door is
closed, the lights will turn off.
When the “Lamp ON when Door Unlocks”
key is set to the OFF position (see INFINITI
InTouch
TMOwner’s Manual), the lights will
illuminate under the following condition:
. any door is opened with the ignition
switch in any position
— remain on while the door is opened. When the door is closed, the lights go
off.
When the switch
is pushed in, the map
lights and rear personal lights will not
illuminate under the above condition.
JVI0759X
CONSOLE LIGHT
The console light will turn on whenever the
clearance lights or headlights are illumi-
nated.
Instruments and controls2-73
Page 200 of 529

button.
Window cannot be closed using the Intelli-
gent Key.
The door windows can be opened or closed
by turning the mechanical key in a door lock.
(See “Doors” (P.3-4).)
Opening/closing liftgate
1. Push the power liftgate buttonfor more than 1 second.
2. The liftgate will automatically open.
The hazard indicator flashes 4 times and the
outside chime sounds for approximately 3
seconds.
To close the liftgate, push the power liftgate
button
for more than 1 second.
The liftgate will automatically close.
If the button
is pushed while the
liftgate is being opened or closed, the
liftgate will reverse.
Using panic alarm
If you are near your vehicle and feel
threatened, you may activate the alarm to
call attention as follows:
1. Push the PANIC
buttonon the
Intelligent Key for more than 1 second.
2. The theft warning alarm and headlights will stay on for 25 seconds. 3. The panic alarm stops when:
.It has run for 25 seconds, or.Any of the buttons on the Intelligent
Key are pushed. (Note: Panic button
or power liftgate button should be
pushed for more than 1 second.)
Remote engine start (if so equipped)
The remote engine startbuttonis on
the Intelligent Key if the vehicle has remote
engine start function. This function allows
the engine to start from outside the vehicle.
See “Remote engine start” (P.3-19).
Setting hazard indicator and horn
mode
This vehicle is set in hazard indicator and
horn mode when you first receive the vehicle.
In hazard indicator and horn mode, when the
LOCK
button is pushed, the hazard
indicator flashes twice and the horn chirps
once. When the UNLOCK
button is
pushed, the hazard indicator flashes once.
If horns are not necessary, the system can be
switched to the hazard indicator mode.
In hazard indicator mode, when the LOCK
button is pushed, the hazard indicator
flashes twice. When the UNLOCK
button is pushed, neither the hazard indica-
tor nor the horn operates.
Pre-driving checks and adjustments3-17
Page 214 of 529
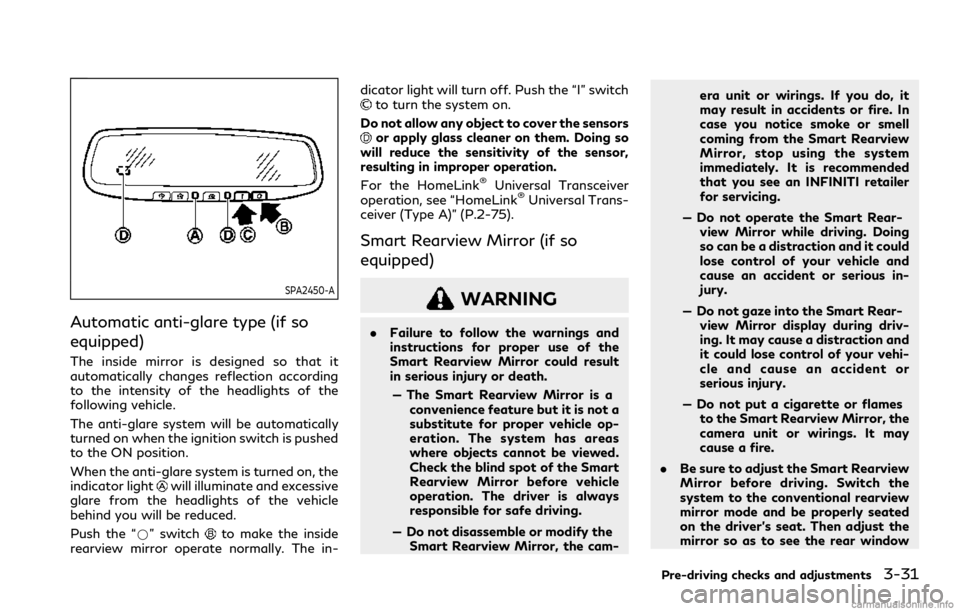
SPA2450-A
Automatic anti-glare type (if so
equipped)
The inside mirror is designed so that it
automatically changes reflection according
to the intensity of the headlights of the
following vehicle.
The anti-glare system will be automatically
turned on when the ignition switch is pushed
to the ON position.
When the anti-glare system is turned on, the
indicator light
will illuminate and excessive
glare from the headlights of the vehicle
behind you will be reduced.
Push the “*” switch
to make the inside
rearview mirror operate normally. The in- dicator light will turn off. Push the “I” switch
to turn the system on.
Do not allow any object to cover the sensors
or apply glass cleaner on them. Doing so
will reduce the sensitivity of the sensor,
resulting in improper operation.
For the HomeLink
®Universal Transceiver
operation, see “HomeLink®Universal Trans-
ceiver (Type A)” (P.2-75).
Smart Rearview Mirror (if so
equipped)
WARNING
. Failure to follow the warnings and
instructions for proper use of the
Smart Rearview Mirror could result
in serious injury or death.
— The Smart Rearview Mirror is a convenience feature but it is not a
substitute for proper vehicle op-
eration. The system has areas
where objects cannot be viewed.
Check the blind spot of the Smart
Rearview Mirror before vehicle
operation. The driver is always
responsible for safe driving.
— Do not disassemble or modify the Smart Rearview Mirror, the cam- era unit or wirings. If you do, it
may result in accidents or fire. In
case you notice smoke or smell
coming from the Smart Rearview
Mirror, stop using the system
immediately. It is recommended
that you see an INFINITI retailer
for servicing.
— Do not operate the Smart Rear- view Mirror while driving. Doing
so can be a distraction and it could
lose control of your vehicle and
cause an accident or serious in-
jury.
— Do not gaze into the Smart Rear- view Mirror display during driv-
ing. It may cause a distraction and
it could lose control of your vehi-
cle and cause an accident or
serious injury.
— Do not put a cigarette or flames to the Smart Rearview Mirror, the
camera unit or wirings. It may
cause a fire.
. Be sure to adjust the Smart Rearview
Mirror before driving. Switch the
system to the conventional rearview
mirror mode and be properly seated
on the driver’s seat. Then adjust the
mirror so as to see the rear window
Pre-driving checks and adjustments3-31
Page 218 of 529

WAD0195X
ROTATION
The camera angle of the display screen can
be rotated.
.Push the left button
to rotate the
camera angle to the left.
. Push the right button
to rotate the
camera angle to the right.
WAD0196X
INDICATION
The textual indication can be turned on or
off on the Smart Rearview Mirror display
screen.
. Push the right button
to disable the
textual indication on the display screen.
. Push the left button
to enable the
textual indication on the display screen.
WAD0197X
DIMMING MIRROR
The mirror is designed so that it automati-
cally changes reflection according to the
intensity of the headlights of the following
vehicle. You can enable or disable the
automatic anti-glare mode.
. Push the left button
to enable the
automatic anti-glare mode.
. Push the right button
to disable the
automatic anti-glare mode.
Pre-driving checks and adjustments3-35
Page 220 of 529
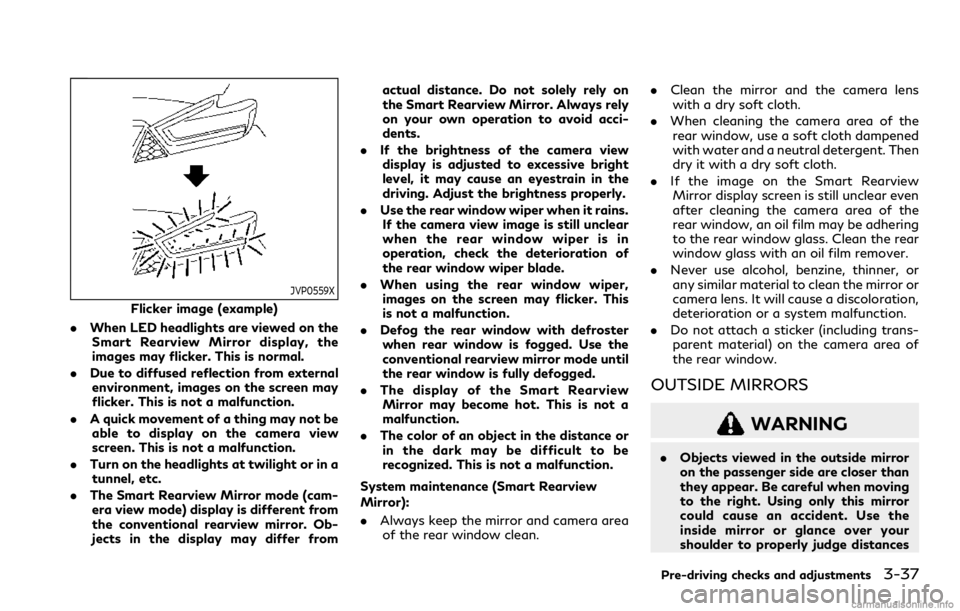
JVP0559X
Flicker image (example)
. When LED headlights are viewed on the
Smart Rearview Mirror display, the
images may flicker. This is normal.
. Due to diffused reflection from external
environment, images on the screen may
flicker. This is not a malfunction.
. A quick movement of a thing may not be
able to display on the camera view
screen. This is not a malfunction.
. Turn on the headlights at twilight or in a
tunnel, etc.
. The Smart Rearview Mirror mode (cam-
era view mode) display is different from
the conventional rearview mirror. Ob-
jects in the display may differ from actual distance. Do not solely rely on
the Smart Rearview Mirror. Always rely
on your own operation to avoid acci-
dents.
. If the brightness of the camera view
display is adjusted to excessive bright
level, it may cause an eyestrain in the
driving. Adjust the brightness properly.
. Use the rear window wiper when it rains.
If the camera view image is still unclear
when the rear window wiper is in
operation, check the deterioration of
the rear window wiper blade.
. When using the rear window wiper,
images on the screen may flicker. This
is not a malfunction.
. Defog the rear window with defroster
when rear window is fogged. Use the
conventional rearview mirror mode until
the rear window is fully defogged.
. The display of the Smart Rearview
Mirror may become hot. This is not a
malfunction.
. The color of an object in the distance or
in the dark may be difficult to be
recognized. This is not a malfunction.
System maintenance (Smart Rearview
Mirror):
. Always keep the mirror and camera area
of the rear window clean. .
Clean the mirror and the camera lens
with a dry soft cloth.
. When cleaning the camera area of the
rear window, use a soft cloth dampened
with water and a neutral detergent. Then
dry it with a dry soft cloth.
. If the image on the Smart Rearview
Mirror display screen is still unclear even
after cleaning the camera area of the
rear window, an oil film may be adhering
to the rear window glass. Clean the rear
window glass with an oil film remover.
. Never use alcohol, benzine, thinner, or
any similar material to clean the mirror or
camera lens. It will cause a discoloration,
deterioration or a system malfunction.
. Do not attach a sticker (including trans-
parent material) on the camera area of
the rear window.
OUTSIDE MIRRORS
WARNING
. Objects viewed in the outside mirror
on the passenger side are closer than
they appear. Be careful when moving
to the right. Using only this mirror
could cause an accident. Use the
inside mirror or glance over your
shoulder to properly judge distances
Pre-driving checks and adjustments3-37
Page 222 of 529
were folded or unfolded by hand, be
sure to adjust them again electrically
before driving.
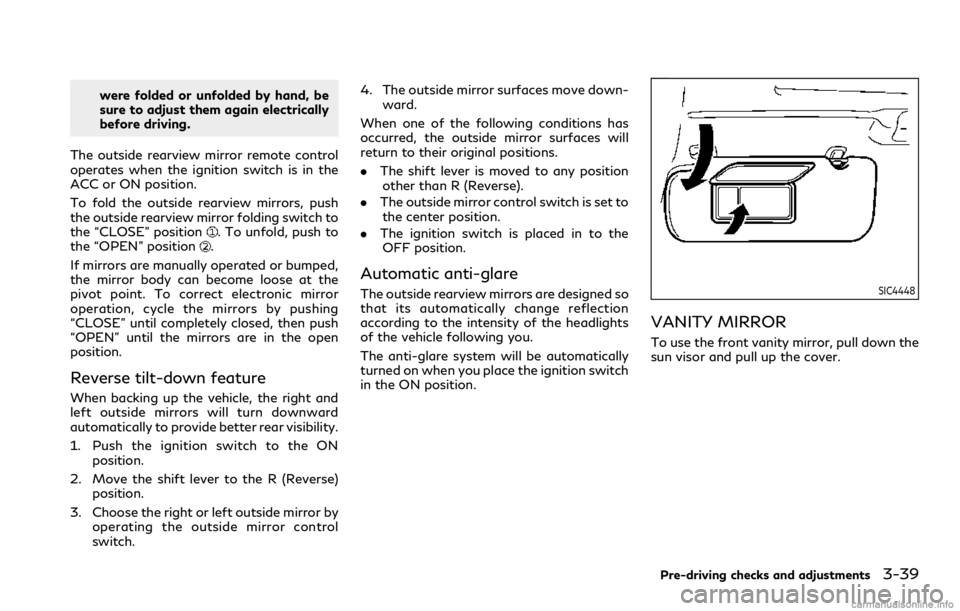
The outside rearview mirror remote control
operates when the ignition switch is in the
ACC or ON position.
To fold the outside rearview mirrors, push
the outside rearview mirror folding switch to
the “CLOSE” position
. To unfold, push to
the “OPEN” position.
If mirrors are manually operated or bumped,
the mirror body can become loose at the
pivot point. To correct electronic mirror
operation, cycle the mirrors by pushing
“CLOSE” until completely closed, then push
“OPEN” until the mirrors are in the open
position.
Reverse tilt-down feature
When backing up the vehicle, the right and
left outside mirrors will turn downward
automatically to provide better rear visibility.
1. Push the ignition switch to the ON position.
2. Move the shift lever to the R (Reverse) position.
3. Choose the right or left outside mirror by operating the outside mirror control
switch. 4. The outside mirror surfaces move down-
ward.
When one of the following conditions has
occurred, the outside mirror surfaces will
return to their original positions.
. The shift lever is moved to any position
other than R (Reverse).
. The outside mirror control switch is set to
the center position.
. The ignition switch is placed in to the
OFF position.
Automatic anti-glare
The outside rearview mirrors are designed so
that its automatically change reflection
according to the intensity of the headlights
of the vehicle following you.
The anti-glare system will be automatically
turned on when you place the ignition switch
in the ON position.SIC4448
VANITY MIRROR
To use the front vanity mirror, pull down the
sun visor and pull up the cover.
Pre-driving checks and adjustments3-39
Page 292 of 529
— On roads where the discontinuedlane markers are still detectable.
— On roads where there are sharp curves.
— On roads where there are sharply contrasting objects, such as sha-
dows, snow, water, wheel ruts,
seams or lines remaining after
road repairs. (The LDW and LDP
(if so equipped) systems could
detect these items as lane mar-
kers.)
— On roads where the traveling lane merges or separates.
— When the vehicle’s traveling di- rection does not align with the
lane marker.
— When traveling close to the ve- hicle in front of you, which ob-
structs the lane camera unit
detection range.
— When rain, snow or dirt adheres to the windshield in front of the
lane camera unit.
— When the headlights are not bright due to dirt on the lens or
if the aiming is not adjusted
properly. — When strong light enters the lane
camera unit. (For example, the
light directly shines on the front
of the vehicle at sunrise or sun-
set.)
— When a sudden change in bright- ness occurs. (For example, when
the vehicle enters or exits a tunnel
or under a bridge.)
. Excessive noise will interfere with the
warning chime sound, and the chime
may not be heard.
SYSTEM TEMPORARILY UNA-
VAILABLE
Condition A
The warning and assist functions of the
LDW and LDP (if so equipped) systems are
not designed to work under the following
conditions:
.When you operate the lane change signal
and change the traveling lanes in the
direction of the signal. (The LDP system
(if so equipped) will be deactivated for
approximately 2 seconds after the lane
change signal is turned off.)
. When the vehicle speed lowers to less
than approximately 45 MPH (70 km/h). .
When the Blind Spot Intervention
®(BSI)
system (if so equipped) activates an
audible warning or brake control.
After the above conditions have finished and
the necessary operating conditions are sa-
tisfied, the warning and assist functions will
resume.
Condition B
The assist function of the LDP system (if so
equipped) is not designed to work under the
following conditions (warning is still func-
tional):
. When the brake pedal is depressed.
. When the steering wheel is turned as far
as necessary for the vehicle to change
lanes.
. When the accelerator pedal is depressed
while the brake control assist is provided.
. When the Intelligent Cruise Control (ICC)
(if so equipped) approach warning oc-
curs.
. When the hazard warning flashers are
operated.
. When driving on a curve at high speed.
After the above conditions have finished and
the necessary operating conditions are sa-
tisfied, the LDP assist function (if so
equipped) will resume.
Starting and driving5-29
Page 309 of 529
5-46Starting and driving
— On roads where discontinued lanemarkers are still detectable.
— On roads where there are sharp curves.
— On roads where there are sharply contrasting objects, such as sha-
dows, snow, water, wheel ruts,
seams or lines remaining after
road repairs.
— On roads where the traveling lane merges or separates.
— When the vehicle’s traveling di- rection does not align with the
lane markers.
— When traveling close to the ve- hicle in front of you, which ob-
structs the lane camera unit
detection range.
— When rain, snow or dirt adheres to the windshield in front of a lane
camera unit.
— When the headlights are not bright due to dirt on the lens or
if aiming is not adjusted properly.
— When strong light enters a lane camera unit. (For example: light
directly shines on the front of the
vehicle at sunrise or sunset.) — When a sudden change in bright-
ness occurs. (For example: when
the vehicle enters or exits a tunnel
or under a bridge.)
. Do not use the BSI system under the
following conditions because the sys-
tem may not function properly.
— During bad weather. (For exam- ple: rain, fog, snow, etc.)
— When driving on slippery roads, such as on ice or snow, etc.
— When driving on winding or un- even roads.
— When there is a lane closure due to road repairs.
— When driving in a makeshift or temporary lane.
— When driving on roads where the lane width is too narrow.
— When driving with a tire that is not within normal tire conditions
(for example, tire wear, low tire
pressure, installation of spare tire,
tire chains, non-standard wheels).
— When the vehicle is equipped with non-original brake parts or sus-
pension parts. — When towing a trailer or other
vehicle.
. Excessive noise (for example, audio
system volume, open vehicle window)
will interfere with the chime sound,
and it may not be heard.
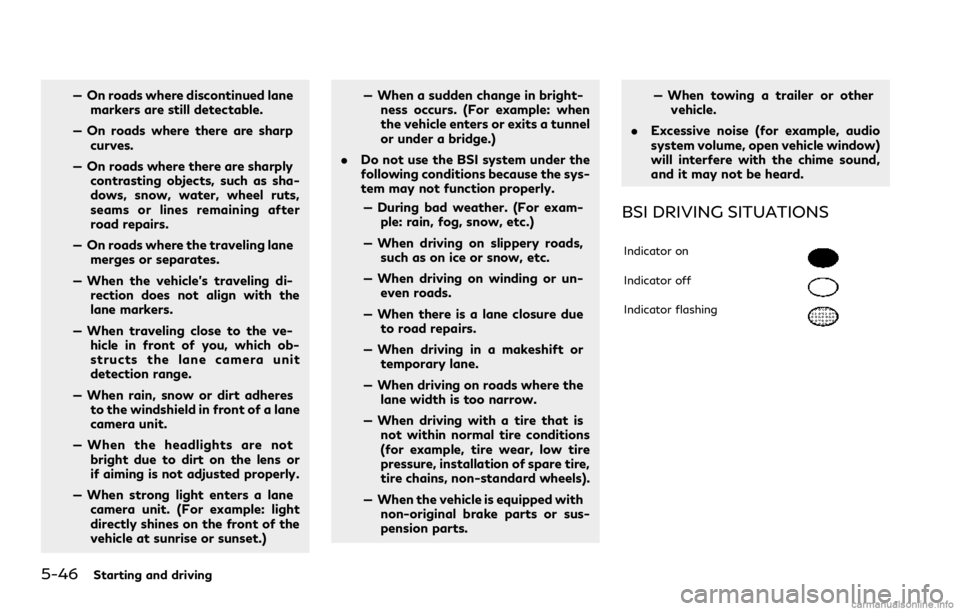
BSI DRIVING SITUATIONS
Indicator on
Indicator off
Indicator flashing
Page 424 of 529

8 Do-it-yourself
Maintenance precautions ............................................... 8-2
Engine compartment check locations ......................... 8-3VK56VD engine model .............................................. 8-3
Engine cooling system ..................................................... 8-4 Checking engine coolant level ................................. 8-5
Changing engine coolant .......................................... 8-5
Engine oil ........................................................................\
..... 8-6 Checking engine oil level ........................................... 8-6
Changing engine oil and filter .................................. 8-6
Automatic Transmission Fluid (ATF) .......................... 8-8
Power steering fluid ......................................................... 8-8
Brake fluid ........................................................................\
... 8-9 Brake fluid ..................................................................... 8-9
Window washer fluid ................................................... 8-10
Battery ........................................................................\
....... 8-11 Jump starting ............................................................. 8-12
Variable voltage control system ................................. 8-13
Drive belts ........................................................................\
. 8-13
Spark plugs ....................................................................... 8-14 Replacing spark plugs .............................................. 8-14
Air cleaner ........................................................................\
. 8-14 Windshield wiper blades .............................................. 8-15
Cleaning ..................................................................... 8-15
Replacing ................................................................... 8-16
Rear window wiper blades .......................................... 8-16
Brakes ........................................................................\
........ 8-17 Self-adjusting brakes ............................................. 8-17
Brake pad wear warning ....................................... 8-17
Brake booster ........................................................... 8-17
Fuses ........................................................................\
.......... 8-18 Engine compartment .............................................. 8-18
Passenger compartment ...................................... 8-20
Intelligent Key battery replacement ......................... 8-21
Lights ........................................................................\
......... 8-23
Headlights ................................................................ 8-24
Exterior and interior lights ................................... 8-24
Wheels and tires ............................................................. 8-27
Tire pressure ............................................................. 8-27
Tire labeling .............................................................. 8-31
Types of tires ........................................................... 8-33
Tire chains ................................................................ 8-34
Changing wheels and tires ................................... 8-35