gas INFINITI QX80 2021 Owner's Manual
[x] Cancel search | Manufacturer: INFINITI, Model Year: 2021, Model line: QX80, Model: INFINITI QX80 2021Pages: 529, PDF Size: 2.05 MB
Page 135 of 529

2-38Instruments and controls
JVI0739X
RAIN-SENSING AUTO WIPER
SYSTEM
The rain-sensing auto wiper system can
automatically turn on the wipers and adjust
the wiper speed depending on the rainfall
and the vehicle speed by using the rain
sensor located on the upper part of the
windshield.
To set the rain-sensing auto wiper system,
push the lever down to the AUTO position
. The wiper will sweep once while the
ignition switch is in the ON position.
The rain sensor sensitivity level can be
adjusted by turning the knob toward the
front
(High) or toward the rear(Low). .
High — High sensitive operation
. Low — Low sensitive operation
To turn the rain-sensing auto wiper system
off, push up the lever to the OFF position, or
pull down the lever to the LO or HI position.
CAUTION
Do not touch the rain sensor and around
it when the wiper switch is in the AUTO
position and the ignition switch is in the
ON position. The wipers may operate
unexpectedly and cause to an injury or
may damage a wiper.
. The rain-sensing auto wipers are in-
tended for use during rain. If the switch
is left in the AUTO position, the wipers
may operate unexpectedly when dirt,
fingerprints, oil film or insects are stuck
on or around the sensor. The wipers may
also operate when exhaust gas or
moisture affect the rain sensor.
. The rain-sensing auto wipers may not
operate if rain does not hit the rain
sensor even if it is raining.
. When the windshield glass is coated
with water repellent, the speed of the
rain-sensing auto wipers may be higher
even though the amount of the rainfall is
small. .
Be sure to turn off the rain-sensing auto
wiper system when you use a car wash.
. When the ignition switch is in the ON
position and the vehicle speed is below
approximately 5 MPH (8 km/h) with
the shift lever in the N (Neutral) posi-
tion, the rain-sensing auto wipers will
not operate.
. Using genuine wiper blades is recom-
mended for proper operation of the
rain-sensing auto wiper system. (See
“Windshield wiper blades” (P.8-15) for
wiper blade replacement.)
Page 146 of 529
.Any liquid spilled on the heated seat
should be removed immediately with
a dry cloth.
. When cleaning the seat, never use
gasoline, thinner, or any similar ma-
terials.
. If any malfunctions are found or the
heated seat does not operate, turn
the switch off and have the system
checked. It is recommended you visit
an INFINITI retailer for this service.
JVR0600X
FRONT
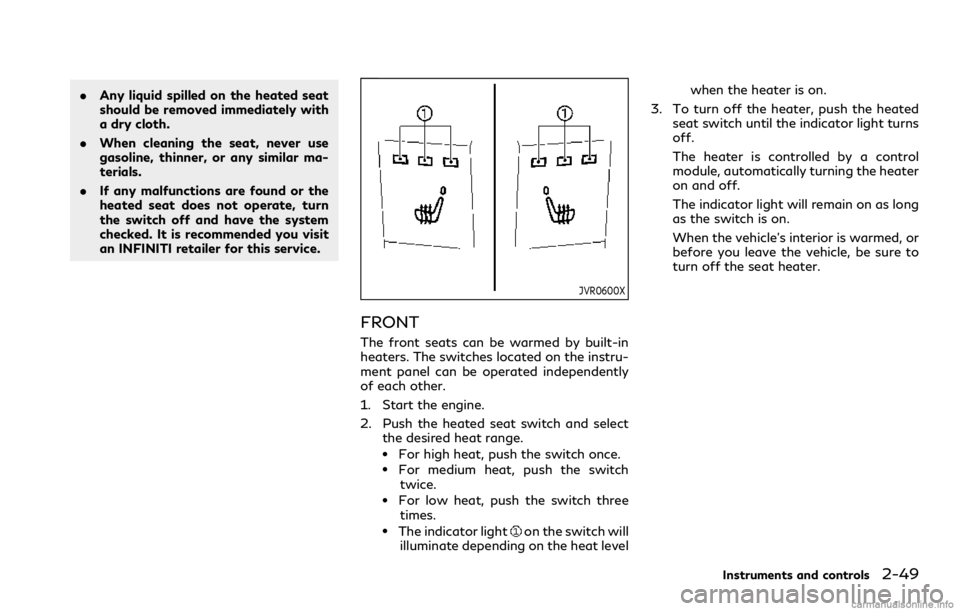
The front seats can be warmed by built-in
heaters. The switches located on the instru-
ment panel can be operated independently
of each other.
1. Start the engine.
2. Push the heated seat switch and select
the desired heat range.
.For high heat, push the switch once..For medium heat, push the switch
twice.
.For low heat, push the switch threetimes.
.The indicator lighton the switch will
illuminate depending on the heat level when the heater is on.
3. To turn off the heater, push the heated seat switch until the indicator light turns
off.
The heater is controlled by a control
module, automatically turning the heater
on and off.
The indicator light will remain on as long
as the switch is on.
When the vehicle’s interior is warmed, or
before you leave the vehicle, be sure to
turn off the seat heater.
Instruments and controls2-49
Page 148 of 529
seat.
. Any liquid spilled on the seat should
be removed immediately with a dry
cloth.
. The climate controlled seat has an air
filter. Do not operate climate con-
trolled seat without an air filter. This
may result in damage to the system.
. When cleaning the seat, never use
gasoline, thinner, or any similar ma-
terials.
. If any malfunctions are found or the
climate controlled seat does not op-
erate, turn the switch off and have
the system checked. It is recom-
mended you visit an INFINITI retailer
for this service.
JVR0599X
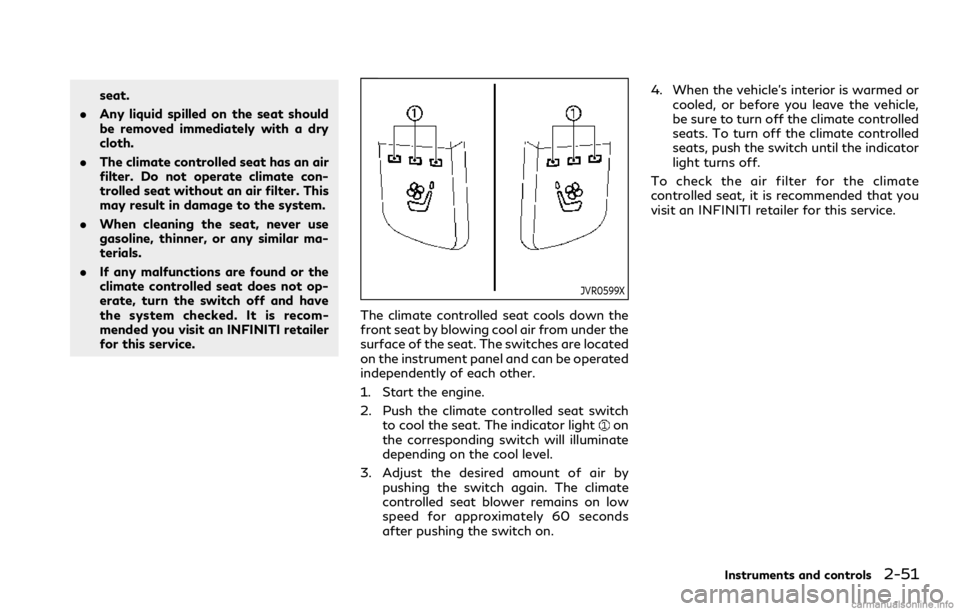
The climate controlled seat cools down the
front seat by blowing cool air from under the
surface of the seat. The switches are located
on the instrument panel and can be operated
independently of each other.
1. Start the engine.
2. Push the climate controlled seat switch
to cool the seat. The indicator light
on
the corresponding switch will illuminate
depending on the cool level.
3. Adjust the desired amount of air by pushing the switch again. The climate
controlled seat blower remains on low
speed for approximately 60 seconds
after pushing the switch on. 4. When the vehicle’s interior is warmed or
cooled, or before you leave the vehicle,
be sure to turn off the climate controlled
seats. To turn off the climate controlled
seats, push the switch until the indicator
light turns off.
To check the air filter for the climate
controlled seat, it is recommended that you
visit an INFINITI retailer for this service.
Instruments and controls2-51
Page 172 of 529
SIC4418
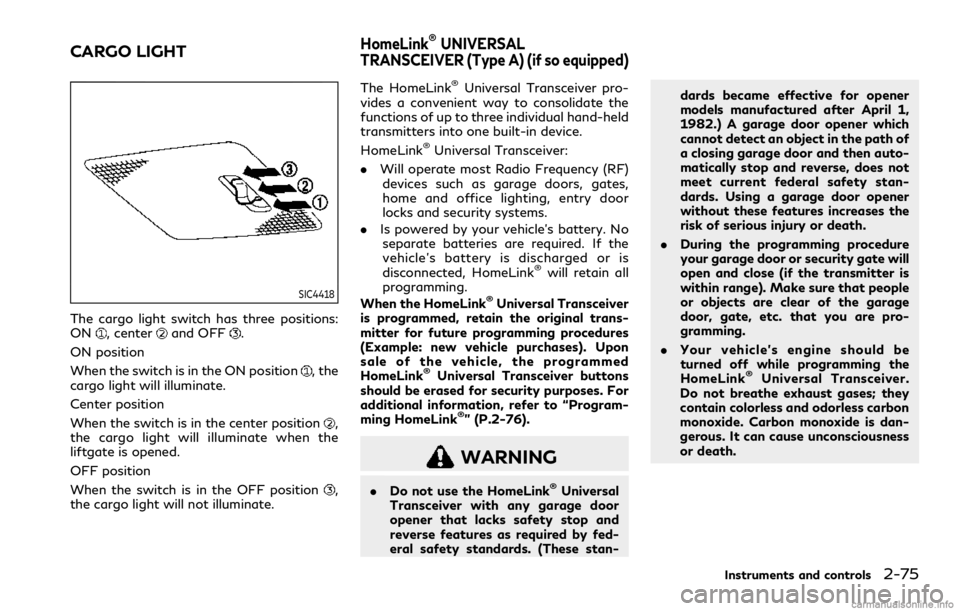
The cargo light switch has three positions:
ON, centerand OFF.
ON position
When the switch is in the ON position
, the
cargo light will illuminate.
Center position
When the switch is in the center position
,
the cargo light will illuminate when the
liftgate is opened.
OFF position
When the switch is in the OFF position
,
the cargo light will not illuminate. The HomeLink
®Universal Transceiver pro-
vides a convenient way to consolidate the
functions of up to three individual hand-held
transmitters into one built-in device.
HomeLink
®Universal Transceiver:
. Will operate most Radio Frequency (RF)
devices such as garage doors, gates,
home and office lighting, entry door
locks and security systems.
. Is powered by your vehicle’s battery. No
separate batteries are required. If the
vehicle’s battery is discharged or is
disconnected, HomeLink
®will retain all
programming.
When the HomeLink
®Universal Transceiver
is programmed, retain the original trans-
mitter for future programming procedures
(Example: new vehicle purchases). Upon
sale of the vehicle, the programmed
HomeLink
®Universal Transceiver buttons
should be erased for security purposes. For
additional information, refer to “Program-
ming HomeLink
®” (P.2-76).
WARNING
. Do not use the HomeLink®Universal
Transceiver with any garage door
opener that lacks safety stop and
reverse features as required by fed-
eral safety standards. (These stan- dards became effective for opener
models manufactured after April 1,
1982.) A garage door opener which
cannot detect an object in the path of
a closing garage door and then auto-
matically stop and reverse, does not
meet current federal safety stan-
dards. Using a garage door opener
without these features increases the
risk of serious injury or death.
. During the programming procedure
your garage door or security gate will
open and close (if the transmitter is
within range). Make sure that people
or objects are clear of the garage
door, gate, etc. that you are pro-
gramming.
. Your vehicle’s engine should be
turned off while programming the
HomeLink
®Universal Transceiver.
Do not breathe exhaust gases; they
contain colorless and odorless carbon
monoxide. Carbon monoxide is dan-
gerous. It can cause unconsciousness
or death.
Instruments and controls2-75
CARGO LIGHTHomeLink®UNIVERSAL
TRANSCEIVER (Type A) (if so equipped)
Page 176 of 529
NOTE:
Changes or modifications not expressly
approved by the party responsible for
compliance could void the user’s authority
to operate the equipment.
For Canada:
This device complies with Industry Canada
licence-exempt RSS standard(s). Operation
is subject to the following two conditions:
(1) this device may not cause interference,
and (2) this device must accept any inter-
ference, including interference that may
cause undesired operation of the device.The HomeLink®Universal Transceiver pro-
vides a convenient way to consolidate the
functions of up to three individual hand-held
transmitters into one built-in device.
HomeLink
®Universal Transceiver:
. Will operate most Radio Frequency (RF)
devices such as garage doors, gates,
home and office lighting, entry door
locks and security systems.
. Is powered by your vehicle’s battery. No
separate batteries are required. If the
vehicle’s battery is discharged or is
disconnected, HomeLink
®will retain all
programming.
When the HomeLink
®Universal Transceiver
is programmed, retain the original trans-
mitter for future programming procedures
(Example: new vehicle purchases). Upon
sale of the vehicle, the programmed
HomeLink
®Universal Transceiver buttons
should be erased for security purposes. For
additional information, refer to “Program-
ming HomeLink
®” (P.2-80).
WARNING
. Do not use the HomeLink®Universal
Transceiver with any garage door
opener that lacks safety stop and
reverse features as required by fed-
eral safety standards. (These stan- dards became effective for opener
models manufactured after April 1,
1982.) A garage door opener which
cannot detect an object in the path of
a closing garage door and then auto-
matically stop and reverse, does not
meet current federal safety stan-
dards. Using a garage door opener
without these features increases the
risk of serious injury or death.
. During the programming procedure
your garage door or security gate will
open and close (if the transmitter is
within range). Make sure that people
or objects are clear of the garage
door, gate, etc. that you are pro-
gramming.
. Your vehicle’s engine should be
turned off while programming the
HomeLink
®Universal Transceiver.
Do not breathe exhaust gases; they
contain colorless and odorless carbon
monoxide. Carbon monoxide is dan-
gerous. It can cause unconsciousness
or death.
NOTE:
If your vehicle is equipped with Smart
Rearview Mirror, you may have to complete
additional programming to enable Two-
Way Communication. The mirror can pro-
Instruments and controls2-79
HomeLink®UNIVERSAL
TRANSCEIVER (Type B) (if so equipped)
Page 205 of 529

3-22Pre-driving checks and adjustments
WARNING
.Always be sure the liftgate has been
closed securely to prevent it from
opening while driving.
. Do not drive with the liftgate open.
This could allow dangerous exhaust
gases to be drawn into the vehicle.
See “Exhaust gas (carbon monoxide)”
(P.5-4).
. Do not leave children unattended
inside the vehicle. They could un-
knowingly activate switches or con-
trols. Unattended children could
become involved in serious accidents.
. Always be sure that hands and feet
are clear of the door frame to avoid
injury while closing the liftgate.
JVP0569X
OPERATING MANUAL LIFTGATE
To open the liftgate, unlock it and push the
liftgate opener switch. Pull up the liftgate
to open.
The liftgate can be unlocked by:
. pushing the unlock button
on the
Intelligent Key twice.
. pushing the liftgate request switch with
the Intelligent Key carried on you.
. pushing the door handle request switch
twice with the Intelligent Key carried on
you.
. pushing the power door lock switch to
the unlock position. .
inserting the mechanical key into the
driver’s door key cylinder and turning it
to the rear of the vehicle twice.
To close the liftgate, pull down until it
securely locks.
OPERATING POWER LIFTGATE
To operate the power liftgate, the shift lever
must be in the P (Park) position.
The power liftgate will not operate if the
battery voltage is low.
LIFTGATE
Page 208 of 529

is pushed during power open or close, the
power operation will be canceled and the
liftgate can be operated manually.
SPA2777
Safe Mode
If the gas stays of the liftgatelose
pressure, the power liftgate safe mode is
activated. When the safe mode is activated,
the liftgate intermittently closes. Then the
liftgate will be pulled to the closed and
latched position by a motor.
The power liftgate cannot be opened using
the switches at any time in the safe mode.
Do not operate the liftgate again until it is
checked. It is recommended you visit an
INFINITI retailer for this service.
CAUTION
. If the power liftgate does not stay
open or if the liftgate unexpectedly
closes at any time, do not operate the
liftgate. There may be a pressure loss
in one or both of the liftgate gas
stays. Have the liftgate inspected. It
is recommended you visit an INFINITI
retailer for this service.
. Do not activate the power liftgate if
one or both of the liftgate gas stays
are removed. Damage to the liftgate
or power liftgate mechanisms may
occur.
AUTO CLOSURE
If the liftgate is pulled down to a partly open
position, the liftgate will pull itself to the
closed position.
Do not apply excessive force when the auto
closure is operating. Excessive force applied
may cause the mechanism to malfunction.
CAUTION
.The liftgate will automatically close
from a partly open position. To avoid
Pre-driving checks and adjustments3-25
Page 210 of 529
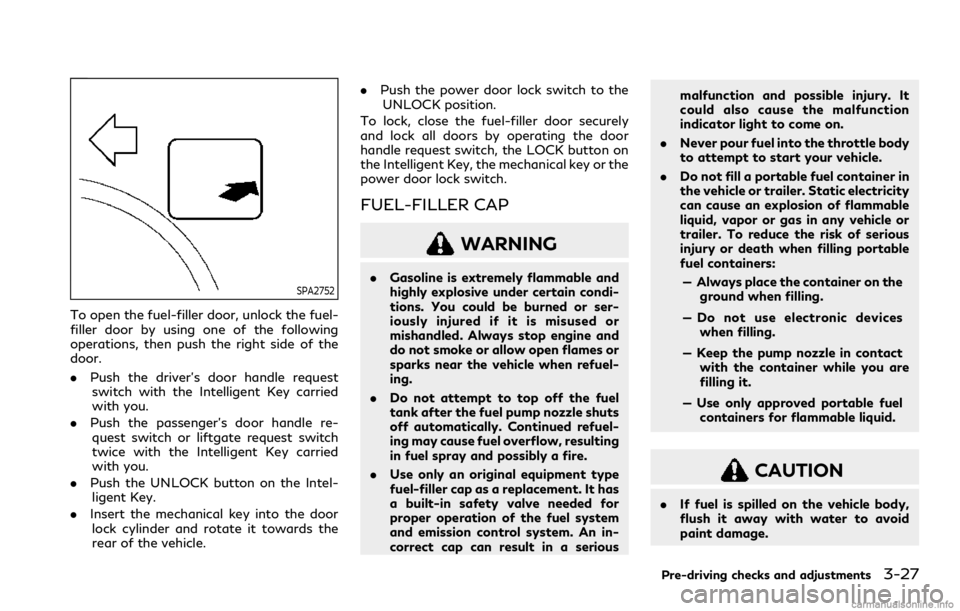
SPA2752
To open the fuel-filler door, unlock the fuel-
filler door by using one of the following
operations, then push the right side of the
door.
.Push the driver’s door handle request
switch with the Intelligent Key carried
with you.
. Push the passenger’s door handle re-
quest switch or liftgate request switch
twice with the Intelligent Key carried
with you.
. Push the UNLOCK button on the Intel-
ligent Key.
. Insert the mechanical key into the door
lock cylinder and rotate it towards the
rear of the vehicle. .
Push the power door lock switch to the
UNLOCK position.
To lock, close the fuel-filler door securely
and lock all doors by operating the door
handle request switch, the LOCK button on
the Intelligent Key, the mechanical key or the
power door lock switch.
FUEL-FILLER CAP
WARNING
. Gasoline is extremely flammable and
highly explosive under certain condi-
tions. You could be burned or ser-
iously injured if it is misused or
mishandled. Always stop engine and
do not smoke or allow open flames or
sparks near the vehicle when refuel-
ing.
. Do not attempt to top off the fuel
tank after the fuel pump nozzle shuts
off automatically. Continued refuel-
ing may cause fuel overflow, resulting
in fuel spray and possibly a fire.
. Use only an original equipment type
fuel-filler cap as a replacement. It has
a built-in safety valve needed for
proper operation of the fuel system
and emission control system. An in-
correct cap can result in a serious malfunction and possible injury. It
could also cause the malfunction
indicator light to come on.
. Never pour fuel into the throttle body
to attempt to start your vehicle.
. Do not fill a portable fuel container in
the vehicle or trailer. Static electricity
can cause an explosion of flammable
liquid, vapor or gas in any vehicle or
trailer. To reduce the risk of serious
injury or death when filling portable
fuel containers:
— Always place the container on the ground when filling.
— Do not use electronic devices when filling.
— Keep the pump nozzle in contact with the container while you are
filling it.
— Use only approved portable fuel containers for flammable liquid.
CAUTION
. If fuel is spilled on the vehicle body,
flush it away with water to avoid
paint damage.
Pre-driving checks and adjustments3-27
Page 257 of 529

4-32Monitor, climate, audio, phone and voice recognition systems
.“A/C”
Touch to turn the air conditioner on/off.
(See “Automatic operation (AUTO)”
(P.4-29).)
. “Auto Recirc” (if so equipped)
Touch to turn the auto-recirculation
mode on/off. (See “Advanced Climate
Control System” (P.4-32).)
. “Upper Vent”
Touch to turn the upper vent system on/
off. (See “Upper vent system ” (P.4-32).)
DUAL mode setting
Touch the "DUAL" key on the Climate screen
to turn on/off the DUAL mode. When the
DUAL mode is set, the temperature for the
driver seat and the front passenger seat can
be adjusted independently. When the DUAL
mode is on, the indicator light is on and
“DUAL” appears.
Upper vent system
When the “Upper Vent” key on the Climate
screen is touched, the air flow against the
driver’s or passenger’s upper body becomes
gentle. The indicator light on the key will
illuminate.
In this mode, air from the upper ventilator
flows in order to control the cabin tempera-
ture without blowing air directly on the
occupants. The upper vent system is useful when you
want the air conditioner to work quickly.
To turn the system off, touch the “Upper
Vent” key to turn the indicator light off.
Advanced Climate Control System
(if so equipped)
The Advanced Climate Control System
keeps the air inside of the vehicle clean,
using the automatic air circulation control
with the exhaust gas/outside odor detection
sensor and with ion control.
WAE0260X
“Auto Recirc” key:
Touch to turn on the automatic air
recirculation mode.
Plasmacluster®icon:
Indicates the Plasmacluster®ion emis-
sion status.
Plasmacluster
®and Plasmacluster®ion are
registered trademarks of Sharp Corporation.
Automatic air recirculation control with the
exhaust gas/outside odor detection sensor:
The Advanced Climate Control system
comes with an exhaust gas detection/out-
side odor sensor. When the automatic air
circulation control is activated, the sensor
Page 258 of 529

detects odors outside the vehicle such as
pulp or chemicals, and exhaust gas such as
gasoline or diesel. When such odors or gases
are detected, the display and the system
automatically change from the fresh air
mode to the recirculation mode.
When the automatic air circulation control
mode is on, for the first 5 minutes, the air
recirculation mode is selected to prevent
dust, dirt and pollen from entering the
vehicle and to clean the air inside of the
vehicle.
After 5 minutes, the sensor detects exhaust
gas and automatically alternates between
the air recirculation mode and the fresh air
mode.
NOTE:
The automatic air recirculation mode can be
activated under the following conditions.
.The air flow control is not in the wind-
shield defrosting mode (the indicator
light on the “
” front defroster but-
ton is turned off).
. The outside temperature is approxi-
mately 32 °F (0 °C) or above.
Ion control:
The Advanced Climate Control system unit
generates highly concentrated Plasmaclus-
ter
®ions into the air blown from the
ventilators to reduce odor absorbed into the interior trim and to suppress airborne
bacteria. The high-density Plasmacluster
®
ions also have a proven skin moisture
preserving effect.
The Plasmacluster
®icon on the Climate
screen indicates the status of the Plas-
macluster
®ion emission from the system
and changes with the amount of the air flow.
REAR AUTOMATIC AIR CONDI-
TIONING SYSTEM
The front air conditioning system must be
turned on to activate the rear air condition-
ing system.
The rear air conditioning system can be
operated with the buttons on the front air
conditioner control panel, the touch panel
screen and the buttons on the rear air
conditioner control panel at the rear of the
center console.
To turn on and off the rear air conditioning
system from the front seats, touch the “Rear
CLIMATE” key on the Climate screen and
then touch the “ON/OFF” key on the Rear
climate screen.
When the Rear climate screen is displayed,
the rear air conditioning system can also be
controlled on the front air conditioner con-
trol panel. (See “Automatic air conditioner”
(P.4-29).) The front air conditioner control panel
cannot be used to operate the front air
conditioning system when the Rear climate
screen is shown on the lower display. To use
the front air conditioner control panel for the
front air conditioning system operation,
push the CLIMATE button or touch the
“
” key on the Rear climate screen so that
the Rear climate screen is not shown on the
lower display. (See “Operations on touch
panel screen” (P.4-31).)
This table shows the relation between the
front air conditioner control panel and the
rear air conditioner control panel.
Display status
Rear climate
screen is dis-
played. Rear climate
screen is not dis-
played (Climate
screen).
Front air
condition-
er control
panel Only the rear
automatic air
conditioning
system can be
operated. Only the front air
conditioner can
be operated.
Rear air
condition-
er control
panel Cannot be op-
erated. Only the rear
automatic air
conditioning sys-
tem can be oper-
ated.
Monitor, climate, audio, phone and voice recognition systems4-33