battery ISUZU TFS SERIES 1997 Workshop Manual
[x] Cancel search | Manufacturer: ISUZU, Model Year: 1997, Model line: TFS SERIES, Model: ISUZU TFS SERIES 1997Pages: 1600, PDF Size: 40.98 MB
Page 345 of 1600

BRAKES 5-17
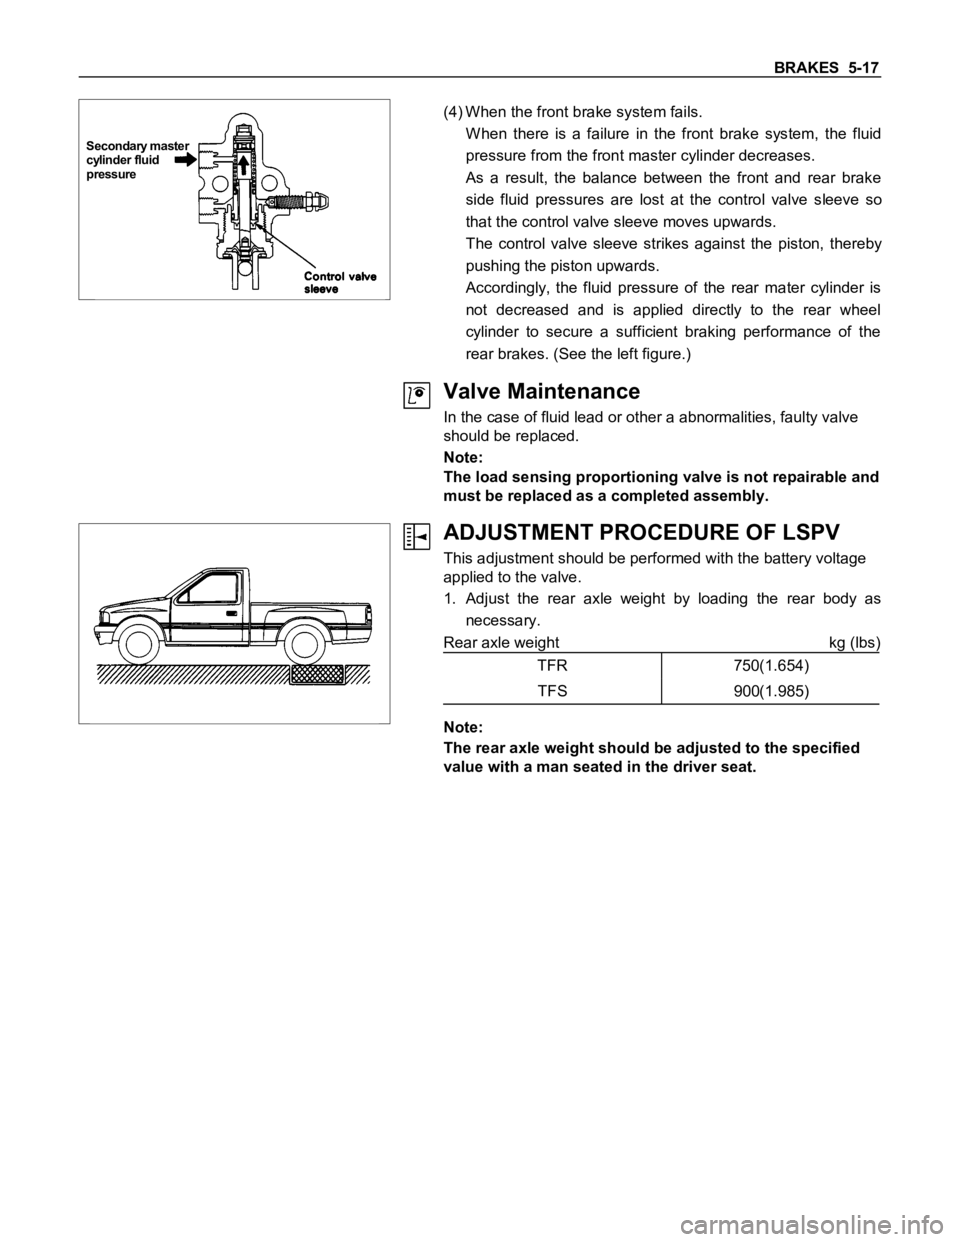
Secondary master
cylinder fluid
pressure
(4) When the front brake system fails.
W hen there is a failure in the front brake system, the fluid
pressure from the front master cylinder decreases.
As a result, the balance between the front and rear brake
side fluid pressures are lost at the control valve sleeve so
that the control valve sleeve moves upwards.
The control valve sleeve strikes against the piston, thereby
pushing the piston upwards.
Accordingly, the fluid pressure of the rear mater cylinder is
not decreased and is applied directly to the rear wheel
cylinder to secure a sufficient braking performance of the
rear brakes. (See the left figure.)
Valve Maintenance
In the case of fluid lead or other a abnormalities, faulty valve
should be replaced.
Note:
The load sensing proportioning valve is not repairable and
must be replaced as a completed assembly.
ADJUSTMENT PROCEDURE OF LSPV
This adjustment should be performed with the battery voltage
applied to the valve.
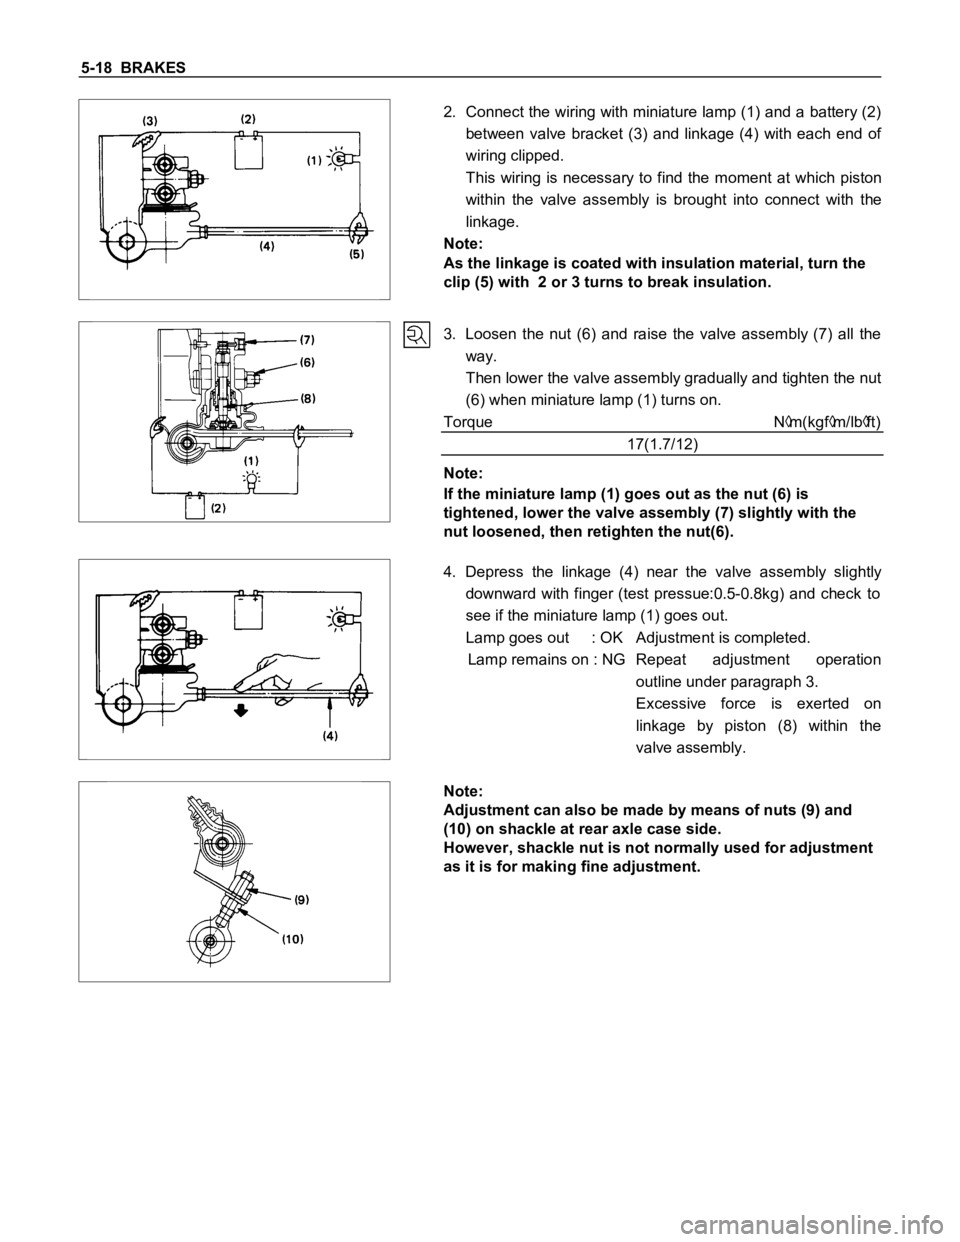
1. Adjust the rear axle weight by loading the rear body as
necessary.
Rear axle weight kg (lbs)
TFR 750(1.654)
TFS 900(1.985)
Note:
The rear axle weight should be adjusted to the specified
value with a man seated in the driver seat.
Page 346 of 1600

5-18 BRAKES
2. Connect the wiring with miniature lamp (1) and a battery (2)
between valve bracket (3) and linkage (4) with each end of
wiring clipped.
This wiring is necessary to find the moment at which piston
within the valve assembly is brought into connect with the
linkage.
Note:
As the linkage is coated with insulation material, turn the
clip (5) with 2 or 3 turns to break insulation.
3. Loosen the nut (6) and raise the valve assembly (7) all the
way.
Then lower the valve assembly gradually and tighten the nut
(6) when miniature lamp (1) turns on.
Torque N
m(kgfm/lbft)
17(1.7/12)
Note:
If the miniature lamp (1) goes out as the nut (6) is
tightened, lower the valve assembly (7) slightly with the
nut loosened, then retighten the nut(6).
4. Depress the linkage (4) near the valve assembly slightly
downward with finger (test pressue:0.5-0.8kg) and check to
see if the miniature lamp (1) goes out.
Lamp goes out : OK Adjustment is completed.
Lamp remains on : NG Repeat adjustment operation
outline under paragraph 3.
Excessive force is exerted on
linkage by piston (8) within the
valve assembly.
Note:
Adjustment can also be made by means of nuts (9) and
(10) on shackle at rear axle case side.
However, shackle nut is not normally used for adjustment
as it is for making fine adjustment.