end float JAGUAR X308 1998 2.G Workshop Manual
[x] Cancel search | Manufacturer: JAGUAR, Model Year: 1998, Model line: X308, Model: JAGUAR X308 1998 2.GPages: 2490, PDF Size: 69.81 MB
Page 5 of 2490
Rear Drive Axle and Diffe rential
General Procedures
Differential Output Shaft End Float Check (51.10.24)
In‐Vehicle Repair
Axle Shaft (47.10.01)
Differential Output Shaft Bearing (51.10.22)
Drive Pinion Flange and Drive Pinion Seal (51.20.01)
Removal and Installation
Axle Assembly (51.25.13)
206: Brake System
206‐00: Brake System ‐ Gen
eral Information
Specification
Description and Operation
Brake System
Diagnosis and Testing
Brake System
General Procedures
Brake System Bleeding (70.25.03) ‐ Vehicles With: Standard Brakes
Brake System Bleeding (70.25.03) ‐ Vehicles With: High Performance Brakes
Front Brake Disc Runout Check ‐ Vehicles With: Standard Brakes
Front Brake Disc Runout Chec
k ‐ Vehicles With: High Performance Brakes
Rear Brake Disc Runout Check (70.12.36) ‐ Vehicles With: Standard Brakes
Rear Brake Disc Runout Check (70.12.36) ‐ Vehicles With: High Performance
Brakes
206‐03: Front Disc Brake
Specification
Description and Operation
Front Disc Brake
Removal and Installation
Brake Caliper (70.55.02) ‐ Vehicles With: Standard Brakes
Brake Caliper (70.55.02) ‐ Vehicles With: High Perfo
rmance Brakes
Brake Disc (70.10.10) ‐ Vehicles With: Standard Brakes
Brake Disc (70.10.10) ‐ Vehicles With: High Performance Brakes
Brake Pads (70.40.02) ‐ Vehicles With: Standard Brakes
Page 66 of 2490
Suspension System - General Information - Wheel Bearing Inspection
Gene
ral Procedures
1.
Dur
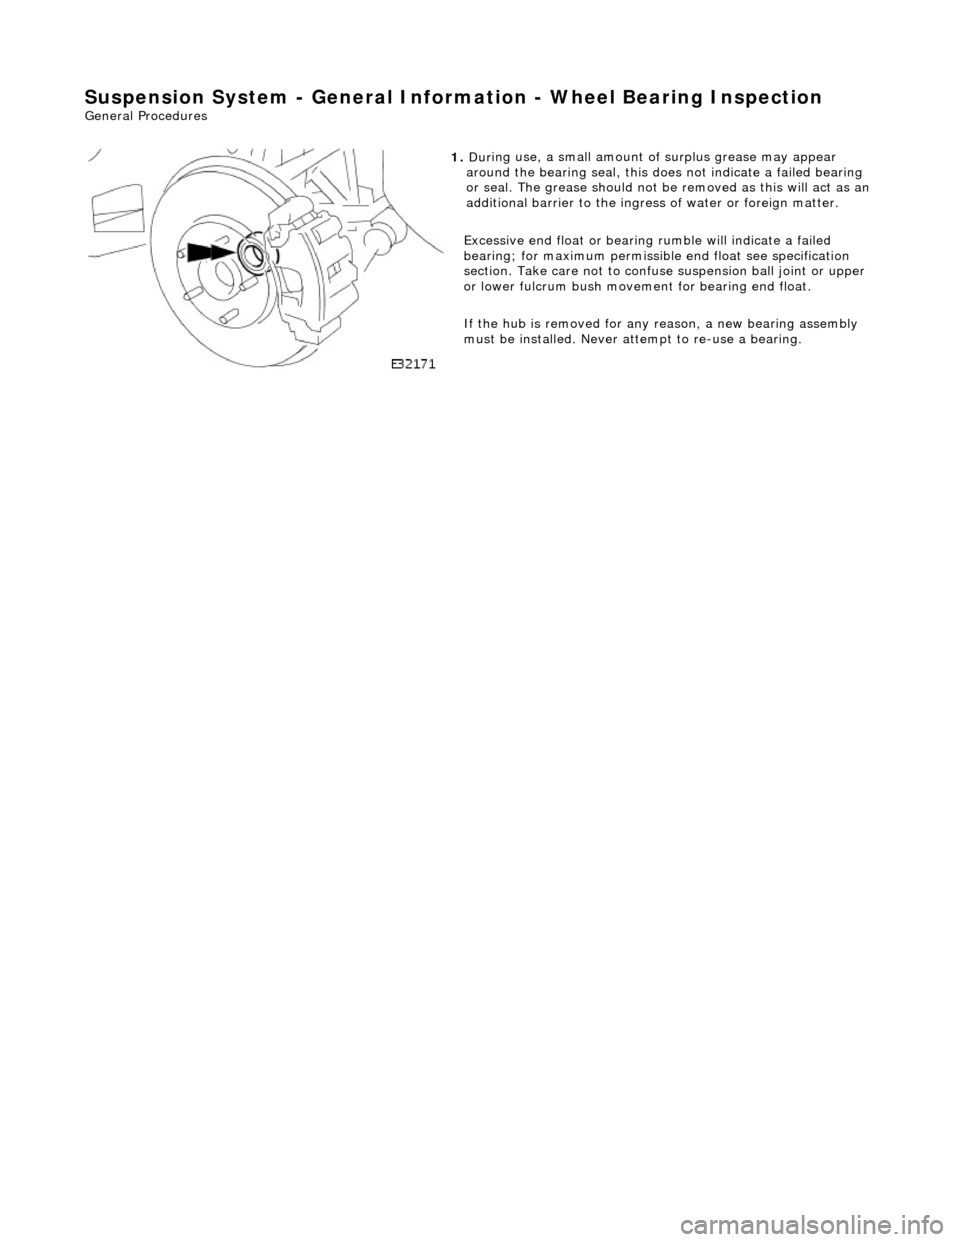
ing use, a small amount of surplus grease may appear
around the bearing seal, this does not indicate a failed bearing
or seal. The grease should not be removed as this will act as an
additional barrier to the ingress of water or foreign matter.
Excessive end float or bearing ru mble will indicate a failed
bearing; for maximum permissibl e end float see specification
section. Take care not to confuse suspension ball joint or upper
or lower fulcrum bu sh movement for bearing end float.
If the hub is removed for any reason, a new bearing assembly
must be installed. Never at tempt to re-use a bearing.
Page 230 of 2490
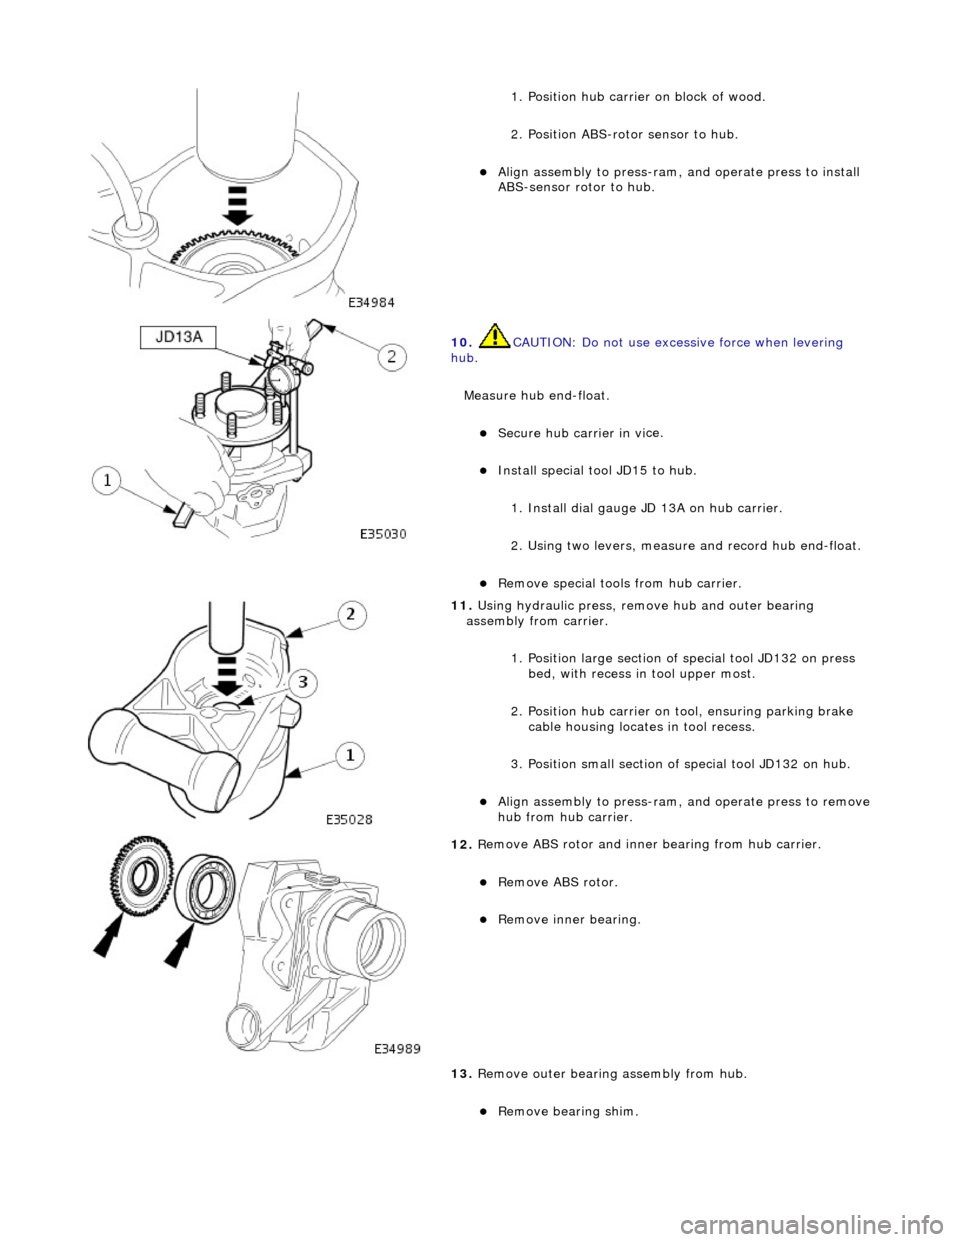
1.
Position hub carrier on block of wood.
2. Position ABS-rotor sensor to hub.
Ali g
n assembly to press-ram, and operate press to install
ABS-sensor rotor to hub.
10 . CAUTI
ON: Do not use excessive force when levering
hub.
Measure hub end-float.
Secure hub carri er in vi
ce.
Inst
al
l special tool JD15 to hub.
1. Install dial gauge JD 13A on hub carrier.
2. Using two levers, measure and record hub end-float.
R e
move special tools from hub carrier.
11
. Using h
ydraulic pr
ess, remove hub and outer bearing
assembly from carrier.
1. Position large section of special tool JD132 on press bed, with recess in tool upper most.
2. Position hub carrier on tool, ensuring parking brake cable housing locates in tool recess.
3. Position small section of special tool JD132 on hub.
Alig
n assembly to press-ram, and operate press to remove
hub from hub carrier.
12 . R
emove ABS rotor and inner bearing from hub carrier.
R
e
move ABS rotor.
R
e
move inner bearing.
13. Remove outer bearing assembly from hub.
Remove bearing shim.
Page 231 of 2490

Re
move bearin
g spacer.
Remove ou
ter bearing.
14. Pack new inner and outer bear ings with Shell Retinax 'A'
grease.
15
.
Install outer bearing and usin g special tool 205-234, fully
seat seal in hub carrier.
16
.
Using a press, install hub in carrier/bearing assembly.
17
.
Install inner bearing assembly.
1. Install bearing spacer.
2. Install bearing shim.
3. Install inner bearing.
18. Determine hub end float.
Measure an
d record end-float as a datum.
Calculating from datum, select
a sh
im that will achieve a
0.076 mm end-float.
19. Install new bearing shim.
Page 287 of 2490

R
ear Drive Axle/Differential - Differ
ential Output Shaft End Float Check
Gen
eral Procedures
1.
Di
sconnect the battery ground lead
2. Raise the vehicle for access
3. Mo
unt a dial test indicator (DTI
) to the differential housing with
the probe resting on the axle sh aft flange (the DTI probe must
be parallel to the output shaf t center line and NOT the axle
shaft)
4. Chec
k the end float
Pus
h the wheel / shaft assembly INWARDS
Zero the DTI
P
ull the wheel / shaft assembly OUTWARDS
N
ote the reading
5. Check the specification
0 t
o 0,15 mm GOOD
0,
15 mm + NOT GOOD; Renew the output shaft bearing
Page 294 of 2490
6.
CAUTIO
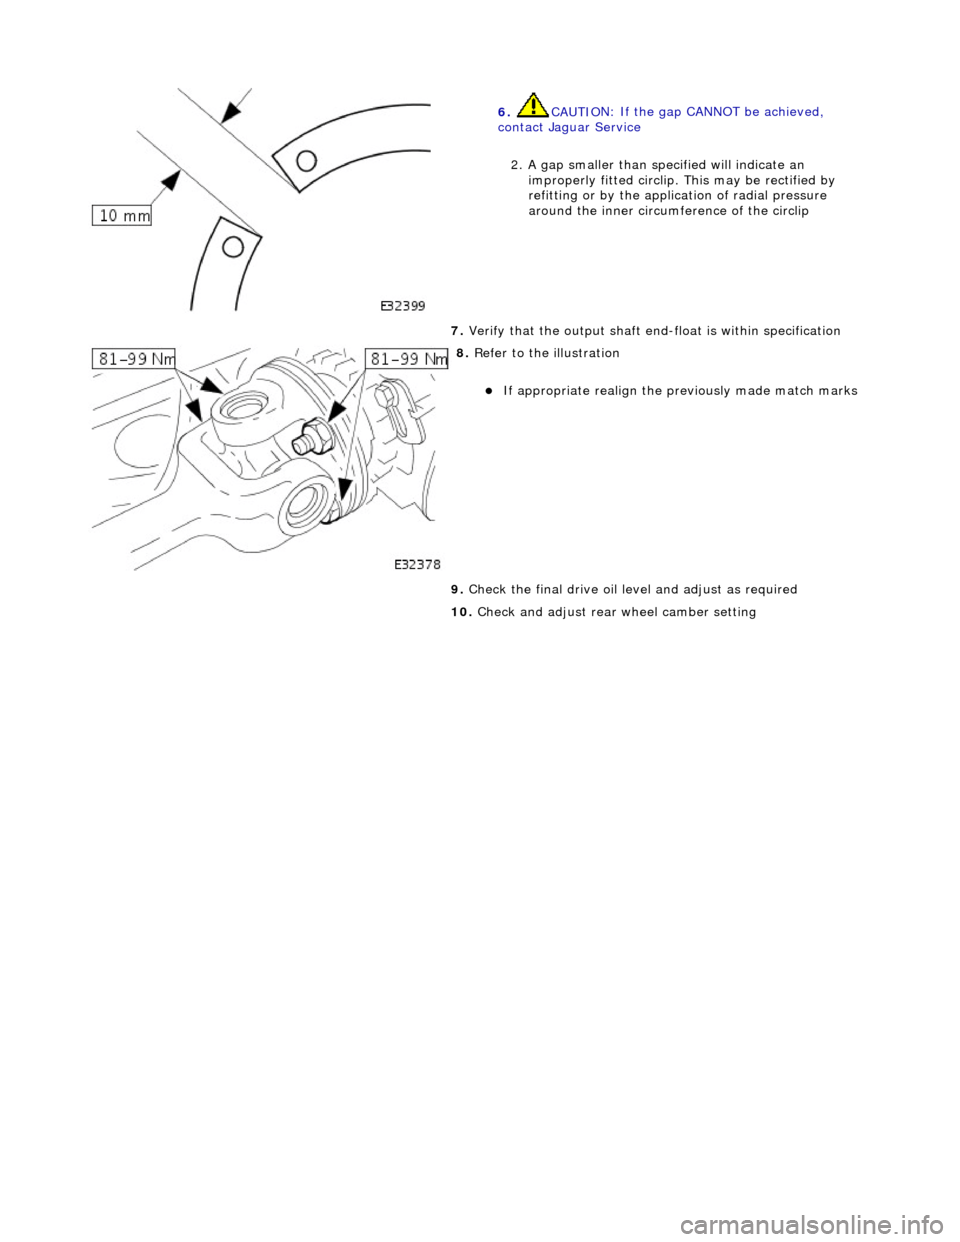
N: If the gap CANNOT be achieved,
contact Jaguar Service
2. A gap smaller than specified will indicate an improperly fitted circlip. This may be rectified by
refitting or by the application of radial pressure
around the inner circum ference of the circlip
7. Verify t
hat the output shaft end-float is within specification
8. Re
fer to the illustration
If
app
ropriate realign the pr
eviously made match marks
9. Check the final drive oil level and adjust as required
10. Check and adjust rear wheel camber setting
Page 328 of 2490

R
emove and tie caliper aside.
5. Make sure that wheel bearing end-float is within specification. Refer to specification section <<204-01>>.
6.
Measure brake disc run-out.
1. Install brake disc to hub and secure with all wheel nuts, tighten wheel nuts to 20 Nm in a diagonal sequence.
2. Position the gauge so that the pointer contacts the disc, between the disc's outer drill holes and the disc's outer edge.
Slowly rotate the disc one revolution, the disc run-out must not exceed the specification. Refer to
Specification Section <<206-03>>.
7. If the brake disc run-out exceeds specification, reposition the brake disc on the hub and repeat the above
procedure. Continue repositioning the brake disc until the run-out is within specification.
8. If the brake disc run-out still exceeds specification, check the hub face run-out.
9. Remove brake disc.
Page 332 of 2490

Me
asurement of the brake disc run-out, must be carried-out with the disc and hub parking-brake
adjuster-holes aligned.
Make sure that wheel bearing end-float is correct. Refer to specification section <<204-02>>.
5.
Measure brake disc run-out.
Install brake disc to hub and secure with all wheel nuts, tighten wheel nuts to 20 Nm in a diagonal
sequence.
Position the gauge so that the pointer contacts the disc 10 mm from its outer edge.
Slowly rotate the disc one revolution, the disc run-out must not exceed the specification. Refer to
specifications in section <<206-04>>.
6. If the brake disc run-out exceeds specification, check the hub face run-out.
7. Remove brake discs. Refer to procedure 70.10.13.
8.
Measure hub face run-out.
Page 336 of 2490

5.
Make sure that wheel bearing end-float is within specification. Refer to specification section
<<204-02>>.
6.
NOTE:
Measurement of the brake disc run-out, must be carried-out with the disc and hub access holes aligned.
7.
Measure brake disc run-out.
1. Install brake disc to hub and secure with all wheel nuts, tighten wheel nuts to 20 Nm in a diagonal sequence.
2. Position the gauge so that the pointer contacts the disc, between the disc's outer drill holes and the disc's outer edge.
Slowly rotate the disc one revolution, the disc run-out must not exceed the specification. Refer to
specifications in section <<206-04>>.
8. If the brake disc run-out exceeds specification, check the hub face run-out.
Page 1157 of 2490
The OR
VR system features are :
N
arrow fuel filler pipe and tank check valve.
Fue
l level vent valve (FLVV) fitted to the evaporative flan
ge and consisting of a two stage shut-off valve with rollover
protection and a pressure relief valve.
Grade ven
t valve with rollover protection, fitted to the ev
aporative flange and with an outlet pipe connected to the
FLVV vapour outlet pipe.
Large bore vapour vent pipes.
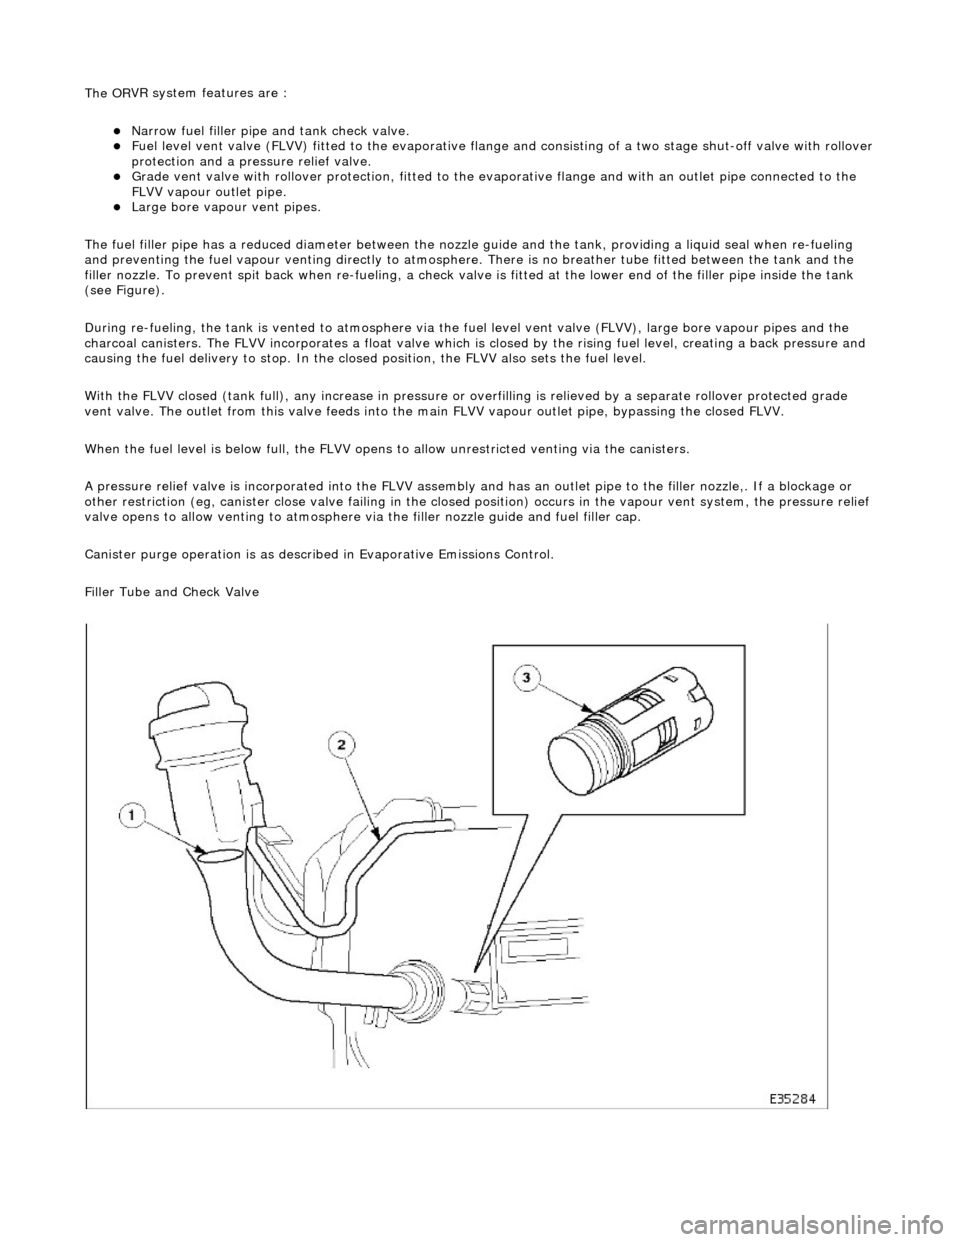
The fuel filler pipe has a reduced diameter between the nozzle guide and the tank, providing a liquid seal when re-fueling
and preventing the fuel vapour venting directly to atmosphere. There is no breather tube fitted between the tank and the
filler nozzle. To prevent spit back when re-fueling, a check valv e is fitted at the lower end of the filler pipe inside the tank
(see Figure).
During re-fueling, the tank is vented to atmosphere via the fuel level vent valv e (FLVV), large bore vapour pipes and the
charcoal canisters. The FLVV incorp orates a float valve which is closed by the rising fuel level, creating a back pressure and
causing the fuel delivery to stop. In the closed position, the FLVV also sets the fuel level.
With the FLVV closed (tank full), any increase in pressure or overfilling is relieved by a separate rollover protected grade
vent valve. The outlet from this valve feeds into the main FLVV vapour outlet pipe, bypassing the closed FLVV.
When the fuel level is below full, the FLVV opens to allow unrestricted venting via the canisters.
A pressure relief valve is incorp orated into the FLVV assembly and has an outlet pipe to the filler nozzle,. If a blockage or
other restriction (eg, canister close valve failing in the closed position) occurs in the vapour vent system, the pressure reli ef
valve opens to allow venting to atmosphere via the filler nozzle guide and fuel filler cap.
Canister purge operation is as described in Evaporative Emissions Control.
Filler Tube and Check Valve