oil JAGUAR XJ6 1994 2.G Electrical Diagnostic Manual
[x] Cancel search | Manufacturer: JAGUAR, Model Year: 1994, Model line: XJ6, Model: JAGUAR XJ6 1994 2.GPages: 327, PDF Size: 13.73 MB
Page 11 of 327
IW Automatic Transmission (AJ16)
TRANSMISSION FLUID TEMPERATURE SENSOR INPUTS P 0712 / P 0713
The transmission fluid temperature sensor is a positive temperature coefficient thermistor bead, located in the internal
wiring harness of the transmission assembly and immersed in the transmission fluid in the unit sump. The wiring is
taken out through the transmission connector and runs through the rotary switch and then into the gearbox harness
to the TCM. The pin outs on the relevant parts are as follows.
TCM ROTARY SWITCH TRANSMISSION
55 WAY CONNECTOR 12 WAY MULTI-LOCK 9 PIN DEUTSCH
(CC007) (GB002) (GB003)
PIN 46 - SIGNAL PIN 8 -SIGNAL PIN D -SIGNAL
PIN
44 -GROUND PIN 9 - GROUND PIN J -GROUND
TRANSMISSION FLUID TEMPERATURE SENSOR LOW INPUT- P 0712
This input is continuously monitored during initialization and operation by the processor and is checked against spe- cific limits to be in range. If the temperature indicated by the sensor is too low then this fault code will be stored and
the processor will use a substitute value for the transmission oil temperature.
The low limit is approximately
-50" C. This fault would indicate that the output signal line (Pin 46) is probably short
circuit to ground.
TRANSMISSION FLUID TEMPERATURE SENSOR HIGH INPUT- P 0713
This input is continuously monitored during initialization and operation by the processor and is checked against spe- cific limits to be in range. If the temperature indicated by the sensor is too high then this fault code will be stored and
the processor will use a substitute value for the transmission oil temperature. The high limit is approximately 185" C.
This fault would indicate that the input signal line (Pin 46) is probably open circuit or short circuit to battery positive
voltage (+I2 nominal).
Possible causes:
. Faulty sensor.
. Faulty harness wiring or connection to sensor.
Effects:
. Substitute oil temperature adopted by TCM.
Remedy:
Renew internal harness.
. Repair or renew harness I connectors.
Issue 1 August 1994 8 X300 EDM
Page 30 of 327

Automatic Transmission (AJ16) w
8.1.5
nector.
TRANSMISSION CONNECTOR
(GB003)
TRANSMISSION ELECTRICAL PIN POINT TESTS
THE FOLLOWING TESTS describe methods of testing the transmission control solenoid valves from the multi-pin con-
0 A = Road Speed Sensor
0 B = Pressure Regulator
0 D = Oil Temperature Signal
0 F = Road Speed Sensor
0 H = MVI Solenoid
0 J = Oil Temperature Ground
0 K = MV2 Solenoid
0 L = MWVK Solenoid
0 M = Solenoid Supply
The solenoid valves are located on the valve block in the transmission assembly and can be identified by their position.
Connection is made via a connector located on the LHS of the transmission assembly.
Impedance Checks
M
-L)
M
-K) 28-60ohm
0 M-H)
M-B 5-70hm
M)(A
K)(D
L 1-( F O/C
H)(J
B)(
L-K)
L
- H ) 56- 120 ohm
K
-H)
L
-B)
K
-B) 33-67ohm
H
-B)
All Pins
- Ground OK
5
m- 1738
Fig. 1 Transmission Multi-plug Connector
X300 EDM 27 Issue 1 August 1994
Page 37 of 327
Automatic Transmission (V12) Powertrain
Engine Speed
The engine speed is provided by an open collector signal supplied from the engine management control module
(ECM).
Throttle Position
This signal, from the ECM, performs the following two functions:
1.
2.
Engine Torque (and warm-up)
This signal, from the ECM, performs the following three functions:
1. During cranking to convey the completion of an engine warm
-up cycle to TCM.
2. To convey engine torque information, under normal running conditions, to TCM.
3. To convey engine torque fault signals to TCM.
Engine ‘warm
-up’ cycle commences from ignition ON until 500ms after the engine exceeds 400rpm. After this time
delay either an engine torque, or torque fault signal will be transmitted.
Transmission Input Speed
The transmission input speed sensor is mounted within the transmission housing and produces a variable frequency
signal, directly proportional to forward clutch housing rotational speed which is transmitted to the TCM. Sensor resis- tance equals 1.25kQ f 0.25.
Transmission Output Speed
The transmission output speed sensor is mounted within the transmission housing and produces a variable frequency
signal, directly proportional to the rear carrier rotational speed which is transmitted to the TCM. Sensor resistance
equals
1.25w2 + 0.25.
hake Application
When a brake application signal is received, due to brake switch operation, the torque convertor clutch lock-up sole- noid is de-energized, releasing lock-up mode if already applied
Transmission Oil Temperature
The transmission oil temperature sensor, located within the internal harness, monitors oil temperature and transmits a corresponding signal to the TCM.
To convey throttle position information to the TCM.
To indicate fault conditions between ECM and throttle potentiometer.
8.2.4.2 OUTPUTS
Gear Shift Solenoids
The two gear shift solenoids, located within the transmission housing, determine gear ratio when the selector is in any
of the forward gear positions.
Force Motor
The force motor, mounted within the transmission housing acts as a transmission torque fluid pressure regulator.
Torque Converter Clutch (TCC) Solenoid
The torque converter clutch solenoid, mounted within the transmission housing, provides a direct drive from the en- gine, via the converter clutch, to the driven wheels, giving the efficiency of a manual gearbox. The solenoid also pro- vides a ’ramp‘ apply and release to engage / disengage the clutch gently.
0
0
0
e
X300 EDM Issue 1 August 1994 6
Page 69 of 327
Brakes (a)
12.3 COMPONENT DESCRlPTlONS
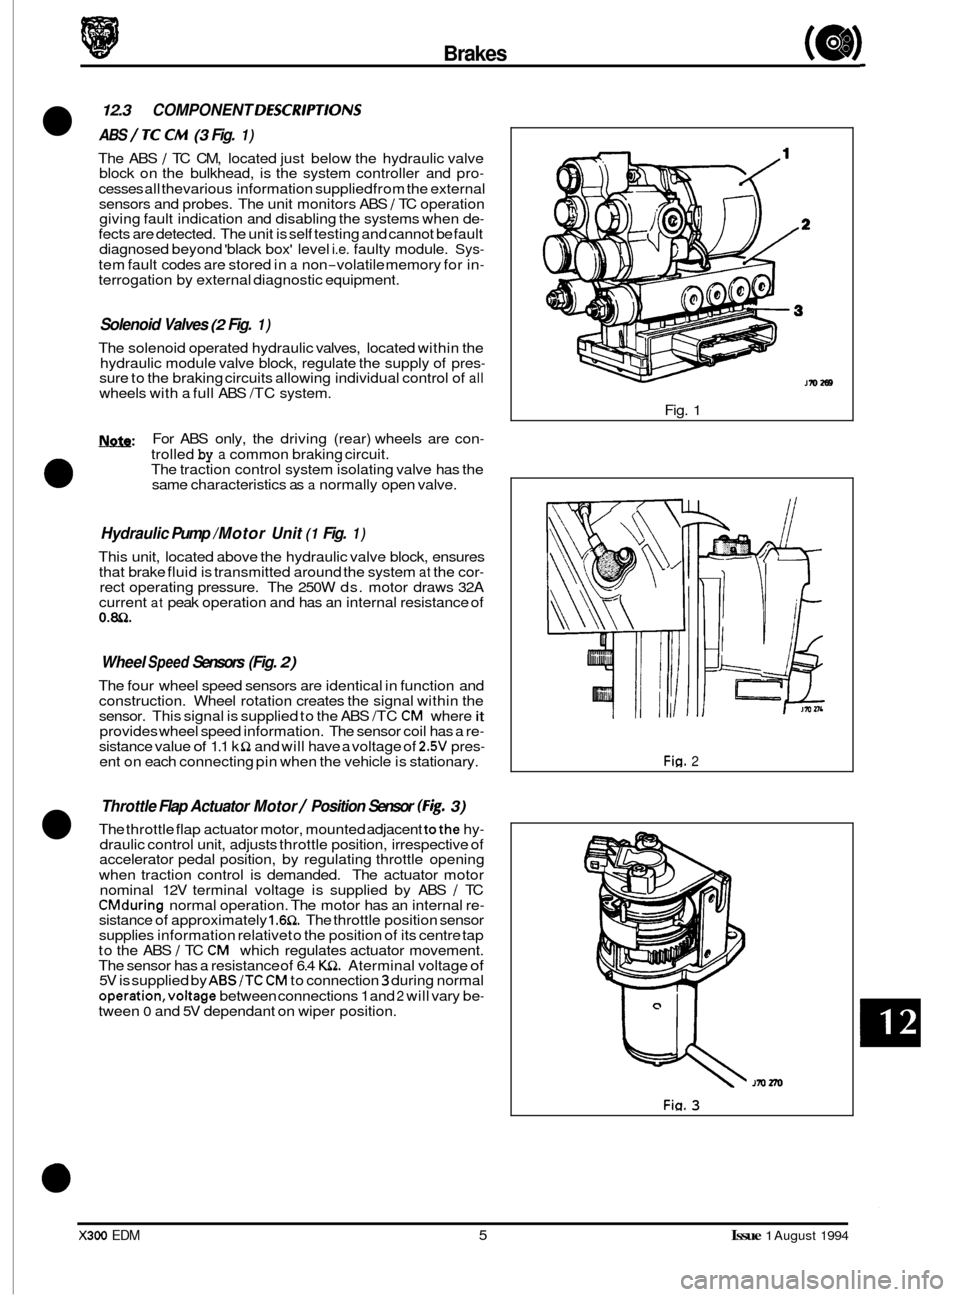
ABS / TC CM (3 Fig. 1)
The ABS / TC CM, located just below the hydraulic valve
block on the bulkhead, is the system controller and pro-
cesses all thevarious information supplied from the external
sensors and probes. The unit monitors ABS / TC operation
giving fault indication and disabling the systems when de- fects are detected. The unit is self testing and cannot be fault
diagnosed beyond 'black box' level i.e. faulty module. Sys-
tem fault codes are stored in a non-volatile memory for in- terrogation by external diagnostic equipment.
Solenoid Valves (2 Fig. 1)
The solenoid operated hydraulic valves, located within the
hydraulic module valve block, regulate the supply of pres- sure to the braking circuits allowing individual control of all wheels with a full ABS /TC system.
Nnfe: For ABS only, the driving (rear) wheels are con-
trolled by a common braking circuit.
The traction control system isolating valve has the
same characteristics as
a normally open valve. a
Hydraulic Pump /Motor Unit (1 Fig. 1)
This unit, located above the hydraulic valve block, ensures
that brake fluid is transmitted around the system at the cor- rect operating pressure. The 250W ds. motor draws 32A
current at peak operation and has an internal resistance of 0.m.
Wheel Speed Sensors (Fig. 2)
The four wheel speed sensors are identical in function and
construction. Wheel rotation creates the signal within the
sensor. This signal is supplied to the ABS /TC
CM where it provides wheel speed information. The sensor coil has a re- sistance value of 1.1 k Q and will have a voltage of 2.5V pres- ent on each connecting pin when the vehicle is stationary.
Throttle Flap Actuator Motor / Position Sensor (Fig. 3)
The throttle flap actuator motor, mounted adjacent tothe hy- draulic control unit, adjusts throttle position, irrespective of
accelerator pedal position, by regulating throttle opening
when traction control is demanded. The actuator motor
nominal 12V terminal voltage is supplied by ABS
/ TC CMduring normal operation. The motor has an internal re- sistance of approximately 1.6Q. The throttle position sensor
supplies information relative to the position of its centre tap
to the ABS
/ TC CM which regulates actuator movement.
The sensor has a resistance of 6.4 K!2. Aterminal voltage of 5V is supplied by ABS/TC CM to connection 3 during normal
operation,voltage between connections 1 and 2 will vary be- tween 0 and 5V dependant on wiper position.
Fig. 1
Fig. 2
Jrn 270
Fia. 3
X300 EDM 5 Issue 1 August 1994
Page 72 of 327
(a) Brakes
Pin Point Tests
Wheel Sensor
The wheel sensors are connected across ABS / TC CM pins 5 - 12 inclusive, one sensor per pair of pins (see 'Control
Module Connections', page 3).
. Testing between pins of the 28 way multi-plug connector, checkthat the resistance of each sensor coil is 1.1kQ (toler- ance of * 50%).
Hydraulic Pump Motor
rn Disconnect the pump motor bi-pin connector.
rn Check the resistance value of the motor winding is approximately 0.m.
Throttle position sensor
With the vehicle ignition ON, test the throttle position sensor harness between ABSITC CM pins 25 and 27. Avoltage
of 5V (k 0.5V) should be recorded.
Repeat the test between ABS
/ TC CM pins 26 and 27 with the accelerator pedal pressed down approximately half
of full travel. Avoltage of approximately half the first value should be recorded. Variation in accelerator pedal posi- tion should cause a varying voltage value to be recorded.
Throttle Flap Actuator Motor
. Test the throttle flap actuator motor between ABS /TC CM multi-plug connector pins 16 and 17. A resistance value
of 1.651 should be recorded.
Brake Switch
. Measure the voltage at the brake switch between ABS /TC CM pin 20 and ground. With pedal UP, ie not operated,
a reading equivalent to battery voltage should be achieved. Operate brake pedal fully ensuring coinciding ground,
ie
0 volts, through switch.
Traction Switch
Check continuity of traction OFF / ON switch between ABS /TC CM pin 18 and ground. Operate switch ensuring CO- inciding short circuit.
Issue 1 August 1994 8 X300 EDM
Page 98 of 327
Climate Control Systems
14.7.22 BLOWER MOTORS
Disconnect the blower motors (LH & RH) multi-plugs and check motor operation by applying battery voltage (+12V) across pin 5 (+vel and pin 9 (-ve).
Non-functioning of both L H and RH motors *
Cause:
1. Loss of ignition voltage.
Remedy:
1.
2.
*
Examine fuse F12 in RH heelboard fuse-box. If fuse is blown determine reason for failure and renew.
Examine harness wiring from
RH heelboard fuse-box connection CA044/010 to splice CAS53. Repair or renew
wiring as necessary.
This fault will also affect the operation of seat control modules, power steering control module and door mirror
heaters.
Non-functioning of RH blower motor only
Cause:
1. Faulty relay operation.
2. Faulty harness wiring.
Remedy:
1. Ensure 12Vsupply between relay pin 1 and ground.
Ensure continuity between pins 3 and
5 when relay operated.
Ensure relay coil impedance of
7552 to 135Q across pins 1 and 2.
Ensure correct seating of relay on base. Examine pins for damage or deformity.
Check continuity of wiring from fuse F12
(RH heelboard fuse-box) to relay pin 1 and from relay pin 2 to A / CCM
pin 53 (26-way connector).
Check continuity of wiring from fuse
F11 (RH heelboard fuse-box) to relay pin 3, from relay pin 5 to motor pin 5, from motor pin 13 to A / CCM pin 41 (16-way connector), from motor pin 8 to ground and from motor pin 10 to A / CCM pin 42 (16-way connector).
2.
Non-functioning of L H blower motor only
Cause:
1. Faulty relay operation.
2. Faulty harness wiring.
Remedy:
1. Ensure 12V supply between relay pin 1 and ground.
Ensure continuity between pins 3 and
5 when relay operated.
Ensure relay coil impedance
of 7552 to 135Q across pins 1 and 2.
Ensure correct seating of relay on base. Examine pins for damage or deformity.
2. Check continuity of wiring from fuse F12 (RH heelboard fuse-box) to relay pin 1 and from relay pin 2 to A / CCM
pin 66 (26-way connector).
Check continuity of wiring from fuse
F11 (LH heelboard fuse box) to relay pin 3, from relay pin 5 to motor pin 5, from motor pin 13 to A / CCM pin 49 (16-way connector), from motor pin 8 to ground and from motor pin 10 to
A / CCM pin 50 (16-way connector).
X300 EDM 23 Issue 1 August 1994
Page 100 of 327
Climate Control Systems
High speed operation at all times - RH blower
a Cause:
1. Faulty high speed relay.
2. Faulty harness wiring.
Remedy:
1. Check the relay contact is not stuck 'ON'.
2. Check continuity of wiring harness between blower motor pin 8 and ground, pin 10 and A / CCM pin 42 (16-way connector) and pin 13 and A/ CCM pin 41 (16-way connector).
High speed operation at all times - LH blower
Cause:
1. Faulty high speed relay.
2. Faulty harness wiring.
Remedy:
1. Check the relay contact is not stuck 'ON'.
2. Check continuity of wiring harness between blower motor pin 8 and ground, pin 10 and A / CCM pin 50
(16-way connector) and pin 13 and A / CCM pin 49 (16-way connector).
14.7.23 Water Valve
For mechanical diagnosis of the water valve, refer to section 14 of the Vehicle Service Manual.
The solenoid coil fitted to the water valve housing has
a resistance of 17.4Q f 1P at 5 - 35 "C.
Check the continuity between pin 2 water valve white 2-way multi-plug and the A/ CCM (pin 52,26-way connector).
Check for ground
at pin 1 water valve white 2-way multi-plug.
14.7.24 Wafer Pump
Disconnect the black 2-way connector.
The motor operation can be checked by applying battery voltage to pin 1, motor 2
-way connector, and ground to pin 2.
Inspect the harness for open circuit or short circuit to ground. Rectify as necessary. If no harness faults are apparent,
renew the
A / CCM.
CAUTION: If removed the water pump should not be operated dry, and for a maximum of five minutes when wet. Failing to observe this may result in pump rotor and shaft damage.
The application of reverse polarity voltage at pins 1 and 2 will result in damage to the pumps internal cir-
cuitry.
X300 EDM 25 Issue 1 August 1994
Page 102 of 327
Electrical IT
SECTION CONTENTS
Sub
-Section 15.2 lnsfrumenfs
Subsection Title SRO Page
15.2 ............. Instruments .................................................................... 15.2-1
15.2.1
............ Introduction .................................................................... 15.2-1
15.2.2
............ Instrument Pack Connectors - Pin Locations ......................................... 15.2-3
15.2.3
............ Component Description .......................................................... 15.24
15.2.3.1 .......... Speedometer ................................................................... 15.24
15.2.3.2 .......... Tachometer .................................................................... 15.24
15.2.3.3
.......... Engine Oil Pressure and Warning Lamp ............................................. 15.24
15.2.3.4 .......... Engine Coolant Temperature ...................................................... 15.24
15.2.3.5 .......... Fuel Tank Level Gauge and Warning Lamp .......................................... 15.24
15.2.3.6
.......... Battery Voltage Gauge and Warning Lamp .......................................... 15.24
15.2.3.7
.......... Liquid Crystal Display ........................................................... 15.24
15.2.3.8 .......... Trip Computer .................................................................. 15.2-5
15.2.4
............ Primary Warning Lamps (Illuminated Red) .......................................... 15.2-5
15.2.4.1
.......... Exhaust Temperature ............................................................ 15.2-5
15.2.4.2
.......... Low Oil Pressure ................................................................ 15.2-5
15.2.4.3
.......... Seat Belt ....................................................................... \
15.2-5
15.2.4.4
.......... Trunk Lid Open ................................................................. 15.2-5
15.2.4.5
.......... DoorAjar ...................................................................... 15.2-5
15.2.4.6
.......... Engine Coolant LeveL ............................................................ 15.24
15.2.4.7
.......... SRS Airbag Fault ................................................................ 15.24
15.2.4.8 .......... Charging Fault .................................................................. 15.24
15.2.4.9 .......... Brake System Fault .............................................................. 15.24
15.2.4.10 ......... Bark Brake ..................................................................... 15.24
15.2.5. ........... Secondary Warning Lamps (Illuminated Amber) ...................................... 15.2-7
15.2.5.1
.......... Transmission Fault ............................................................... 15.2-7
15.2.5.2
.......... Washer Fluid Level .............................................................. 15.2-7
15.2.5.3
.......... Bulb Fail ....................................................................... \
15.2-7
15.2.5.4
.......... Traction Control Fail ............................................................. 15.2-7
15.2.5.5
.......... Anti-lock Fail .................................................................. 15.2-7
15.2.5.6
.......... Low Fuel Level ................................................................. 15.2-7
15.2.5.7
.......... Check Engine ................................................................... 15.2-7
15.2.6.1
.......... Transmission Sport Mode ......................................................... 15.2-8
15.2.6.2
.......... Traction Control OFF ............................................................ 15.2-8
15.2.6.3
.......... Direction Indicators ............................................................. 15.2-8
15.2.6.4
.......... Main Beam .................................................................... 15.2-8
15.2.6
............ Status
and Warning Lamps ........................................................ 15.2-8
m
a
0
e
0
X300 EDM ii Issue 1 August 1994
Page 103 of 327
Electrical IT
SECTION CON TENTS
Subsection 15.2 Instruments (continued)
Sub-Section Title SRO Page
15.2.7 ............ Fault Diagnosis ................................................................. 15.2-9
15.2.7.1
.......... Active High /Low Inputs ......................................................... 15.2-9
15.2.8.
........... Instrument Pack Pin-point Tests .................................................. 15.2-1 0
15.2.8.1 .......... Oil Pressure, Battery Condition, Coolant Temperature and Fuel Gauges ................. 15.2-1 0
75.2.8.2
.......... Speedometer .................................................................. 15.2-10
15.2.8.4
.......... Liquid Crystal Display .......................................................... 15.2-17
15.2.8.6
.......... Door Open Warning Lamp ...................................................... 15.2-12
15.2.8.7
.......... Exhaust Temperature Warning Lamp .............................................. 15.2-1 3
15.2.8.8 .......... Luggage Compartment Warning Lamp ............................................. 15.2-14
15.2.8.9
.......... Seat Belt Warning Indicator ...................................................... 15.2-1 5
15.2.8.3
.......... Tachometer ................................................................... 15.2-11
15.2.8.5
.......... Trip Computer ................................................................. 15.2-11
15.2.8.70
......... Park Brake Indicator ............................................................ 15.2-16
15.2.8.71
......... Main Beam Indicator ........................................................... 15.2-17
75.2.8.12
......... Direction Indicator Tell Tales ..................................................... 15.2-18
15.2.8.14
......... Washer Fluid Level Indicator ..................................................... 15.2-20
15.2.8.16
......... Brake Fluid Level Indicator ...................................................... 15.2-22
75.2.8.17
......... General Bulb Failure Indicator ................................................... 15.2-23
15.2.8.18
.........
75.2.8.19 .........
15.2.8.20 ......... Traction Control OFF Tell-tale .................................................... 15.2-24
0
75.2.8.13 ......... Generator IND Voltage Indicator ................................................. 15.2-19
7 5.2.8.15 ......... Engine Coolant Level indicator ................................................... 15.2-2 1
Transmission Sport mode Indicator ................................................ 75.2-24
Traction Control Failure Warning Lamp
............................................ 15.2-24
15.2.8.21
......... Anti-lock Failure Warning Lamp .................................................. 15.2-24
15.2.8.22
......... Check Engine Warning Lamp .................................................... 75.2-24
Issue 1 August 1994 iii X300 EDM
Page 107 of 327
E I ect r ica I
15.1 SUPPLEMENTAL RESTRAINT SYSTEM
15.1.1 System Description
The Supplemental Restraint System (SRS) installation comprises:
0 electronic Diagnostic Module (DM)
0 driver and passenger-side air bag modules (including firing mechanisms)
0 two front impact sensors (left and right)
0 one safing sensor
0 dedicated wiring harness
0 two cable reel cassettes (integral part of the steering column harness)
0 Malfunction Indicator Lamp (MIL) and driver information message
The system is designed to provide protection for both driver and front seat passenger by automatically deploying air
bags in the event of a collision during forward travel. The driver
-side air bag is located in the centre of the steering
wheel assembly and the passenger-side air bag in the fascia panel.
In the event of a collision the impact
/ safing sensors operate, completing the electrical firing circuit and causing the
air bags to inflate within 32 milliseconds. At least two of the three sensors (at least one impact, and the safing sensor)
.must be activated to initiate firing. System operation is dependent upon battery voltage supplied directly, and via the
ignition switch, to the DM and the correct installation and operation of all system components, including the wiring
harness. Faults in system components, installation or wiring will be indicated by the MIL Lamp, located on the instru
- ment panel, which will illuminate 'SRS AIR BAG'. Indication is also given by the driver information message'AIR BAG'
displayed on the LCD panel below the speedometer.
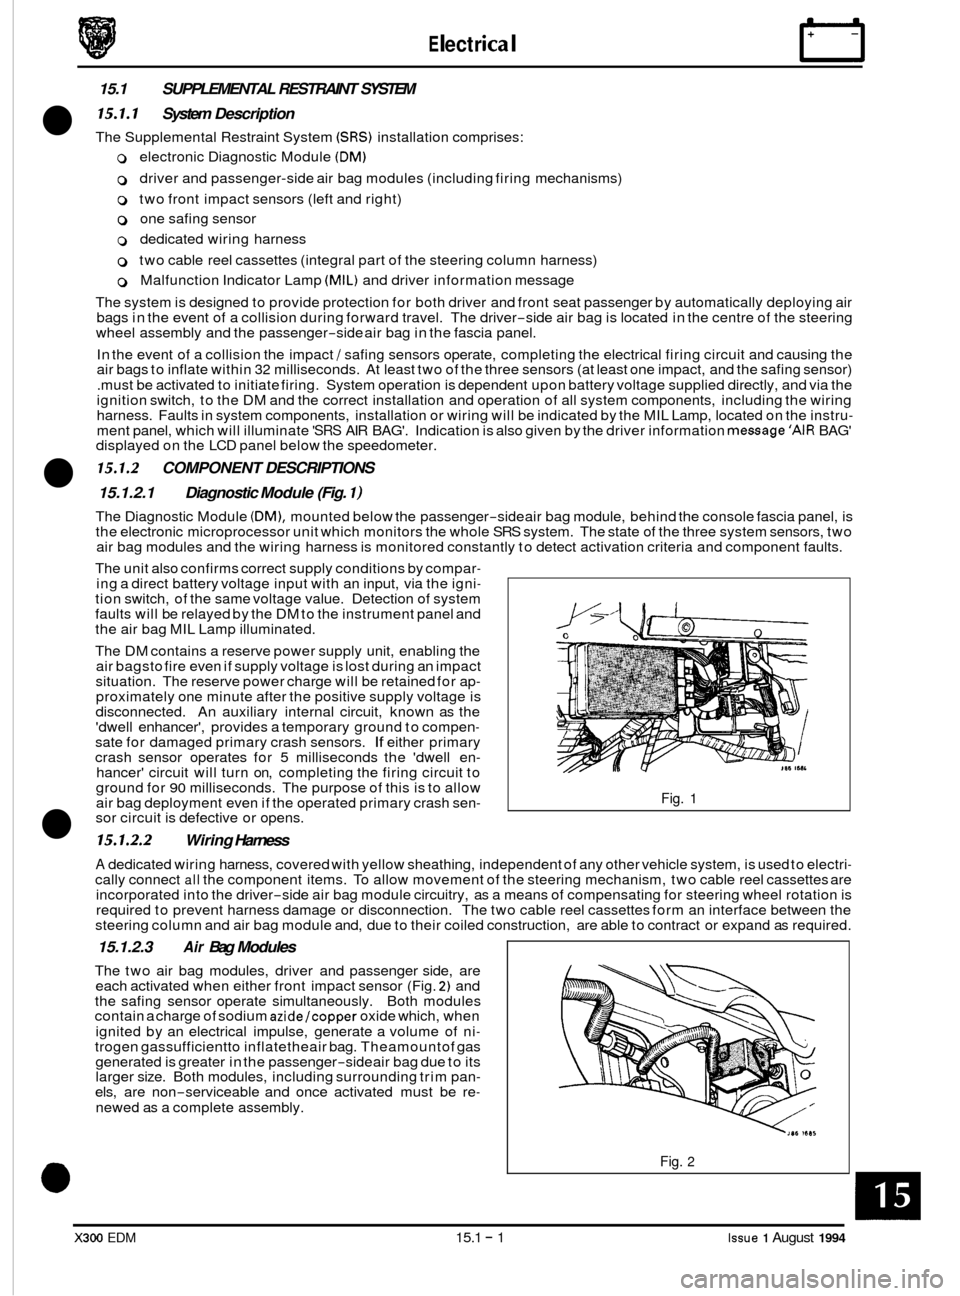
15.1.2.1 Diagnostic Module (Fig. I)
The Diagnostic Module (DM), mounted below the passenger-side air bag module, behind the console fascia panel, is
the electronic microprocessor unit which monitors the whole SRS system. The state of the three system sensors, two
air bag modules and the wiring harness is monitored constantly to detect activation criteria and component faults.
15.1.2 COMPONENT DESCRIPTIONS
The unit also confirms correct supply conditions by compar- ing a direct battery voltage input with an input, via the igni- tion switch, of the same voltage value. Detection of system
faults will be relayed by the DM to the instrument panel and
the air bag MIL Lamp illuminated.
The DM contains a reserve power supply unit, enabling the
air bagsto fire even if supply voltage is lost during an impact
situation. The reserve power charge will be retained for ap
- proximately one minute after the positive supply voltage is
disconnected. An auxiliary internal circuit, known as the
'dwell enhancer', provides a temporary ground to compen
- sate for damaged primary crash sensors. If either primary
crash sensor operates for 5 milliseconds the 'dwell en- hancer' circuit will turn on, completing the firing circuit to
ground for 90 milliseconds. The purpose of this is to allow
air bag deployment even if the operated primary crash sen- sor circuit is defective or opens.
15.1.2.2 Wiring Harness
Fig. 1
A dedicated wiring harness, covered with yellow sheathing, independent of any other vehicle system, is used to electri- cally connect all the component items. To allow movement of the steering mechanism, two cable reel cassettes are
incorporated into the driver-side air bag module circuitry, as a means of compensating for steering wheel rotation is
required to prevent harness damage or disconnection. The two cable reel cassettes form an interface between the
steering column and air bag module and, due to their coiled construction, are able to contract or expand as required.
15.1.2.3 Air Bag Modules
The two air bag modules, driver and passenger side, are
each activated when either front impact sensor (Fig. 2) and
the safing sensor operate simultaneously. Both modules
contain a charge of sodium
azide/copper oxide which, when
ignited by an electrical impulse, generate a volume of ni
- trogen gassufficientto inflatetheair bag. Theamountof gas
generated is greater in the passenger-side air bag due to its
larger size. Both modules, including surrounding trim pan- els, are non-serviceable and once activated must be re-
newed as a complete assembly.
Fig. 2
X300 EDM 15.1 - 1 Issue 1 August 1994