programming JEEP CHEROKEE 2015 KL / 5.G User Guide
[x] Cancel search | Manufacturer: JEEP, Model Year: 2015, Model line: CHEROKEE, Model: JEEP CHEROKEE 2015 KL / 5.GPages: 772, PDF Size: 18.21 MB
Page 293 of 772
2. Place the hand-held transmitter 1 to 3 inches (3 to 8
cm) away from the HomeLink® button you wish to
program while keeping the HomeLink® indicator
light in view.
3. Simultaneously push and hold both the HomeLink®
button you want to program and the hand-held trans-
mitter button.
4. Continue to hold both buttons and observe the indi-
cator light. The HomeLink® indicator will flash slowly
and then rapidly after HomeLink® has received the
frequency signal from the hand-held transmitter. Re-
lease both buttons after the indicator light changes
from slow to rapid.
5. At the garage door opener motor (in the garage),
locate the “LEARN” or “TRAINING” button. This can
usually be found where the hanging antenna wire is
attached to the garage door opener/device motor.
Firmly push and release the “LEARN” or “TRAIN-
ING” button. On some garage door openers/devices
there may be a light that blinks when the garage door
opener/device is in the LEARN/TRAIN mode.
NOTE:You have 30 seconds in which to initiate the next
step after the LEARN button has been pushed.
6. Return to the vehicle and push the programmed
HomeLink® button twice (holding the button for two
seconds each time). If the garage door opener/device
activates, programming is complete.
NOTE:If the garage door opener/device does not acti-
vate, push the button a third time (for two seconds) to
complete the training.
To program the remaining two HomeLink® buttons,
repeat each step for each remaining button. DO NOT
erase the channels.
3
UNDERSTANDING THE FEATURES OF YOUR VEHICLE 291
Page 294 of 772
Reprogramming A Single HomeLink® Button
(Rolling Code)
To reprogram a channel that has been previously trained,
follow these steps:
1. Turn the ignition switch to the ON/RUN position.
For vehicle’s equipped with Keyless Enter-N-Go, place
the ignition in the RUN position with the Engine ON.
2. Push and hold the desired HomeLink® button until
the indicator light begins to flash after 20 seconds.Do
not release the button.
3.Without releasing the buttonproceed with “Program-
ming A Rolling Code” step 2 and follow all remaining
steps.
Programming A Non-Rolling Code
For programming Garage Door Openers manufactured
before 1995.
1. Cycle the ignition to the ON/RUN position.
2. Place the hand-held transmitter 1 to 3 inches (3 to 8
cm) away from the HomeLink® button you would like
to program while keeping the HomeLink® indicator
light in view.
3. Simultaneously push and hold both the HomeLink®
button you want to program and the hand-held trans-
mitter button.
4. Continue to hold both buttons and observe the indi-
cator light. HomeLink® indicator will flash slowly
and then rapidly after HomeLink® has received the
frequency signal from the hand-held transmitter. Re-
lease both buttons after the indicator light changes
from slow to rapid.
5. Push and hold the programmed HomeLink® button
and observe the indicator light.
292 UNDERSTANDING THE FEATURES OF YOUR VEHICLE
Page 295 of 772
•If the indicator light stays on constantly, program-
ming is complete and the garage door/device should
activate when the HomeLink® button is pressed.
•To program the remaining two HomeLink® buttons,
repeat each step for each remaining button. DO NOT
erase the channels.
Reprogramming A Single HomeLink® Button
(Non — Rolling Code)
To reprogram a channel that has been previously trained,
follow these steps:
1. Cycle the ignition to the ON/RUN position.
For vehicle’s equipped with Keyless Enter-N-Go, place
the ignition in the RUN position with the Engine ON.
2. Push and hold the desired HomeLink® button until
the indicator light begins to flash after 20 seconds.Do
not release the button.
3.Without releasing the buttonproceed with “Program-
ming A Non-Rolling Code” step 2 and follow all
remaining steps.
Canadian/Gate Operator Programming
For programming transmitters in Canada/United States
that require the transmitter signals to “time-out” after
several seconds of transmission.
Canadian radio frequency laws require transmitter sig-
nals to time-out (or quit) after several seconds of trans-
mission – which may not be long enough for HomeLink®
to pick up the signal during programming. Similar to this
Canadian law, some U.S. gate operators are designed to
time-out in the same manner.
It may be helpful to unplug the device during the cycling
process to prevent possible overheating of the garage
door or gate motor.
1. Cycle the ignition to the ON/RUN position.
3
UNDERSTANDING THE FEATURES OF YOUR VEHICLE 293
Page 296 of 772
2. Place the hand-held transmitter 1 to 3 inches (3 to 8
cm) away from the HomeLink® button you wish to
program while keeping the HomeLink® indicator
light in view.
3. Continue to push and hold the HomeLink® button,
while you press and release (“cycle”) your hand-held
transmitter every two seconds until HomeLink® has
successfully accepted the frequency signal. The indi-
cator light will flash slowly and then rapidly when
fully trained.
4. Watch for the HomeLink® indicator to change flash
rates. When it changes, it is programmed. It may take
up to 30 seconds or longer in rare cases. The garage
door may open and close while you are programming.
5. Push and hold the programmed HomeLink® button
and observe the indicator light.
NOTE:
•If the indicator light stays on constantly, program-
ming is complete and the garage door/device should
activate when the HomeLink® button is pushed.
•To program the two remaining HomeLink® buttons,
repeat each step for each remaining button. DO NOT
erase the channels.
If you unplugged the garage door opener/device for
programming, plug it back in at this time.
Reprogramming A Single HomeLink® Button
(Canadian/Gate Operator)
To reprogram a channel that has been previously trained,
follow these steps:
1. Cycle the ignition to the ON/RUN position.
294 UNDERSTANDING THE FEATURES OF YOUR VEHICLE
Page 297 of 772
2. Push and hold the desired HomeLink® button until
the indicator light begins to flash after 20 seconds.Do
not release the button.
3.Without releasing the buttonproceed with
“Canadian/Gate Operator Programming” step 2 and
follow all remaining steps.
Using HomeLink®
To operate, push and release the programmed
HomeLink® button. Activation will now occur for the
programmed device (i.e., garage door opener, gate opera-
tor, security system, entry door lock, home/office light-
ing, etc.,). The hand-held transmitter of the device may
also be used at any time.
Security
It is advised to erase all channels before you sell or turn
in your vehicle.
To do this, push and hold the two outside buttons for 20
seconds until the red indicator flashes. Note that all
channels will be erased. Individual channels cannot be
erased.
The HomeLink® Universal Transceiver is disabled when
the Vehicle Security Alarm is active.
Troubleshooting Tips
If you are having trouble programming HomeLink®,
here are some of the most common solutions:
•Replace the battery in the original hand-held transmit-
ter.
•Push the LEARN button on the Garage Door Opener
to complete the training for a Rolling Code.
•Did you unplug the device for programming and
remember to plug it back in?
3
UNDERSTANDING THE FEATURES OF YOUR VEHICLE 295
Page 298 of 772
If you have any problems, or require assistance, please
call toll-free 1-800-355-3515 or, on the Internet at
HomeLink.com for information or assistance.
WARNING!
Vehicle exhaust contains carbon monoxide, a danger-
ous gas. Do not run your vehicle in the garage while
programming the transceiver. Exhaust gas can cause
serious injury or death.
WARNING!
Your motorized door or gate will open and close
while you are programming the universal trans-
ceiver. Do not program the transceiver if people, pets
or other objects are in the path of the door or gate.
Only use this transceiver with a garage door opener
(Continued)
WARNING!(Continued)
that has a “stop and reverse” feature as required by
Federal safety standards. This includes most garage
door opener models manufactured after 1982. Do not
use a garage door opener without these safety fea-
tures. Call toll-free 1–800–355–3515 or, on the Internet
atHomeLink.com for safety information or assis-
tance.
General Information
This device complies with FCC rules Part 15 and Industry
Canada RSS-210. Operation is subject to the following
two conditions:
1. This device may not cause harmful interference.
2. This device must accept any interference that may be
received including interference that may cause unde-
sired operation.
296 UNDERSTANDING THE FEATURES OF YOUR VEHICLE
Page 759 of 772
Instrument Cluster......................351
Instrument Panel and Controls................328
Instrument Panel Cover.....................702
Instrument Panel Lens Cleaning...............704
Interior Appearance Care....................702
Interior Fuses............................719
Interior Lights...........................176
Intermittent Wipers (Delay Wipers).............180
Introduction..............................4
Inverter, Power...........................306
Jacking Instructions........................632
Jack Location............................629
Jack Operation...........................628
Jump Starting............................640
Key Fob
Arm The Alarm.........................19
Panic Alarm............................25
Programming Additional Key Fobs...........18
Programming Additional Transmitters.........18
Key-In Reminder..........................15
Keyless Enter-N-Go........................38
Keyless Enter-N-Go™
Lock The Vehicle’s Doors..................393
Passive Entry Programming................393
Unlock Liftgate.........................393
Keyless Entry System.......................22
Key, Replacement..........................18
Keys...................................12
Key, Sentry (Immobilizer)....................16
Lane Change and Turn Signals................174
Lane Change Assist........................174
LaneSense..............................223
Lap/Shoulder Belts.........................55
Latches................................121
Hood................................16610
INDEX 757
Page 763 of 772
Owner’s Manual (Operator Manual).............5
Paint Care..............................698
Panic Alarm..............................25
Parking Brake............................511
ParkSense® System, Rear....................234
Passing Light............................174
Pets...................................115
Placard, Tire and Loading Information..........548
Power
Brakes...............................518
Door Locks............................35
Inverter..............................306
Lift Gate..............................49
Mirrors..............................138
Outlet (Auxiliary Electrical Outlet)...........302
Sunroof..............................297
Sunroof (Sky Slider).....................696
Windows..............................44
Pregnant Women and Seat Belts................62
Preparation for Jacking.....................631
Pretensioners
Seat Belts..............................62
Programming Transmitters (Remote Keyless Entry) . .22
Radial Ply Tires..........................555
Radiator Cap (Coolant Pressure Cap)...........690
Radio Operation..........................425
Radio Remote Controls.....................422
Radio (Sound Systems).....................421
Rain Sensitive Wiper System.................183
Rear Camera............................286
Rear Cross Path..........................146
Rear ParkSense System.....................234
Rear Seat, Folding.........................159
Rear Window Defroster.....................321
Rear Window Features.....................320
Rear Wiper/Washer........................32010
INDEX 761
Page 764 of 772
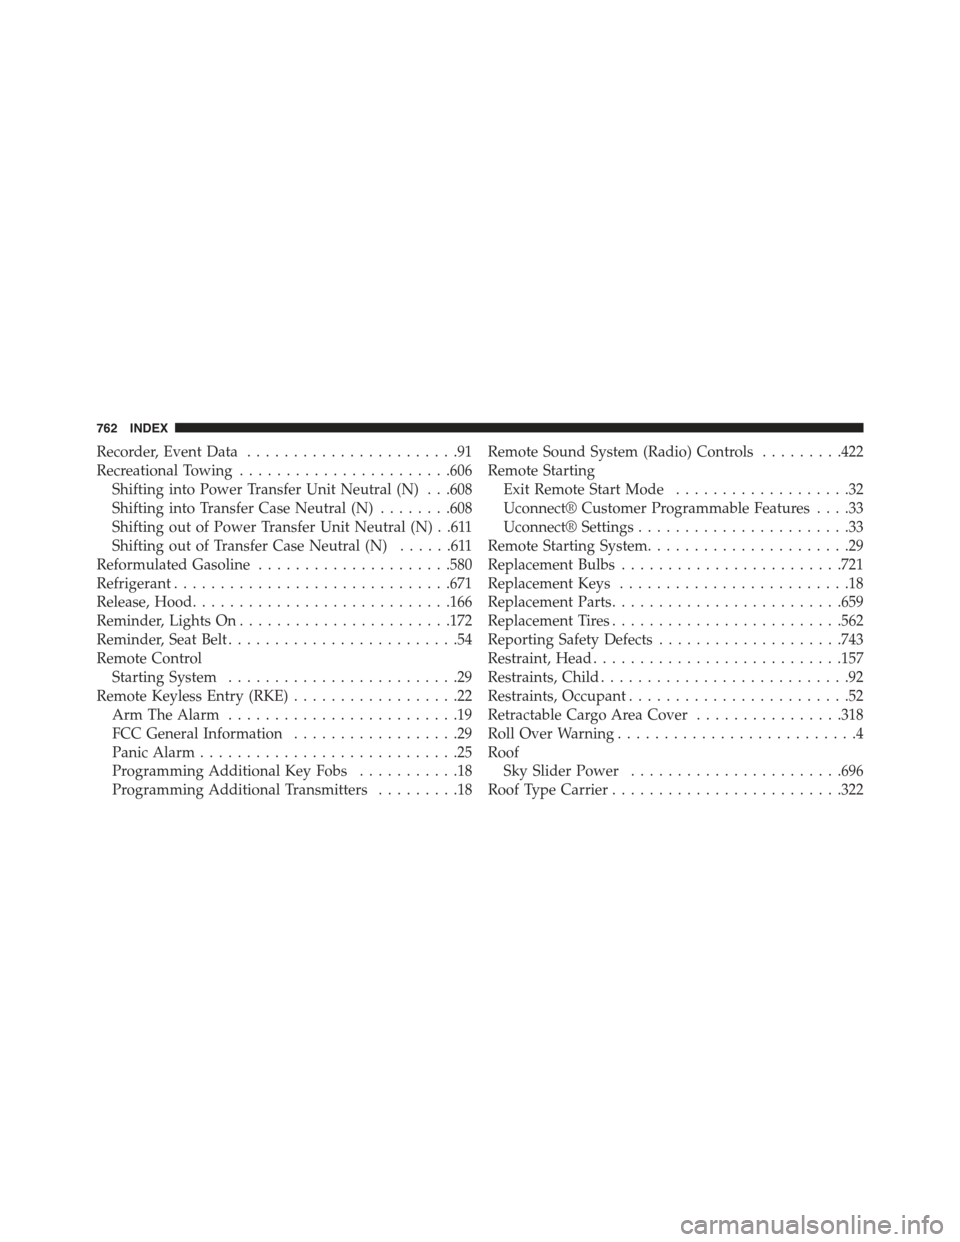
Recorder, Event Data.......................91
Recreational Towing.......................606
Shifting into Power Transfer Unit Neutral (N) . . .608
Shifting into Transfer Case Neutral (N)........608
Shifting out of Power Transfer Unit Neutral (N) . .611
Shifting out of Transfer Case Neutral (N)......611
Reformulated Gasoline.....................580
Refrigerant..............................671
Release, Hood............................166
Reminder, Lights On.......................172
Reminder, Seat Belt.........................54
Remote Control
Starting System.........................29
Remote Keyless Entry (RKE)..................22
Arm The Alarm.........................19
FCC General Information..................29
Panic Alarm............................25
Programming Additional Key Fobs...........18
Programming Additional Transmitters.........18
Remote Sound System (Radio) Controls.........422
Remote Starting
Exit Remote Start Mode...................32
Uconnect® Customer Programmable Features....33
Uconnect® Settings.......................33
Remote Starting System......................29
Replacement Bulbs........................721
Replacement Keys.........................18
Replacement Parts.........................659
Replacement Tires.........................562
Reporting Safety Defects....................743
Restraint, Head...........................157
Restraints, Child...........................92
Restraints, Occupant........................52
Retractable Cargo Area Cover................318
Roll Over Warning..........................4
Roof
Sky Slider Power.......................696
Roof Type Carrier.........................322
762 INDEX
Page 766 of 772
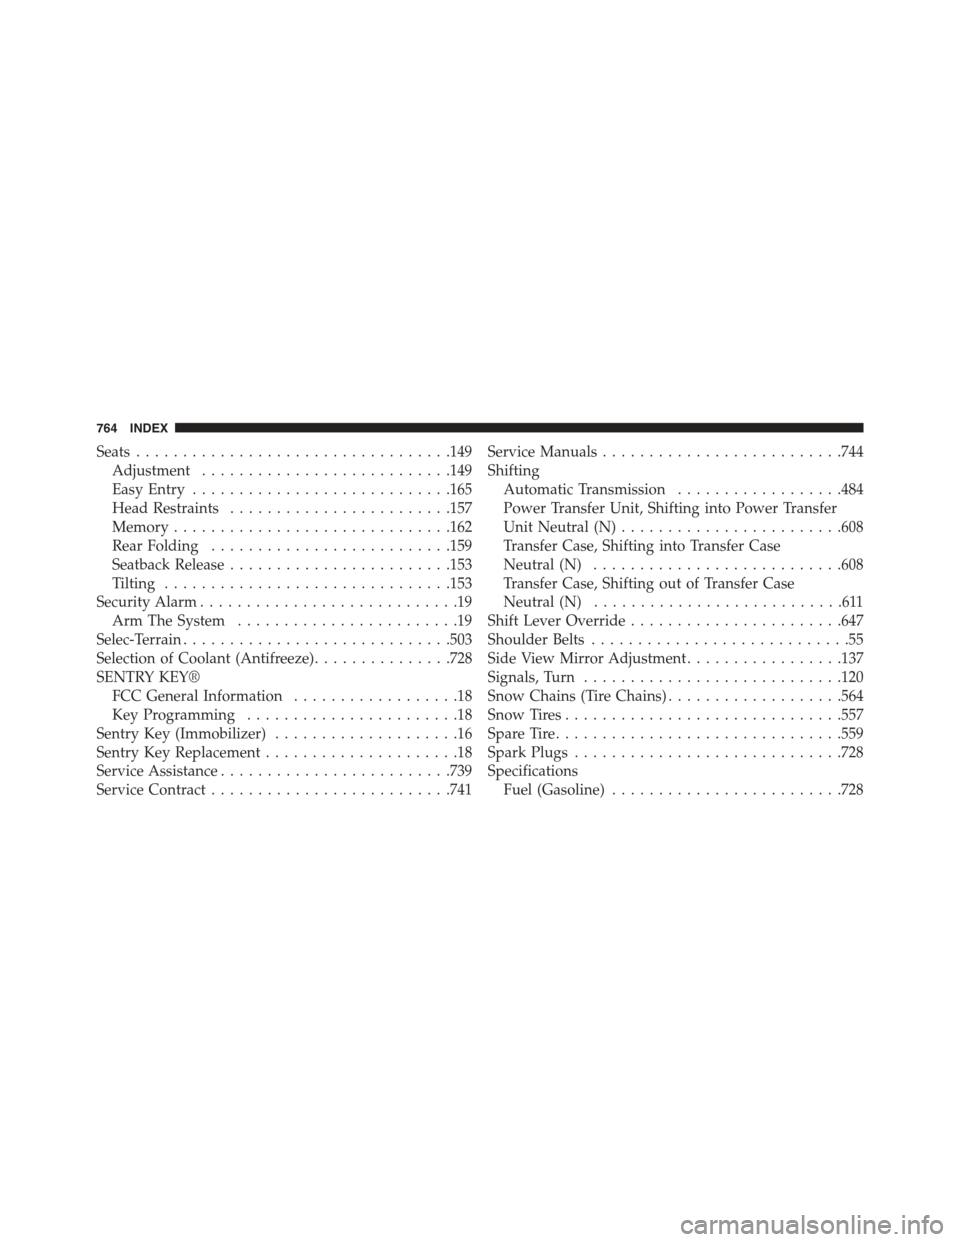
Seats..................................149
Adjustment...........................149
Easy Entry............................165
Head Restraints........................157
Memory..............................162
Rear Folding..........................159
Seatback Release........................153
Tilting...............................153
Security Alarm............................19
Arm The System........................19
Selec-Terrain.............................503
Selection of Coolant (Antifreeze)...............728
SENTRY KEY®
FCC General Information..................18
Key Programming.......................18
Sentry Key (Immobilizer)....................16
Sentry Key Replacement.....................18
Service Assistance.........................739
Service Contract..........................741
Service Manuals..........................744
Shifting
Automatic Transmission..................484
Power Transfer Unit, Shifting into Power Transfer
Unit Neutral (N)........................608
Transfer Case, Shifting into Transfer Case
Neutral (N)...........................608
Transfer Case, Shifting out of Transfer Case
Neutral (N)...........................611
Shift Lever Override.......................647
Shoulder Belts............................55
Side View Mirror Adjustment.................137
Signals, Turn............................120
Snow Chains (Tire Chains)...................564
Snow Tires..............................557
Spare Tire...............................559
Spark Plugs.............................728
Specifications
Fuel (Gasoline).........................728
764 INDEX