wheel JEEP CHEROKEE 2015 KL / 5.G Owner's Manual
[x] Cancel search | Manufacturer: JEEP, Model Year: 2015, Model line: CHEROKEE, Model: JEEP CHEROKEE 2015 KL / 5.GPages: 244, PDF Size: 30.6 MB
Page 142 of 244
Seek Up/Down Buttons
• Press to seek through Disc tracks.
• Hold either button to bypass tracks without stopping.
Browse
• Press the “Browse” button on the touchscreen to scroll through and select a
desired track on the Disc. Press the “Exit” button on the touchscreen if you wish
to cancel the browse function.
MEDIA HUB — PLAYING iPod®/USB/MP3 DEVICES
There are many ways to play music from iPod®/MP3 players or USB devices through
your vehicle's sound system.
• Press your “Media” button on the touchscreen to begin.
USB Port
Connect your iPod®or compatible device using a USB cable into the USB Port. USB
Memory sticks with audio files can also be used. Audio from the device can be played
on the vehicle's sound system while providing metadata (artist, track title, album,
etc.) information on the radio display.
When connected, the iPod®/compatible USB device can be controlled using the
radio or Steering Wheel Audio Controls to play, skip to the next or previous track,
browse, and list the contents.
The iPod®battery charges when plugged into the USB port (if supported by the
specific device).
To route the USB/iPod®cable out of the center console, use the access cut out.
NOTE:
• When connecting your iPod®device for the first time, the system may take several
minutes to read your music, depending on the number of files. For example, the
system will take approximately five minutes for every 1000 songs loaded on the
device. Also during the reading process, the Shuffle and Browse functions will be
disabled. This process is needed to ensure the full use of your iPod®features and
only happens the first time it is connected. After the first time, the reading process
of your iPod®will take considerably less time unless changes are made or new
songs are added to the playlist.
• The USB port supports certain Mini, Classic, Nano, Touch, and iPhone®devices.
The USB port also supports playing music from compatible external USB Mass
Storage Class memory devices. Some iPod®software versions may not fully
support the USB port features. Please visit Apple’s website for iPod®software
updates.
ELECTRONICS
140
Page 149 of 244
To access SiriusXM Travel Link, press “Apps” button on the touchscreen, then press
the “SiriusXM Travel Link” button on the touchscreen.
NOTE:
SiriusXM Travel Link requires a subscription, sold separately after the 1 year trial
subscription included with your vehicle purchase.
SiriusXM Travel Link is only available in the United States.
Fuel PricesCheck local gas and diesel prices in your area and route to the stationof your choice.
Movie ListingsCheck local movie theatres and listings in your area and route to thetheater of your choice.
Sports ScoresIn-game and final scores as well as weekly schedules.
WeatherCheck variety of local and national weather information from radarmaps to current and 5-day forecast.
Uconnect® Phone (Bluetooth® Hands Free Calling)
• If the Uconnect®Phone Buttonexists on your steering wheel, then you have
the Uconnect®Phone features.
• The Uconnect®Phone is a voice-activated, hands-free, in-vehicle communica-
tions system with Voice Command Capability (see Voice Command section).
• The Uconnect®Phone allows you to dial a phone number with your mobile phone
using simple voice commands or using button on the touchscreen.
• Refer to the “Understanding The Features Of Your Vehicle” section of your
vehicle's Owner's Manual on the DVD for further details.
NOTE:
The Uconnect®Phone requires a mobile phone equipped with the Bluetooth®
Hands-Free Profile, Version 1.0 or higher. For Uconnect®Customer Support:
• U.S. residents visit UconnectPhone.com or call 1-877-855-8400.
• Canadian Residents visit UconnectPhone.com or call, 1-800-465-2001 (English)
or 1-800-387-9983 (French).
Pairing A Phone
• To use the Uconnect®Phone feature, you must first pair your Bluetooth®phone
with the Uconnect®system.
Start Pairing Procedure On The Radio
• Press the “Phone” button on the touchscreen, then press the “Settings” button on
the touchscreen. Next, press “Add Device.”
•Uconnect®Phone will display an “In progress” screen while the system is connecting.
ELECTRONICS
147
Page 150 of 244
Start Pairing Procedure On Mobile Phone
• Search for available devices on your Bluetooth®enabled mobile phone. This is
usually within Settings or Options under “Bluetooth.” See your mobile phone’s
manual for details.
• When your phone finds the system, select “Uconnect” as the paired device. You
may be prompted by your phone to download the phonebook. This is so you can
make calls by saying the name of your contact (PBAP-Phone Book Access Profile).
Complete The Pairing Procedure
• When prompted on the phone, verify with radio password shown on the Uconnect®
Screen.
• If your phone asks you to accept a connection request from Uconnect®, select
“Yes.” If available, check the box telling it not to ask again – that way your phone
will automatically connect each time you start the vehicle.
Select The Mobile Phone's Priority Level
• When the pairing process has successfully completed, the system will prompt you
to choose whether or not this is your favorite phone. Selecting “Yes” will make this
phone the highest priority. This phone will take precedence over other paired
phones within range. Only one phone can be paired at a time.
• You are now ready to make hands-free calls. Push the “Uconnect®Phone” button
on your steering wheel to begin.
Making A Phone Call
• Push the Uconnect®Phone button.
• After the BEEP, say “dial” then the number (or “call” then the name as listed in
your phone; see Phonebook).
NOTE:
You can also initiate a call by using the touchscreen on the Phone main screen.
Receiving A Call – Accept (And End)
• When an incoming call rings/is announced on Uconnect®, push the Phone button
.
• To end a call, push the Hang Up or Phone button.
Mute (Or Unmute) Microphone During Call
To mute the Uconnect®Phone microphone during a call:
• Press the “Mute” button on the main Phone screen to mute and unmute the call.
ELECTRONICS
148
Page 151 of 244
Transfer Ongoing Call Between Handset And Vehicle
To transfer an on-going Uconnect®phone call:
• Press the “Transfer” button on the main Phone screen to transfer an on-going call
between the handset and the vehicle.
Common Phone Commands (Examples)
• “Call John Smith”
• “Call John Smith mobile”
• “Dial 1 248 555 1212”
• “Redial”
Phonebook
Uconnect®radios automatically downloads your phonebook from your paired phone,
if this feature is supported by your phone. Entries are updated each time that the
phone is connected. If your phone book entries do not appear, check the settings on
your phone. Some phones require you to enable this feature manually.
• Your phonebook can be browsed on your radio screen, but editing can only be done
on your phone. To browse, press the “Phone” button on the touchscreen, then the
“Phonebook” button on the touchscreen.
Favorite phonebook entries can be saved as Favorites for quicker access. Favorites
are shown at the top of your main phone screen.
Voice Command Tips
• Speaking complete names (i.e; Call John Doe vs. Call John) will result in greater
system accuracy.
• You can “chain” commands together for faster results. Say “Call John Doe,
mobile,” for example.
• If you are listening to available voice command options, you do not have to listen
to the entire list. When you hear the command that you need, push the
button on the steering wheel, wait for the beep and say your command.
Changing The Volume
• Start a dialogue by pushing the Phone button, then say a command for
example - "Help".
• Use the radio ON/OFF VOLUME rotary knob to adjust the volume to a comfortable
level while the Uconnect®system is speaking. Please note the volume setting for
Uconnect®is different than the audio system.
NOTE:
To access help, push the Uconnect®Phonebutton on the steering wheel and
say "help." Press the display or push either the Phoneor VRbutton and
say "cancel" to cancel the help session.
ELECTRONICS
149
Page 153 of 244
STEERING WHEEL AUDIO CONTROLS
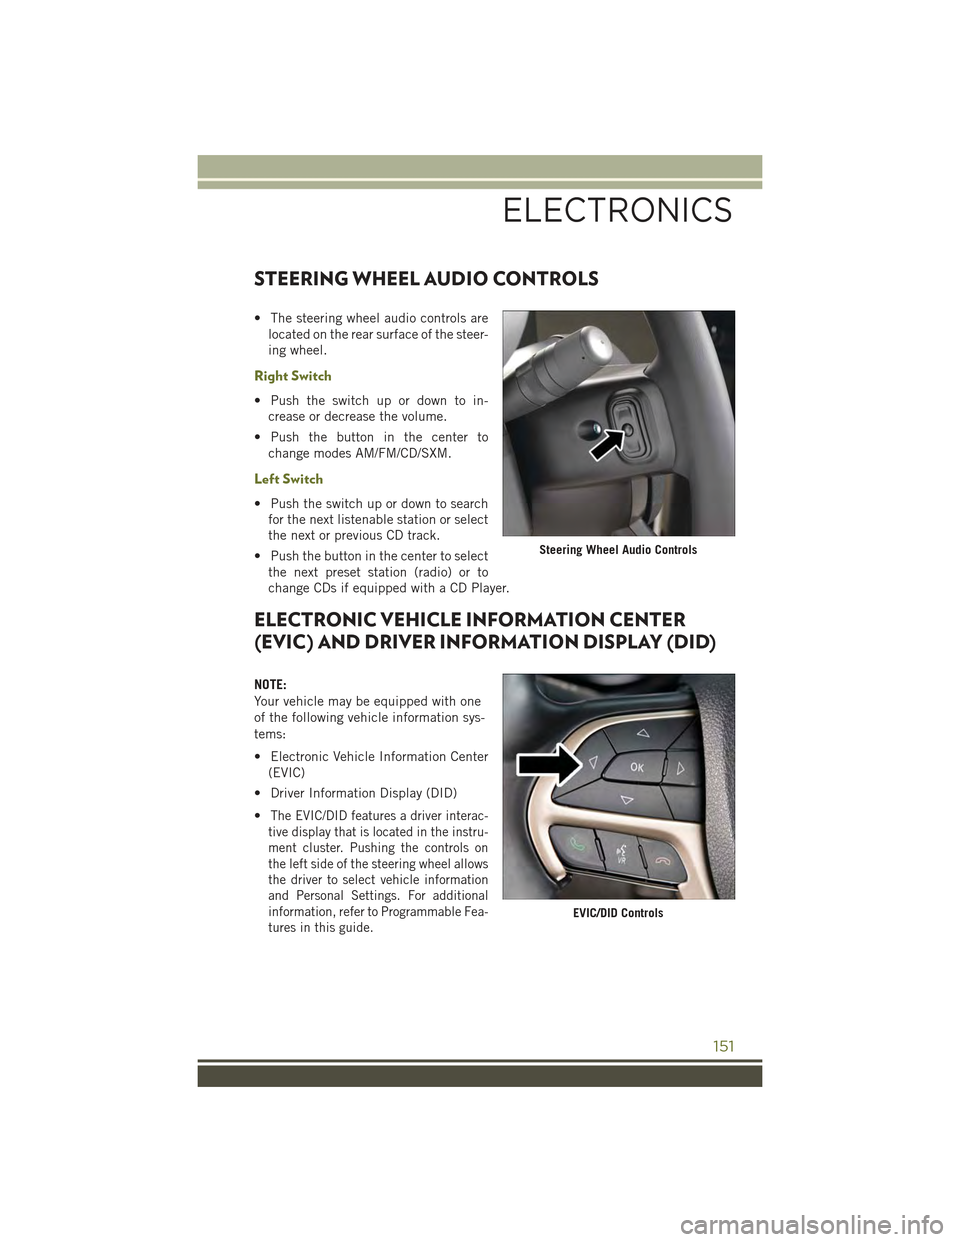
• The steering wheel audio controls are
located on the rear surface of the steer-
ing wheel.
Right Switch
• Push the switch up or down to in-
crease or decrease the volume.
• Push the button in the center to
change modes AM/FM/CD/SXM.
Left Switch
• Push the switch up or down to search
for the next listenable station or select
the next or previous CD track.
• Push the button in the center to select
the next preset station (radio) or to
change CDs if equipped with a CD Player.
ELECTRONIC VEHICLE INFORMATION CENTER
(EVIC) AND DRIVER INFORMATION DISPLAY (DID)
NOTE:
Your vehicle may be equipped with one
of the following vehicle information sys-
tems:
• Electronic Vehicle Information Center
(EVIC)
• Driver Information Display (DID)
•The EVIC/DID features a driver interac-
tive display that is located in the instru-
ment cluster. Pushing the controls on
the left side of the steering wheel allows
the driver to select vehicle information
and Personal Settings. For additional
information, refer to Programmable Fea-
tures in this guide.
Steering Wheel Audio Controls
EVIC/DID Controls
ELECTRONICS
151
Page 164 of 244
FOUR-WHEEL DRIVE OPERATION
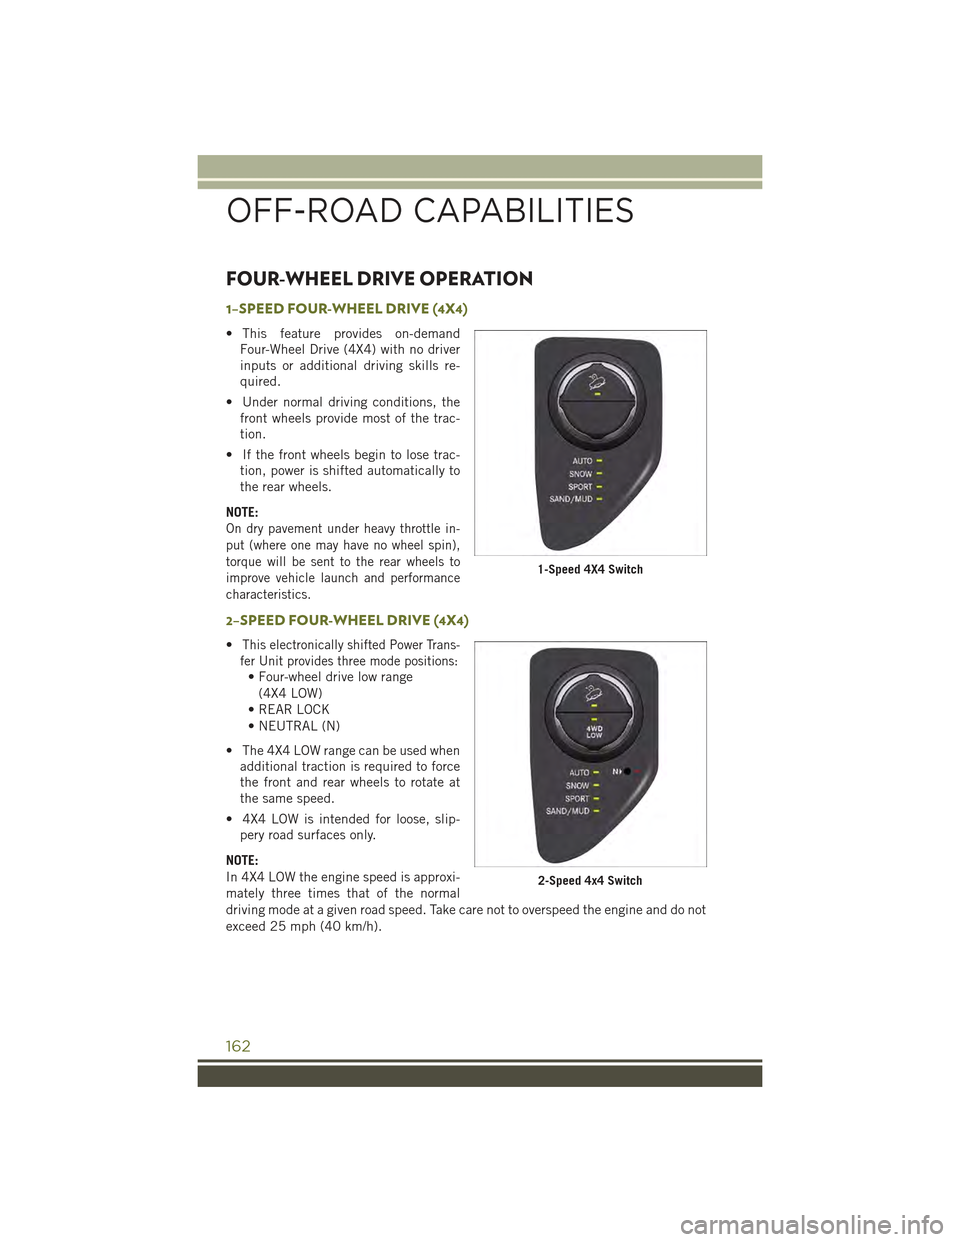
1–SPEED FOUR-WHEEL DRIVE (4X4)
• This feature provides on-demand
Four-Wheel Drive (4X4) with no driver
inputs or additional driving skills re-
quired.
• Under normal driving conditions, the
front wheels provide most of the trac-
tion.
• If the front wheels begin to lose trac-
tion, power is shifted automatically to
the rear wheels.
NOTE:
On dry pavement under heavy throttle in-
put (where one may have no wheel spin),
torque will be sent to the rear wheels to
improve vehicle launch and performance
characteristics.
2–SPEED FOUR-WHEEL DRIVE (4X4)
•This electronically shifted Power Trans-
fer Unit provides three mode positions:
• Four-wheel drive low range
(4X4 LOW)
• REAR LOCK
• NEUTRAL (N)
• The 4X4 LOW range can be used when
additional traction is required to force
the front and rear wheels to rotate at
the same speed.
• 4X4 LOW is intended for loose, slip-
pery road surfaces only.
NOTE:
In 4X4 LOW the engine speed is approxi-
mately three times that of the normal
driving mode at a given road speed. Take care not to overspeed the engine and do not
exceed 25 mph (40 km/h).
1-Speed 4X4 Switch
2-Speed 4x4 Switch
OFF-ROAD CAPABILITIES
162
Page 167 of 244
• Shifting into or out of Rear E-Locker is possible with the vehicle completely
stopped; however, difficulty may occur due to the mating clutch teeth not being
properly aligned. Several attempts may be required for clutch teeth alignment and
shift completion to occur. The preferred method is for the vehicle to be rolling,
below 15 MPH (24 km/h), while including right and left steering maneuvers to
allow for the clutch teeth to align.
• The Rear E-Locker System must be disengaged prior to taking the vehicle out of
4X4 LOW range. If 4X4 LOW shift conditions/interlocks are not met, a message will
flash from the Electronic Vehicle Information Center (EVIC)/Driver Information
Display with instructions on how to complete the requested shift.
SELEC-TERRAIN™
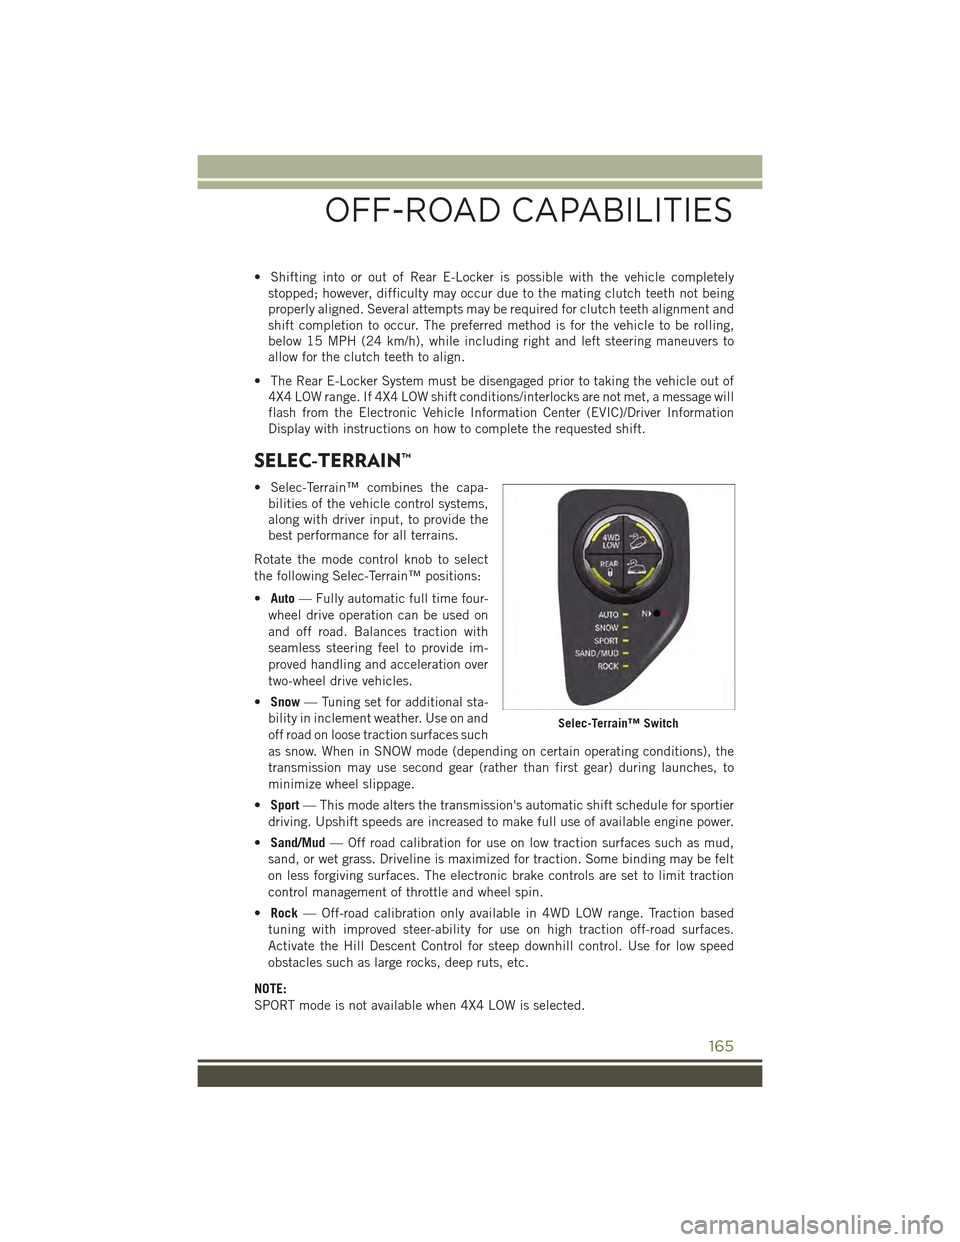
• Selec-Terrain™ combines the capa-
bilities of the vehicle control systems,
along with driver input, to provide the
best performance for all terrains.
Rotate the mode control knob to select
the following Selec-Terrain™ positions:
•Auto— Fully automatic full time four-
wheel drive operation can be used on
and off road. Balances traction with
seamless steering feel to provide im-
proved handling and acceleration over
two-wheel drive vehicles.
•Snow— Tuning set for additional sta-
bility in inclement weather. Use on and
off road on loose traction surfaces such
as snow. When in SNOW mode (depending on certain operating conditions), the
transmission may use second gear (rather than first gear) during launches, to
minimize wheel slippage.
•Sport— This mode alters the transmission's automatic shift schedule for sportier
driving. Upshift speeds are increased to make full use of available engine power.
•Sand/Mud— Off road calibration for use on low traction surfaces such as mud,
sand, or wet grass. Driveline is maximized for traction. Some binding may be felt
on less forgiving surfaces. The electronic brake controls are set to limit traction
control management of throttle and wheel spin.
•Rock— Off-road calibration only available in 4WD LOW range. Traction based
tuning with improved steer-ability for use on high traction off-road surfaces.
Activate the Hill Descent Control for steep downhill control. Use for low speed
obstacles such as large rocks, deep ruts, etc.
NOTE:
SPORT mode is not available when 4X4 LOW is selected.
Selec-Terrain™ Switch
OFF-ROAD CAPABILITIES
165
Page 170 of 244
RECREATIONAL TOWING (BEHIND MOTORHOME,
ETC.)
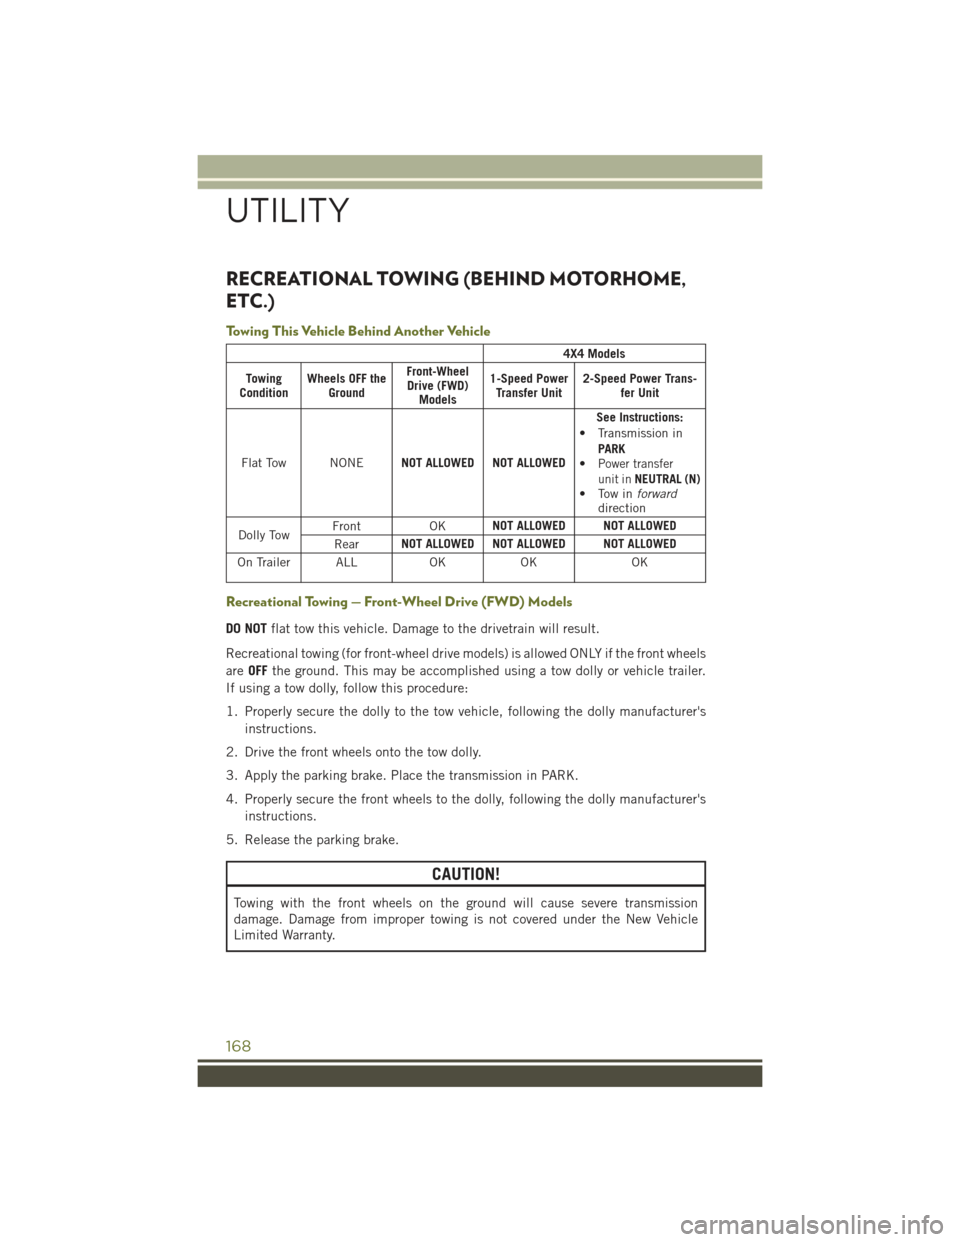
Towing This Vehicle Behind Another Vehicle
4X4 Models
TowingConditionWheels OFF theGround
Front-WheelDrive (FWD)Models
1-Speed PowerTransfer Unit2-Speed Power Trans-fer Unit
Flat Tow NONENOT ALLOWED NOT ALLOWED
See Instructions:• Transmission in
PARK•Power transferunit inNEUTRAL (N)• Tow inforwarddirection
Dolly TowFrontOKNOT ALLOWED NOT ALLOWED
RearNOT ALLOWED NOT ALLOWED NOT ALLOWED
On Trailer ALLOKOKOK
Recreational Towing — Front-Wheel Drive (FWD) Models
DO NOTflat tow this vehicle. Damage to the drivetrain will result.
Recreational towing (for front-wheel drive models) is allowed ONLY if the front wheels
areOFFthe ground. This may be accomplished using a tow dolly or vehicle trailer.
If using a tow dolly, follow this procedure:
1. Properly secure the dolly to the tow vehicle, following the dolly manufacturer's
instructions.
2. Drive the front wheels onto the tow dolly.
3. Apply the parking brake. Place the transmission in PARK.
4. Properly secure the front wheels to the dolly, following the dolly manufacturer's
instructions.
5. Release the parking brake.
CAUTION!
Towing with the front wheels on the ground will cause severe transmission
damage. Damage from improper towing is not covered under the New Vehicle
Limited Warranty.
UTILITY
168
Page 171 of 244
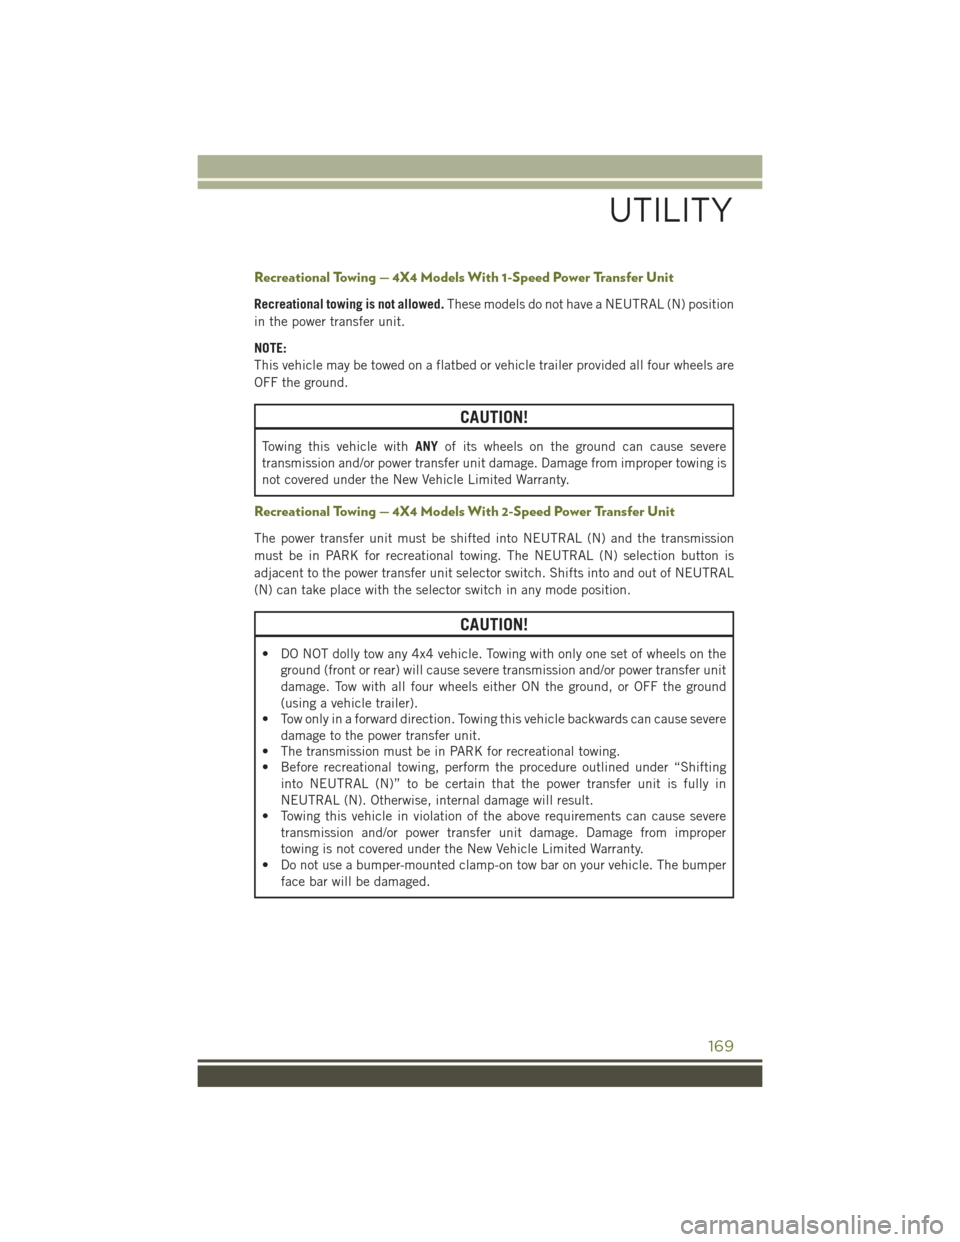
Recreational Towing — 4X4 Models With 1-Speed Power Transfer Unit
Recreational towing is not allowed.These models do not have a NEUTRAL (N) position
in the power transfer unit.
NOTE:
This vehicle may be towed on a flatbed or vehicle trailer provided all four wheels are
OFF the ground.
CAUTION!
Towing this vehicle withANYof its wheels on the ground can cause severe
transmission and/or power transfer unit damage. Damage from improper towing is
not covered under the New Vehicle Limited Warranty.
Recreational Towing — 4X4 Models With 2-Speed Power Transfer Unit
The power transfer unit must be shifted into NEUTRAL (N) and the transmission
must be in PARK for recreational towing. The NEUTRAL (N) selection button is
adjacent to the power transfer unit selector switch. Shifts into and out of NEUTRAL
(N) can take place with the selector switch in any mode position.
CAUTION!
• DO NOT dolly tow any 4x4 vehicle. Towing with only one set of wheels on the
ground (front or rear) will cause severe transmission and/or power transfer unit
damage. Tow with all four wheels either ON the ground, or OFF the ground
(using a vehicle trailer).
• Tow only in a forward direction. Towing this vehicle backwards can cause severe
damage to the power transfer unit.
• The transmission must be in PARK for recreational towing.
• Before recreational towing, perform the procedure outlined under “Shifting
into NEUTRAL (N)” to be certain that the power transfer unit is fully in
NEUTRAL (N). Otherwise, internal damage will result.
• Towing this vehicle in violation of the above requirements can cause severe
transmission and/or power transfer unit damage. Damage from improper
towing is not covered under the New Vehicle Limited Warranty.
• Do not use a bumper-mounted clamp-on tow bar on your vehicle. The bumper
face bar will be damaged.
UTILITY
169
Page 177 of 244
Your vehicle has also been equipped with a TPMS malfunction indicator to indicate
when the system is not operating properly. The TPMS malfunction indicator is
combined with the low tire pressure telltale. When the system detects a malfunction,
the telltale will flash for approximately one minute and then remain continuously
illuminated. This sequence will continue each time the vehicle is restarted as long as
the malfunction exists.
When the malfunction indicator is illuminated, the system may not be able to detect
or signal low tire pressure as intended. TPMS malfunctions may occur for a variety of
reasons, including the installation of replacement or alternate tires or wheels on the
vehicle that prevent the TPMS from functioning properly. Always check the TPMS
malfunction telltale after replacing one or more tires or wheels on your vehicle, to
ensure that the replacement or alternate tires and wheels allow the TPMS to continue
to function properly.
NOTE:
Tire pressures change by approximately 1 psi (7 kPa) per 12° F (7° C) of air
temperature change. Keep this in mind when checking tire pressure inside a garage,
especially in the Winter. Example: If garage temperature is 68°F (20°C) and the
outside temperature is 32°F (0°C), then the cold tire inflation pressure should be
increased by 3 psi (21 kPa), which equals 1 psi (7 kPa) for every 12°F (7°C) for this
outside temperature condition.
CAUTION!
The TPMS has been optimized for the original equipment tires and wheels. TPMS
pressures and warning have been established for the tire size equipped on your
vehicle. Undesirable system operation or sensor damage may result when using
replacement equipment that is not of the same size, type, and/or style. Aftermar-
ket wheels can cause sensor damage. Do not use tire sealant from a can, or
balance beads if your vehicle is equipped with a TPMS, as damage to the sensors
may result.
- Engine Temperature Warning Light
• This light warns of an overheated engine condition.
• If the light turns on and a warning chime sounds while driving, safely pull over and
stop the vehicle. If the A/C system is on, turn it off. Also, shift the transmission into
NEUTRAL and idle the vehicle. If the temperature reading does not return to
normal, turn the engine off immediately.
• We recommend that you do not operate the vehicle or engine damage will occur.
Have the vehicle serviced immediately.
WARNING!
A hot engine cooling system is dangerous. You or others could be badly burned by
steam or boiling coolant.
WHAT TO DO IN EMERGENCIES
175