ignition JEEP CHEROKEE 2016 KL / 5.G Owner's Manual
[x] Cancel search | Manufacturer: JEEP, Model Year: 2016, Model line: CHEROKEE, Model: JEEP CHEROKEE 2016 KL / 5.GPages: 236, PDF Size: 11.24 MB
Page 62 of 236
To Manually Turn On The Stop/Start System
Push the STOP/START Off switch (located on the switch bank). The light on the
switch will turn off.
For complete details on the Stop/Start System refer to the “Stop/Start System” in the
“Starting And Operating” section located in your owners manual on the DVD for
further information.
ELECTRIC PARK BRAKE (EPB)
Your vehicle is equipped with a new Electric Park Brake System (EPB) that offers
greater convenience. The park brake switch is located in the center console.
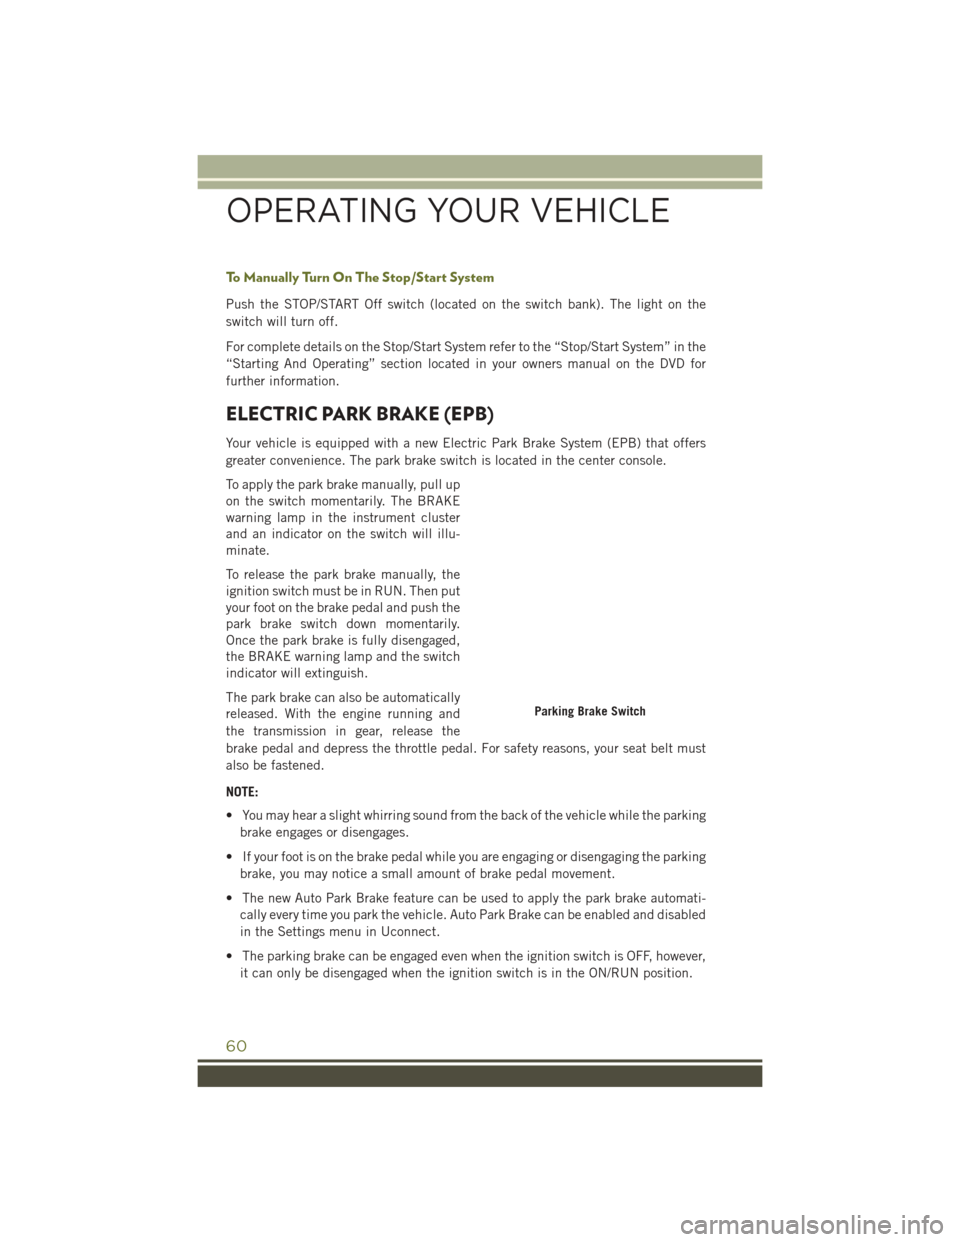
To apply the park brake manually, pull up
on the switch momentarily. The BRAKE
warning lamp in the instrument cluster
and an indicator on the switch will illu-
minate.
To release the park brake manually, the
ignition switch must be in RUN. Then put
your foot on the brake pedal and push the
park brake switch down momentarily.
Once the park brake is fully disengaged,
the BRAKE warning lamp and the switch
indicator will extinguish.
The park brake can also be automatically
released. With the engine running and
the transmission in gear, release the
brake pedal and depress the throttle pedal. For safety reasons, your seat belt must
also be fastened.
NOTE:
• You may hear a slight whirring sound from the back of the vehicle while the parkingbrake engages or disengages.
• If your foot is on the brake pedal while you are engaging or disengaging the parking brake, you may notice a small amount of brake pedal movement.
• The new Auto Park Brake feature can be used to apply the park brake automati- cally every time you park the vehicle. Auto Park Brake can be enabled and disabled
in the Settings menu in Uconnect.
• The parking brake can be engaged even when the ignition switch is OFF, however, it can only be disengaged when the ignition switch is in the ON/RUN position.
Parking Brake Switch
OPERATING YOUR VEHICLE
60
Page 63 of 236
• SafeHold a new feature that will automatically apply the park brake under certainconditions. The EPB monitors the status of the driver’s seat belt, driver’s door and
pedal positions to determine if the driver may have exited while the vehicle is still
capable of moving and will then automatically apply the park brake to prevent the
vehicle from rolling.
• The EPB fault lamp will illuminate if the EPB switch is held for longer than 20 seconds in either the released or applied position. The light will extinguish
upon releasing the switch.
• Refer to the Starting And Operating section of your vehicle’s Owner’s Manual on the DVD for further details.
CAUTION!
If the Brake System Warning Light remains on with the parking brake released, a
brake system malfunction is indicated. Have the brake system serviced by an
authorized dealer immediately.
WARNING!
• Never use the PARK position as a substitute for the parking brake. Always apply the parking brake fully when parked to guard against vehicle movement and
possible injury or damage.
• When leaving the vehicle, always make sure the ignition is in the OFF mode,
remove the Key Fob from the vehicle, and lock your vehicle.
• Never leave children alone in a vehicle, or with access to an unlocked vehicle.
Allowing children to be in a vehicle unattended is dangerous for a number of
reasons. A child or others could be seriously or fatally injured. Children should
be warned not to touch the parking brake, brake pedal or the transmission gear
selector.
• Do not leave the Key Fob in or near the vehicle, (or in a location accessible to
children), and do not leave the ignition in the ACC or ON/RUN mode. A child
could operate power windows, other controls, or move the vehicle.
• Be sure the parking brake is fully disengaged before driving; failure to do so can
lead to brake failure and a collision.
• Always fully apply the parking brake when leaving your vehicle, or it may roll
and cause damage or injury. Also be certain to leave the transmission in PARK.
Failure to do so may allow the vehicle to roll and cause damage or injury.
•
Driving the vehicle with the parking brake engaged, or repeated use of the parking
brake to slow the vehicle may cause serious damage to the brake system.
OPERATING YOUR VEHICLE
61
Page 67 of 236
NOTE:
The ParkView Rear Back Up Camera has programmable modes of operation that may
be selected through the Uconnect System. Refer to “Uconnect Settings” in “Under-
standing Your Instrument Panel” for further information.
When the vehicle is shifted out of REVERSE (with camera delay turned OFF), the rear
camera mode is exited and the previous screen appears again. When the vehicle is
shifted out of REVERSE (with camera delay turned ON), the camera image will
continue to be displayed for up to 10 seconds after shifting out of REVERSE unless
the vehicle speed exceeds 8 mph (13 km/h), the vehicle is shifted into PARK or the
vehicles ignition is cycled to the OFF position.
When enabled, active guide lines are overlaid on the image to illustrate the width of
the vehicle and its projected backup path based on the steering wheel position. A
dashed center line overlay indicates the center of the vehicle to assist with parking or
aligning to a hitch/receiver.
When enabled, fixed guide lines are overlaid on the image to illustrate the width of
the vehicle.
Different colored zones indicate the distance to the rear of the vehicle.
CAUTION!
• To avoid vehicle damage, ParkView should only be used as a parking aid. TheParkView camera is unable to view every obstacle or object in your drive path.
•
To avoid vehicle damage, the vehicle must be driven slowly when using ParkView
to be able to stop in time when an obstacle is seen. It is recommended that the
driver look frequently over his/her shoulder when using ParkView.
WARNING!
Drivers must be careful when backing up even when using the ParkView Rear Back
Up Camera. Always check carefully behind your vehicle, and be sure to check for
pedestrians, animals, other vehicles, obstructions, or blind spots before backing
up. You are responsible for the safety of your surroundings and must continue to
pay attention while backing up. Failure to do so can result in serious injury or
death.
NOTE:
If snow, ice, mud, or any foreign substance builds up on the camera lens, clean the
lens, rinse with water, and dry with a soft cloth. Do not cover the lens.
OPERATING YOUR VEHICLE
65
Page 70 of 236
Pinch Protection Feature
This feature will detect an obstruction in the opening of the sunroof during Express
Close operation. If an obstruction in the path of the sunroof is detected, the sunroof
will automatically retract. Remove the obstruction if this occurs. Next, push the
switch forward and release to Express Close.
NOTE:
If three consecutive sunroof close attempts result in Pinch Protect reversals, the
fourth close attempt will be a Manual Close movement with Pinch Protect disabled.
WARNING!
• Do not let children play with the sunroof. Never leave children unattended in avehicle, or with access to an unlocked vehicle. Do not leave the Key Fob in or
near the vehicle, and do not leave the ignition of a vehicle equipped with
Keyless Enter-N-Go in the ACC or ON/RUN mode. Occupants, particularly
unattended children, can become entrapped by the power sunroof while
operating the power sunroof switch. Such entrapment may result in serious
injury or death.
• In a collision, there is a greater risk of being thrown from a vehicle with an open
sunroof. You could also be severely injured or killed. Always fasten your seat
belt properly and make sure all passengers are properly secured.
• Do not allow small children to operate the sunroof. Never allow your fingers,
other body parts, or any object to project through the sunroof opening. Injury
may result.
OPERATING YOUR VEHICLE
68
Page 135 of 236
If the Uconnect Phone Buttonexists on your steering wheel, you then have the
Uconnect Phone features.
Refer to the Understand The Features Of Your Vehicle section of your vehicle's Owner's
Manual on the DVD for further details.
NOTE:
• The Uconnect Phone requires a mobile phone equipped with the Bluetooth Hands-Free Profile, Version 1.0 or higher.
• Most mobile phones/devices are compatible with the Uconnect system, however some mobile phones/devices may not be equipped with all of the required features
to utilize all of the Uconnect system features.
• For Uconnect Customer Care: • U.S. residents visit UconnectPhone.com or call 1-877-855-8400.
• Canadian Residents visit UconnectPhone.com or call, 1-800-465-2001(English) or 1-800-387-9983 (French).
Pairing (Wirelessly Connecting) Your Mobile Phone To The Uconnect System
Mobile phone pairing is the process of establishing a wireless connection between a
cellular phone and the Uconnect system.
NOTE:
• To use the Uconnect Phone feature, you first must determine if your mobilephone and software are compatible with the Uconnect system. Please visit
UconnectPhone.com for complete mobile phone compatibility information.
• Mobile phone pairing is not available while the vehicle is in motion.
• A maximum of 10 mobile phones can be paired to the Uconnect system.
Start Pairing Procedure On The Radio
Uconnect 5.0:
1. Place the ignition in the ACC or ON position.
2. Press the “Phone” button.
3. Select “Settings.”
4. Select “Paired Phones.”
5. Select “Add device.” • Uconnect Phone will display an “Inprogress” screen while the system
is connecting.
Uconnect 5.0
ELECTRONICS
133
Page 136 of 236
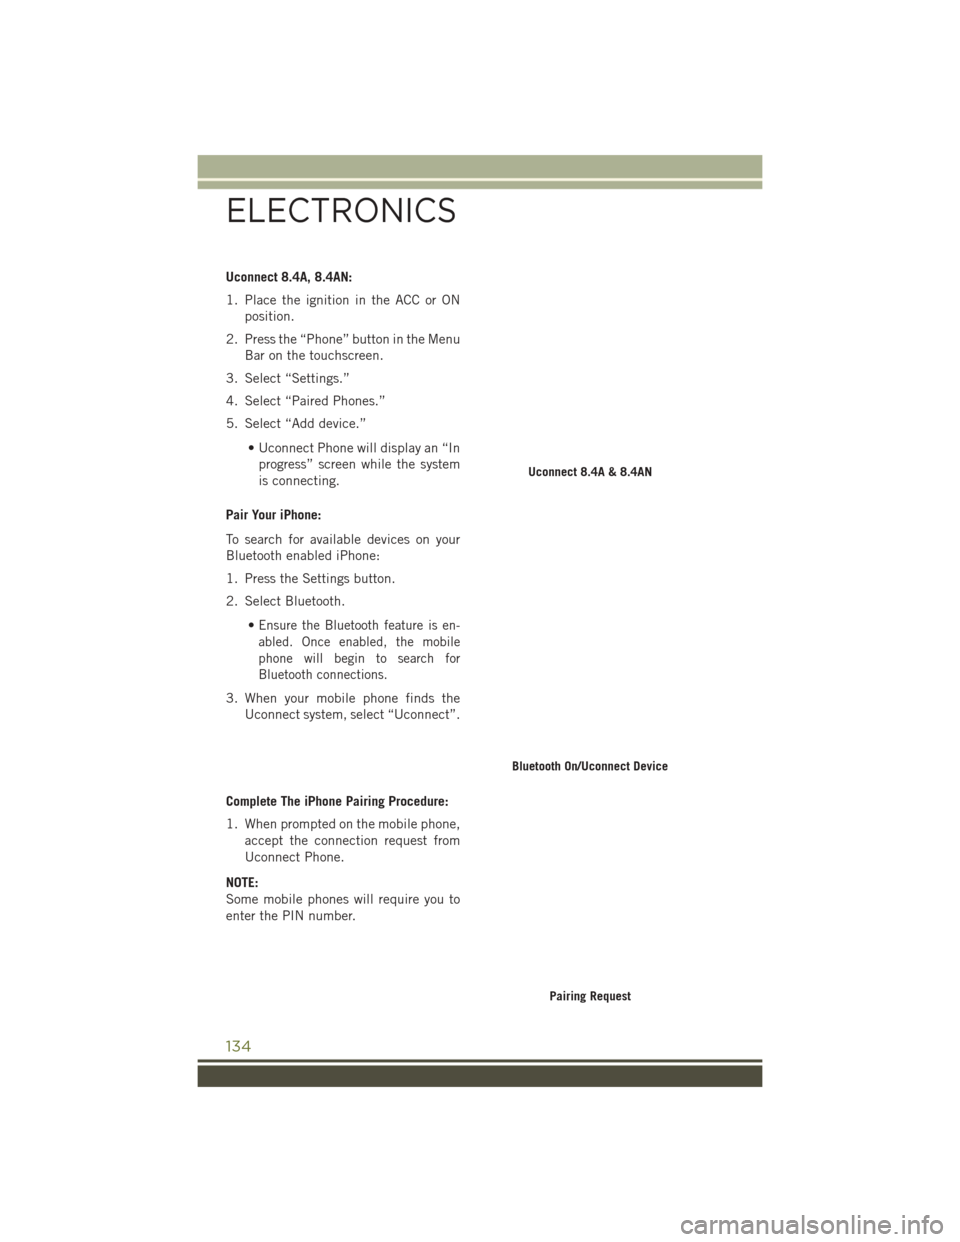
Uconnect 8.4A, 8.4AN:
1. Place the ignition in the ACC or ONposition.
2. Press the “Phone” button in the Menu Bar on the touchscreen.
3. Select “Settings.”
4. Select “Paired Phones.”
5. Select “Add device.”
• Uconnect Phone will display an “Inprogress” screen while the system
is connecting.
Pair Your iPhone:
To search for available devices on your
Bluetooth enabled iPhone:
1. Press the Settings button.
2. Select Bluetooth. •
Ensure the Bluetooth feature is en-
abled. Once enabled, the mobile
phone will begin to search for
Bluetooth connections.
3. When your mobile phone finds theUconnect system, select “Uconnect”.
Complete The iPhone Pairing Procedure:
1. When prompted on the mobile phone, accept the connection request from
Uconnect Phone.
NOTE:
Some mobile phones will require you to
enter the PIN number.
Uconnect 8.4A & 8.4AN
Bluetooth On/Uconnect Device
Pairing Request
ELECTRONICS
134
Page 140 of 236
Incoming Text Messages
After pairing your Uconnect system with a Bluetooth enabled mobile device with the
Message Access Profile (MAP), the Uconnect system can announce a new incoming
text message and read it to you over the vehicle’s audio system.
NOTE:
Only incoming text messages received during the current ignition cycle can be
viewed/read.
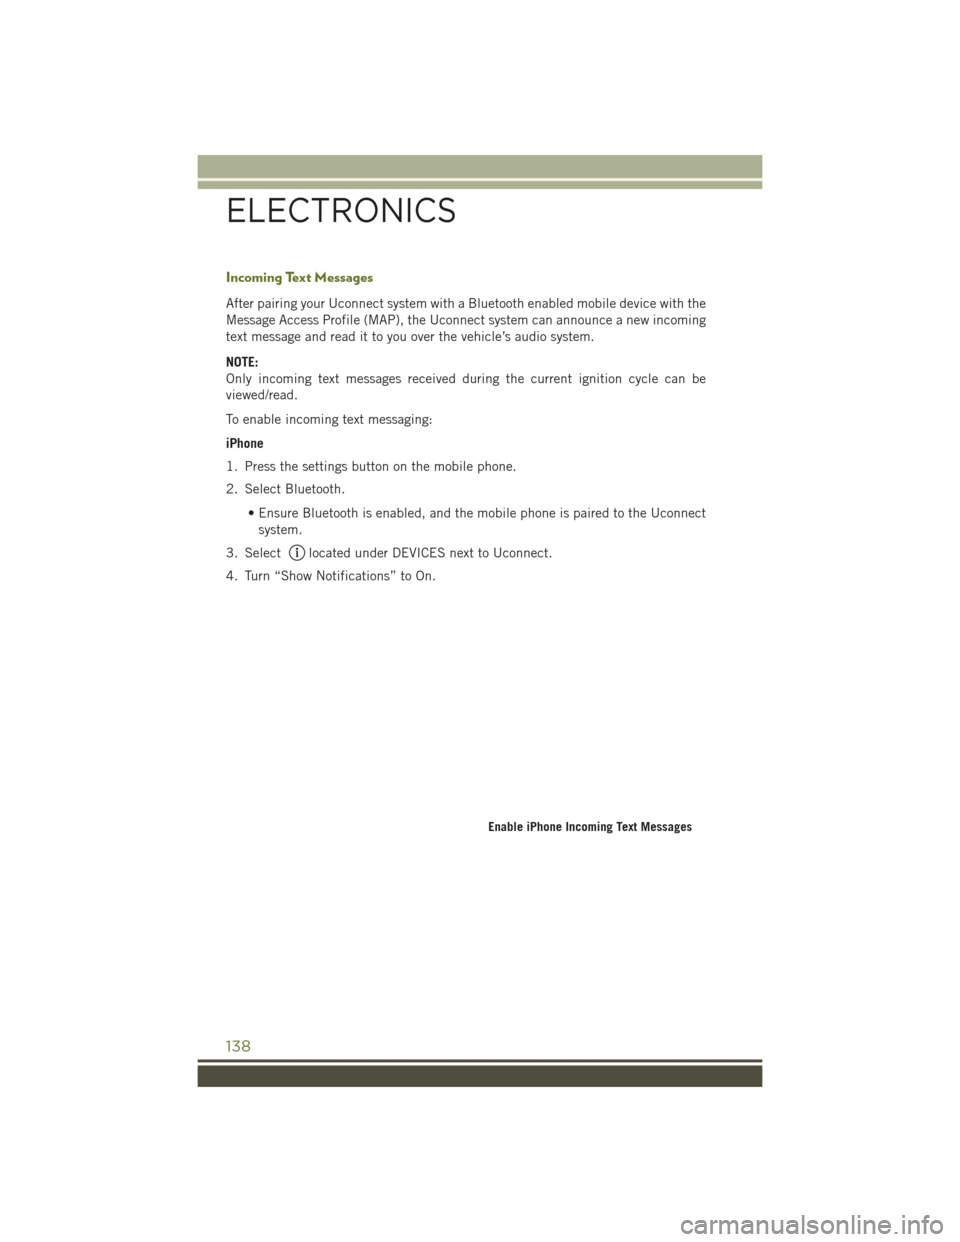
To enable incoming text messaging:
iPhone
1. Press the settings button on the mobile phone.
2. Select Bluetooth.• Ensure Bluetooth is enabled, and the mobile phone is paired to the Uconnectsystem.
3. Select
located under DEVICES next to Uconnect.
4. Turn “Show Notifications” to On.
Enable iPhone Incoming Text Messages
ELECTRONICS
138
Page 141 of 236
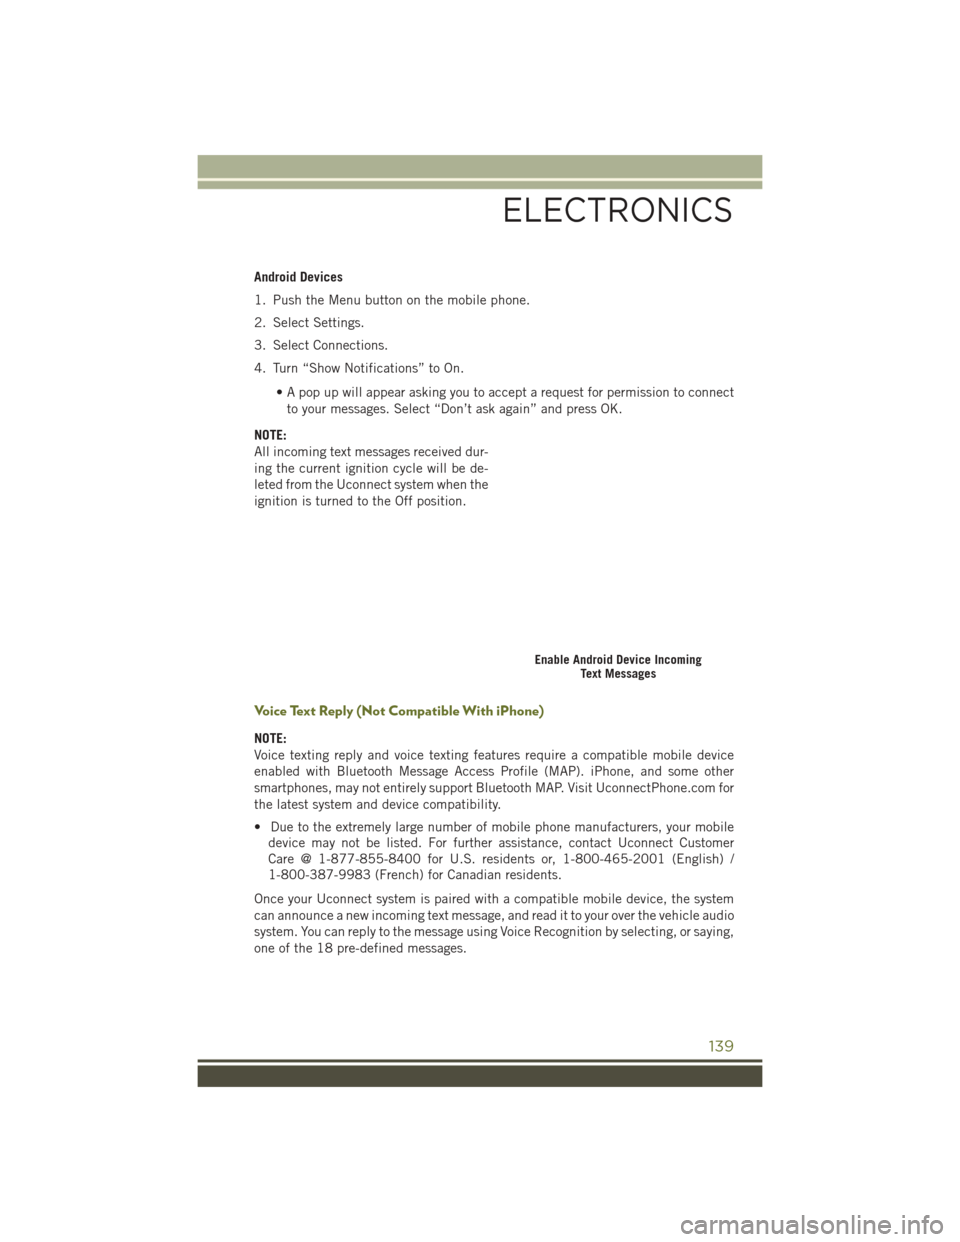
Android Devices
1. Push the Menu button on the mobile phone.
2. Select Settings.
3. Select Connections.
4. Turn “Show Notifications” to On.• A pop up will appear asking you to accept a request for permission to connectto your messages. Select “Don’t ask again” and press OK.
NOTE:
All incoming text messages received dur-
ing the current ignition cycle will be de-
leted from the Uconnect system when the
ignition is turned to the Off position.
Voice Text Reply (Not Compatible With iPhone)
NOTE:
Voice texting reply and voice texting features require a compatible mobile device
enabled with Bluetooth Message Access Profile (MAP). iPhone, and some other
smartphones, may not entirely support Bluetooth MAP. Visit UconnectPhone.com for
the latest system and device compatibility.
• Due to the extremely large number of mobile phone manufacturers, your mobile device may not be listed. For further assistance, contact Uconnect Customer
Care @ 1-877-855-8400 for U.S. residents or, 1-800-465-2001 (English) /
1-800-387-9983 (French) for Canadian residents.
Once your Uconnect system is paired with a compatible mobile device, the system
can announce a new incoming text message, and read it to your over the vehicle audio
system. You can reply to the message using Voice Recognition by selecting, or saying,
one of the 18 pre-defined messages.
Enable Android Device Incoming Text Messages
ELECTRONICS
139
Page 146 of 236
UNIVERSAL GARAGE DOOR OPENER (HomeLink)
• HomeLinkreplaces up to three
hand-held transmitters that operate
devices such as garage door openers,
motorized gates, lighting or home se-
curity systems. The HomeLink unit is
powered by your vehicles 12 Volt bat-
tery.
• The HomeLink buttons that are lo- cated in the overhead console or sun-
visor designate the three different
HomeLink channels.
•
The HomeLink indicatoris located
above the center button.
Before You Begin Programming
HomeLink
Ensure that your vehicle is parked outside of the garage before you begin program-
ming.
For efficient programming and accurate transmission of the radio-frequency signal,
it is recommended that a new battery be placed in the hand-held transmitter of the
device that is being programmed to the HomeLink system.
To erase the channels, place the ignition switch into the ON/RUN position, then push
and hold the two outside HomeLink buttons (I and III) for up to 20 seconds or until
the red indicator flashes.
NOTE:
Erasing all channels should only be performed when programming HomeLink for the
first time. Do not erase channels when programming additional buttons.
If you have any problems, or require assistance, please call toll-free 1-800-355-3515 or,
on the Internet at
HomeLink.com for information or assistance.
Universal Garage Door Opener (HomeLink)
ELECTRONICS
144
Page 147 of 236
Programming A Rolling Code
NOTE:
For programming Garage Door Openers that were manufactured after 1995. These
Garage Door Openers can be identified by the “LEARN” or “TRAIN” button located
where the hanging antenna is attached to the Garage Door Opener. It is NOT the
button that is normally used to open and close the door. The name and color of the
button may vary by manufacturer.
1. Place the ignition switch into the ON/RUN position.
2. Place the hand-held transmitter 1 to 3 inches (3 to 8 cm) away from theHomeLink button you wish to program while keeping the HomeLink indicator light
in view.
3. Push and hold the HomeLink button you want to program while you push and hold the hand-held transmitter button.
4. Continue to hold both buttons and observe the indicator light. The HomeLink indicator will flash slowly and then rapidly after HomeLink has received the
frequency signal from the hand-held transmitter. Release both buttons after the
indicator light changes from slow to rapid.
5.
At the garage door opener motor (in the garage), locate the “LEARN” or “TRAINING”
button. This can usually be found where the hanging antenna wire is attached to the
garage door opener motor. Firmly push and release the “LEARN” or “TRAINING”
button.
NOTE:
You have 30 seconds in which to initiate the next step after the LEARN button has
been pushed.
6. Return to the vehicle and push the programmed HomeLink button twice (holding the button for two seconds each time). If the device is plugged in and activates,
programming is complete.
NOTE:
If the device does not activate, push the button a third time (for two seconds) to
complete the training.
7. To program the remaining two HomeLink buttons, repeat each step for each remaining button. DO NOT erase the channels.
ELECTRONICS
145