Instrument cluster JEEP CHEROKEE 2018 Owner handbook (in English)
[x] Cancel search | Manufacturer: JEEP, Model Year: 2018, Model line: CHEROKEE, Model: JEEP CHEROKEE 2018Pages: 312, PDF Size: 4.91 MB
Page 74 of 312
ESC uses sensors in the vehicle to determine
the vehicle path intended by the driver and
compares it to the actual path of the vehicle.
When the actual path does not match the
intended path, ESC applies the brake of the
appropriate wheel to assist in counteracting
the oversteer or understeer condition.
• Oversteer — when the vehicle is turningmore than appropriate for the steering
wheel position.
• Understeer — when the vehicle is turning less than appropriate for the steering wheel
position.
The “ESC Activation/Malfunction Indicator
Light” located in the instrument cluster will
start to flash as soon as the ESC system
becomes active. The “ESC Activation/
Malfunction Indicator Light” also flashes
when the TCS is active. If the “ESC
Activation/Malfunction Indicator Light” be-
gins to flash during acceleration, ease up on
the accelerator and apply as little throttle as
possible. Be sure to adapt your speed and
driving to the prevailing road conditions.WARNING!
• Electronic Stability Control (ESC) can- not prevent the natural laws of physics
from acting on the vehicle, nor can it
increase the traction afforded by prevail-
ing road conditions. ESC cannot prevent
accidents, including those resulting
from excessive speed in turns, driving on
very slippery surfaces, or hydroplaning.
ESC also cannot prevent accidents re-
sulting from loss of vehicle control due
to inappropriate driver input for the con-
ditions. Only a safe, attentive, and skill-
ful driver can prevent accidents. The
capabilities of an ESC equipped vehicle
must never be exploited in a reckless or
dangerous manner which could jeopar-
dize the user’s safety or the safety of
others.
• Vehicle modifications, or failure to prop-
erly maintain your vehicle, may change
the handling characteristics of your ve-
hicle, and may negatively affect the per-
formance of the ESC system. Changes to
the steering system, suspension, brak-
WARNING!
ing system, tire type and size or wheel
size may adversely affect ESC perfor-
mance. Improperly inflated and un-
evenly worn tires may also degrade ESC
performance. Any vehicle modification
or poor vehicle maintenance that re-
duces the effectiveness of the ESC sys-
tem can increase the risk of loss of
vehicle control, vehicle rollover, per-
sonal injury and death.
ESC Operating Modes
NOTE:
Depending upon model and mode of opera-
tion, the ESC system may have multiple op-
erating modes.
ESC On
This is the normal operating mode for the
ESC. Whenever the vehicle is started, the
ESC system will be in this mode. This mode
SAFETY
72
Page 76 of 312
WARNING!
maneuver, the ESC system will not en-
gage to assist in maintaining stability.
ESC “Full Off” mode is only intended for
off-highway or off-road use.
• The Electronic Stability Control (ESC)
cannot prevent the natural laws of phys-
ics from acting on the vehicle, nor can it
increase the traction afforded by prevail-
ing road conditions. ESC cannot prevent
all accidents, including those resulting
from excessive speed in turns, driving on
very slippery surfaces, or hydroplaning.
ESC also cannot prevent collisions.
ESC Activation/Malfunction Indicator Light
And ESC OFF Indicator Light
The “ESC Activation/Malfunction
Indicator Light” in the instrument
cluster will come on when the
ignition is turned to the ON mode.
It should go out with the engine
running. If the “ESC Activation/Malfunction
Indicator Light” comes on continuously with the engine running, a malfunction has been
detected in the ESC system. If this light
remains on after several ignition cycles, and
the vehicle has been driven several miles
(kilometers) at speeds greater than 30 mph
(48 km/h), see an authorized dealer as soon
as possible to have the problem diagnosed
and corrected.
The “ESC Activation/Malfunction Indicator
Light” (located in the instrument cluster)
starts to flash as soon as the tires lose trac-
tion and the ESC system becomes active. The
“ESC Activation/Malfunction Indicator
Light” also flashes when TCS is active. If the
“ESC Activation/Malfunction Indicator
Light” begins to flash during acceleration,
ease up on the accelerator and apply as little
throttle as possible. Be sure to adapt your
speed and driving to the prevailing road con-
ditions.
NOTE:
• The “ESC Activation/Malfunction Indicator
Light” and the “ESC OFF Indicator Light”
come on momentarily each time the igni-
tion is turned ON. • Each time the ignition is turned ON, the
ESC system will be on even if it was turned
off previously.
• The ESC system will make buzzing or click- ing sounds when it is active. This is normal;
the sounds will stop when ESC becomes
inactive following the maneuver that
caused the ESC activation.
The “ESC OFF Indicator Light” indi-
cates the customer has elected to
have the Electronic Stability Control
(ESC) in a reduced mode.
Electronic Roll Mitigation (ERM)
This system anticipates the potential for
wheel lift by monitoring the driver’s steering
wheel input and the speed of the vehicle.
When ERM determines that the rate of
change of the steering wheel angle and vehi-
cle’s speed are sufficient to potentially cause
wheel lift, it then applies the appropriate
brake and may also reduce engine power to
lessen the chance that wheel lift will occur.
ERM can only reduce the chance of wheel lift
occurring during severe or evasive driving
SAFETY
74
Page 79 of 312
NOTE:
During HDC the +/- shifter input is used for
HDC target speed selection, but will not af-
fect the gear chosen by the transmission.
When actively controlling HDC the transmis-
sion will shift appropriately for the driver-
selected set speed and corresponding driving
conditions.
Driver Override
The driver may override HDC activation with
throttle or brake application at anytime.
Deactivating HDC
HDC will be deactivated but remain available
if any of the following conditions occur:
• Driver overrides HDC set speed with throttleor brake application.
• Vehicle speed exceeds 20 mph (32 km/h) but remains below 40 mph (64 km/h).
• Vehicle is on a downhill grade of insuffi- cient magnitude, is on level ground, or is on
an uphill grade.
• Vehicle is shifted to park. Disabling HDC
HDC will be deactivated and disabled if any
of the following conditions occur:
• The driver pushes the HDC switch.
• The driveline is shifted out of 4WD Low
Range.
• The parking brake is applied.
• Driver door opens.
• The vehicle is driven greater than 20 mph (32 km/h) for greater than 70 seconds.
• The vehicle is driven greater than 40 mph (64 km/h) (HDC exits immediately).
• HDC detects excessive brake temperature.
Feedback To The Driver
The instrument cluster has an HDC icon and
the HDC switch has an LED icon, which offers
feedback to the driver about the state HDC is
in.
• The cluster icon and switch lamp will illu- minate and remain on solid when HDC is
enabled or activated. This is the normal
operating condition for HDC. • The cluster icon and switch lamp will flash
for several seconds then extinguish when
the driver pushes the HDC switch but en-
able conditions are not met.
• The cluster icon and switch lamp will flash for several seconds then extinguish when
HDC disables due to excess speed.
• The cluster icon and switch lamp will flash when HDC deactivates due to overheated
brakes. The flashing will stop and HDC will
activate again once the brakes have cooled
sufficiently.
WARNING!
HDC is only intended to assist the driver in
controlling vehicle speed when descend-
ing hills. The driver must remain attentive
to the driving conditions and is responsible
for maintaining a safe vehicle speed.
Selec Speed Control (SSC) — If Equipped
SSC is intended for off road driving in 4WD
Low Range only. SSC maintains vehicle
speed by actively controlling engine torque
and brakes.
77
Page 81 of 312
• Vehicle speed exceeds 20 mph (32 km/h)but remains below 40 mph (64 km/h).
• Vehicle is shifted to PARK.
Disabling SSC
SSC will deactivate and be disabled if any of
the following conditions occur:
• The driver pushes the SSC switch.
• The driveline is shifted out of 4WD Low Range.
• The parking brake is applied.
• Driver door opens.
• The vehicle is driven greater than 20 mph (32 km/h) for greater than 70 seconds.
• The vehicle is driven greater than 40 mph (64 km/h) (SSC exits immediately).
Feedback To The Driver:
The instrument cluster has an SSC icon and
the SSC switch has an LED which offer feed-
back to the driver about the state SSC is in. • The cluster icon and switch lamp will illu-
minate and remain on solid when SSC is
enabled or activated. This is the normal
operating condition for SSC.
• The cluster icon and switch lamp will flash for several seconds then extinguish when
the driver pushes the SSC switch but en-
able conditions are not met.
• The cluster icon and switch lamp will flash for several seconds then extinguish when
SSC disables due to excess speed.
• The cluster icon and switch lamp will flash then extinguish when SSC deactivates due
to overheated brakes.
WARNING!
SSC is only intended to assist the driver in
controlling vehicle speed when driving in
off road conditions. The driver must re-
main attentive to the driving conditions
and is responsible for maintaining a safe
vehicle speed.
AUXILIARY DRIVING
SYSTEMS
Blind Spot Monitoring
The Blind Spot Monitoring (BSM) system
uses two radar-based sensors, located inside
the rear bumper fascia, to detect highway
licensable vehicles (automobiles, trucks, mo-
torcycles etc.) that enter the blind spot zones
from the rear/front/side of the vehicle.
The BSM detection zone covers approxi-
mately one lane width on both sides of the
vehicle 12 ft (3.8 m). The zone length starts
at the outside rear view mirror and extends
approximately 10 ft (3 m) beyond the rear
bumper of the vehicle. The BSM system
monitors the detection zones on both sides of
the vehicle when the vehicle speed reaches
approximately 6 mph (10 km/h) or higher and
will alert the driver of vehicles in these areas.
79
Page 83 of 312
Blind Spot Alert Lights/Chime
When operating in Blind Spot Alert Lights/
Chime mode, the BSM system will provide a
visual alert in the appropriate side view mirror
based on a detected object. If the turn signal
is then activated, and it corresponds to an
alert present on that side of the vehicle, an
audible chime will also be sounded. When-
ever a turn signal and detected object are
present on the same side at the same time,
both the visual and audible alerts will be
issued. In addition to the audible alert, the
radio (if on) will also be muted.
NOTE:
Whenever an audible alert is requested by the
BSM system, the radio is also muted.
When the system is in RCP, the system shall
respond with both visual and audible alerts
when a detected object is present. Whenever
an audible alert is requested, the radio is also
muted. Turn/hazard signal status is ignored;
the RCP state always requests the chime.Blind Spot Alert Off
When the BSM system is turned off, there will
be no visual or audible alerts from either the
BSM or RCP systems.
NOTE:
The BSM system will store the current oper-
ating mode when the vehicle is shut off. Each
time the vehicle is started the previously
stored mode will be recalled and used.
Forward Collision Warning (FCW)
The Forward Collision Warning (FCW) system
provides the driver with audible and visual
warnings within the instrument cluster display
to warn the driver when it detects a potential
frontal collision. The warnings are intended to
provide the driver with enough time to react,
avoid or mitigate the potential collision.
NOTE:
FCW monitors the information from the for-
ward looking sensors, as well as the Elec-
tronic Brake Controller (EBC), to calculate
the probability of a forward collision. When
the system determines that a forward colli-
sion is probable, the driver will be provided
with audible and visual warnings.Turning FCW On Or Off
The FCW button is located on the switch
panel below the Uconnect display.
• To turn the FCW system off, push the for-
ward collision button once to turn the sys-
tem OFF.
• To turn the FCW system back on, push the forward collision button again to turn the
system on.
NOTE:
• The default status of FCW is “on”, this allows the system to warn you of a possible
collision with the vehicle in front of you.
• Changing the FCW status to “off” prevents the system from warning you of a possible
collision with the vehicle in front of you. If
FCW is set to off, “FCW OFF” will appear in
the instrument cluster display.
Changing FCW Status
The FCW feature has two settings and can be
changed within the Uconnect System
Screen:
• Far
• Near
81
Page 86 of 312
CAUTION!
sealant it is recommended that you take
your vehicle to an authorized dealer to
have your sensor function checked.
• After inspecting or adjusting the tire
pressure always reinstall the valve stem
cap. This will prevent moisture and dirt
from entering the valve stem, which
could damage the TPMS sensor.
NOTE:
• The TPMS is not intended to replace nor- mal tire care and maintenance, or to pro-
vide warning of a tire failure or condition.
• The TPMS should not be used as a tire pressure gauge while adjusting your tire
pressure.
• Driving on a significantly underinflated tire causes the tire to overheat and can lead to
tire failure. Underinflation also reduces
fuel efficiency and tire tread life, and may
affect the vehicle’s handling and stopping
ability.
• The TPMS is not a substitute for proper tire maintenance, and it is the driver’s respon-
sibility to maintain correct tire pressure using an accurate tire pressure gauge, even
if underinflation has not reached the level
to trigger illumination of the “Tire Pressure
Monitoring Telltale Light”.
• Seasonal temperature changes will affect tire pressure, and the TPMS will monitor
the actual tire pressure in the tire.
Premium System
The Tire Pressure Monitor System (TPMS)
uses wireless technology with wheel rim
mounted electronic sensors to monitor tire
pressure levels. Sensors, mounted to each
wheel as part of the valve stem, transmit tire
pressure readings to the receiver module.
NOTE:
It is particularly important for you to check
the tire pressure in all of the tires on your
vehicle monthly and to maintain the proper
pressure.
The TPMS consists of the following compo-
nents:
• Receiver module
• Four tire pressure monitoring sensors • Various tire pressure monitoring system
messages, which display in the instrument
cluster
• Tire Pressure Monitoring System Warning Light
Tire Pressure Monitoring Low Pressure Warnings
The “Tire Pressure Monitoring
Telltale Light” will illuminate in
the instrument cluster and a
chime will sound when tire pres-
sure is low in one or more of the
four active road tires. In addition, the instru-
ment cluster will display a "Tire Low" mes-
sage for a minimum of five seconds and a
graphic showing the pressure values of each
tire with the low tire pressure values in a
different color.
SAFETY
84
Page 87 of 312
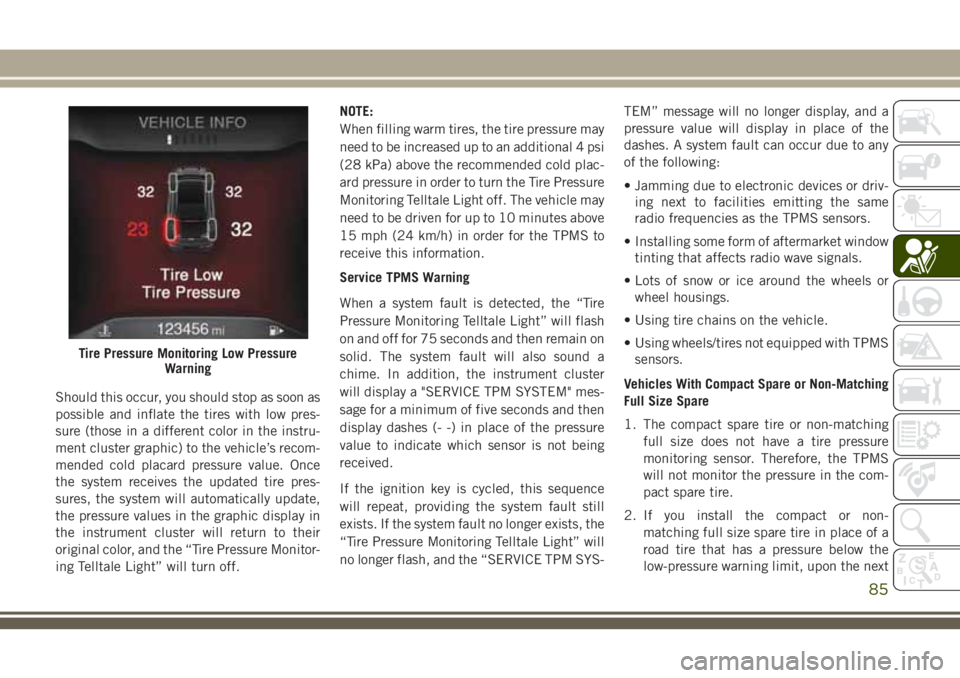
Should this occur, you should stop as soon as
possible and inflate the tires with low pres-
sure (those in a different color in the instru-
ment cluster graphic) to the vehicle’s recom-
mended cold placard pressure value. Once
the system receives the updated tire pres-
sures, the system will automatically update,
the pressure values in the graphic display in
the instrument cluster will return to their
original color, and the “Tire Pressure Monitor-
ing Telltale Light” will turn off.NOTE:
When filling warm tires, the tire pressure may
need to be increased up to an additional 4 psi
(28 kPa) above the recommended cold plac-
ard pressure in order to turn the Tire Pressure
Monitoring Telltale Light off. The vehicle may
need to be driven for up to 10 minutes above
15 mph (24 km/h) in order for the TPMS to
receive this information.
Service TPMS Warning
When a system fault is detected, the “Tire
Pressure Monitoring Telltale Light” will flash
on and off for 75 seconds and then remain on
solid. The system fault will also sound a
chime. In addition, the instrument cluster
will display a "SERVICE TPM SYSTEM" mes-
sage for a minimum of five seconds and then
display dashes (- -) in place of the pressure
value to indicate which sensor is not being
received.
If the ignition key is cycled, this sequence
will repeat, providing the system fault still
exists. If the system fault no longer exists, the
“Tire Pressure Monitoring Telltale Light” will
no longer flash, and the “SERVICE TPM SYS-
TEM” message will no longer display, and a
pressure value will display in place of the
dashes. A system fault can occur due to any
of the following:
• Jamming due to electronic devices or driv-
ing next to facilities emitting the same
radio frequencies as the TPMS sensors.
• Installing some form of aftermarket window tinting that affects radio wave signals.
• Lots of snow or ice around the wheels or wheel housings.
• Using tire chains on the vehicle.
• Using wheels/tires not equipped with TPMS sensors.
Vehicles With Compact Spare or Non-Matching
Full Size Spare
1. The compact spare tire or non-matching full size does not have a tire pressure
monitoring sensor. Therefore, the TPMS
will not monitor the pressure in the com-
pact spare tire.
2. If you install the compact or non- matching full size spare tire in place of a
road tire that has a pressure below the
low-pressure warning limit, upon the next
Tire Pressure Monitoring Low Pressure Warning
85
Page 88 of 312
ignition key cycle, the “TPMS Telltale
Light” will remain on and a chime will
sound. In addition, the graphic in the
instrument cluster will still display a dif-
ferent color pressure value.
3. After driving the vehicle for up to 10 min- utes above 15 mph (24 km/h), the “TPMS
Telltale Light” will flash on and off for
75 seconds and then remain on solid. In
addition, the instrument cluster will dis-
play a “Service Tire Pressure System”
message for five seconds and then display
dashes (- -) in place of the pressure value.
4. For each subsequent ignition key cycle, a chime will sound, the “TPMS Telltale
Light” will flash on and off for 75 seconds
and then remain on solid, and the instru-
ment cluster will display a “SERVICE
TPM SYSTEM” message for five seconds
and then display dashes (- -) in place of
the pressure value.
5. Once you repair or replace the original road tire and reinstall it on the vehicle in
place of the compact spare or non-
matching full size, the TPMS will update
automatically. In addition, the “TPMS Telltale Light” will turn off and the
graphic in the instrument cluster will dis-
play a new pressure value instead of
dashes (- -), as long as no tire pressure is
below the low-pressure warning limit in
any of the four active road tires. The
vehicle may need to be driven for up to
10 minutes above 15 mph (24 km/h) in
order for the TPMS to receive this
information.
TPMS Deactivation — If Equipped
The TPMS can be deactivated if replacing all
four wheel and tire assemblies (road tires)
with wheel and tire assemblies that do not
have TPMS Sensors, such as when installing
winter wheel and tire assemblies on your
vehicle.
To deactivate the TPMS, first replace all four
wheel and tire assemblies (road tires) with
tires not equipped with Tire Pressure Moni-
toring (TPM) Sensors. Then, drive the vehicle
for 10 minutes above 15 mph (24 km/h). The
TPMS will chime, the "TPM Telltale Light"
will flash on and off for 75 seconds and then remain on. The instrument cluster will dis-
play the “SERVICE TPM SYSTEM” message
and then display dashes (--) in place of the
pressure values.
Beginning with the next ignition cycle, the
TPMS will no longer chime or display the
“SERVICE TPM SYSTEM” message in the
instrument cluster but dashes (--) will remain
in place of the pressure values.
To reactivate the TPMS, replace all four
wheel and tire assemblies (road tires) with
tires equipped with TPM sensors. Then, drive
the vehicle for up to 10 minutes above
15 mph (24 km/h). The TPMS will chime, the
"TPM Telltale Light" will flash on and off for
75 seconds and then turn off. The instrument
cluster will display the “SERVICE TPM SYS-
TEM” message and then display pressure
values in place of the dashes. On the next
ignition cycle the "SERVICE TPM SYSTEM"
message will no longer be displayed as long
as no system fault exists.
SAFETY
86
Page 122 of 312
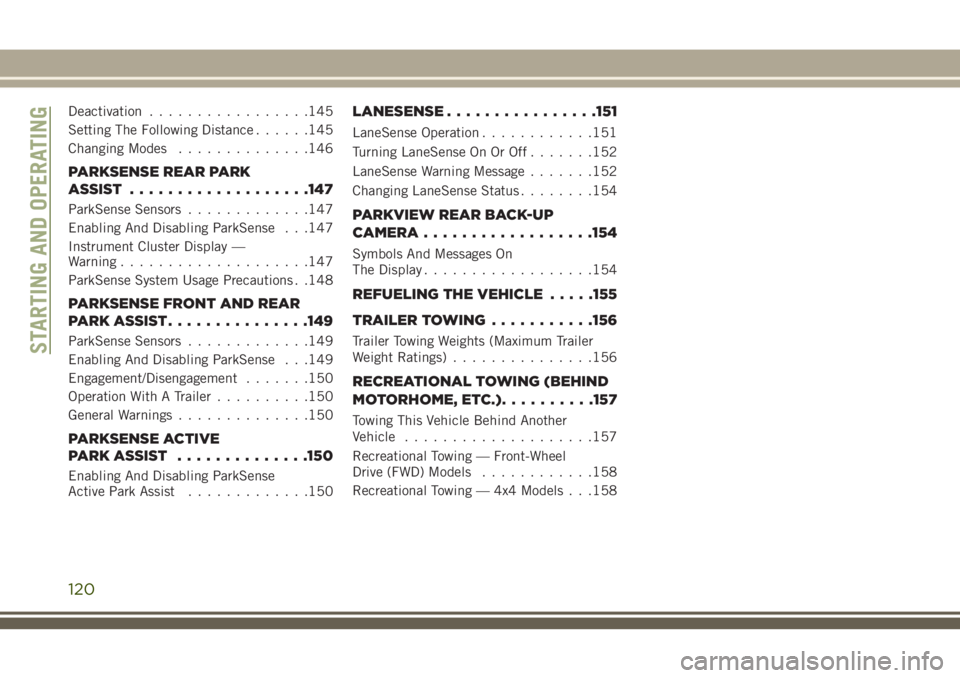
Deactivation.................145
Setting The Following Distance ......145
Changing Modes ..............146
PARKSENSE REAR PARK
ASSIST ...................147
ParkSense Sensors .............147
Enabling And Disabling ParkSense . . .147
Instrument Cluster Display —
Warning ....................147
ParkSense System Usage Precautions . .148
PARKSENSE FRONT AND REAR
PARKASSIST...............149
ParkSense Sensors .............149
Enabling And Disabling ParkSense . . .149
Engagement/Disengagement .......150
Operation With A Trailer ..........150
General Warnings ..............150
PARKSENSE ACTIVE
PARKASSIST ..............150
Enabling And Disabling ParkSense
Active Park Assist .............150
LANESENSE................151
LaneSense Operation ............151
Turning LaneSense On Or Off .......152
LaneSense Warning Message .......152
Changing LaneSense Status ........154
PARKVIEW REAR BACK-UP
CAMERA..................154
Symbols And Messages On
The Display ..................154
REFUELING THE VEHICLE .....155
TRAILER TOWING ...........156
Trailer Towing Weights (Maximum Trailer
Weight Ratings)...............156
RECREATIONAL TOWING (BEHIND
MOTORHOME, ETC.) ..........157
Towing This Vehicle Behind Another
Vehicle................... .157
Recreational Towing — Front-Wheel
Drive (FWD) Models ............158
Recreational Towing — 4x4 Models . . .158
STARTING AND OPERATING
120
Page 124 of 312
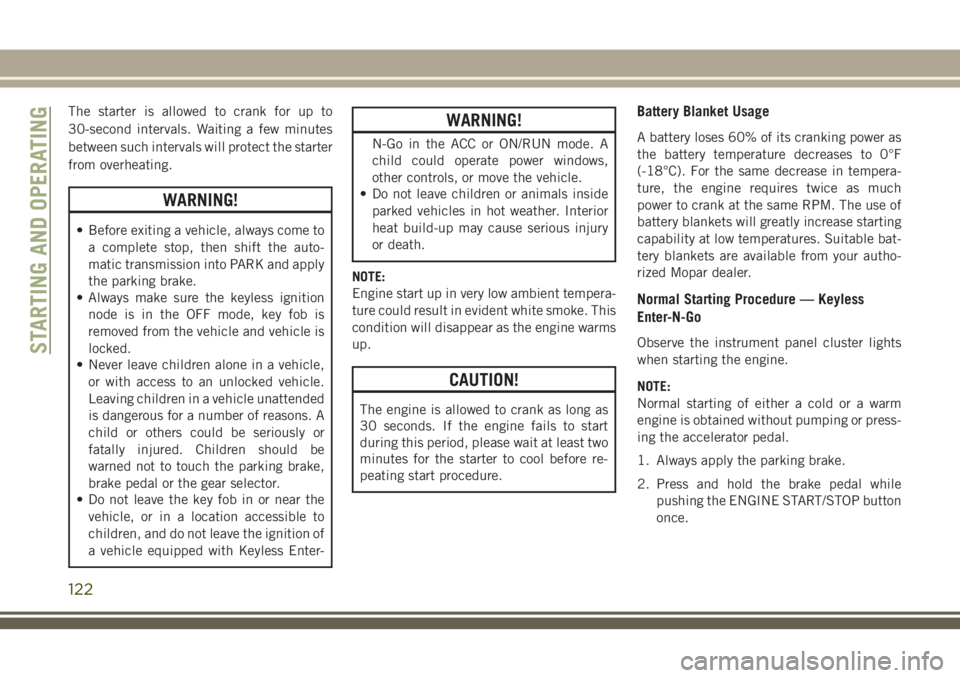
The starter is allowed to crank for up to
30-second intervals. Waiting a few minutes
between such intervals will protect the starter
from overheating.
WARNING!
• Before exiting a vehicle, always come toa complete stop, then shift the auto-
matic transmission into PARK and apply
the parking brake.
• Always make sure the keyless ignition
node is in the OFF mode, key fob is
removed from the vehicle and vehicle is
locked.
• Never leave children alone in a vehicle,
or with access to an unlocked vehicle.
Leaving children in a vehicle unattended
is dangerous for a number of reasons. A
child or others could be seriously or
fatally injured. Children should be
warned not to touch the parking brake,
brake pedal or the gear selector.
• Do not leave the key fob in or near the
vehicle, or in a location accessible to
children, and do not leave the ignition of
a vehicle equipped with Keyless Enter-
WARNING!
N-Go in the ACC or ON/RUN mode. A
child could operate power windows,
other controls, or move the vehicle.
• Do not leave children or animals inside
parked vehicles in hot weather. Interior
heat build-up may cause serious injury
or death.
NOTE:
Engine start up in very low ambient tempera-
ture could result in evident white smoke. This
condition will disappear as the engine warms
up.
CAUTION!
The engine is allowed to crank as long as
30 seconds. If the engine fails to start
during this period, please wait at least two
minutes for the starter to cool before re-
peating start procedure.
Battery Blanket Usage
A battery loses 60% of its cranking power as
the battery temperature decreases to 0°F
(-18°C). For the same decrease in tempera-
ture, the engine requires twice as much
power to crank at the same RPM. The use of
battery blankets will greatly increase starting
capability at low temperatures. Suitable bat-
tery blankets are available from your autho-
rized Mopar dealer.
Normal Starting Procedure — Keyless
Enter-N-Go
Observe the instrument panel cluster lights
when starting the engine.
NOTE:
Normal starting of either a cold or a warm
engine is obtained without pumping or press-
ing the accelerator pedal.
1. Always apply the parking brake.
2. Press and hold the brake pedal while pushing the ENGINE START/STOP button
once.STARTING AND OPERATING
122