climate control JEEP CHEROKEE 2020 Owner handbook (in English)
[x] Cancel search | Manufacturer: JEEP, Model Year: 2020, Model line: CHEROKEE, Model: JEEP CHEROKEE 2020Pages: 332, PDF Size: 8.87 MB
Page 9 of 332
7
WINDSHIELD WIPERS AND WASHERS ..... 34
Windshield Wiper Operation............. 34
Rain Sensing Wipers —
If Equipped ................................... 35 Rear Window Wiper/Washer ............. 36
CLIMATE CONTROLS............................... 36
Automatic Climate Control
Overview ........................................ 37 Climate Control Functions ............... 45
Automatic Temperature
Control (ATC) ................................ 45 Operating Tips ............................... 46
WINDOWS ............................................ 47
Power Window Controls ................... 47
Auto-Up Feature With Anti-Pinch
Protection ..................................... 48 Window Lockout Switch .................. 48
POWER SUNROOF WITH POWER SHADE —
IF EQUIPPED ......................................... 49
Opening Sunroof ............................ 49
Venting Sunroof.............................. 50
Closing Sunroof .............................. 50
Wind Buffeting .............................. 50
Opening Power Shade ..................... 50
Closing Power Shade....................... 51
Pinch Protect Feature ..................... 51
Sunroof Maintenance ...................... 51
Ignition Off Operation ..................... 51
HOOD ....................................................52
Opening The Hood ......................... 52
Closing The Hood ........................... 52
LIFTGATE...............................................53
Opening ........................................ 53
Closing .......................................... 53
Hands-Free Liftgate —
If Equipped .................................. 54
INTERNAL EQUIPMENT ........................... 55
Power Outlets ............................... 55
Power Inverter — If Equipped ........ 56
ROOF LUGGAGE RACK — IF EQUIPPED ....57
ENVIRONMENTAL PROTECTION
SYSTEMS — IF EQUIPPED ...................... 58
GETTING TO KNOW YOUR INSTRUMENT
PANEL
INSTRUMENT CLUSTER DISPLAY ............ 59
Instrument Cluster Display Location
And Controls .................................. 59 Oil Change Indicator System —
If Equipped .................................. 60 Gear Shift Indicator (GSI) —
If Equipped ................................... 60 Instrument Cluster Display Selectable
Items ............................................ 61 Diesel Displays .............................. 61
Diesel Particulate Filter (DPF)
Messages ..................................... 61 Fuel System Messages .................... 62
WARNING LIGHTS AND MESSAGES ..........64
Red Warning Lights .........................64
Yellow Warning Lights .....................67
Yellow Indicator Lights ....................71
Green Indicator Lights .....................72
White Indicator Lights .....................73
Blue Indicator Lights .......................74
ONBOARD DIAGNOSTIC SYSTEM —
OBD II ..................................................74
Onboard Diagnostic System (OBD II)
Cybersecurity..................................75
SAFETY
SAFETY FEATURES .................................76
Anti-Lock Brake System (ABS) ........76
Electronic Brake Control (EBC)
System .........................................77
AUXILIARY DRIVING SYSTEMS ................87
Blind Spot Monitoring (BSM) —
If Equipped ....................................87 Forward Collision Warning (FCW) With
Mitigation — If Equipped ................90 Tire Pressure Monitoring
System (TPMS)...............................93
2020_JEEP_CHEROKEE_UG_RHD_UK.book Page 7
Page 27 of 332
25
Front Heated Seats — If Equipped
If your vehicle is equipped with front heated
seats, the control buttons are located within
the Uconnect system. You can gain access to
the control buttons through the climate
screen or the controls screen.
Press the heated seat button once to
turn the HI setting on.
Press the heated seat button a second
time to turn the LO setting on.
Press the heated seat button a third
time to turn the heating elements off.
The level of heat selected will stay on until
changed by the operator.
NOTE:
The engine must be running for the heated
seats to operate.
Vehicles Equipped With Remote Start
On models that are equipped with remote start,
the driver’s heated seat can be programmed to
come on during a remote start.
This feature can be programmed through the
Uconnect system. Refer to “Uconnect Settings”
in “Multimedia” in the Owner's Manual.
Rear Heated Seats — If Equipped
On some models, the two outboard rear seats
are equipped with heated seats. The heated
seat switches for these seats are located on
the rear of the center console.
There are two heated seat switches that allow
the rear passengers to operate the seats
independently. Amber indicator lights in
each switch indicate the level of heat in use. Two indicator lights will illuminate for HI,
one for LO and none for off.
Push the heated seat button once to
turn the HI setting on.
Push the heated seat button a second
time to turn the LO setting on.
Push the heated seat button a third
time to turn the heating elements off.
NOTE:
Once a heat setting is selected, heat will
be felt within two to five minutes.
The engine must be running for the heated
seats to operate.
When the HI-level setting is selected, the
heater will provide a boosted heat level
during the first four minutes of operation.
Then, the heat output will drop to the normal
HI-level. The level of heat selected will stay
on until changed by the operator.
Front Ventilated Seats — If Equipped
If your vehicle is equipped with ventilated
seats, the seat cushion and seat back will
have fans that draw the air from the
passenger compartment and move air
through fine perforations in the seat cover to
WARNING!
Persons who are unable to feel pain to
the skin because of advanced age,
chronic illness, diabetes, spinal cord
injury, medication, alcohol use, exhaus-
tion or other physical condition must
exercise care when using the seat heater.
It may cause burns even at low tempera-
tures, especially if used for long periods
of time.
Do not place anything on the seat or
seatback that insulates against heat,
such as a blanket or cushion. This may
cause the seat heater to overheat. Sitting
in a seat that has been overheated could
cause serious burns due to the increased
surface temperature of the seat.
2020_JEEP_CHEROKEE_UG_RHD_UK.book Page 25
Page 28 of 332
GETTING TO KNOW YOUR VEHICLE
26
help keep the driver and front passenger
cooler in higher ambient temperatures. The
fans operate at two speeds, HI and LO.
The front ventilated seats control buttons are
located within the Uconnect system. You can
gain access to the control buttons through
the climate screen or the controls screen.
Press the ventilated seat button once to
choose HI.
Press the ventilated seat button a
second time to choose LO.
Press the ventilated seat button a third
time to turn the ventilated seat off.
NOTE:
The engine must be running for the venti -
lated seats to operate.
Vehicles Equipped With Remote Start
On models that are equipped with remote
start, the driver’s ventilated seat can be
programmed to come on during a remote
start.
This feature can be programmed through the
Uconnect system. Refer to “Uconnect
Settings” in “Multimedia” in the Owner's
Manual.
HEAD RESTRAINTS
Head restraints are designed to reduce the
risk of injury by restricting head movement in
the event of a rear impact. Head restraints
should be adjusted so that the top of the
head restraint is located above the top of
your ear.
NOTE:
Do not reverse the head restraints (making
the rear of the head restraint face forward) in
an attempt to gain additional clearance to
the back of your head.
Reactive Head Restraints — Front Seats
The front driver and passenger seats are
equipped with Reactive Head Restraints
(RHR). In the event of a rear impact, the
RHRs will automatically extend forward
minimizing the gap between the back of the
occupant’s head and the RHR.
The RHRs will automatically return to their
normal position following a rear impact. If
the RHRs do not return to their normal posi -
tion, see your authorized dealer immediately.
To raise the head restraint, pull upward on
the head restraint. To lower the head
restraint, push the adjustment button,
located at the base of the head restraint, and
push downward on the head restraint.
NOTE:
To remove the head restraint, raise it as far
as it can go. Then, push the release button
and the adjustment button at the base of
each post while pulling the head restraint up.
Seatback angle may need to be adjusted to
fully remove the head restraint. To reinstall
the head restraint, put the head restraint
posts into the holes and push downward.
Then adjust the head restraint to the appro -
priate height.
WARNING!
All occupants, including the driver,
should not operate a vehicle or sit in a
vehicle’s seat until the head restraints
are placed in their proper positions in
order to minimize the risk of neck injury
in the event of a crash.
Head restraints should never be adjusted
while the vehicle is in motion. Driving a
vehicle with the head restraints improp -
erly adjusted or removed could cause
serious injury or death in the event of a
collision.
2020_JEEP_CHEROKEE_UG_RHD_UK.book Page 26
Page 31 of 332
29
The heated steering wheel control button is
located within the Uconnect system. You can
gain access to the control button through the
climate screen or the controls screen.
Press the heated steering wheel button
once to turn the heating element on.
Press the heated steering wheel button
a second time to turn the heating element
off.
NOTE:
The engine must be running for the heated
steering wheel to operate.
Vehicles Equipped With Remote Start
On models that are equipped with remote
start, the heated steering wheel can be
programmed to come on during a remote
start through the Uconnect system. Refer to
“Uconnect Settings” in “Multimedia” in the
Owner’s Manual for further information.
MIRRORS
Power Folding Mirrors — If Equipped
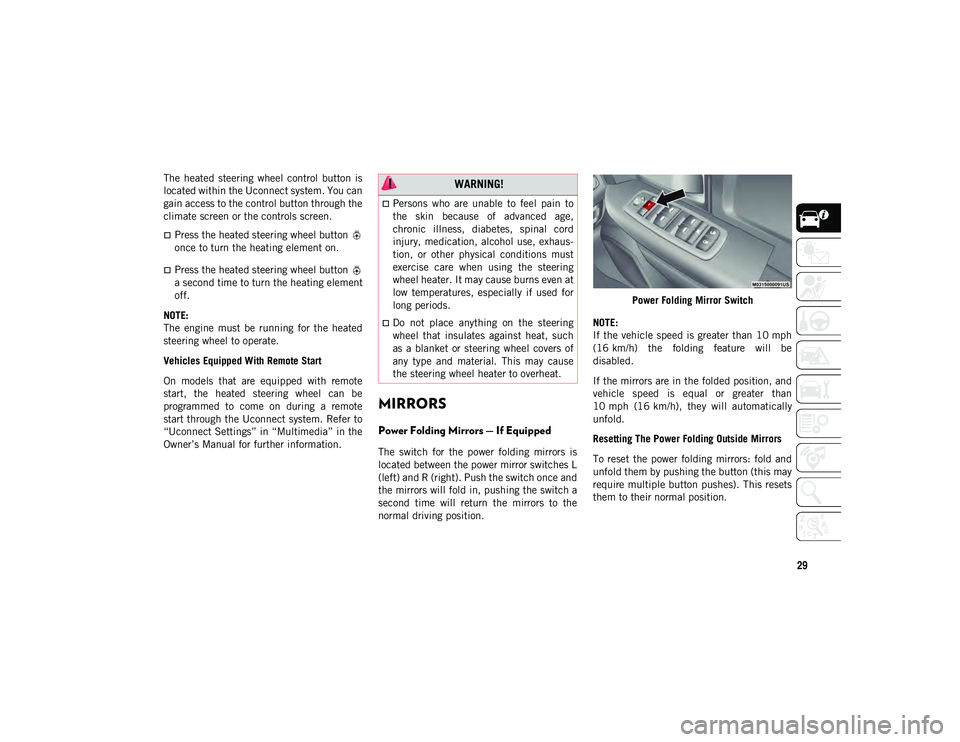
The switch for the power folding mirrors is
located between the power mirror switches L
(left) and R (right). Push the switch once and
the mirrors will fold in, pushing the switch a
second time will return the mirrors to the
normal driving position. Power Folding Mirror Switch
NOTE:
If the vehicle speed is greater than 10 mph
(16 km/h) the folding feature will be
disabled.
If the mirrors are in the folded position, and
vehicle speed is equal or greater than
10 mph (16 km/h), they will automatically
unfold.
Resetting The Power Folding Outside Mirrors
To reset the power folding mirrors: fold and
unfold them by pushing the button (this may
require multiple button pushes). This resets
them to their normal position.
WARNING!
Persons who are unable to feel pain to
the skin because of advanced age,
chronic illness, diabetes, spinal cord
injury, medication, alcohol use, exhaus-
tion, or other physical conditions must
exercise care when using the steering
wheel heater. It may cause burns even at
low temperatures, especially if used for
long periods.
Do not place anything on the steering
wheel that insulates against heat, such
as a blanket or steering wheel covers of
any type and material. This may cause
the steering wheel heater to overheat.
2020_JEEP_CHEROKEE_UG_RHD_UK.book Page 29
Page 38 of 332
GETTING TO KNOW YOUR VEHICLE
36
Rear Window Wiper/Washer
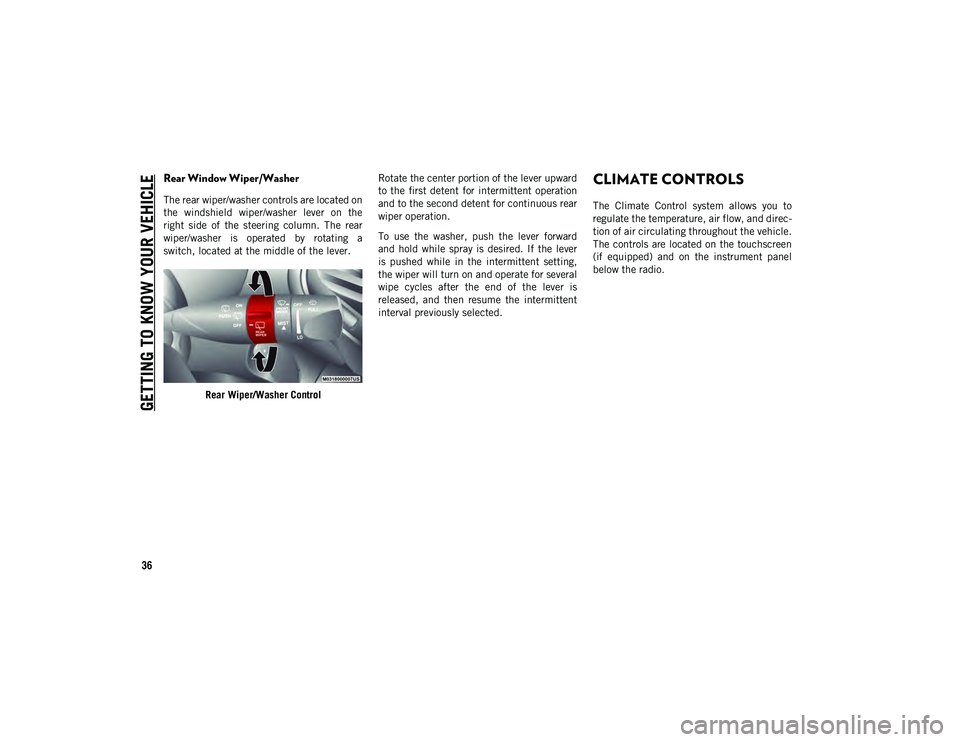
The rear wiper/washer controls are located on
the windshield wiper/washer lever on the
right side of the steering column. The rear
wiper/washer is operated by rotating a
switch, located at the middle of the lever.Rear Wiper/Washer Control Rotate the center portion of the lever upward
to the first detent for intermittent operation
and to the second detent for continuous rear
wiper operation.
To use the washer, push the lever forward
and hold while spray is desired. If the lever
is pushed while in the intermittent setting,
the wiper will turn on and operate for several
wipe cycles after the end of the lever is
released, and then resume the intermittent
interval previously selected.
CLIMATE CONTROLS
The Climate Control system allows you to
regulate the temperature, air flow, and direc
-
tion of air circulating throughout the vehicle.
The controls are located on the touchscreen
(if equipped) and on the instrument panel
below the radio.
2020_JEEP_CHEROKEE_UG_RHD_UK.book Page 36
Page 39 of 332
37
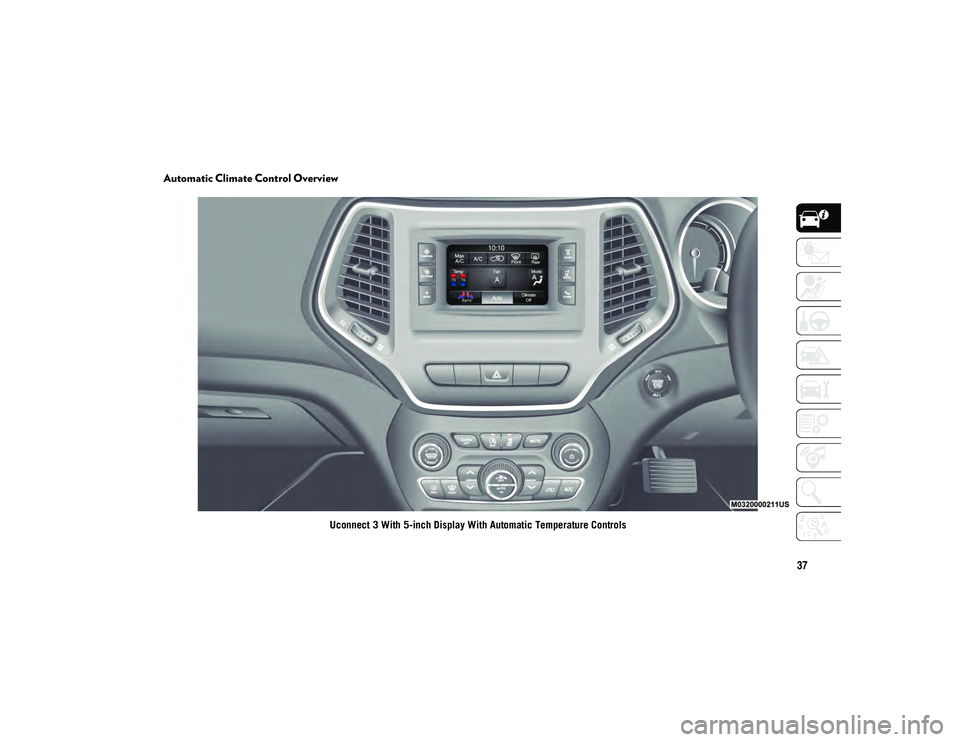
Automatic Climate Control Overview
Uconnect 3 With 5-inch Display With Automatic Temperature Controls
2020_JEEP_CHEROKEE_UG_RHD_UK.book Page 37
Page 44 of 332
GETTING TO KNOW YOUR VEHICLE
42
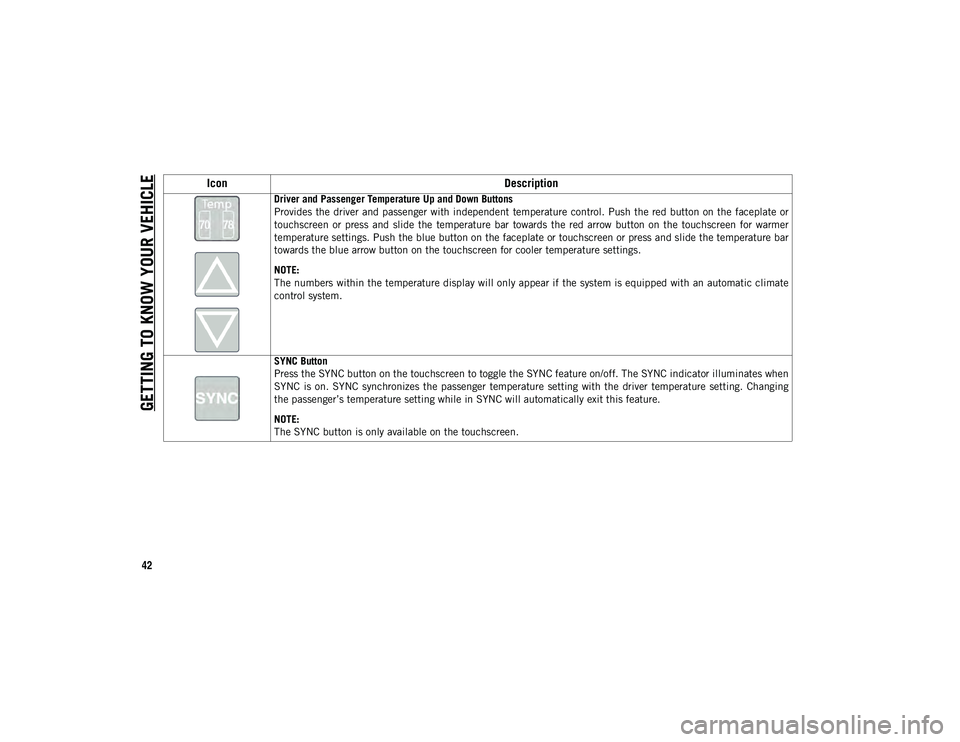
Driver and Passenger Temperature Up and Down Buttons
Provides the driver and passenger with independent temperature control. Push the red button on the faceplate or
touchscreen or press and slide the temperature bar towards the red arrow button on the touchscreen for warmer
temperature settings. Push the blue button on the faceplate or touchscreen or press and slide the temperature bar
towards the blue arrow button on the touchscreen for cooler temperature settings.
NOTE:
The numbers within the temperature display will only appear if the system is equipped with an automatic climate
control system.
SYNC Button
Press the SYNC button on the touchscreen to toggle the SYNC feature on/off. The SYNC indicator illuminates when
SYNC is on. SYNC synchronizes the passenger temperature setting with the driver temperature setting. Changing
the passenger’s temperature setting while in SYNC will automatically exit this feature.
NOTE:
The SYNC button is only available on the touchscreen.
IconDescription
2020_JEEP_CHEROKEE_UG_RHD_UK.book Page 42
Page 45 of 332
43
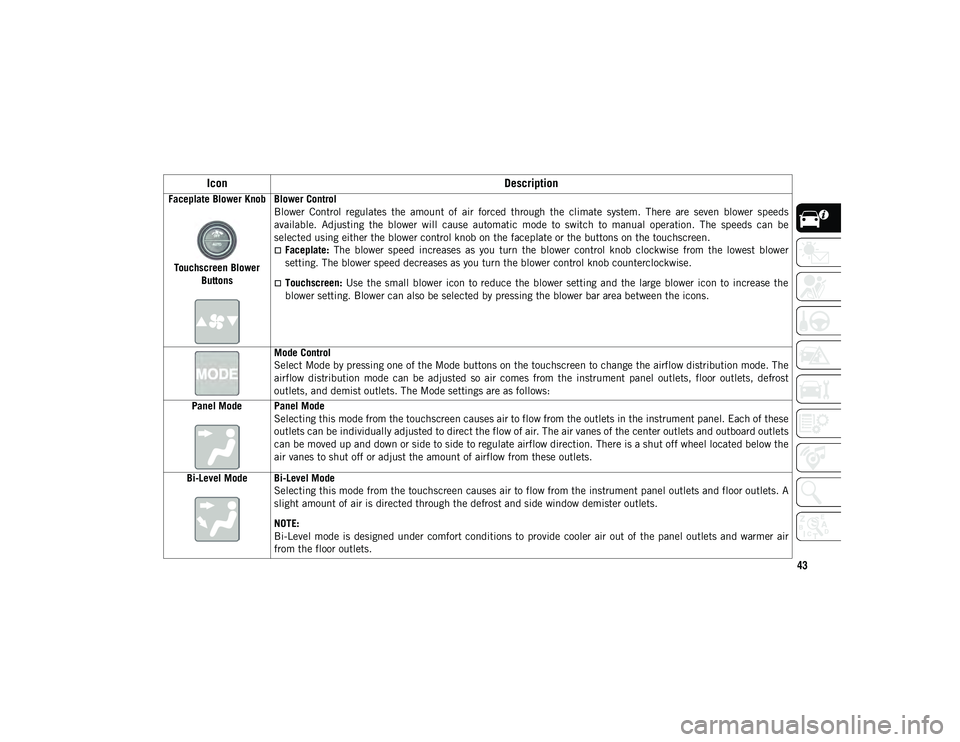
Faceplate Blower KnobTouchscreen Blower Buttons Blower Control
Blower Control regulates the amount of air forced through the climate system. There are seven blower speeds
available. Adjusting the blower will cause automatic mode to switch to manual operation. The speeds can be
selected using either the blower control knob on the faceplate or the buttons on the touchscreen.
Faceplate:
The blower speed increases as you turn the blower control knob clockwise from the lowest blower
setting. The blower speed decreases as you turn the blower control knob counterclockwise.
Touchscreen: Use the small blower icon to reduce the blower setting and the large blower icon to increase the
blower setting. Blower can also be selected by pressing the blower bar area between the icons.
Mode Control
Select Mode by pressing one of the Mode buttons on the touchscreen to change the airflow distribution mode. The
airflow distribution mode can be adjusted so air comes from the instrument panel outlets, floor outlets, defrost
outlets, and demist outlets. The Mode settings are as follows:
Panel Mode Panel Mode Selecting this mode from the touchscreen causes air to flow from the outlets in the instrument panel. Each of these
outlets can be individually adjusted to direct the flow of air. The air vanes of the center outlets and outboard outlets
can be moved up and down or side to side to regulate airflow direction. There is a shut off wheel located below the
air vanes to shut off or adjust the amount of airflow from these outlets.
Bi-Level Mode Bi-Level Mode Selecting this mode from the touchscreen causes air to flow from the instrument panel outlets and floor outlets. A
slight amount of air is directed through the defrost and side window demister outlets.
NOTE:
Bi-Level mode is designed under comfort conditions to provide cooler air out of the panel outlets and warmer air
from the floor outlets.
Icon Description
2020_JEEP_CHEROKEE_UG_RHD_UK.book Page 43
Page 46 of 332
GETTING TO KNOW YOUR VEHICLE
44
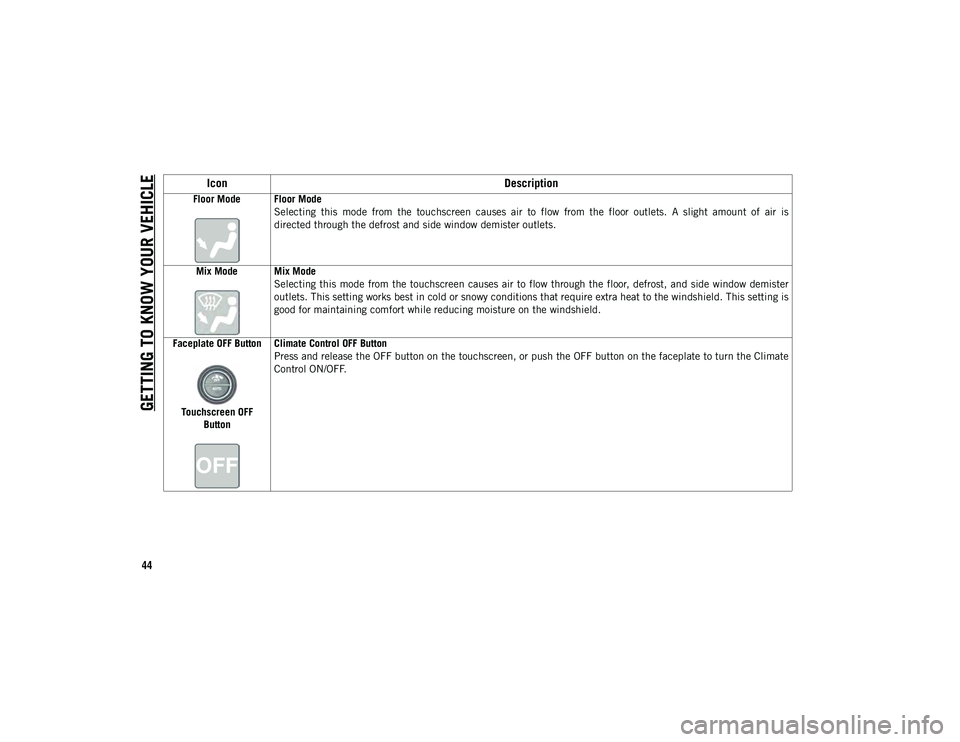
Floor Mode Floor ModeSelecting this mode from the touchscreen causes air to flow from the floor outlets. A slight amount of air is
directed through the defrost and side window demister outlets.
Mix Mode Mix Mode Selecting this mode from the touchscreen causes air to flow through the floor, defrost, and side window demister
outlets. This setting works best in cold or snowy conditions that require extra heat to the windshield. This setting is
good for maintaining comfort while reducing moisture on the windshield.
Faceplate OFF Button
Touchscreen OFF Button Climate Control OFF Button
Press and release the OFF button on the touchscreen, or push the OFF button on the faceplate to turn the Climate
Control ON/OFF.
Icon
Description
2020_JEEP_CHEROKEE_UG_RHD_UK.book Page 44
Page 47 of 332
45
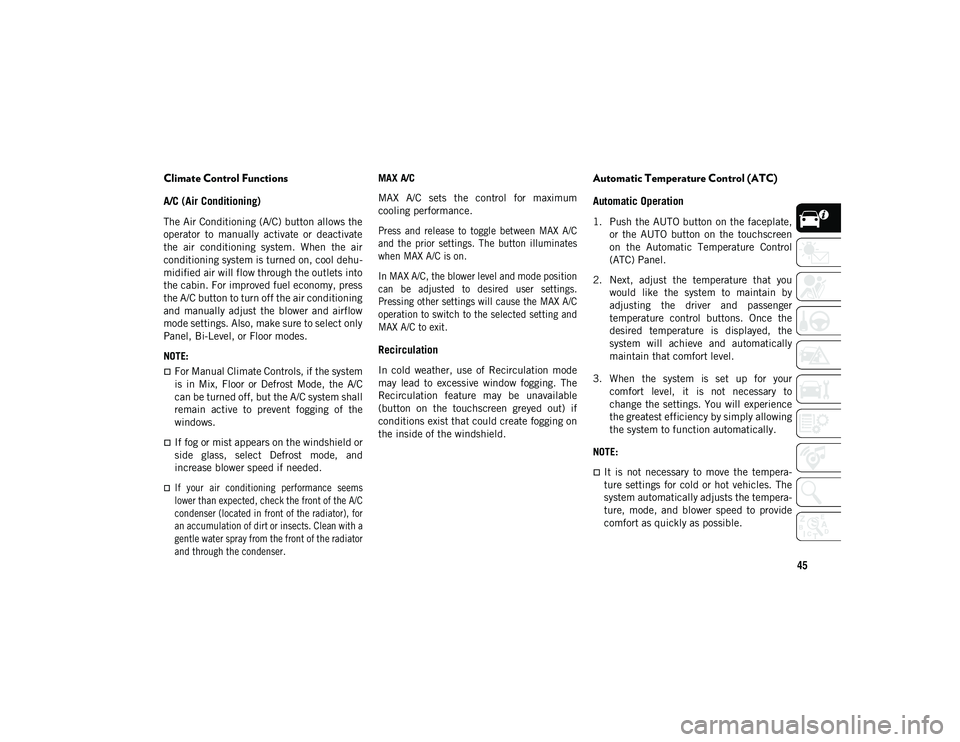
Climate Control Functions
A/C (Air Conditioning)
The Air Conditioning (A/C) button allows the
operator to manually activate or deactivate
the air conditioning system. When the air
conditioning system is turned on, cool dehu-
midified air will flow through the outlets into
the cabin. For improved fuel economy, press
the A/C button to turn off the air conditioning
and manually adjust the blower and airflow
mode settings. Also, make sure to select only
Panel, Bi-Level, or Floor modes.
NOTE:
For Manual Climate Controls, if the system
is in Mix, Floor or Defrost Mode, the A/C
can be turned off, but the A/C system shall
remain active to prevent fogging of the
windows.
If fog or mist appears on the windshield or
side glass, select Defrost mode, and
increase blower speed if needed.
If your air conditioning performance seems
lower than expected, check the front of the A/C
condenser (located in front of the radiator), for
an accumulation of dirt or insects. Clean with a
gentle water spray from the front of the radiator
and through the condenser.
MAX A/C
MAX A/C sets the control for maximum
cooling performance.
Press and release to toggle between MAX A/C
and the prior settings. The button illuminates
when MAX A/C is on.
In MAX A/C, the blower level and mode position
can be adjusted to desired user settings.
Pressing other settings will cause the MAX A/C
operation to switch to the selected setting and
MAX A/C to exit.
Recirculation
In cold weather, use of Recirculation mode
may lead to excessive window fogging. The
Recirculation feature may be unavailable
(button on the touchscreen greyed out) if
conditions exist that could create fogging on
the inside of the windshield.
Automatic Temperature Control (ATC)
Automatic Operation
1. Push the AUTO button on the faceplate,
or the AUTO button on the touchscreen
on the Automatic Temperature Control
(ATC) Panel.
2. Next, adjust the temperature that you would like the system to maintain by
adjusting the driver and passenger
temperature control buttons. Once the
desired temperature is displayed, the
system will achieve and automatically
maintain that comfort level.
3. When the system is set up for your comfort level, it is not necessary to
change the settings. You will experience
the greatest efficiency by simply allowing
the system to function automatically.
NOTE:
It is not necessary to move the tempera-
ture settings for cold or hot vehicles. The
system automatically adjusts the tempera-
ture, mode, and blower speed to provide
comfort as quickly as possible.
2020_JEEP_CHEROKEE_UG_RHD_UK.book Page 45