brake light JEEP CHEROKEE 2021 Owner handbook (in English)
[x] Cancel search | Manufacturer: JEEP, Model Year: 2021, Model line: CHEROKEE, Model: JEEP CHEROKEE 2021Pages: 332, PDF Size: 8.87 MB
Page 153 of 332
151
When operating your vehicle in 4WD LOW,
the engine speed is approximately three
times that of the normal driving mode at a
given road speed. Take care not to overspeed
the engine and do not exceed 50 mph
(80 km/h).
Proper operation of four-wheel drive vehicles
depends on tires of equal size, type, and
circumference on each wheel. Any difference
will adversely affect shifting and cause
damage to the driveline components.
Because four-wheel drive provides improved
traction, there is a tendency to exceed safe
turning and stopping speeds. Do not go
faster than road conditions permit.
Shift Positions
For additional information on the appropriate
use of each 4WD system mode position, see
the information below:
NEUTRAL (N)
This range disengages the driveline from the
powertrain.
4WD LOW
This range is for low speed four-wheel drive.
It provides an additional gear reduction
which allows for increased torque to be deliv-
ered to both the front and rear wheels while
providing maximum pulling power for loose,
slippery road surfaces only. Do not exceed
25 mph (40 km/h).
NOTE:
Refer to “Selec-Terrain — If Equipped” for
further information on the various positions
and their intended usages.
Shifting Procedures
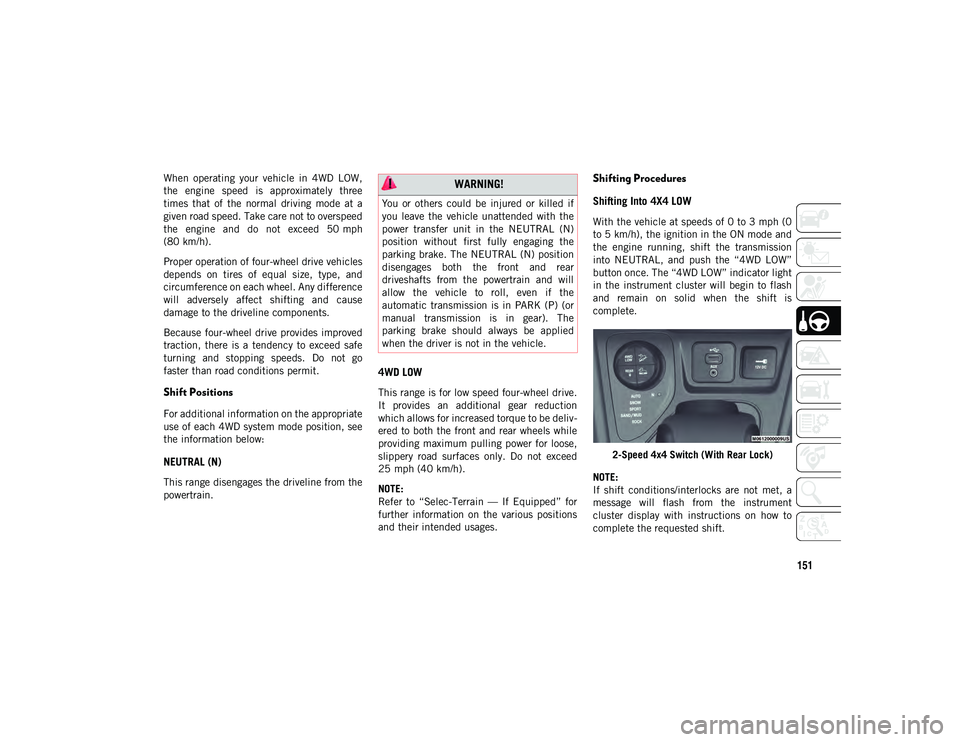
Shifting Into 4X4 LOW
With the vehicle at speeds of 0 to 3 mph (0
to 5 km/h), the ignition in the ON mode and
the engine running, shift the transmission
into NEUTRAL, and push the “4WD LOW”
button once. The “4WD LOW” indicator light
in the instrument cluster will begin to flash
and remain on solid when the shift is
complete.
2-Speed 4x4 Switch (With Rear Lock)
NOTE:
If shift conditions/interlocks are not met, a
message will flash from the instrument
cluster display with instructions on how to
complete the requested shift.
WARNING!
You or others could be injured or killed if
you leave the vehicle unattended with the
power transfer unit in the NEUTRAL (N)
position without first fully engaging the
parking brake. The NEUTRAL (N) position
disengages both the front and rear
driveshafts from the powertrain and will
allow the vehicle to roll, even if the
automatic transmission is in PARK (P) (or
manual transmission is in gear). The
parking brake should always be applied
when the driver is not in the vehicle.
2020_JEEP_CHEROKEE_UG_RHD_UK.book Page 151
Page 155 of 332
153
NOTE:
It may also be necessary to drive slowly
steering back and forth to complete
engagement and disengagement of the
E-Locker.
When disengaging Rear E-Locker, the indi-
cator lights in the instrument cluster and on
the REAR LOCK button will begin to flash.
When the shift is complete the REAR LOCK
indicator lights will remain off.
Shifting into or out of Rear E-Locker is
possible with the vehicle completely
stopped; however, difficulty may occur
due to the mating clutch teeth not being
properly aligned. Several attempts may be
required for clutch teeth alignment and
shift completion to occur. The preferred
method is for the vehicle to be rolling,
below 15 mph (24 km/h), while including
right and left steering maneuvers to allow
for the clutch teeth to align.
The Rear E-Locker System must be disen -
gaged prior to taking the vehicle out of
4WD LOW range. If 4WD LOW shift condi -
tions/interlocks are not met, a message
will flash from the instrument cluster
display with instructions on how to
complete the requested shift.
SELEC-TERRAIN
Description
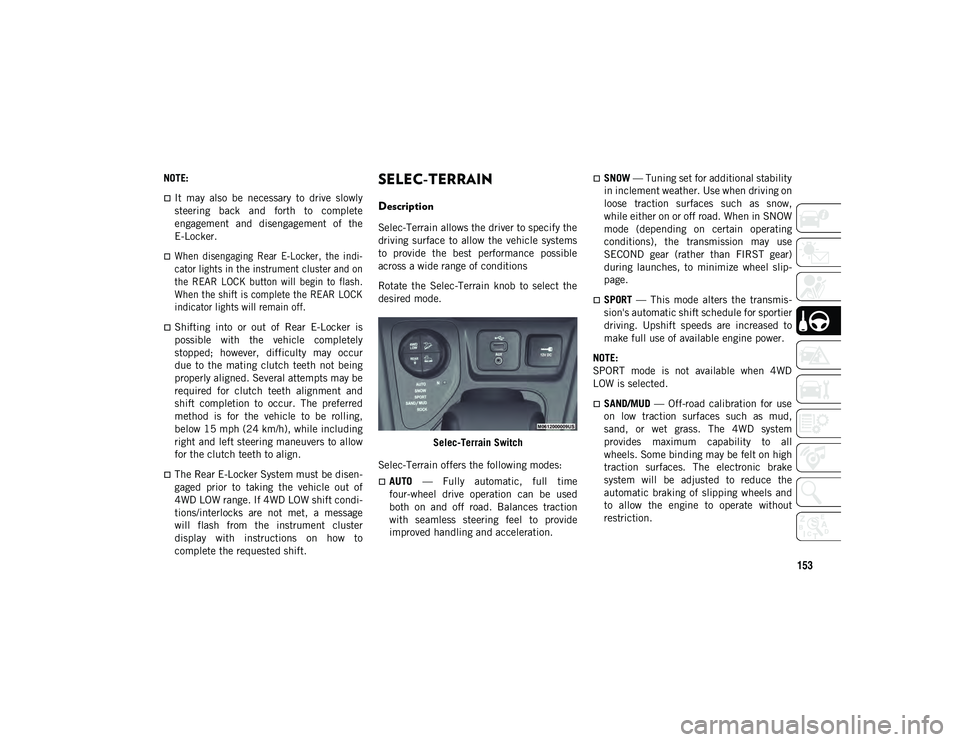
Selec-Terrain allows the driver to specify the
driving surface to allow the vehicle systems
to provide the best performance possible
across a wide range of conditions
Rotate the Selec-Terrain knob to select the
desired mode.
Selec-Terrain Switch
Selec-Terrain offers the following modes:
AUTO — Fully automatic, full time
four-wheel drive operation can be used
both on and off road. Balances traction
with seamless steering feel to provide
improved handling and acceleration.
SNOW — Tuning set for additional stability
in inclement weather. Use when driving on
loose traction surfaces such as snow,
while either on or off road. When in SNOW
mode (depending on certain operating
conditions), the transmission may use
SECOND gear (rather than FIRST gear)
during launches, to minimize wheel slip -
page.
SPORT — This mode alters the transmis -
sion's automatic shift schedule for sportier
driving. Upshift speeds are increased to
make full use of available engine power.
NOTE:
SPORT mode is not available when 4WD
LOW is selected.
SAND/MUD — Off-road calibration for use
on low traction surfaces such as mud,
sand, or wet grass. The 4WD system
provides maximum capability to all
wheels. Some binding may be felt on high
traction surfaces. The electronic brake
system will be adjusted to reduce the
automatic braking of slipping wheels and
to allow the engine to operate without
restriction.
2020_JEEP_CHEROKEE_UG_RHD_UK.book Page 153
Page 156 of 332
STARTING AND OPERATING
154
ROCK — Off-road calibration is only avail -
able in 4WD LOW range. ROCK mode
provides the most aggressive 4WD perfor -
mance for extreme off road terrain. Use for
low speed obstacles such as large rocks,
deep ruts, etc.
NOTE:
ROCK mode is only available on the vehi -
cles equipped with the Off-Road package.
Activate the Hill Descent Control or Selec
Speed Control for steep downhill control.
Refer to “Electronic Brake Control System”
in “Safety” for further information.
STOP/START SYSTEM
The Stop/Start function was developed to
reduce fuel consumption. The system will
stop the engine automatically during a
vehicle stop if the required conditions are
met. Releasing the brake pedal or pressing
the accelerator pedal will automatically
restart the engine.
This vehicle has been upgraded with a heavy
duty battery, starter, as well as other engine
parts, to handle the additional engine starts.
Automatic Mode
The Stop/Start feature is enabled after every
normal customer engine start. At that time,
the system will go into STOP/START READY
and if all other conditions are met, can go
into a STOP/START AUTOSTOP ACTIVE
“Autostop” mode.
To Activate The Autostop Mode, The Following
Must Occur:
The system must be in STOP/START
READY state. A STOP/START READY
message will be displayed in the instru -
ment cluster display within the Stop/Start
section. Refer to “Warning Lights And
Messages” in “Getting To Know Your
Instrument Panel” in your Owner’s
Manual.
The vehicle must be completely stopped.
The gear selector must be in a forward
gear and the brake pedal depressed.
The engine will shut down, the tachometer
will move to the zero position and the Stop/
Start telltale will illuminate indicating you
are in Autostop. Customer settings will be
maintained upon return to an engine running
condition. Refer to the “Stop/Start System” in the
“Starting And Operating” in your Owner’s
Manual.
Possible Reasons The Engine Does Not
Autostop
Prior to engine shut down, the system will
check many safety and comfort conditions to
see if they are fulfilled. Detailed information
about the operation of the Stop/Start system
may be viewed in the instrument cluster
display Stop/Start Screen. In the following
situations, the engine will not stop:
Driver’s seat belt is not buckled
Driver’s door is not closed
Battery temperature is too warm or cold
Battery charge is low
The vehicle is on a steep grade
Cabin heating or cooling is in process and
an acceptable cabin temperature has not
been achieved
HVAC is set to full defrost mode at a high
blower speed
HVAC set to MAX A/C
2020_JEEP_CHEROKEE_UG_RHD_UK.book Page 154
Page 158 of 332
STARTING AND OPERATING
156
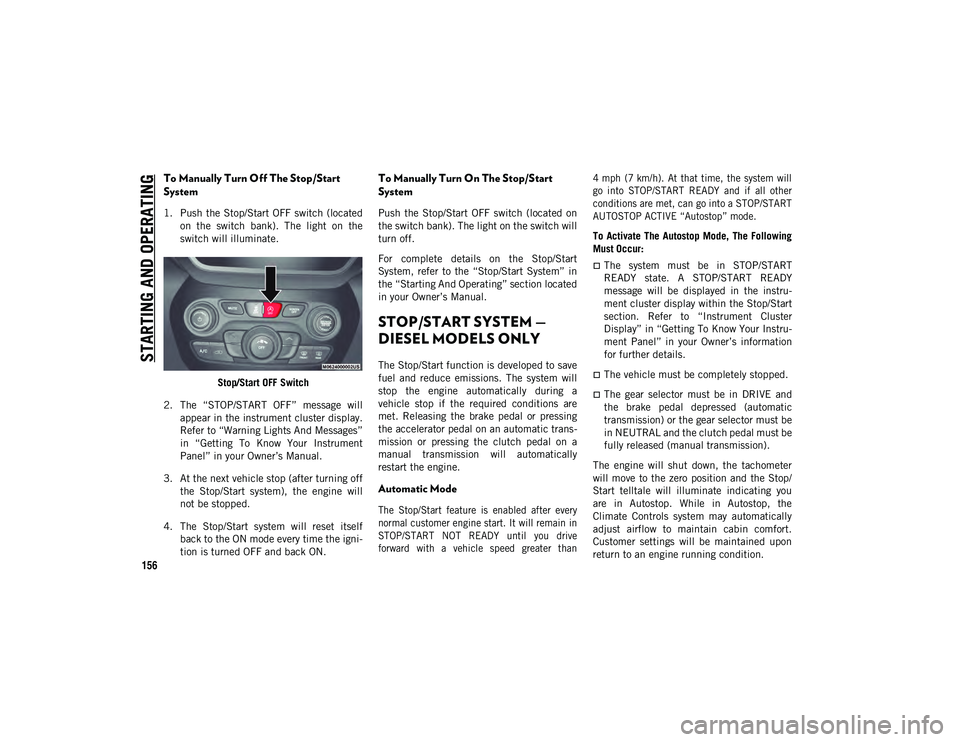
To Manually Turn Off The Stop/Start
System
1. Push the Stop/Start OFF switch (locatedon the switch bank). The light on the
switch will illuminate.
Stop/Start OFF Switch
2. The “STOP/START OFF” message will appear in the instrument cluster display.
Refer to “Warning Lights And Messages”
in “Getting To Know Your Instrument
Panel” in your Owner’s Manual.
3. At the next vehicle stop (after turning off the Stop/Start system), the engine will
not be stopped.
4. The Stop/Start system will reset itself back to the ON mode every time the igni -
tion is turned OFF and back ON.
To Manually Turn On The Stop/Start
System
Push the Stop/Start OFF switch (located on
the switch bank). The light on the switch will
turn off.
For complete details on the Stop/Start
System, refer to the “Stop/Start System” in
the “Starting And Operating” section located
in your Owner’s Manual.
STOP/START SYSTEM —
DIESEL MODELS ONLY
The Stop/Start function is developed to save
fuel and reduce emissions. The system will
stop the engine automatically during a
vehicle stop if the required conditions are
met. Releasing the brake pedal or pressing
the accelerator pedal on an automatic trans -
mission or pressing the clutch pedal on a
manual transmission will automatically
restart the engine.
Automatic Mode
The Stop/Start feature is enabled after every
normal customer engine start. It will remain in
STOP/START NOT READY until you drive
forward with a vehicle speed greater than 4 mph (7 km/h). At that time, the system will
go into STOP/START READY and if all other
conditions are met, can go into a STOP/START
AUTOSTOP ACTIVE “Autostop” mode.
To Activate The Autostop Mode, The Following
Must Occur:
The system must be in STOP/START
READY state. A STOP/START READY
message will be displayed in the instru
-
ment cluster display within the Stop/Start
section. Refer to “Instrument Cluster
Display” in “Getting To Know Your Instru -
ment Panel” in your Owner’s information
for further details.
The vehicle must be completely stopped.
The gear selector must be in DRIVE and
the brake pedal depressed (automatic
transmission) or the gear selector must be
in NEUTRAL and the clutch pedal must be
fully released (manual transmission).
The engine will shut down, the tachometer
will move to the zero position and the Stop/
Start telltale will illuminate indicating you
are in Autostop. While in Autostop, the
Climate Controls system may automatically
adjust airflow to maintain cabin comfort.
Customer settings will be maintained upon
return to an engine running condition.
2020_JEEP_CHEROKEE_UG_RHD_UK.book Page 156
Page 160 of 332
STARTING AND OPERATING
158
Conditions That Force An Application Of The
Electric Park Brake While In Autostop Mode:
The driver door is open and brake pedal
released.
The driver door is open and the driver seat
belt is unbuckled.
The engine hood has been opened.
A Stop/Start system error occurs.
If the Electric Park Brake is applied with the
engine off, the engine may require a manual
restart and the electric park brake may
require a manual release (depress brake
pedal and push Electric Park Brake switch).
Refer to “Instrument Cluster Display” in
“Getting To Know Your Instrument Panel” in
your Owner’s Manual for further information.
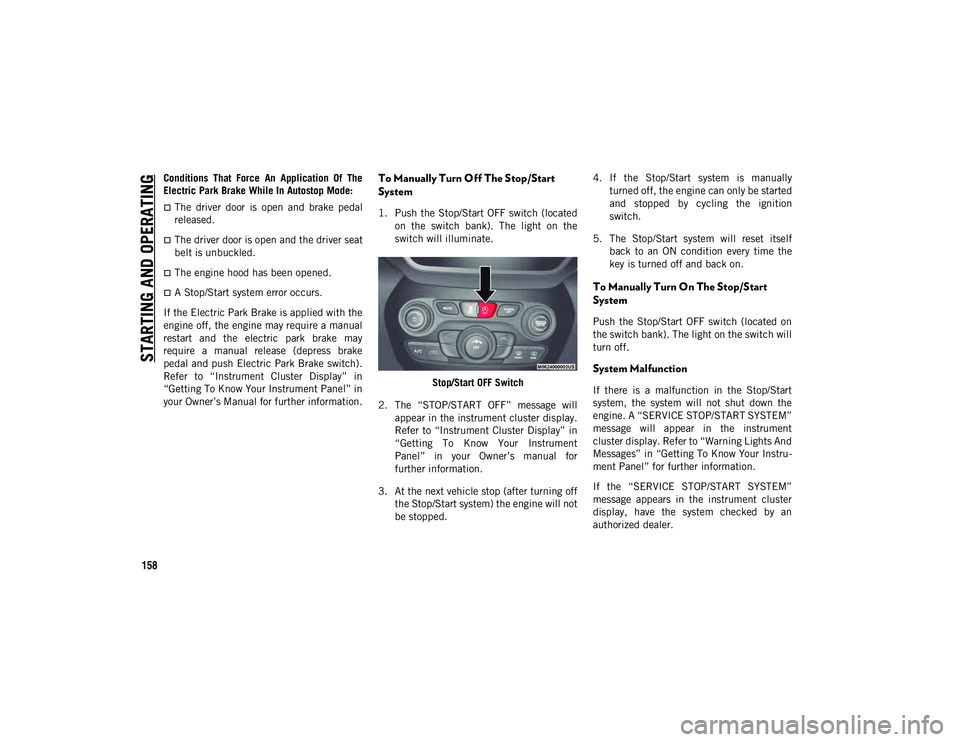
To Manually Turn Off The Stop/Start
System
1. Push the Stop/Start OFF switch (located on the switch bank). The light on the
switch will illuminate.
Stop/Start OFF Switch
2. The “STOP/START OFF” message will appear in the instrument cluster display.
Refer to “Instrument Cluster Display” in
“Getting To Know Your Instrument
Panel” in your Owner’s manual for
further information.
3. At the next vehicle stop (after turning off the Stop/Start system) the engine will not
be stopped. 4. If the Stop/Start system is manually
turned off, the engine can only be started
and stopped by cycling the ignition
switch.
5. The Stop/Start system will reset itself back to an ON condition every time the
key is turned off and back on.
To Manually Turn On The Stop/Start
System
Push the Stop/Start OFF switch (located on
the switch bank). The light on the switch will
turn off.
System Malfunction
If there is a malfunction in the Stop/Start
system, the system will not shut down the
engine. A “SERVICE STOP/START SYSTEM”
message will appear in the instrument
cluster display. Refer to “Warning Lights And
Messages” in “Getting To Know Your Instru -
ment Panel” for further information.
If the “SERVICE STOP/START SYSTEM”
message appears in the instrument cluster
display, have the system checked by an
authorized dealer.
2020_JEEP_CHEROKEE_UG_RHD_UK.book Page 158
Page 166 of 332
STARTING AND OPERATING
164
(resume) button, or apply the accelerator
pedal to reengage the ACC to the existing
set speed.
The ACC system maintains set speed when
driving uphill and downhill. However, a
slight speed change on moderate hills is
normal. In addition, downshifting may
occur while climbing uphill or descending
downhill. This is normal operation and
necessary to maintain set speed. When
driving uphill and downhill, the ACC
system will cancel if the braking tempera-
ture exceeds normal range (overheated).
Setting The Following Distance In ACC
The specified following distance for ACC can
be set by varying the distance setting
between four bars (longest), three bars
(long), two bars (medium) and one bar
(short). Using this distance setting and the
vehicle speed, ACC calculates and sets the
distance to the vehicle ahead. This distance
setting appears in the instrument cluster
display.
To increase the distance setting, push the
Distance Setting — Increase button and
release. Each time the button is pushed, the
distance setting increases by one bar (longer).
To decrease the distance setting, push the
Distance Setting — Decrease button and
release. Each time the button is pushed, the
distance setting decreases by one bar
(shorter).
PARKSENSE REAR PARK
ASSIST — IF EQUIPPED
The ParkSense Rear Park Assist system
provides visual and audible indications of
the distance between the rear fascia and a
detected obstacle when backing up (e.g.
during a parking maneuver). The vehicle
brakes may be automatically applied and
released when performing a reverse parking
maneuver if the system detects a possible
collision with an obstacle. Refer to “Ucon
-
nect Settings” in “Multimedia” in the
Owner’s Manual for information on turning
Rear Braking Assist on or off.
Refer to “ParkSense System Usage Precau -
tions” in this section for limitations of this
system and recommendations.
ParkSense will retain the last system state
(enabled or disabled) from the last ignition
cycle when the ignition is changed to the ON/
RUN position.
ParkSense Sensors
The four ParkSense sensors, located in the
rear fascia/bumper, monitor the area behind
the vehicle that is within the sensors’ field of
view. The sensors can detect obstacles from
approximately 12 inches (30 cm) up to
79 inches (200 cm) from the rear fascia/
bumper in the horizontal direction,
depending on the location, type and orienta -
tion of the obstacle.
ParkSense Warning Display
The ParkSense Warning screen will only be
displayed if Sound and Display is selected
from the Customer - Programmable Features
section of the Uconnect System.
Refer to "Uconnect Settings” in “Multi -
media” in the Owner’s Manual for further
information.
The ParkSense Warning screen is located
within the instrument cluster display. It
provides visual warnings to indicate the
distance between the rear fascia/bumper and
the detected obstacle.
Refer to “Instrument Cluster Display” in
“Getting To Know Your Instrument Panel” in
the Owner’s Manual for further information.
2020_JEEP_CHEROKEE_UG_RHD_UK.book Page 164
Page 192 of 332
IN CASE OF EMERGENCY
190
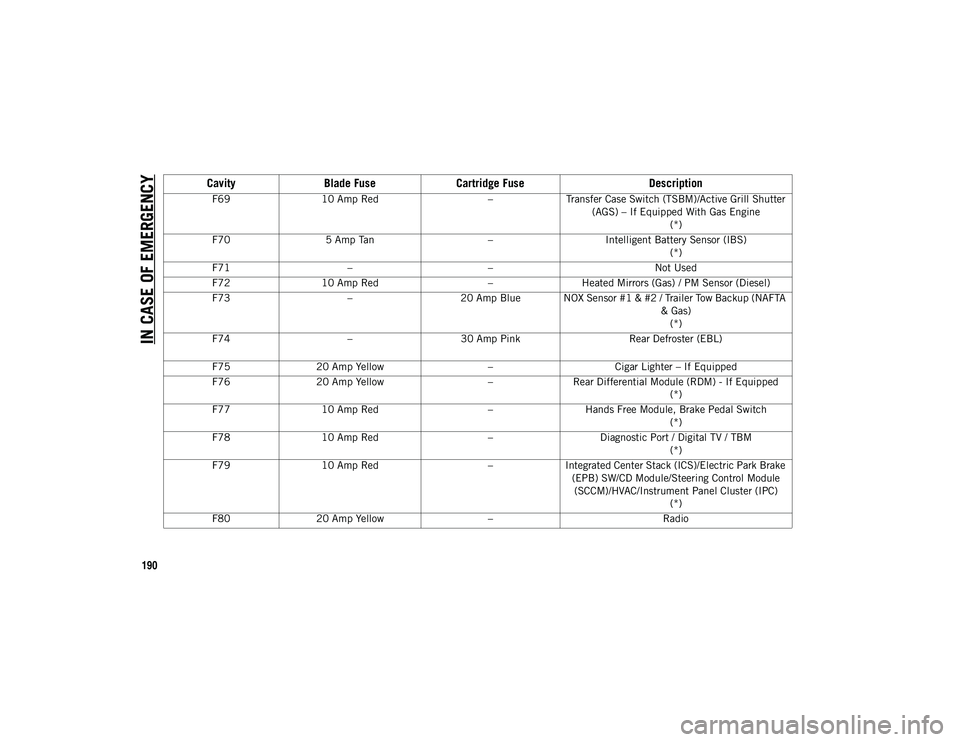
F6910 Amp Red –Transfer Case Switch (TSBM)/Active Grill Shutter
(AGS) – If Equipped With Gas Engine (*)
F70 5 Amp Tan –Intelligent Battery Sensor (IBS)
(*)
F71 – – Not Used
F72 10 Amp Red –Heated Mirrors (Gas) / PM Sensor (Diesel)
F73 –20 Amp Blue NOX Sensor #1 & #2 / Trailer Tow Backup (NAFTA
& Gas)(*)
F74 –30 Amp Pink Rear Defroster (EBL)
F75 20 Amp Yellow –Cigar Lighter – If Equipped
F76 20 Amp Yellow –Rear Differential Module (RDM) - If Equipped
(*)
F77 10 Amp Red –Hands Free Module, Brake Pedal Switch
(*)
F78 10 Amp Red –Diagnostic Port / Digital TV / TBM
(*)
F79 10 Amp Red –Integrated Center Stack (ICS)/Electric Park Brake
(EPB) SW/CD Module/Steering Control Module (SCCM)/HVAC/Instrument Panel Cluster (IPC) (*)
F80 20 Amp Yellow – Radio
CavityBlade Fuse Cartridge Fuse Description
2020_JEEP_CHEROKEE_UG_RHD_UK.book Page 190
Page 212 of 332
IN CASE OF EMERGENCY
210
(Continued)
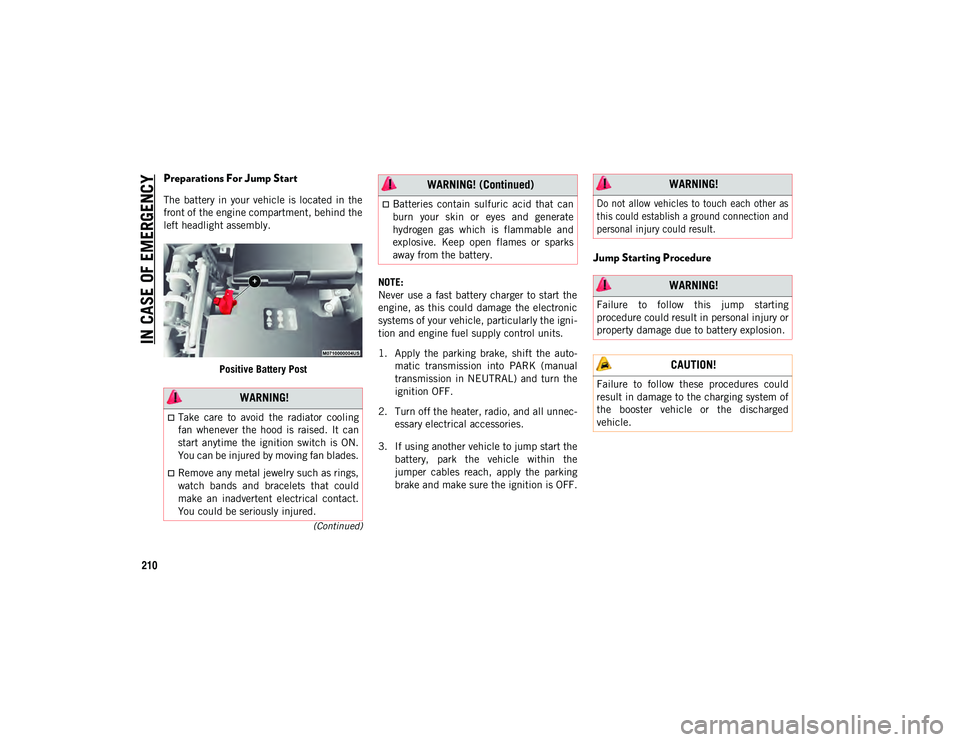
Preparations For Jump Start
The battery in your vehicle is located in the
front of the engine compartment, behind the
left headlight assembly.Positive Battery Post NOTE:
Never use a fast battery charger to start the
engine, as this could damage the electronic
systems of your vehicle, particularly the igni
-
tion and engine fuel supply control units.
1. Apply the parking brake, shift the auto -
matic transmission into PARK (manual
transmission in NEUTRAL) and turn the
ignition OFF.
2. Turn off the heater, radio, and all unnec -
essary electrical accessories.
3. If using another vehicle to jump start the battery, park the vehicle within the
jumper cables reach, apply the parking
brake and make sure the ignition is OFF.
Jump Starting Procedure
WARNING!
Take care to avoid the radiator cooling
fan whenever the hood is raised. It can
start anytime the ignition switch is ON.
You can be injured by moving fan blades.
Remove any metal jewelry such as rings,
watch bands and bracelets that could
make an inadvertent electrical contact.
You could be seriously injured.
Batteries contain sulfuric acid that can
burn your skin or eyes and generate
hydrogen gas which is flammable and
explosive. Keep open flames or sparks
away from the battery.
WARNING! (Continued) WARNING!
Do not allow vehicles to touch each other as
this could establish a ground connection and
personal injury could result.
WARNING!
Failure to follow this jump starting
procedure could result in personal injury or
property damage due to battery explosion.
CAUTION!
Failure to follow these procedures could
result in damage to the charging system of
the booster vehicle or the discharged
vehicle.
2020_JEEP_CHEROKEE_UG_RHD_UK.book Page 210
Page 221 of 332
219
Once A Month Or Before A Long Trip
Check engine oil level.
Check windshield washer fluid level.
Check tire pressure and look for unusual
wear or damage. Rotate tires at the first
sign of irregular wear, even if it occurs
before the oil indicator system turns on.
Check the fluid levels of the coolant reser-
voir and brake master cylinder, fill as
needed.
Check function of all interior and exterior
lights. At Each Oil Change
Change oil and filter.
Rotate the tires.
Rotate at the first sign of
irregular wear, even if it occurs before the
oil indicator system turns on.
Inspect battery and clean and tighten
terminals as required.
Inspect the CV/Universal joints.
Inspect brake pads, shoes, rotors, drums,
hoses and park brake.
Inspect engine cooling system protection
and hoses.
Inspect exhaust system.
Inspect engine air cleaner if using in dusty
or off-road conditions. Maintenance Plan — Gasoline Engine
NOTE:
Once you have carried out the last interven
-
tion in the table, continue with the sched -
uled servicing, maintaining the frequency
indicated in the plan by marking each oper -
ation with a dot or dedicated note. Simply
restarting the maintenance from the start of
the plan may cause the allowed interval to be
exceeded for some operations.
CAUTION!
Failure to perform the required
maintenance items may result in damage
to the vehicle.
2020_JEEP_CHEROKEE_UG_RHD_UK.book Page 219
Page 227 of 332
225
Once A Month Or Before A Long Trip
Check engine oil level.
Check windshield washer fluid level.
Check tire pressure and look for unusual
wear or damage. Rotate tires at the first
sign of irregular wear, even if it occurs
before the oil indicator system turns on.
Check the fluid levels of the coolant reser-
voir and brake master cylinder, fill as
needed.
Check function of all interior and exterior
lights.
Control and recovery of additive level for
AdBlue® Diesel emissions (UREA) (if
equipped) At Each Oil Change
Change the engine oil filter.
Inspect the brake hoses and lines.
Inspect for the presence of water in the
fuel filter/water separator unit.
Inspect the CV/Universal joints.
Demanding Vehicle Use
Restore additive level for AdBlue® Diesel
emissions (UREA) (if equipped), when the
lamp is illuminated or the message on the
instrument panel.
Maintenance Plan — Diesel Engine
NOTE:
Once you have carried out the last interven -
tion in the table, continue with the sched -
uled servicing, maintaining the frequency
indicated in the plan by marking each oper -
ation with a dot or dedicated note. Simply
restarting the maintenance from the start of
the plan may cause the allowed interval to be
exceeded for some operations.
CAUTION!
Failure to perform the required
maintenance items may result in damage
to the vehicle.
2020_JEEP_CHEROKEE_UG_RHD_UK.book Page 225