air filter JEEP CHEROKEE 2023 Owners Manual
[x] Cancel search | Manufacturer: JEEP, Model Year: 2023, Model line: CHEROKEE, Model: JEEP CHEROKEE 2023Pages: 276, PDF Size: 12.55 MB
Page 7 of 276
5
IN CASE OF EMERGENCY
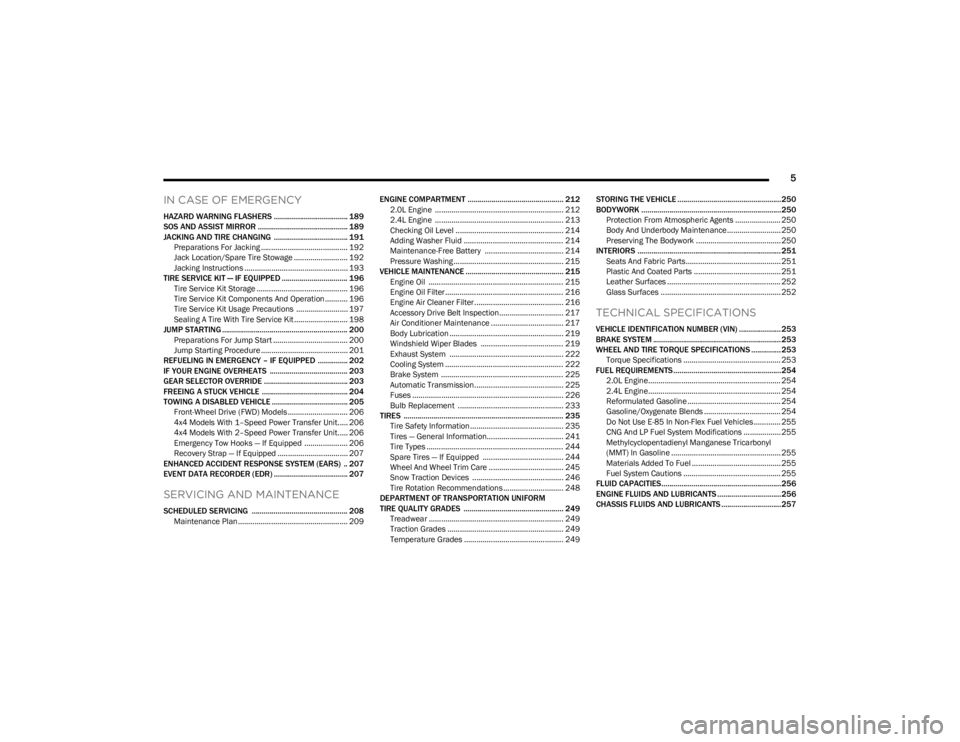
HAZARD WARNING FLASHERS ..................................... 189
SOS AND ASSIST MIRROR ............................................. 189
JACKING AND TIRE CHANGING ..................................... 191 Preparations For Jacking .......................................... 192
Jack Location/Spare Tire Stowage .......................... 192Jacking Instructions .................................................. 193
TIRE SERVICE KIT — IF EQUIPPED ................................. 196 Tire Service Kit Storage ............................................ 196
Tire Service Kit Components And Operation ........... 196Tire Service Kit Usage Precautions ......................... 197Sealing A Tire With Tire Service Kit .......................... 198
JUMP STARTING ............................................................... 200 Preparations For Jump Start .................................... 200
Jump Starting Procedure .......................................... 201
REFUELING IN EMERGENCY – IF EQUIPPED ............... 202
IF YOUR ENGINE OVERHEATS ....................................... 203
GEAR SELECTOR OVERRIDE .......................................... 203
FREEING A STUCK VEHICLE ........................................... 204
TOWING A DISABLED VEHICLE ...................................... 205 Front-Wheel Drive (FWD) Models ............................. 206
4x4 Models With 1–Speed Power Transfer Unit..... 2064x4 Models With 2–Speed Power Transfer Unit..... 206Emergency Tow Hooks — If Equipped ..................... 206
Recovery Strap — If Equipped .................................. 207
ENHANCED ACCIDENT RESPONSE SYSTEM (EARS) .. 207
EVENT DATA RECORDER (EDR) ..................................... 207
SERVICING AND MAINTENANCE
SCHEDULED SERVICING ................................................ 208 Maintenance Plan ..................................................... 209 ENGINE COMPARTMENT ................................................ 212
2.0L Engine .............................................................. 212
2.4L Engine .............................................................. 213
Checking Oil Level .................................................... 214
Adding Washer Fluid ................................................ 214
Maintenance-Free Battery ...................................... 214
Pressure Washing ..................................................... 215
VEHICLE MAINTENANCE ................................................. 215 Engine Oil ................................................................. 215Engine Oil Filter ......................................................... 216Engine Air Cleaner Filter ........................................... 216Accessory Drive Belt Inspection............................... 217
Air Conditioner Maintenance ................................... 217Body Lubrication ....................................................... 219
Windshield Wiper Blades ........................................ 219
Exhaust System ....................................................... 222
Cooling System ......................................................... 222Brake System ........................................................... 225
Automatic Transmission........................................... 225Fuses ......................................................................... 226
Bulb Replacement ................................................... 233
TIRES ................................................................................ 235 Tire Safety Information ............................................. 235
Tires — General Information..................................... 241
Tire Types .................................................................. 244
Spare Tires — If Equipped ....................................... 244
Wheel And Wheel Trim Care .................................... 245Snow Traction Devices ............................................ 246
Tire Rotation Recommendations ............................. 248
DEPARTMENT OF TRANSPORTATION UNIFORM
TIRE QUALITY GRADES .................................................. 249 Treadwear ................................................................. 249Traction Grades ........................................................ 249Temperature Grades ................................................ 249 STORING THE VEHICLE ....................................................250
BODYWORK ......................................................................250
Protection From Atmospheric Agents ...................... 250
Body And Underbody Maintenance.......................... 250
Preserving The Bodywork ......................................... 250
INTERIORS ........................................................................ 251 Seats And Fabric Parts.............................................. 251Plastic And Coated Parts .......................................... 251
Leather Surfaces ....................................................... 252
Glass Surfaces .......................................................... 252
TECHNICAL SPECIFICATIONS
VEHICLE IDENTIFICATION NUMBER (VIN) ..................... 253
BRAKE SYSTEM ................................................................ 253
WHEEL AND TIRE TORQUE SPECIFICATIONS ...............253 Torque Specifications ............................................... 253
FUEL REQUIREMENTS......................................................254 2.0L Engine................................................................ 254
2.4L Engine................................................................ 254
Reformulated Gasoline ............................................. 254Gasoline/Oxygenate Blends ..................................... 254
Do Not Use E-85 In Non-Flex Fuel Vehicles ............. 255
CNG And LP Fuel System Modifications .................. 255Methylcyclopentadienyl Manganese Tricarbonyl
(MMT) In Gasoline ..................................................... 255Materials Added To Fuel ........................................... 255
Fuel System Cautions ............................................... 255
FLUID CAPACITIES............................................................256
ENGINE FLUIDS AND LUBRICANTS ................................256
CHASSIS FLUIDS AND LUBRICANTS ..............................257
23_KL_OM_EN_USC_t.book Page 5
Page 50 of 276
48GETTING TO KNOW YOUR VEHICLE
AUTOMATIC TEMPERATURE CONTROL
(ATC) — I
F EQUIPPED
Automatic Operation
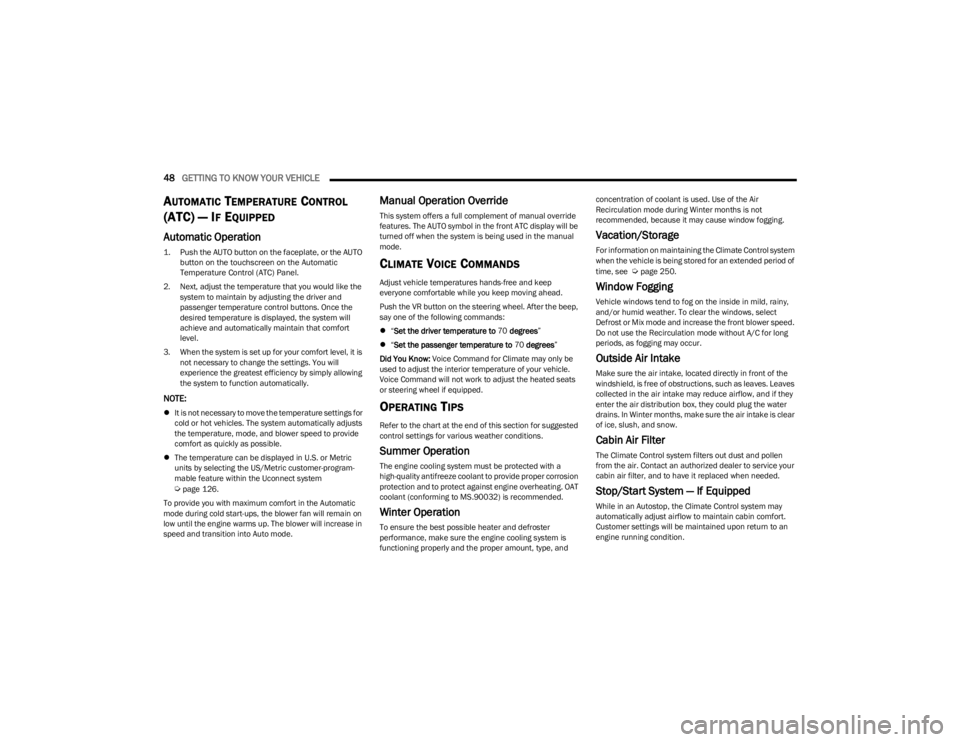
1. Push the AUTO button on the faceplate, or the AUTO
button on the touchscreen on the Automatic
Temperature Control (ATC) Panel.
2. Next, adjust the temperature that you would like the system to maintain by adjusting the driver and
passenger temperature control buttons. Once the
desired temperature is displayed, the system will
achieve and automatically maintain that comfort
level.
3. When the system is set up for your comfort level, it is not necessary to change the settings. You will
experience the greatest efficiency by simply allowing
the system to function automatically.
NOTE:
It is not necessary to move the temperature settings for
cold or hot vehicles. The system automatically adjusts
the temperature, mode, and blower speed to provide
comfort as quickly as possible.
The temperature can be displayed in U.S. or Metric
units by selecting the US/Metric customer-program -
mable feature within the Uconnect system
Úpage 126.
To provide you with maximum comfort in the Automatic
mode during cold start-ups, the blower fan will remain on
low until the engine warms up. The blower will increase in
speed and transition into Auto mode.
Manual Operation Override
This system offers a full complement of manual override
features. The AUTO symbol in the front ATC display will be
turned off when the system is being used in the manual
mode.
CLIMATE VOICE COMMANDS
Adjust vehicle temperatures hands-free and keep
everyone comfortable while you keep moving ahead.
Push the VR button on the steering wheel. After the beep,
say one of the following commands:
“Set the driver temperature to 70 degrees ”
“Set the passenger temperature to 70 degrees ”
Did You Know: Voice Command for Climate may only be
used to adjust the interior temperature of your vehicle.
Voice Command will not work to adjust the heated seats
or steering wheel if equipped.
OPERATING TIPS
Refer to the chart at the end of this section for suggested
control settings for various weather conditions.
Summer Operation
The engine cooling system must be protected with a
high-quality antifreeze coolant to provide proper corrosion
protection and to protect against engine overheating. OAT
coolant (conforming to MS.90032) is recommended.
Winter Operation
To ensure the best possible heater and defroster
performance, make sure the engine cooling system is
functioning properly and the proper amount, type, and concentration of coolant is used. Use of the Air
Recirculation mode during Winter months is not
recommended, because it may cause window fogging.
Vacation/Storage
For information on maintaining the Climate Control system
when the vehicle is being stored for an extended period of
time, see
Úpage 250.
Window Fogging
Vehicle windows tend to fog on the inside in mild, rainy,
and/or humid weather. To clear the windows, select
Defrost or Mix mode and increase the front blower speed.
Do not use the Recirculation mode without A/C for long
periods, as fogging may occur.
Outside Air Intake
Make sure the air intake, located directly in front of the
windshield, is free of obstructions, such as leaves. Leaves
collected in the air intake may reduce airflow, and if they
enter the air distribution box, they could plug the water
drains. In Winter months, make sure the air intake is clear
of ice, slush, and snow.
Cabin Air Filter
The Climate Control system filters out dust and pollen
from the air. Contact an authorized dealer to service your
cabin air filter, and to have it replaced when needed.
Stop/Start System — If Equipped
While in an Autostop, the Climate Control system may
automatically adjust airflow to maintain cabin comfort.
Customer settings will be maintained upon return to an
engine running condition.
23_KL_OM_EN_USC_t.book Page 48
Page 177 of 276
SAFETY175
(Continued)
NOTE:
Air bag covers may not be obvious in the interior trim,
but they will open during air bag deployment.
After any collision, the vehicle should be taken to an
authorized dealer immediately.
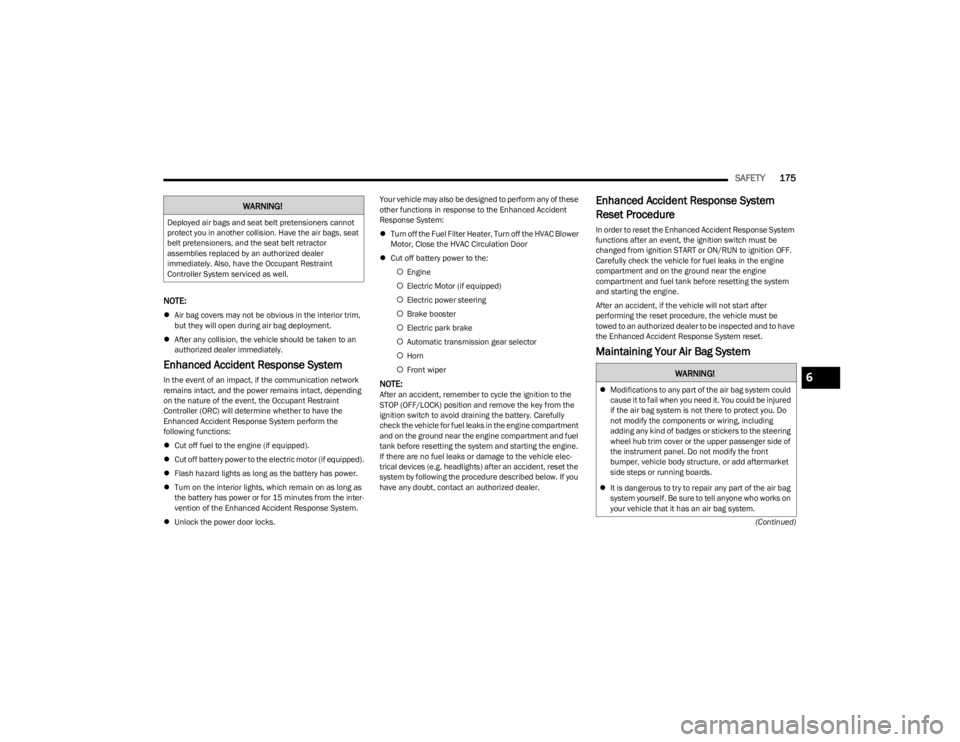
Enhanced Accident Response System
In the event of an impact, if the communication network
remains intact, and the power remains intact, depending
on the nature of the event, the Occupant Restraint
Controller (ORC) will determine whether to have the
Enhanced Accident Response System perform the
following functions:
Cut off fuel to the engine (if equipped).
Cut off battery power to the electric motor (if equipped).
Flash hazard lights as long as the battery has power.
Turn on the interior lights, which remain on as long as
the battery has power or for 15 minutes from the inter -
vention of the Enhanced Accident Response System.
Unlock the power door locks. Your vehicle may also be designed to perform any of these
other functions in response to the Enhanced Accident
Response System:
Turn off the Fuel Filter Heater, Turn off the HVAC Blower
Motor, Close the HVAC Circulation Door
Cut off battery power to the:
Engine
Electric Motor (if equipped)
Electric power steering
Brake booster
Electric park brake
Automatic transmission gear selector
Horn
Front wiperNOTE:After an accident, remember to cycle the ignition to the
STOP (OFF/LOCK) position and remove the key from the
ignition switch to avoid draining the battery. Carefully
check the vehicle for fuel leaks in the engine compartment
and on the ground near the engine compartment and fuel
tank before resetting the system and starting the engine.
If there are no fuel leaks or damage to the vehicle elec -
trical devices (e.g. headlights) after an accident, reset the
system by following the procedure described below. If you
have any doubt, contact an authorized dealer.
Enhanced Accident Response System
Reset Procedure
In order to reset the Enhanced Accident Response System
functions after an event, the ignition switch must be
changed from ignition START or ON/RUN to ignition OFF.
Carefully check the vehicle for fuel leaks in the engine
compartment and on the ground near the engine
compartment and fuel tank before resetting the system
and starting the engine.
After an accident, if the vehicle will not start after
performing the reset procedure, the vehicle must be
towed to an authorized dealer to be inspected and to have
the Enhanced Accident Response System reset.
Maintaining Your Air Bag System
WARNING!
Deployed air bags and seat belt pretensioners cannot
protect you in another collision. Have the air bags, seat
belt pretensioners, and the seat belt retractor
assemblies replaced by an authorized dealer
immediately. Also, have the Occupant Restraint
Controller System serviced as well.
WARNING!
Modifications to any part of the air bag system could
cause it to fail when you need it. You could be injured
if the air bag system is not there to protect you. Do
not modify the components or wiring, including
adding any kind of badges or stickers to the steering
wheel hub trim cover or the upper passenger side of
the instrument panel. Do not modify the front
bumper, vehicle body structure, or add aftermarket
side steps or running boards.
It is dangerous to try to repair any part of the air bag
system yourself. Be sure to tell anyone who works on
your vehicle that it has an air bag system.6
23_KL_OM_EN_USC_t.book Page 175
Page 211 of 276
SERVICING AND MAINTENANCE209
MAINTENANCE PLAN
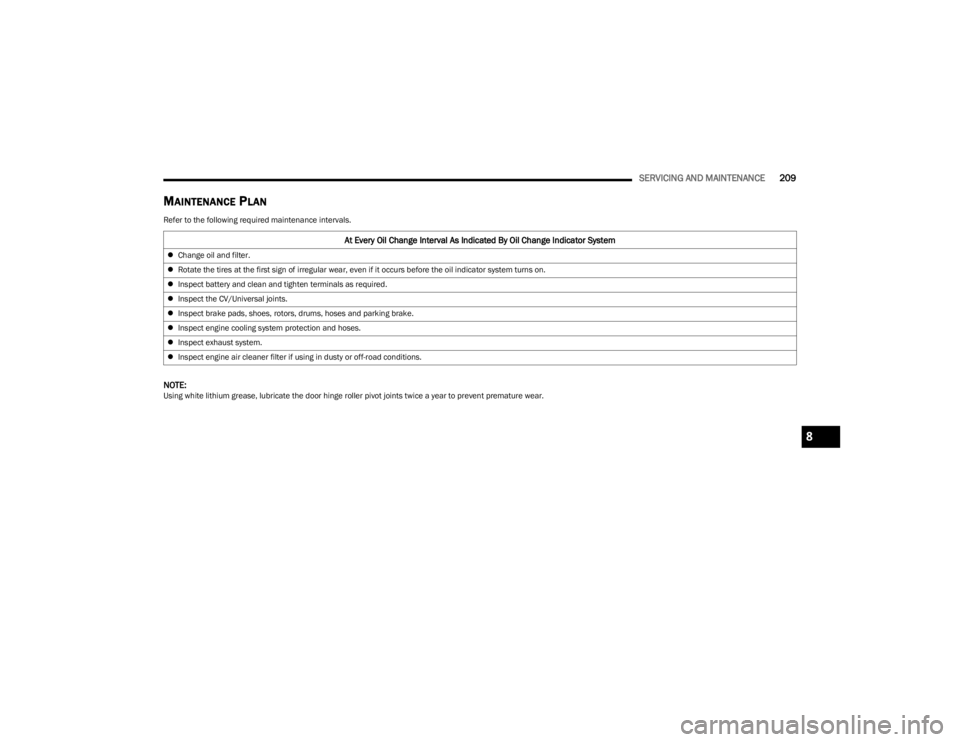
Refer to the following required maintenance intervals.
NOTE:Using white lithium grease, lubricate the door hinge roller pivot joints twice a year to prevent premature wear.
At Every Oil Change Interval As Indicated By Oil Change Indicator System
Change oil and filter.
Rotate the tires at the first sign of irregular wear, even if it occurs before the oil indicator system turns on.
Inspect battery and clean and tighten terminals as required.
Inspect the CV/Universal joints.
Inspect brake pads, shoes, rotors, drums, hoses and parking brake.
Inspect engine cooling system protection and hoses.
Inspect exhaust system.
Inspect engine air cleaner filter if using in dusty or off-road conditions.
8
23_KL_OM_EN_USC_t.book Page 209
Page 212 of 276

210SERVICING AND MAINTENANCE
Mileage Or Time Passed (Whichever Comes First)20,000
30,000
40,000
50,000
60,000
70,000
80,000
90,000
100,000
110,000
120,000
130,000
140,000
150,000
Or Years: 2 3 4 5 6 7 8 9 10 11 12 13 14 15
Or Kilometers:
32,000
48,000
64,000
80,000
96,000
112,000
128,000
144,000
160,000
176,000
192,000
208,000
224,000
240,000
Additional Inspections
Inspect the CV/Universal joints. X X X X X X X X X X X X X X
Inspect front suspension, boot seals. tie rod ends, and
replace if necessary. X
XXXXXX
Inspect the brake linings, parking brake function. XXXXXXX
Inspect front accessory drive belt, tensioner, idler pulley, and
replace if necessary. X
Additional Maintenance
Replace engine air cleaner filter. XXXXX
Clean and lube sun roof tracks. XXXXXXX
Replace the cabin air filter. To be replaced every 12,000 miles (19,000 km).
Replace spark plugs — 2.0L Engine.
1X X
Replace spark plugs — 2.4L Engine.
1X
Flush and replace the engine coolant at 10 years or
150,000 miles (240,000 km) whichever comes first. X
X
23_KL_OM_EN_USC_t.book Page 210
Page 214 of 276

212SERVICING AND MAINTENANCE
ENGINE COMPARTMENT
2.0L ENGINE
1 — Engine Air Cleaner Filter 5 — Engine Oil Dipstick
2 — Oil Fill Cap 6 — Engine Coolant Reservoir
3 — Brake Fluid Reservoir Cap 7 — Battery
4 — Power Distribution Center (Fuses) 8 — Washer Fluid Reservoir Cap
23_KL_OM_EN_USC_t.book Page 212
Page 215 of 276
SERVICING AND MAINTENANCE213
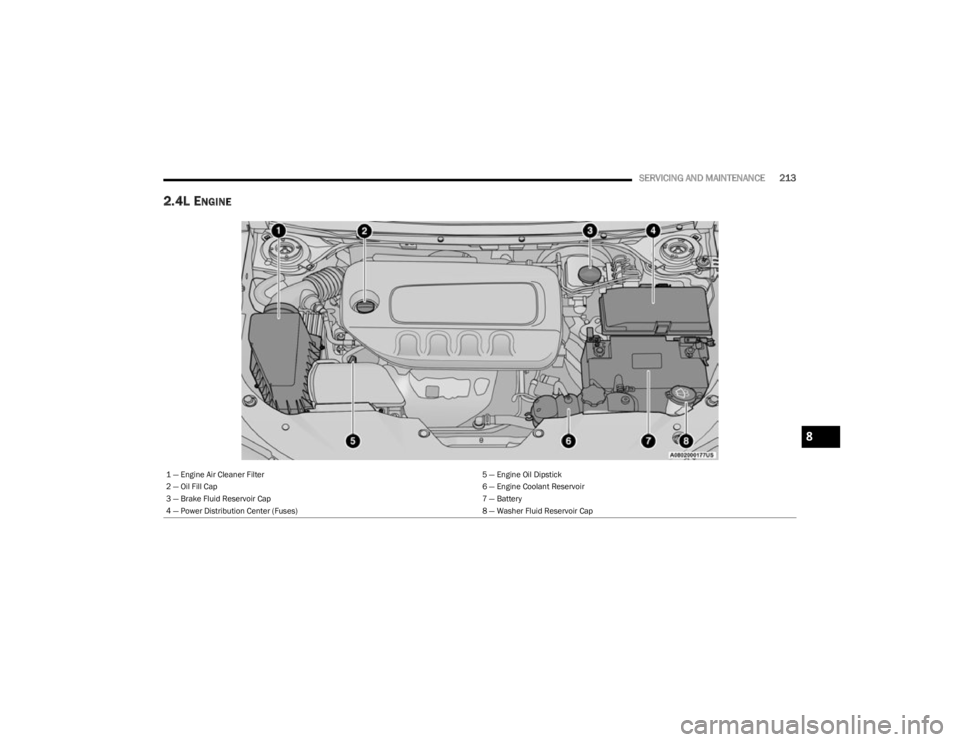
2.4L ENGINE
1 — Engine Air Cleaner Filter 5 — Engine Oil Dipstick
2 — Oil Fill Cap 6 — Engine Coolant Reservoir
3 — Brake Fluid Reservoir Cap 7 — Battery
4 — Power Distribution Center (Fuses) 8 — Washer Fluid Reservoir Cap
8
23_KL_OM_EN_USC_t.book Page 213
Page 217 of 276
SERVICING AND MAINTENANCE215
PRESSURE WASHING
Cleaning the engine compartment with a high pressure
washer is not recommended.
VEHICLE MAINTENANCE
An authorized dealer has the qualified service personnel,
special tools, and equipment to perform all service
operations in an expert manner. Service Manuals are
available which include detailed service information for your vehicle. Refer to these Service Manuals before
attempting any procedure yourself.
NOTE:Intentional tampering with emissions control systems may
void your warranty and could result in civil penalties being
assessed against you.
ENGINE OIL
Engine Oil Selection
Use only the manufacturer's recommended fluid Úpage 256.
American Petroleum Institute (API)
Approved Engine Oil
These symbols mean that the oil has been certified by the
API. The manufacturer only recommends API trademark
oils.
The API Starburst trademark certifies 0W-20,
0W-30 and 5W-30 engine oils.
The API Donut trademark certifies 0W-40 and
5W-40 engine oil.
Synthetic Engine Oils
Your engine was designed for synthetic engine oils, only
use synthetic API approved engine oils.
Synthetic engine oils which do not have both the correct
API trademark and the correct SAE viscosity grade
numbers should not be used.
Materials Added To Engine Oil
The manufacturer strongly recommends against the
addition of any additives (other than leak detection dyes)
to the engine oil. Engine oil is an engineered product and
its performance may be impaired by supplemental
additives.
Disposing Of Used Engine Oil And Oil
Filters
Care should be taken in disposing of used engine oil and
oil filters from your vehicle. Used oil and oil filters,
indiscriminately discarded, can present a problem to the
environment. Contact an authorized dealer, service
station or governmental agency for advice on how and
where used oil and oil filters can be safely discarded in
your area.
CAUTION!
It is essential when replacing the cables on the
battery that the positive cable is attached to the posi -
tive post and the negative cable is attached to the
negative post. Battery posts are marked positive (+)
and negative (-) and are identified on the battery
case. Cable clamps should be tight on the terminal
posts and free of corrosion.
If a “fast charger” is used while the battery is in the
vehicle, disconnect both vehicle battery cables
before connecting the charger to the battery. Do not
use a “fast charger” to provide starting voltage.
CAUTION!
Precautions have been taken to safeguard all parts and
connections however, the pressures generated by these
machines is such that complete protection against
water ingress cannot be guaranteed.
WARNING!
You can be badly injured working on or around a motor
vehicle. Only do service work for which you have the
knowledge and the proper equipment. If you have any
doubt about your ability to perform a service job, take
your vehicle to a competent mechanic.
CAUTION!
Do not use chemical flushes in your engine oil as the
chemicals can damage your engine. Such damage is
not covered by the New Vehicle Limited Warranty.
8
23_KL_OM_EN_USC_t.book Page 215
Page 218 of 276
216SERVICING AND MAINTENANCE
ENGINE OIL FILTER
The engine oil filter should be replaced with a new filter at
every engine oil change.
Engine Oil Filter Selection
A full-flow type disposable oil filter should be used for
replacement. The quality of replacement filters varies
considerably. Only high quality Mopar® certified filters
should be used. If a Mopar® Engine Oil Filter is
unavailable only use filters that meet or exceed SAE/
USCAR-36 Filter Performance Requirements.
ENGINE AIR CLEANER FILTER
Refer to the Maintenance Plan in this section for the
proper maintenance intervals Úpage 209.Engine Air Cleaner Filter Selection
The quality of replacement filters varies considerably. Only
high quality Mopar® certified filters should be used.
Engine Air Cleaner Filter Inspection and
Replacement
Engine Air Cleaner Filter Removal
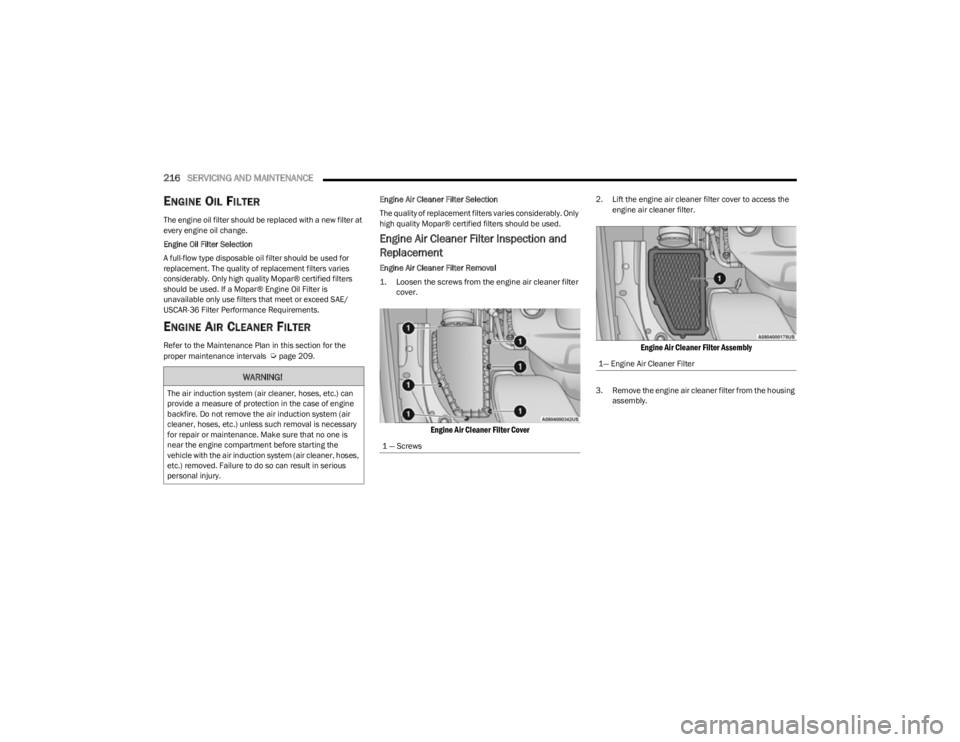
1. Loosen the screws from the engine air cleaner filter
cover.
Engine Air Cleaner Filter Cover
2. Lift the engine air cleaner filter cover to access the engine air cleaner filter.
Engine Air Cleaner Filter Assembly
3. Remove the engine air cleaner filter from the housing assembly.
WARNING!
The air induction system (air cleaner, hoses, etc.) can
provide a measure of protection in the case of engine
backfire. Do not remove the air induction system (air
cleaner, hoses, etc.) unless such removal is necessary
for repair or maintenance. Make sure that no one is
near the engine compartment before starting the
vehicle with the air induction system (air cleaner, hoses,
etc.) removed. Failure to do so can result in serious
personal injury.
1 — Screws
1— Engine Air Cleaner Filter
23_KL_OM_EN_USC_t.book Page 216
Page 219 of 276
SERVICING AND MAINTENANCE217
Engine Air Cleaner Filter Installation
NOTE:Inspect and clean the housing assembly if significant dirt
or debris is present before replacing the engine air cleaner
filter.
1. Install the engine air cleaner filter into the housing
assembly with the engine air cleaner filter
inspection surface facing downward.
2. Install the engine air cleaner filter cover onto the housing assembly locating tabs.
3. Install screws to secure the engine air cleaner filter cover to the housing assembly.
ACCESSORY DRIVE BELT INSPECTION
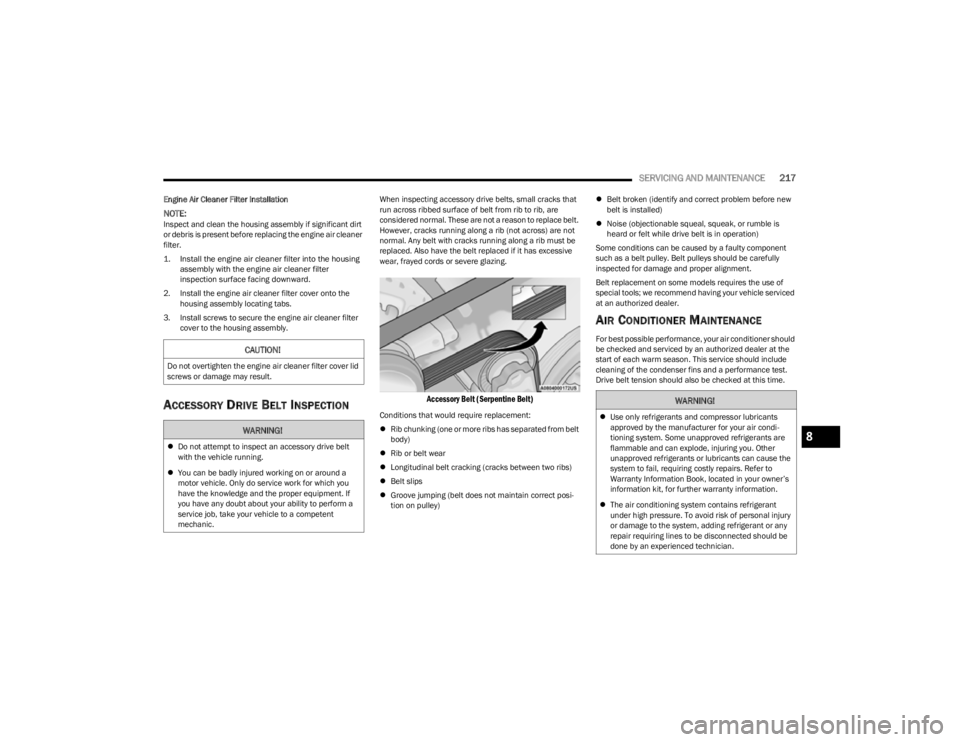
When inspecting accessory drive belts, small cracks that
run across ribbed surface of belt from rib to rib, are
considered normal. These are not a reason to replace belt.
However, cracks running along a rib (not across) are not
normal. Any belt with cracks running along a rib must be
replaced. Also have the belt replaced if it has excessive
wear, frayed cords or severe glazing.
Accessory Belt (Serpentine Belt)
Conditions that would require replacement:
Rib chunking (one or more ribs has separated from belt
body)
Rib or belt wear
Longitudinal belt cracking (cracks between two ribs)
Belt slips
Groove jumping (belt does not maintain correct posi -
tion on pulley)
Belt broken (identify and correct problem before new
belt is installed)
Noise (objectionable squeal, squeak, or rumble is
heard or felt while drive belt is in operation)
Some conditions can be caused by a faulty component
such as a belt pulley. Belt pulleys should be carefully
inspected for damage and proper alignment.
Belt replacement on some models requires the use of
special tools; we recommend having your vehicle serviced
at an authorized dealer.
AIR CONDITIONER MAINTENANCE
For best possible performance, your air conditioner should
be checked and serviced by an authorized dealer at the
start of each warm season. This service should include
cleaning of the condenser fins and a performance test.
Drive belt tension should also be checked at this time.CAUTION!
Do not overtighten the engine air cleaner filter cover lid
screws or damage may result.
WARNING!
Do not attempt to inspect an accessory drive belt
with the vehicle running.
You can be badly injured working on or around a
motor vehicle. Only do service work for which you
have the knowledge and the proper equipment. If
you have any doubt about your ability to perform a
service job, take your vehicle to a competent
mechanic.
WARNING!
Use only refrigerants and compressor lubricants
approved by the manufacturer for your air condi -
tioning system. Some unapproved refrigerants are
flammable and can explode, injuring you. Other
unapproved refrigerants or lubricants can cause the
system to fail, requiring costly repairs. Refer to
Warranty Information Book, located in your owner’s
information kit, for further warranty information.
The air conditioning system contains refrigerant
under high pressure. To avoid risk of personal injury
or damage to the system, adding refrigerant or any
repair requiring lines to be disconnected should be
done by an experienced technician.
8
23_KL_OM_EN_USC_t.book Page 217