remote control JEEP CHEROKEE 2023 Owners Manual
[x] Cancel search | Manufacturer: JEEP, Model Year: 2023, Model line: CHEROKEE, Model: JEEP CHEROKEE 2023Pages: 276, PDF Size: 12.55 MB
Page 4 of 276
2
INTRODUCTION
SYMBOLS KEY ....................................................................... 8
ROLLOVER WARNING ......................................................... 8
VEHICLE MODIFICATIONS/ALTERATIONS ........................ 8
SYMBOL GLOSSARY ............................................................. 9
GETTING TO KNOW YOUR VEHICLE
KEYS ....................................................................................13Key Fob ........................................................................ 13
SENTRY KEY ........................................................................16
IGNITION SWITCH ...............................................................16 Ignition Node Module (IGNM) —
If Equipped .................................................................. 16
Keyless Enter ‘n Go™ Ignition
(If Equipped) ................................................................ 16
REMOTE START — IF EQUIPPED .......................................18 How To Use Remote Start .......................................... 18
To Exit Remote Start Mode ........................................ 18
Remote Start Front Defrost Activation —
If Equipped .................................................................. 19
Remote Start Comfort Systems —
If Equipped ................................................................. 19
Remote Start Windshield Wiper De-Icer
Activation — If Equipped ............................................. 19
Remote Start Cancel Message .................................. 19
VEHICLE SECURITY SYSTEM — IF EQUIPPED ..................20 To Arm The System .................................................... 20
To Disarm The System ............................................... 20
Rearming Of The System ............................................ 20
Security System Manual Override.............................. 20 DOORS ................................................................................ 20
Manual Door Locks......................................................20
Power Door Locks .......................................................21
Keyless Enter ‘n Go™ — Passive Entry ....................... 22
Automatic Unlock Doors On Exit ................................. 23
Automatic Door Locks — If Equipped ........................ 24
Child-Protection Door Lock System — Rear Doors .... 24
STEERING WHEEL............................................................... 24 Tilt/Telescoping Steering Column ..............................24
Heated Steering Wheel — If Equipped ....................... 25
UCONNECT VOICE RECOGNITION ..................................... 25 Introducing Voice Recognition .................................... 25
Basic Voice Commands............................................... 25
Get Started ................................................................... 26
Additional Information................................................. 26
DRIVER MEMORY SETTINGS — IF EQUIPPED ................ 26 Programming The Memory Feature............................ 27
Linking And Unlinking The Key Fob To Memory......... 27
Memory Position Recall............................................... 27
SEATS .................................................................................. 28 Manual Adjustment
(Front Seats) — If Equipped......................................... 28
Manual Adjustment (Rear Seats) ............................... 29
Power Adjustment (Front Seats) — If Equipped ......... 30
Heated Seats — If Equipped........................................ 31
Ventilated Seats — If Equipped................................... 32
Head Restraints ........................................................... 32
MIRRORS ............................................................................ 34 Inside Rearview Mirror ................................................ 34
Illuminated Vanity Mirrors ........................................... 34
Outside Mirrors ........................................................... 34
Outside Mirrors With Turn Signal And Approach
Lighting — If Equipped ................................................. 35
Power Mirrors...............................................................35
Heated Mirrors — If Equipped .................................... 35 UNIVERSAL GARAGE DOOR OPENER
(HOMELINK®) — IF EQUIPPED
S
................................... 35
Before You Begin Programming HomeLink® ............ 36
Erasing All The HomeLink® Channels ....................... 36
Identifying Whether You Have A Rolling Code Or
Non-Rolling Code Device............................................. 36
Programming HomeLink® To A Garage Door
Opener ......................................................................... 36
Programming HomeLink® To A Miscellaneous
Device .......................................................................... 37
Reprogramming A Single HomeLink® Button ........... 37
Canadian/Gate Operator Programming .................... 37
Security ........................................................................ 38
Troubleshooting Tips ................................................... 38
EXTERIOR LIGHTS .............................................................. 39 Multifunction Lever .................................................... 39
Headlight Switch.......................................................... 39
Daytime Running Lights (DRLs) — If Equipped .......... 40
High/Low Beam Switch............................................... 40
Automatic High Beam Headlamp Control —
If Equipped .................................................................. 40
Flash-To-Pass............................................................... 40
Automatic Headlights — If Equipped ......................... 40
Parking Lights .............................................................. 40
Automatic Headlights With
Wipers — If Equipped .................................................. 41
Headlight Time Delay .................................................. 41
Lights-On Reminder .................................................... 41
Fog Lights — If Equipped ............................................. 41
Turn Signals ................................................................. 42
Lane Change Assist — If Equipped ............................. 42
Battery Saver ............................................................... 42
INTERIOR LIGHTS ............................................................... 42 Interior Courtesy Lights ............................................... 42
Illuminated Entry ........................................................ 43
23_KL_OM_EN_USC_t.book Page 2
Page 20 of 276
18GETTING TO KNOW YOUR VEHICLE
position. In addition to the chime, the message “Igni-
tion or Accessory ON” will display in the cluster.
The power window switches and power sunroof (if
equipped) will remain active for three minutes after the
ignition is placed in the OFF position. Opening either
front door will cancel this feature. The timing for this
feature is programmable.
REMOTE START — IF EQUIPPED
This system uses the key fob to start the engine
conveniently from outside the vehicle while still
maintaining security. The system has a range
of approximately 328 ft (100 m).
Remote Start is used to defrost windows in cold weather,
and to reach a comfortable climate in all ambient
conditions before the driver enters the vehicle.
NOTE:Obstructions between the vehicle and key fob may reduce
this range Úpage 262.
HOW TO USE REMOTE START
Push and release the Remote Start button on the key fob
twice within five seconds. The vehicle doors will lock, the
parking lights will flash, and the horn will chirp (if
programmed within the Uconnect system). Then, the
engine will start, and the vehicle will remain in the Remote
Start mode for a 15 minute cycle. Pushing the Remote
Start button a third time shuts the engine off.
NOTE:
With Remote Start, the engine will only run for
15 minutes.
Remote Start can only be used twice.
The ignition must be placed in the ON/RUN position
before the Remote Start sequence can be repeated for
a third cycle.
If an engine fault is present or fuel level is low, the
vehicle will start and then shut down in 10 seconds.
The parking lights will turn on and remain on during
Remote Start mode.
For security, power window and power sunroof opera -
tion (if equipped) are disabled when the vehicle is in
the Remote Start mode.
The ignition must be placed in the ON/RUN position
before the Remote Start sequence can be repeated for
a third cycle.
All of the following conditions must be met before the
engine will remote start:
Gear selector in PARK
Doors closed
Hood closed
Liftgate closed
Hazard switch off
Brake switch inactive (brake pedal not pressed)
Battery at an acceptable charge level
System not disabled from previous Remote Start event
Vehicle Security system indicator flashing
Ignition in OFF position
Fuel level meets minimum requirement
Vehicle Security system is not signaling an intrusion
Malfunction Indicator Light (MIL) is not illuminated
TO EXIT REMOTE START MODE
To drive the vehicle after starting the Remote Start
system, push and release the START/STOP ignition button
while pressing the brake pedal prior to the end of the
15 minute cycle. If the vehicle is not equipped with a
START/STOP ignition button, insert the key fob into the
ignition switch and place the ignition in the ON/RUN
position.
WARNING!
Do not start or run an engine in a closed garage or
confined area. Exhaust gas contains carbon
monoxide (CO) which is odorless and colorless.
Carbon monoxide is poisonous and can cause
serious injury or death when inhaled.
Keep key fobs away from children. Operation of the
Remote Start system, windows, door locks or other
controls could cause serious injury or death.
23_KL_OM_EN_USC_t.book Page 18
Page 21 of 276
GETTING TO KNOW YOUR VEHICLE19
The Remote Start system will turn the engine off if the
Remote Start button on the key fob is pushed again, or if
the engine is allowed to run for the entire 15 minute cycle.
Once the driver’s door is opened, or the ignition is placed
in the ON/RUN position, the climate controls will resume
previously set operations (temperature, blower control,
etc.).
NOTE:
For vehicles equipped with the Keyless Enter ‘n Go™ —
Passive Entry feature, the message “Remote Start
Active — Push Start Button” will show in the instrument
cluster display until you push the START/STOP ignition
button.
To avoid unintentional shutdowns, the system will
disable for two seconds after receiving a valid Remote
Start request.
REMOTE START FRONT DEFROST
A
CTIVATION — IF EQUIPPED
When Remote Start is active, and the outside ambient
temperature is 40°F (4.5°C) or below, the system will
automatically activate front defrost for 15 minutes or less.
The timing is dependent on the ambient temperature.
Once the timer expires, the system will automatically
adjust the settings depending on ambient conditions. See
“Remote Start Comfort Systems — If Equipped” in the next
section for detailed operation.
REMOTE START COMFORT SYSTEMS —
I
F EQUIPPED
When Remote Start is activated, the front and rear defrost
will automatically turn on in cold weather. The heated steering wheel and driver heated seat feature will turn on
if selected in the Comfort menu screen within Uconnect
Settings
Úpage 126. In warm weather, the driver vented
seat feature will automatically turn on when the Remote
Start is activated, if programmed in the Comfort menu
screen. The vehicle will adjust the climate control settings
depending on the outside ambient temperature.
Automatic Temperature Control (ATC) — If Equipped
The climate controls automatically adjust to the optimal
temperature and mode settings dependent on the outside
ambient temperature. This will occur until the driver’s door
is opened, or the ignition is placed in the ON/RUN position,
where the climate controls will resume their previous
settings.
Manual Temperature Control (MTC) — If Equipped
In ambient temperatures at 40°F (4.5°C) or below, the
climate settings will default to maximum heat, with
fresh air entering the cabin. If the front defrost timer
expires, the vehicle will enter Mix Mode.
In ambient temperatures from 40°F (4.5°C) to 78°F
(26°C), the climate settings will be based on the last
settings selected by the driver.
In ambient temperatures at 78°F (26°C) or above, the
climate settings will default to MAX A/C, Bi-Level Mode,
and Recirculation on.
For more information on ATC, MTC, and climate control
settings, see
Úpage 45.
NOTE:These features will stay on through the duration of Remote
Start until the driver’s door is opened, or until the ignition
is placed in the ON/RUN position. The climate control
settings will change if manually adjusted by the driver while the vehicle is in Remote Start mode, and exit auto
-
matic override. This includes the OFF button on the
climate controls, which will turn the system off.
REMOTE START WINDSHIELD WIPER
D
E-ICER ACTIVATION — IF EQUIPPED
When Remote Start is active and the outside ambient
temperature is less than 33°F (0.6°C), the Windshield
Wiper De-Icer will activate. Exiting Remote Start will
resume its previous operation. If the Windshield Wiper
De-Icer was active, the timer and operation will continue.
REMOTE START CANCEL MESSAGE
One of the following messages will display in the
instrument cluster display if the vehicle fails to remote
start, or exits Remote Start prematurely:
Remote Start Canceled — Door Open
Remote Start Canceled — Hood Open
Remote Start Canceled — Fuel Low
Remote Start Canceled — Liftgate Open
Remote Start Disabled — Start Vehicle To Reset
Remote Start Canceled — Too Cold
Remote Start Canceled — Time Expired
The message will stay active until the ignition is placed in
the ON/RUN position.
2
23_KL_OM_EN_USC_t.book Page 19
Page 27 of 276
GETTING TO KNOW YOUR VEHICLE25
HEATED STEERING WHEEL —
I
F EQUIPPED
The steering wheel contains a heating element
that helps warm your hands in cold weather.
The heated steering wheel has only one
temperature setting. Once the heated steering
wheel has been turned on, a sensor will monitor the
temperature of the steering wheel and adjust the power
level to maintain an optimum heat level.
The heated steering wheel control button is located within
the Uconnect system. You can gain access to the control
button through the climate screen or the controls screen.
Press the heated steering wheel button once to turn
the heating element on.
Press the heated steering wheel button a second time
to turn the heating element off.
NOTE:The engine must be running for the heated steering wheel
to operate. For information on use with the Remote Start system, see
Úpage 19.
UCONNECT VOICE RECOGNITION
INTRODUCING VOICE RECOGNITION
Start using Uconnect Voice Recognition with these helpful
quick tips. This section provides Voice Commands and tips
you need to know to control your vehicle’s Voice
Recognition (VR) system.
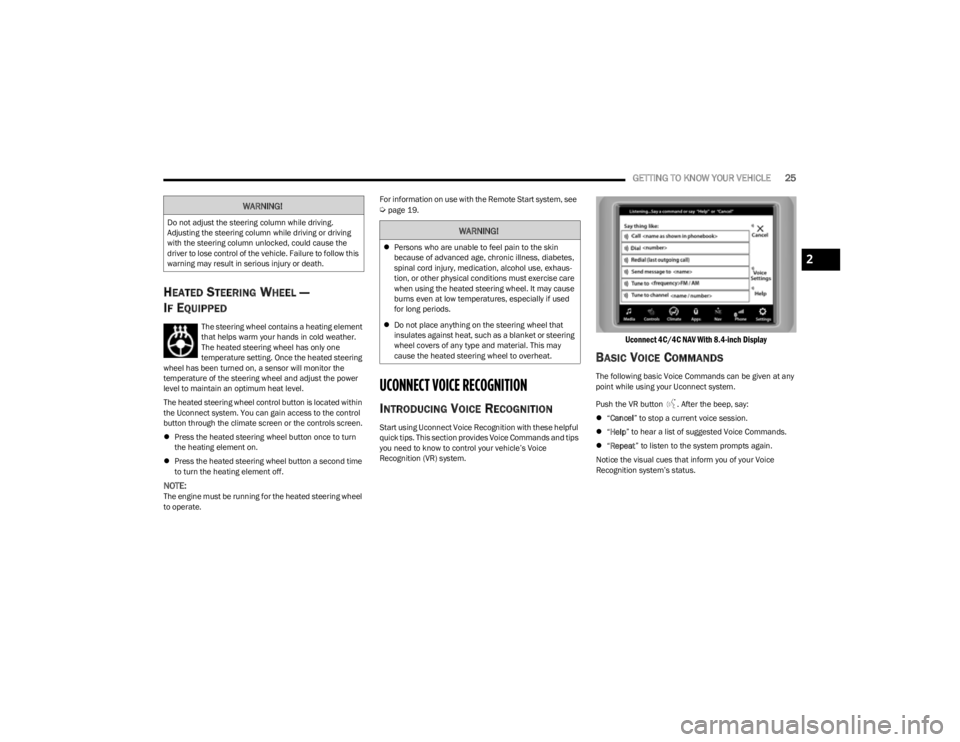
Uconnect 4C/4C NAV With 8.4-inch Display
BASIC VOICE COMMANDS
The following basic Voice Commands can be given at any
point while using your Uconnect system.
Push the VR button . After the beep, say:
“Cancel ” to stop a current voice session.
“Help ” to hear a list of suggested Voice Commands.
“Repeat ” to listen to the system prompts again.
Notice the visual cues that inform you of your Voice
Recognition system’s status.
WARNING!
Do not adjust the steering column while driving.
Adjusting the steering column while driving or driving
with the steering column unlocked, could cause the
driver to lose control of the vehicle. Failure to follow this
warning may result in serious injury or death.WARNING!
Persons who are unable to feel pain to the skin
because of advanced age, chronic illness, diabetes,
spinal cord injury, medication, alcohol use, exhaus -
tion, or other physical conditions must exercise care
when using the heated steering wheel. It may cause
burns even at low temperatures, especially if used
for long periods.
Do not place anything on the steering wheel that
insulates against heat, such as a blanket or steering
wheel covers of any type and material. This may
cause the heated steering wheel to overheat.
2
23_KL_OM_EN_USC_t.book Page 25
Page 33 of 276
GETTING TO KNOW YOUR VEHICLE31
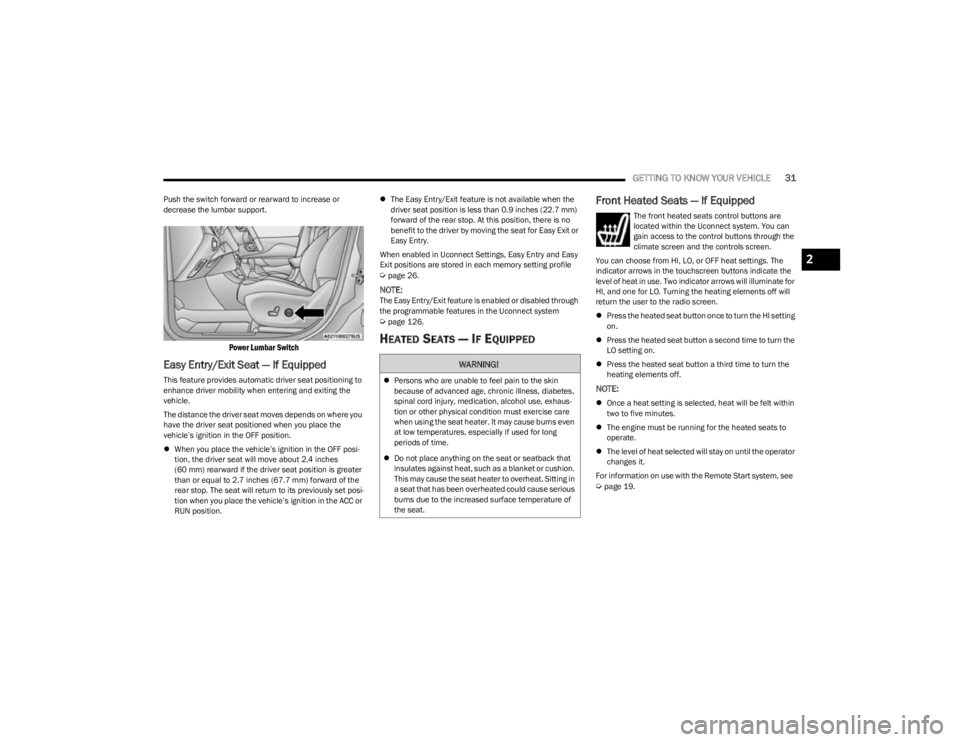
Push the switch forward or rearward to increase or
decrease the lumbar support.
Power Lumbar Switch
Easy Entry/Exit Seat — If Equipped
This feature provides automatic driver seat positioning to
enhance driver mobility when entering and exiting the
vehicle.
The distance the driver seat moves depends on where you
have the driver seat positioned when you place the
vehicle’s ignition in the OFF position.
When you place the vehicle’s ignition in the OFF posi -
tion, the driver seat will move about 2.4 inches
(60 mm) rearward if the driver seat position is greater
than or equal to 2.7 inches (67.7 mm) forward of the rear stop. The seat will return to its previously set posi -
tion when you place the vehicle’s ignition in the ACC or
RUN position.
The Easy Entry/Exit feature is not available when the
driver seat position is less than 0.9 inches (22.7 mm)
forward of the rear stop. At this position, there is no
benefit to the driver by moving the seat for Easy Exit or
Easy Entry.
When enabled in Uconnect Settings, Easy Entry and Easy
Exit positions are stored in each memory setting profile
Úpage 26.
NOTE:The Easy Entry/Exit feature is enabled or disabled through
the programmable features in the Uconnect system
Úpage 126.
HEATED SEATS — IF EQUIPPED
Front Heated Seats — If Equipped
The front heated seats control buttons are
located within the Uconnect system. You can
gain access to the control buttons through the
climate screen and the controls screen.
You can choose from HI, LO, or OFF heat settings. The
indicator arrows in the touchscreen buttons indicate the
level of heat in use. Two indicator arrows will illuminate for
HI, and one for LO. Turning the heating elements off will
return the user to the radio screen.
Press the heated seat button once to turn the HI setting
on.
Press the heated seat button a second time to turn the
LO setting on.
Press the heated seat button a third time to turn the
heating elements off.
NOTE:
Once a heat setting is selected, heat will be felt within
two to five minutes.
The engine must be running for the heated seats to
operate.
The level of heat selected will stay on until the operator
changes it.
For information on use with the Remote Start system, see
Úpage 19.
WARNING!
Persons who are unable to feel pain to the skin
because of advanced age, chronic illness, diabetes,
spinal cord injury, medication, alcohol use, exhaus -
tion or other physical condition must exercise care
when using the seat heater. It may cause burns even
at low temperatures, especially if used for long
periods of time.
Do not place anything on the seat or seatback that
insulates against heat, such as a blanket or cushion.
This may cause the seat heater to overheat. Sitting in
a seat that has been overheated could cause serious
burns due to the increased surface temperature of
the seat.
2
23_KL_OM_EN_USC_t.book Page 31
Page 34 of 276
32GETTING TO KNOW YOUR VEHICLE
VENTILATED SEATS — IF EQUIPPED
Located in the seat cushion and seatback are fans that
draw the air from the passenger compartment and move
air through fine perforations in the seat cover to help keep
the occupant cooler in higher ambient temperatures.
Front Ventilated Seats — If Equipped
The front ventilated seat controls are located
within the climate and control screen in the
Uconnect system. The fans operate at two
speeds: HI and LO.
Press the ventilated seat button once to choose HI.
Press the ventilated seat button a second time to
choose LO.
Press the ventilated seat button a third time to turn the
ventilated seat off.
NOTE:The engine must be running for the ventilated seats to
operate.
For information on use with the Remote Start system, see
Úpage 19.
HEAD RESTRAINTS
Head restraints are designed to reduce the risk of injury by
restricting head movement in the event of a rear impact.
Head restraints should be adjusted so that the top of the
head restraint is located above the top of your ear.
NOTE:Do not reverse the head restraints (making the rear of the
head restraint face forward) in an attempt to gain addi -
tional clearance to the back of your head.
Reactive Head Restraints — Front Seats
The front driver and passenger seats are equipped with
Reactive Head Restraints (RHR). In the event of a rear
impact, the RHRs will automatically extend forward
minimizing the gap between the back of the occupant’s
head and the RHR.
The RHRs will automatically return to their normal position
following a rear impact. If the RHRs do not return to their
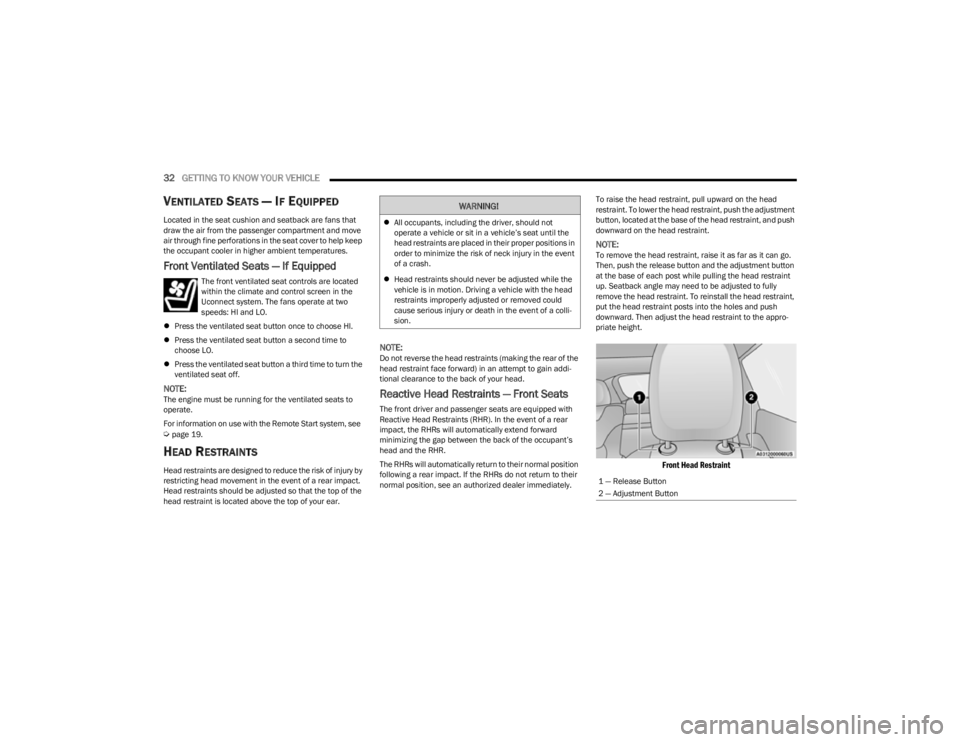
normal position, see an authorized dealer immediately. To raise the head restraint, pull upward on the head
restraint. To lower the head restraint, push the adjustment
button, located at the base of the head restraint, and push
downward on the head restraint.
NOTE:To remove the head restraint, raise it as far as it can go.
Then, push the release button and the adjustment button
at the base of each post while pulling the head restraint
up. Seatback angle may need to be adjusted to fully
remove the head restraint. To reinstall the head restraint,
put the head restraint posts into the holes and push
downward. Then adjust the head restraint to the appro
-
priate height.
Front Head Restraint
WARNING!
All occupants, including the driver, should not
operate a vehicle or sit in a vehicle’s seat until the
head restraints are placed in their proper positions in
order to minimize the risk of neck injury in the event
of a crash.
Head restraints should never be adjusted while the
vehicle is in motion. Driving a vehicle with the head
restraints improperly adjusted or removed could
cause serious injury or death in the event of a colli -
sion.
1 — Release Button
2 — Adjustment Button
23_KL_OM_EN_USC_t.book Page 32
Page 47 of 276

GETTING TO KNOW YOUR VEHICLE45
Use of products containing wax or silicone may reduce
Rain Sensing performance.
The Rain Sensing feature can be turned on and off
using the Uconnect system
Úpage 126.
The Rain Sensing system has protection features for the
wiper blades and arms, and will not operate under the
following conditions:
Low Ambient Temperature — When the ignition is first
placed in the ON position, the Rain Sensing system will
not operate until the wiper switch is moved, vehicle
speed is greater than 3 mph (5 km/h) or the outside
temperature is greater than 32°F (0°C).
Transmission In NEUTRAL Position — When the ignition
is ON, and the transmission is in NEUTRAL, the Rain
Sensing system will not operate until the wiper switch
is moved, vehicle speed is greater than 3 mph (5 km/
h) or the gear selector is moved out of the NEUTRAL
position.
Remote Start Mode Inhibit — On vehicles equipped with
the Remote Start system, Rain Sensing wipers are not
operational when the vehicle is in the Remote Start
mode.
REAR WINDOW WIPER/WASHER
The rear wiper/washer controls are located on the
windshield wiper/washer lever on the right side of the
steering column. The rear wiper/washer is operated by
rotating a switch, located at the middle of the lever.
Rotate the center portion of the lever upward to
the first detent for intermittent operation and to
the second detent for continuous rear wiper
operation. To use the washer, push the lever forward and
hold while spray is desired. If the lever is
pushed while in the intermittent setting, the
wiper will turn on and operate for several wipe
cycles after the end of the lever is released, and then
resume the intermittent interval previously selected.
If the lever is pushed while the wiper is in the off position,
the wiper will operate for several wipe cycles, then turn off.
NOTE:As a protective measure, the pump will stop if the switch
is held for more than 20 seconds. Once the lever is
released the pump will resume normal operation.
If the rear wiper is operating when the ignition is placed in
the OFF position, the wiper will automatically return to the
parked position.
WINDSHIELD WIPER DE-ICER —
I
F EQUIPPED
Your vehicle may be equipped with a Windshield Wiper
De-Icer feature that may be activated under the following
conditions:
Activation By Front Defrost — The Windshield Wiper
De-Icer shall be activated automatically in the case of
a cold weather manual start with full front defrost, and
when the ambient temperature is below 33°F (0.6°C).
Activation By Rear Defrost — The Windshield Wiper
De-Icer shall be activated automatically when the rear
defrost is turned on and when the ambient tempera -
ture is below 33°F (0.6°C).
Activation By Remote Start Operation — When Remote
Start is active and the outside ambient temperature is
less than 33°F (0.6°C), the Windshield Wiper De-Icer will activate. Exiting Remote Start will resume its
previous operation. If the Windshield Wiper De-Icer was
active, the timer and operation will continue.
CLIMATE CONTROLS
The Climate Control system allows you to regulate the
temperature, air flow, and direction of air circulating
throughout the vehicle. The controls are located on the
touchscreen and on the instrument panel below the radio.
AUTOMATIC CLIMATE CONTROL
D
ESCRIPTIONS AND FUNCTIONS
Uconnect 4C/4C NAV With 8.4-inch Display With Automatic
Temperature Controls
MAX A/C Button
Press and release the MAX A/C button on the
touchscreen to change the current setting to
the coldest output of air. The MAX A/C indicator
illuminates when MAX A/C is on. Pressing the
button again will cause the MAX A/C operation to exit. In
2
23_KL_OM_EN_USC_t.book Page 45
Page 51 of 276
GETTING TO KNOW YOUR VEHICLE49
Windshield Wiper De-Icer — If Equipped
The Windshield Wiper De-Icer is a heating element located
at the base of the windshield.
It operates automatically once the following conditions are
met:
Activation By Front Defrost
The Windshield Wiper De-Icer activates automatically
during a cold weather manual start with full defrost,
and when the ambient temperature is below 33°F
(0.6°C) .
Activation By Rear Defrost
The Windshield Wiper De-Icer activates automatically
when the Rear Defrost is operating and the ambient
temperature is below 33°F (0.6°C) .
Activation By Remote Start Operation
When Remote Start is activated and the outside
ambient temperature is less than 33°F (0.6°C) the
Windshield Wiper De-Icer will activate. Exiting Remote
Start will resume its previous operation. If the Wind -
shield Wiper De-Icer was active, the timer and opera -
tion will continue.
Operating Tips ChartINTERIOR STORAGE AND EQUIPMENT
STORAGE
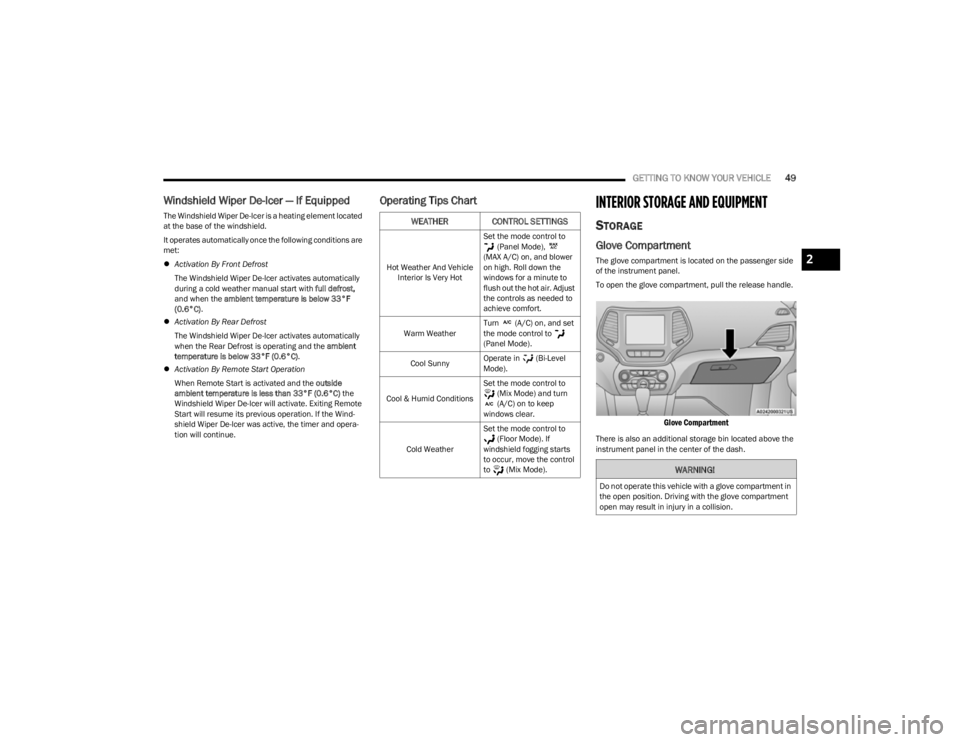
Glove Compartment
The glove compartment is located on the passenger side
of the instrument panel.
To open the glove compartment, pull the release handle.
Glove Compartment
There is also an additional storage bin located above the
instrument panel in the center of the dash.
WEATHER CONTROL SETTINGS
Hot Weather And Vehicle Interior Is Very Hot Set the mode control to
(Panel Mode),
(MAX A/C) on, and blower
on high. Roll down the
windows for a minute to
flush out the hot air. Adjust
the controls as needed to
achieve comfort.
Warm Weather Turn (A/C) on, and set
the mode control to
(Panel Mode).
Cool Sunny Operate in (Bi-Level
Mode).
Cool & Humid Conditions Set the mode control to
(Mix Mode) and turn
(A/C) on to keep
windows clear.
Cold Weather Set the mode control to
(Floor Mode). If
windshield fogging starts
to occur, move the control
to (Mix Mode).
WARNING!
Do not operate this vehicle with a glove compartment in
the open position. Driving with the glove compartment
open may result in injury in a collision.
2
23_KL_OM_EN_USC_t.book Page 49
Page 142 of 276
140MULTIMEDIA
STEERING WHEEL AUDIO CONTROLS —
IF EQUIPPED
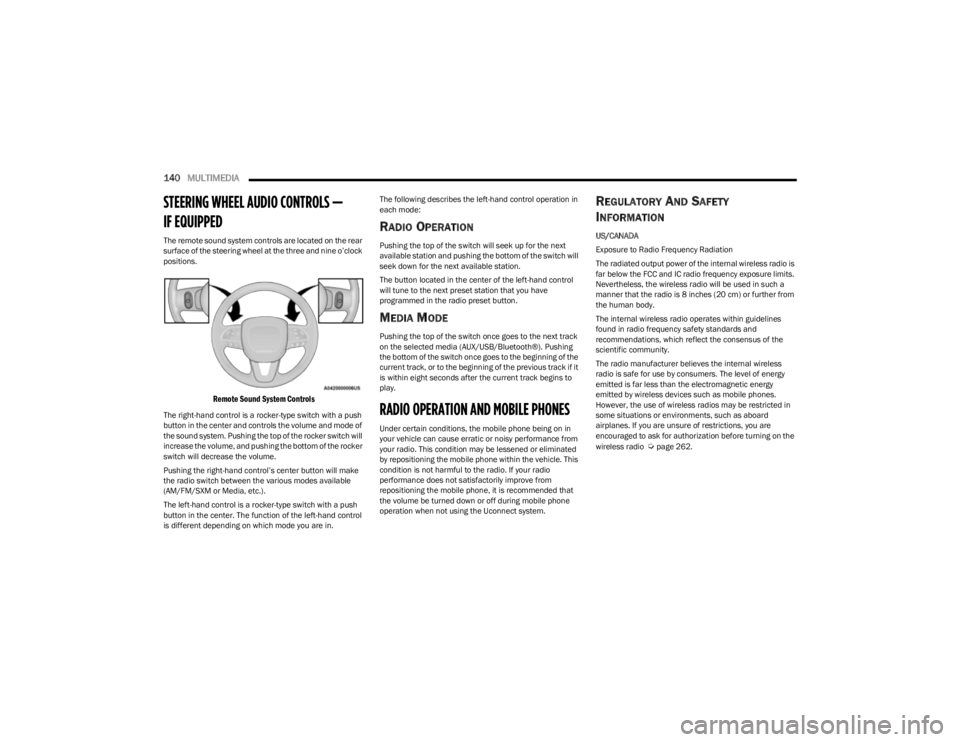
The remote sound system controls are located on the rear
surface of the steering wheel at the three and nine o’clock
positions.
Remote Sound System Controls
The right-hand control is a rocker-type switch with a push
button in the center and controls the volume and mode of
the sound system. Pushing the top of the rocker switch will
increase the volume, and pushing the bottom of the rocker
switch will decrease the volume.
Pushing the right-hand control’s center button will make
the radio switch between the various modes available
(AM/FM/SXM or Media, etc.).
The left-hand control is a rocker-type switch with a push
button in the center. The function of the left-hand control
is different depending on which mode you are in. The following describes the left-hand control operation in
each mode:
RADIO OPERATION
Pushing the top of the switch will seek up for the next
available station and pushing the bottom of the switch will
seek down for the next available station.
The button located in the center of the left-hand control
will tune to the next preset station that you have
programmed in the radio preset button.
MEDIA MODE
Pushing the top of the switch once goes to the next track
on the selected media (AUX/USB/Bluetooth®). Pushing
the bottom of the switch once goes to the beginning of the
current track, or to the beginning of the previous track if it
is within eight seconds after the current track begins to
play.
RADIO OPERATION AND MOBILE PHONES
Under certain conditions, the mobile phone being on in
your vehicle can cause erratic or noisy performance from
your radio. This condition may be lessened or eliminated
by repositioning the mobile phone within the vehicle. This
condition is not harmful to the radio. If your radio
performance does not satisfactorily improve from
repositioning the mobile phone, it is recommended that
the volume be turned down or off during mobile phone
operation when not using the Uconnect system.
REGULATORY AND SAFETY
I
NFORMATION
US/CANADA
Exposure to Radio Frequency Radiation
The radiated output power of the internal wireless radio is
far below the FCC and IC radio frequency exposure limits.
Nevertheless, the wireless radio will be used in such a
manner that the radio is 8 inches (20 cm) or further from
the human body.
The internal wireless radio operates within guidelines
found in radio frequency safety standards and
recommendations, which reflect the consensus of the
scientific community.
The radio manufacturer believes the internal wireless
radio is safe for use by consumers. The level of energy
emitted is far less than the electromagnetic energy
emitted by wireless devices such as mobile phones.
However, the use of wireless radios may be restricted in
some situations or environments, such as aboard
airplanes. If you are unsure of restrictions, you are
encouraged to ask for authorization before turning on the
wireless radio
Úpage 262.
23_KL_OM_EN_USC_t.book Page 140
Page 266 of 276

264
Care And Maintenance ................................................ 250
Cargo Area Cover ............................................................59
Cargo Compartment ....................................................... 59
Cargo Load Floor ............................................................. 59
Cargo Tie-Downs ............................................................. 59
Cellular Phone .............................................................. 140
Center Seat Storage Compartment ...............................50
Certification Label ........................................................ 113
Changing A Flat Tire ..................................................... 191
Chart, Tire Sizing .......................................................... 236
Chassis Fluids And Lubricants .................................... 257
Check Engine Light (Malfunction Indicator Light) .........75
Checking Your Vehicle For Safety ............................... 186
Checks, Safety.............................................................. 186
Child Restraint.............................................................. 176
Child Restraints
Booster Seats.......................................................... 178
How To Stow An Unused ALR Seat Belt................. 183
Infant And Child Restraints .................................... 177Lower Anchors And Tethers For Children .............. 179Older Children And Child Restraints ...................... 177
Seating Positions .................................................... 178
Clean Air Gasoline........................................................ 254
Cleaning Wheels ..................................................................... 245
Climate Control ............................................................... 45
Cold Weather Operation .................................................77
Compact Spare Tire ..................................................... 245
Console Storage ....................................................................... 50
Contract, Service .......................................................... 260
Cooling Pressure Cap (Radiator Cap) ......................... 224
Cooling System............................................................. 222 Adding Coolant (Antifreeze) ................................... 223Coolant Level .......................................................... 224 Cooling Capacity ...................................................... 256
Disposal Of Used Coolant ....................................... 224
Drain, Flush, And Refill............................................223
Inspection ...................................................... 223
, 224
Points To Remember............................................... 224
Pressure Cap ...........................................................224
Radiator Cap ............................................................224 Selection Of Coolant (Antifreeze) ...........................223
Corrosion Protection ..................................................... 250
Cruise Control (Speed Control) ...................................... 90 Cruise Light .............................................................. 74
, 75
Customer Assistance ....................................................258
Cybersecurity ................................................................ 126
DDaytime Running Lights ................................................. 40
Defroster, Windshield ...................................................187
De-Icer, Remote Start ..................................................... 19 Diagnostic System, Onboard.......................................... 75
Dipsticks Oil (Engine)............................................................... 214
Disable Vehicle Towing................................................. 205
Disposal Antifreeze (Engine Coolant) ....................................224
Door Ajar.......................................................................... 69 Door Ajar Light ................................................................ 69
Door Locks Automatic ............................................................ 23
, 24
Doors ............................................................................... 20
Driver Memory Settings .................................................. 26
Driver’s Seat Back Tilt .................................................... 28 Driving ...........................................................................123
EEasy Entry Seats ............................................................. 31
Electric Brake Control System ..................................... 143 Anti-Lock Brake System .......................................... 143Electronic Roll Mitigation ...............................144
, 150
Electric Parking Brake.................................................... 78
Electrical Power Outlets ................................................. 51 Electronic Stability Control (ESC) ................................ 145
Electronic Throttle Control Warning Light ..................... 69
Emergency SOS Emergency Call................................................ 189
Emergency Gas Can Refueling .................................... 202
Emergency, In Case Of Gear Selector Override ........................................... 203
Hazard Warning Flasher ......................................... 189Jacking ..................................................................... 191Jump Starting .......................................................... 200
Tow Hooks ............................................................... 206
Emission Control System Maintenance ........................ 75
Engine ..................................................................212
, 213
Air Cleaner ............................................................... 216 Break-In Recommendations..................................... 78
Checking Oil Level ................................................... 214
Cooling ..................................................................... 222 Exhaust Gas Caution............................................... 188
Fails To Start ............................................................. 78
Flooded, Starting....................................................... 78
Fuel Requirements.................................................. 254
Jump Starting .......................................................... 200
Oil ............................................................................. 215 Oil Filler Cap ...................................................212
, 213
Oil Filter.................................................................... 216
Oil Reset .................................................................... 64
23_KL_OM_EN_USC_t.book Page 264