JEEP CHEROKEE LATITUDE 2019 Repair Manual
CHEROKEE LATITUDE 2019
JEEP
JEEP
https://www.carmanualsonline.info/img/16/56012/w960_56012-0.png
JEEP CHEROKEE LATITUDE 2019 Repair Manual
Trending: torque, odometer, recommended oil, clutch, bluetooth, height, maintenance
Page 61 of 638
WARNING!(Continued)
restraints improperly adjusted or removed could
cause serious injury or death in the event of a
collision.
NOTE: Do not reverse the head restraints (making the rear
of the head restraint face forward) in an attempt to gain
additional clearance to the back of your head.
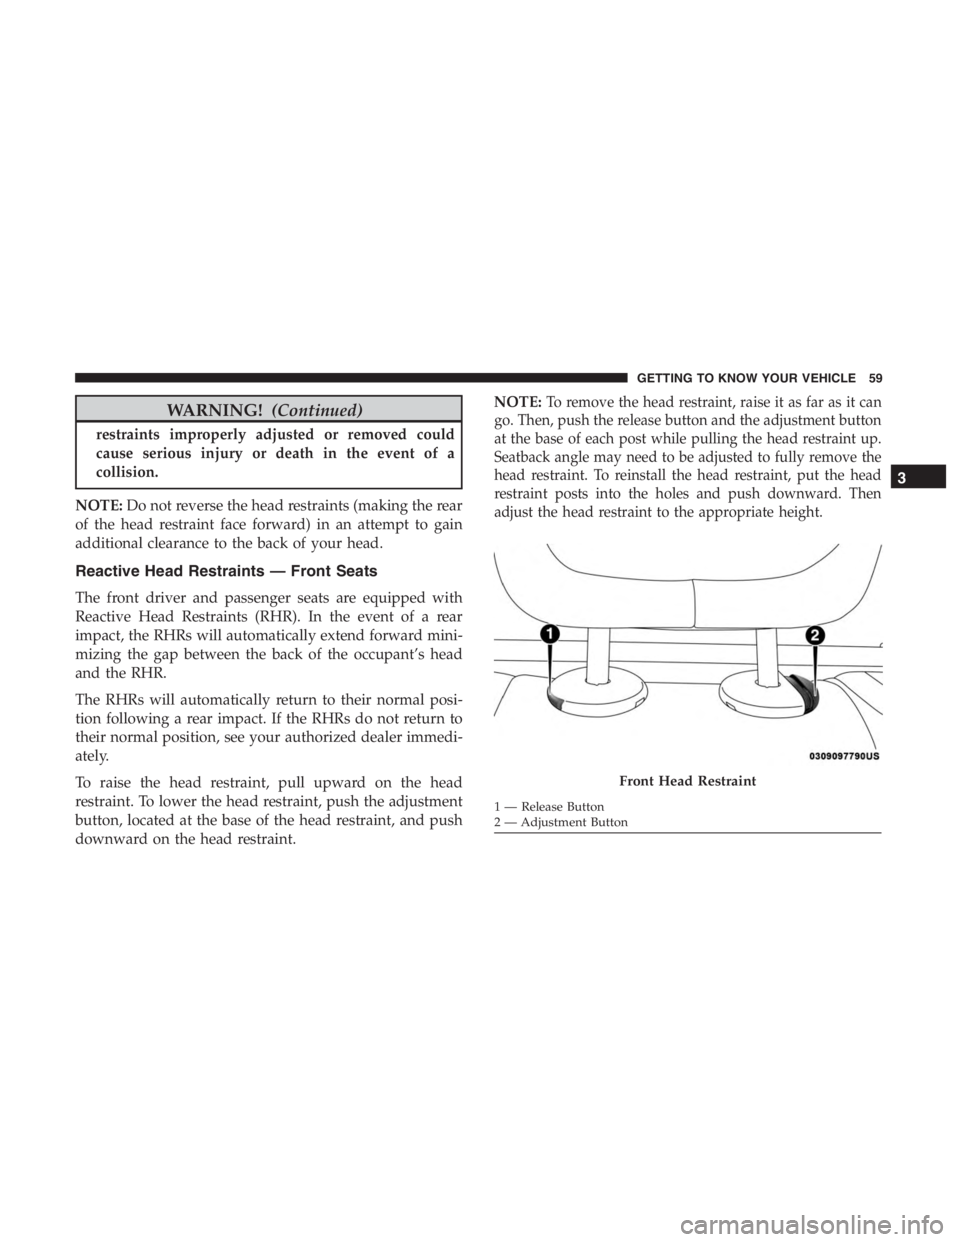
Reactive Head Restraints — Front Seats
The front driver and passenger seats are equipped with
Reactive Head Restraints (RHR). In the event of a rear
impact, the RHRs will automatically extend forward mini-
mizing the gap between the back of the occupant’s head
and the RHR.
The RHRs will automatically return to their normal posi-
tion following a rear impact. If the RHRs do not return to
their normal position, see your authorized dealer immedi-
ately.
To raise the head restraint, pull upward on the head
restraint. To lower the head restraint, push the adjustment
button, located at the base of the head restraint, and push
downward on the head restraint. NOTE:
To remove the head restraint, raise it as far as it can
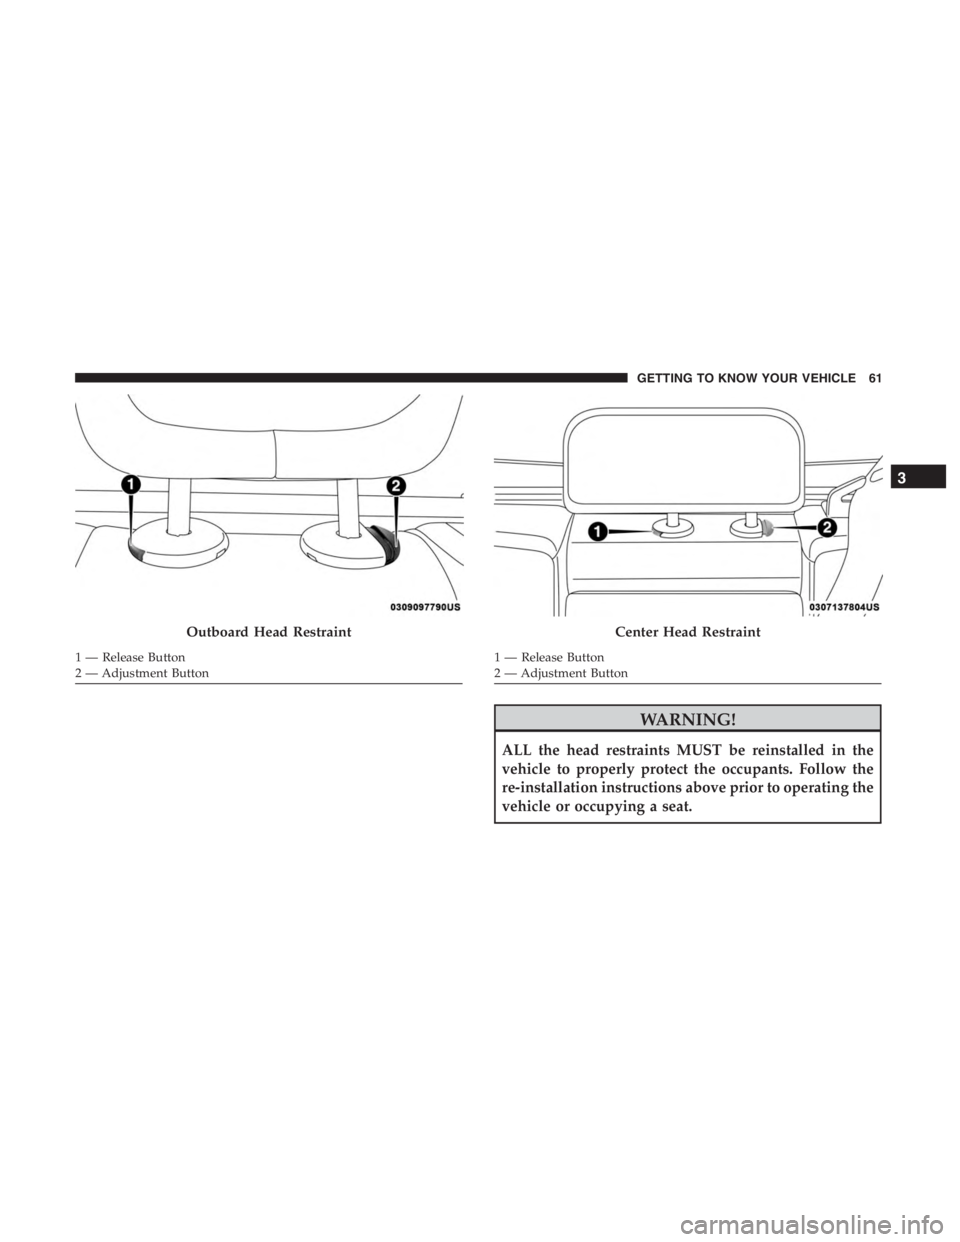
go. Then, push the release button and the adjustment button
at the base of each post while pulling the head restraint up.
Seatback angle may need to be adjusted to fully remove the
head restraint. To reinstall the head restraint, put the head
restraint posts into the holes and push downward. Then
adjust the head restraint to the appropriate height.
Page 62 of 638
WARNING!
•A loose head restraint thrown forward in a collision or
hard stop could cause serious injury or death to
occupants of the vehicle. Always securely stow re-
moved head restraints in a location outside the occu-
pant compartment.
•ALL the head restraints MUST be reinstalled in the
vehicle to properly protect the occupants. Follow the
re-installation instructions above prior to operating
the vehicle or occupying a seat.
• Do not place items over the top of the Reactive Head
Restraint, such as coats, seat covers or portable DVD
players. These items may interfere with the opera-
tion of the Reactive Head Restraint in the event of a
collision and could result in serious injury or death.
Rear Head Restraints
The rear outboard and center head restraints have two
positions: up and down. When the center seat is being
occupied the head restraint should be in the raised posi-
tion. When there is no occupant in the center seat, the head
restraint can be lowered for maximum visibility for the
driver.
To raise the head restraint, pull upward on the head
restraint. To lower the head restraint, push the adjustment
button, located at the base of the head restraint, and push
downward on the head restraint.
NOTE: To remove the head restraint, raise it as far as it can
go. Then, push the release button and the adjustment
button at the base of each post while pulling the head
restraint up. To reinstall the head restraint, put the head
restraint posts into the holes and push downward. Then,
adjust the head restraint to the appropriate height.
60 GETTING TO KNOW YOUR VEHICLE
Page 63 of 638
WARNING!
ALL the head restraints MUST be reinstalled in the
vehicle to properly protect the occupants. Follow the
re-installation instructions above prior to operating the
vehicle or occupying a seat.
Outboard Head Restraint
Page 64 of 638
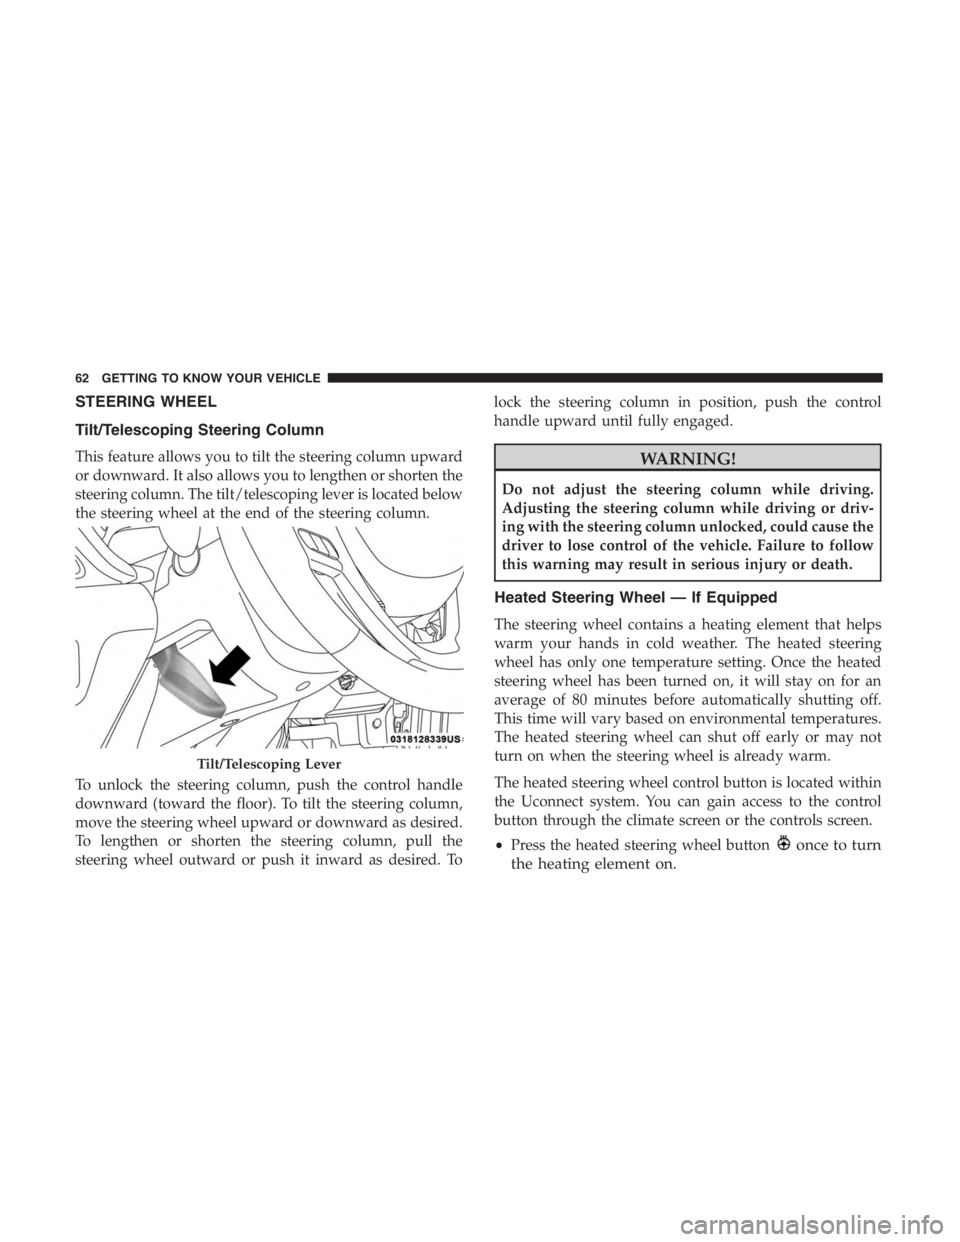
STEERING WHEEL
Tilt/Telescoping Steering Column
This feature allows you to tilt the steering column upward
or downward. It also allows you to lengthen or shorten the
steering column. The tilt/telescoping lever is located below
the steering wheel at the end of the steering column.
To unlock the steering column, push the control handle
downward (toward the floor). To tilt the steering column,
move the steering wheel upward or downward as desired.
To lengthen or shorten the steering column, pull the
steering wheel outward or push it inward as desired. Tolock the steering column in position, push the control
handle upward until fully engaged.
once to turn
the heating element on.
Page 65 of 638
•Press the heated steering wheel buttona second time
to turn the heating element off.
NOTE: The engine must be running for the heated steering
wheel to operate.
Vehicles Equipped With Remote Start
On models that are equipped with remote start, the heated
steering wheel can be programmed to come on during a
remote start through the Uconnect system. Refer to
“Uconnect Settings” in “Multimedia” for further informa-
tion.
Page 66 of 638
Page 67 of 638
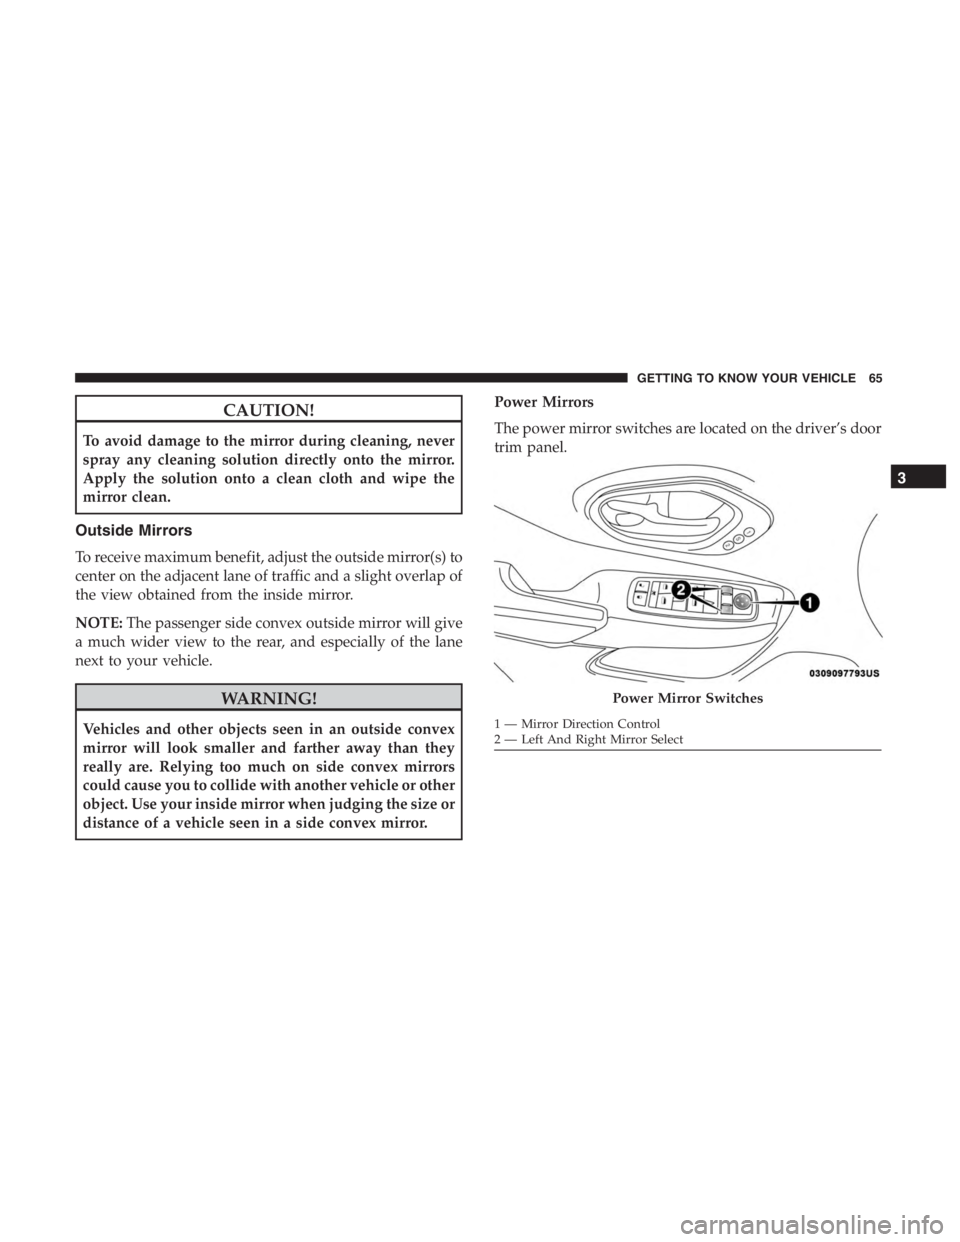
CAUTION!
To avoid damage to the mirror during cleaning, never
spray any cleaning solution directly onto the mirror.
Apply the solution onto a clean cloth and wipe the
mirror clean.
Outside Mirrors
To receive maximum benefit, adjust the outside mirror(s) to
center on the adjacent lane of traffic and a slight overlap of
the view obtained from the inside mirror.
NOTE:The passenger side convex outside mirror will give
a much wider view to the rear, and especially of the lane
next to your vehicle.
Page 68 of 638
Page 69 of 638
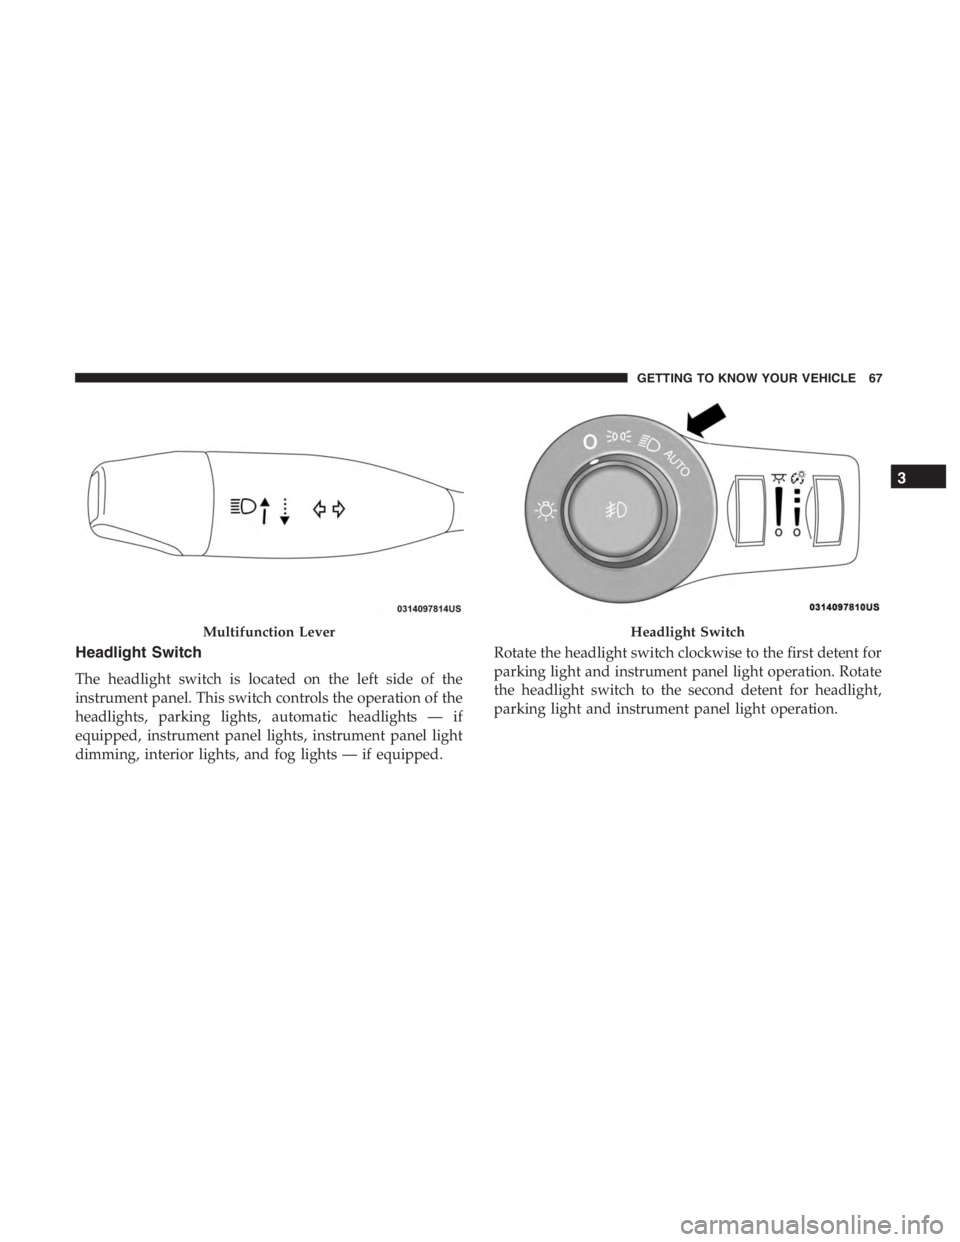
Headlight Switch
3
GETTING TO KNOW YOUR VEHICLE 67
Page 70 of 638
Trending: clutch, battery location, oil change, tires, clock, technical specifications, ABS


