seat width JEEP CJ 1953 Service Manual
[x] Cancel search | Manufacturer: JEEP, Model Year: 1953, Model line: CJ, Model: JEEP CJ 1953Pages: 376, PDF Size: 19.96 MB
Page 56 of 376
D
HURRICANE
F4
ENGINE
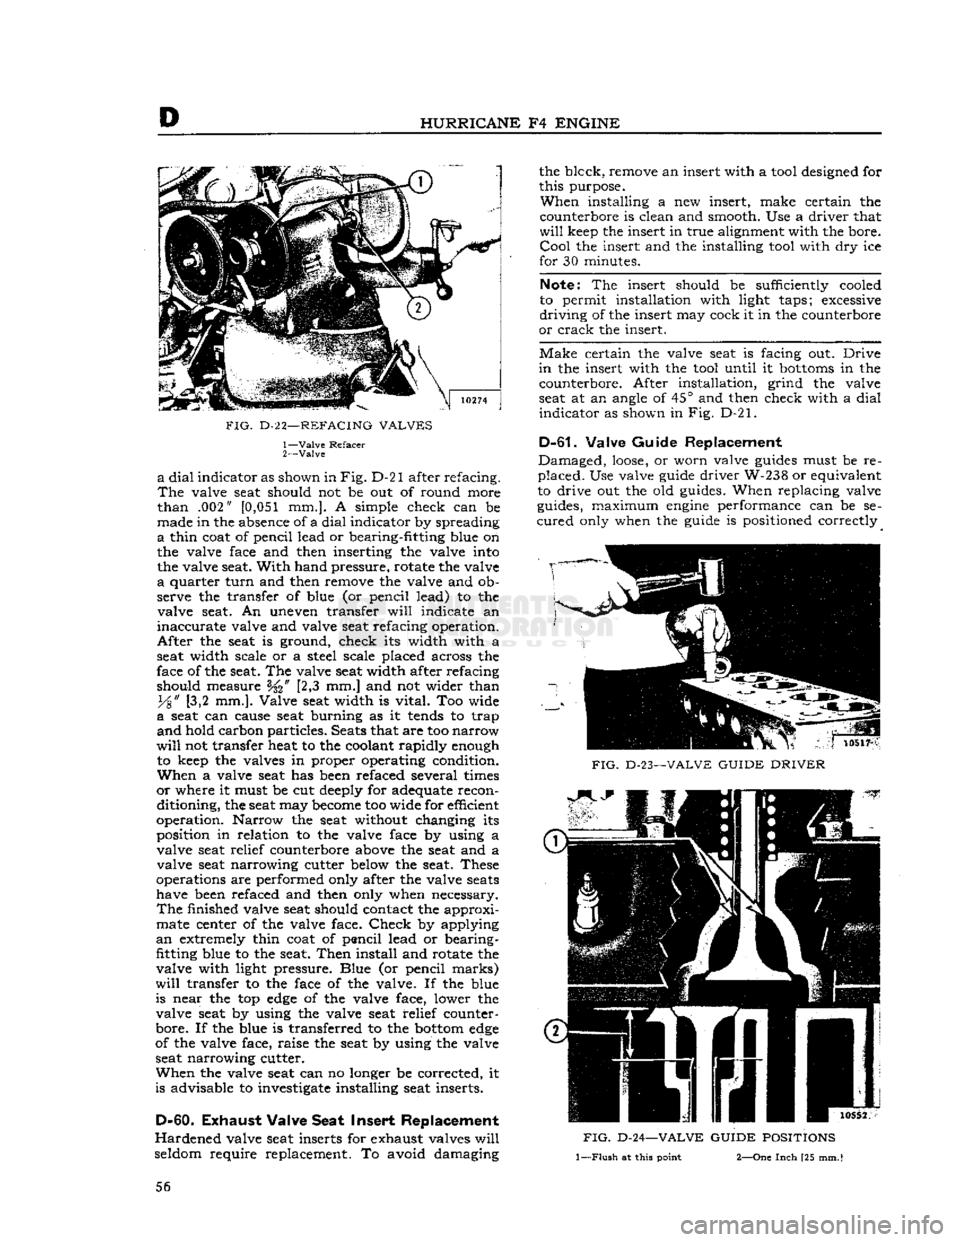
FIG.
D-2
2—REFACING
VALVES
1—
Valve
Refacer
2—
Valve
a
dial
indicator as shown in
Fig.
D-21 after refacing.
The
valve seat should not be out of round more
than
.002"
[0,051
mm.]. A simple check can be
made in the absence of a
dial
indicator by spreading
a
thin coat of pencil lead or bearing-fitting blue on
the valve face and then inserting the valve into the valve seat.
With
hand pressure, rotate the valve
a
quarter
turn
and then remove the valve and ob
serve the transfer of blue (or pencil lead) to the valve seat. An uneven transfer
will
indicate an
inaccurate
valve and valve seat refacing operation.
After
the seat is ground, check its width with a
seat width scale or a steel scale placed across the
face of the seat. The valve seat width after refacing
should measure [2,3 mm.] and not wider than
y%"
[3,2 mm.]. Valve seat width is
vital.
Too wide
a
seat can cause seat burning as it
tends
to trap
and
hold carbon particles. Seats that are too
narrow
will
not transfer heat to the coolant rapidly enough to keep the valves in proper operating condition.
When
a valve seat has been refaced several times
or
where it must be cut deeply for adequate recon
ditioning, the seat may
become
too wide for efficient
operation. Narrow the seat without changing its
position in relation to the valve face by using a
valve seat relief counterbore above the seat and a valve seat narrowing cutter below the seat. These
operations are performed only after the valve
seats
have been refaced and then only when necessary.
The
finished valve seat should contact the approximate center of the valve face.
Check
by applying
an
extremely thin coat of pencil lead or bearing-
fitting blue to the seat.
Then
install and rotate the
valve with light pressure. Blue (or pencil
marks)
will
transfer to the face of the valve. If the blue
is near the top
edge
of the valve face, lower the valve seat by using the valve seat relief counter-
bore. If the blue is transferred to the
bottom
edge
of the valve face, raise the seat by using the valve
seat narrowing cutter.
When
the valve seat can no longer be corrected, it
is advisable to investigate installing seat inserts.
D-60.
Exhaust
Valve Seat Insert Replacement
Hardened
valve seat inserts for exhaust valves
will
seldom require replacement. To avoid damaging the blcck, remove an insert with a tool designed for
this purpose.
When
installing a new insert, make certain the
counterbore is clean and smooth. Use a driver that
will
keep the insert in true alignment with the bore.
Cool
the insert and the installing tool with dry ice
for 30 minutes.
Note:
The insert should be sufficiently cooled
to permit installation with light taps; excessive
driving
of the insert may cock it in the counterbore
or
crack the insert.
Make
certain the valve seat is facing out.
Drive
in
the insert with the tool until it
bottoms
in the counterbore. After installation, grind the valve
seat at an angle of 45° and then check with a
dial
indicator
as shown in Fig. D-21.
D-61.
Valve Guide Replacement
Damaged,
loose,
or worn valve
guides
must be re
placed.
Use valve guide driver W-238 or equivalent
to drive out the old guides. When replacing valve
guides, maximum
engine
performance can be se
cured
only when the guide is positioned correctly
FIG.
D-23—VALVE
GUIDE
DRIVER
FIG.
D-24—VALVE
GUIDE
POSITIONS
1—Flush
at
this
point
2—One
Inch
[25
mm.
I
56
Page 88 of 376
Pi
DAUNTLESS
¥-6
ENGINE
which
would cause rings to seat improperly or have
excessive clearance in
ring
grooves. Damaged or
faulty
pistons should be replaced,
c.
Inspect bearing surfaces of piston pins and check
for
wear by measuring worn and unworn surfaces
with
a micrometer. Rough or worn pins should be
replaced.
Test fit the piston pins in piston
bosses.
Occasionally,
a pin
will
be tight due to gum or
varnish
deposits.
This
may be corrected by remov
ing
the deposit with a suitable solvent. If piston
bosses
are worn out-of-round or oversize, the piston
and
pin assembly must be replaced. Oversize pins
are
not
practical,
since the pin must be a press fit
in
the connecting rod bore. Piston pins must fit the
piston with an easy finger push at
70°F.
[21°C.].
They
should have .0004" to .0007"
[0,0178
a
0,0102
mm.] clearance.
Dl-46.
Piston Fitting
If
cylinder bores are rebored or heavily honed,
new and possibly oversize diameter pistons must be
installed.
A new piston must be fitted to its cylinder
bore.
A satisfactory method of fitting pistons is as
follows.
a.
Expand
a
telescope
gauge
to fit the cylinder bore at right angles to the piston pin and
between
1
Vi"
to 2" [3,7 a 5,1 cm.] from the top.
b.
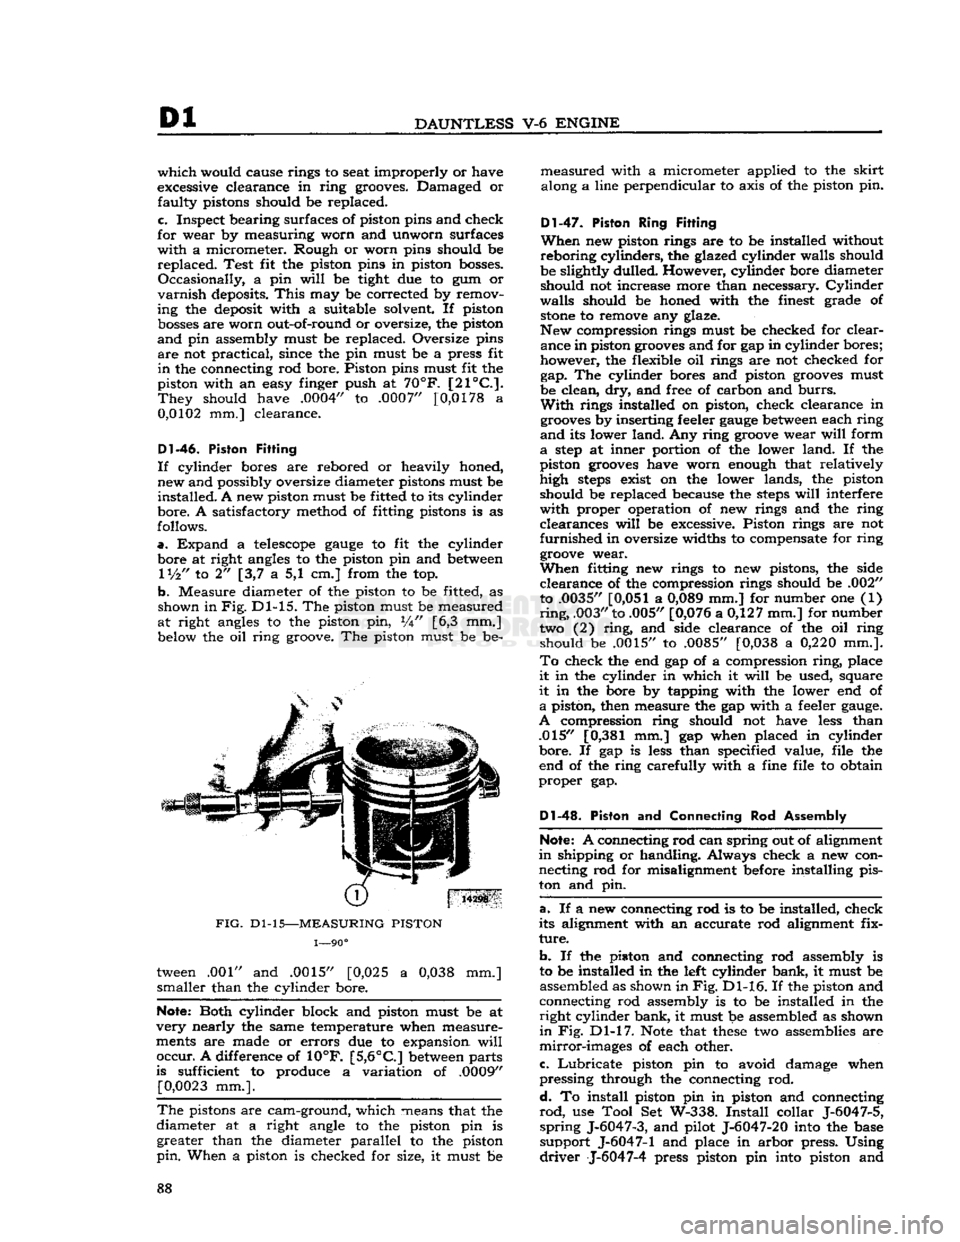
Measure diameter of the piston to be fitted, as
shown in
Fig.
Dl-15. The piston must be measured
at
right angles to the piston pin, W [6,3 mm.] below the oil
ring
groove. The piston must be be-
FIG.
Dl-15—MEASURING
PISTON
1—90°
tween .001" and .0015" [0,025 a
0,038
mm.]
smaller
than the cylinder bore.
Note:
Both cylinder block and piston must be at
very
nearly the same temperature when measure
ments are made or
errors
due to expansion
will
occur.
A difference of 10°F.
[5,6°C]
between
parts
is sufficient to produce a variation of .0009"
[0,0023
mm.].
The
pistons are cam-ground, which means that the
diameter at a right angle to the piston pin is
greater
than the diameter
parallel
to the piston
pin.
When a piston is checked for size, it must be
measured
with a micrometer applied to the
skirt
along a line
perpendicular
to axis of the piston pin.
Dl-47.
Piston Ring Fitting
When
new piston rings are to be installed without
reboring
cylinders,
the glazed cylinder walls should
be slightly dulled. However, cylinder bore diameter
should
not increase more than necessary.
Cylinder
walls
should be honed with the finest grade of
stone
to remove any glaze.
New compression rings must be checked for clear ance in piston
grooves
and for gap in cylinder bores;
however, the flexible oil rings are not checked for gap. The cylinder bores and piston
grooves
must
be clean, dry, and free of carbon and
burrs.
With
rings installed on piston, check clearance in
grooves
by inserting feeler
gauge
between
each
ring
and
its lower
land.
Any
ring
groove
wear
will
form
a
step
at inner portion of the lower
land.
If the
piston
grooves
have worn enough that relatively
high
steps
exist on the lower lands, the piston
should
be replaced because the
steps
will
interfere
with
proper operation of new rings and the
ring
clearances
will
be excessive. Piston rings are not
furnished
in oversize widths to compensate for
ring
groove
wear.
When
fitting new rings to new pistons, the side
clearance
of the compression rings should be .002" to .0035"
[0,051
a
0,089
mm.] for number one (1)
ring,
.003" to .005" [0,076 a 0,127 mm.] for number
two (2)
ring,
and side clearance of the oil
ring
should
be .0015" to .0085" [0,038 a
0,220
mm.].
To
check the end gap of a compression
ring,
place
it
in the cylinder in which it
will
be used, square
it
in the bore by tapping with the lower end of
a
piston, then measure the gap with a feeler
gauge.
A
compression
ring
should not have
less
than .015"
[0,381
mm.] gap when placed in cylinder
bore.
If gap is
less
than specified value, file the
end of the
ring
carefully with a fine file to obtain
proper
gap.
Dl-48.
Piston and Connecting Rod Assembly
Note:
A connecting rod can spring out of alignment
in
shipping or handling. Always check a new con
necting rod for misalignment before installing pis
ton and pin.
a.
If a new connecting rod is to be installed, check
its alignment with an accurate rod alignment fix
ture.
b.
If the piston and connecting rod assembly is
to be installed in the left cylinder bank, it must be assembled as shown in
Fig.
Dl-16. If the piston and
connecting rod assembly is to be installed in the
right
cylinder bank, it must be assembled as shown
in
Fig. Dl-17.
Note
that
these
two assemblies are
mirror-images
of each other.
c.
Lubricate
piston pin to avoid damage when
pressing
through the connecting rod.
d.
To install piston pin in piston and connecting
rod,
use
Tool
Set W-338.
Install
collar J-6047-5,
spring
J-6047-3, and pilot J-6047-20 into the base
support
J-6047-1 and place in
arbor
press. Using
driver
J-6047-4 press piston pin into piston and 88
Page 94 of 376
Dl
DAUNTLESS
V-6
ENGINE
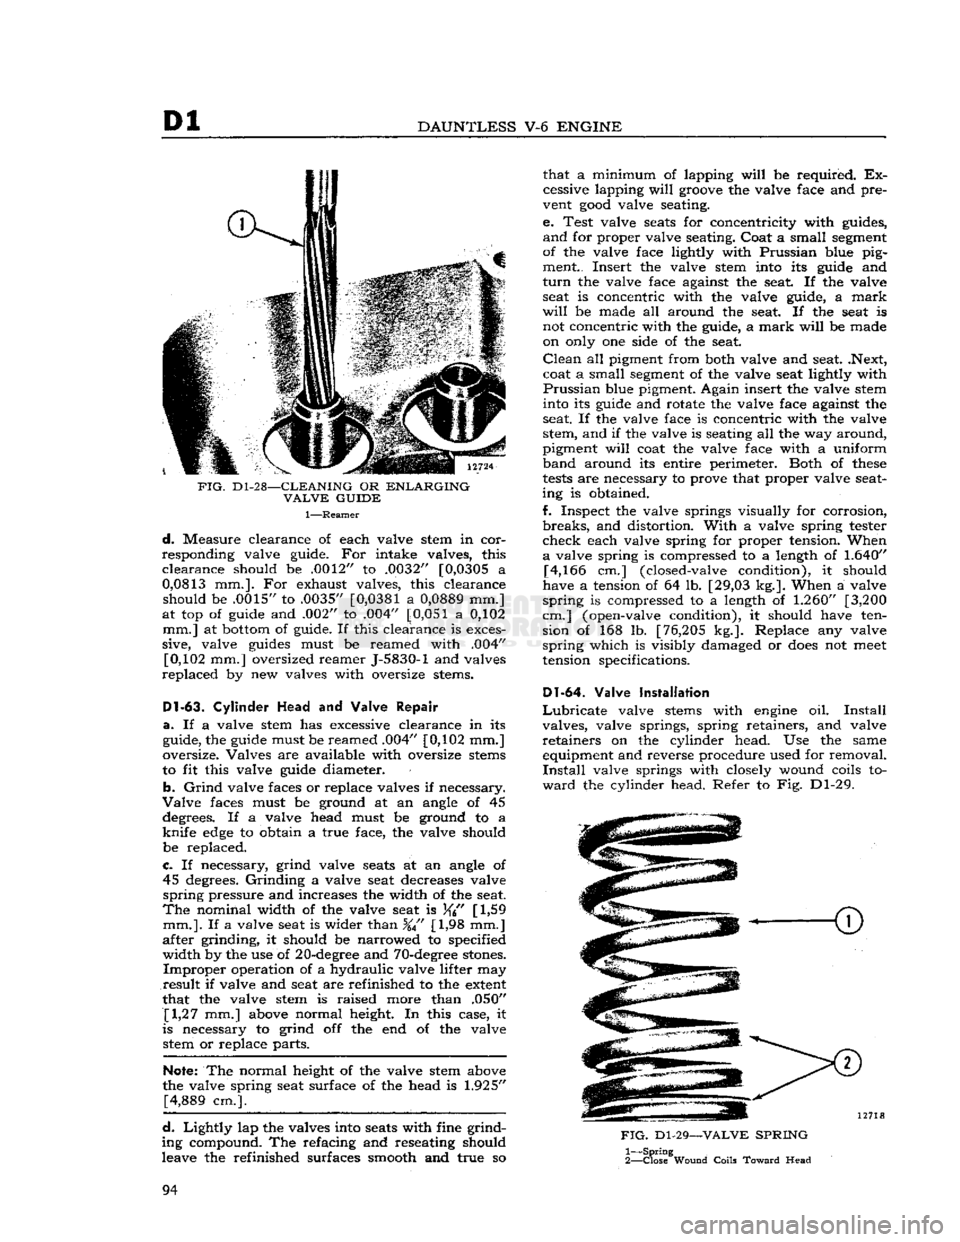
FIG.
D1-28—CLEANING
OR
ENLARGING
VALVE
GUIDE
1—Reamer
d.
Measure clearance of each valve stem in cor
responding valve guide. For intake valves, this
clearance
should be .0012" to .0032" [0,0305 a
0,0813
mm.]. For exhaust valves, this clearance should be .0015" to .0035"
[0,0381
a
0,0889
mm.]
at top of guide and .002" to .004"
[0,051
a 0,102 mm.] at bottom of guide. If this clearance is exces
sive, valve guides must be reamed with .004" [0,102 mm.] oversized reamer J-5830-1 and valves
replaced
by new valves with oversize stems.
Dl-63.
Cylinder
Head
and Valve
Repair
a.
If a valve stem has excessive clearance in its
guide, the guide must be reamed .004" [0,102 mm.]
oversize. Valves are available with oversize stems
to fit this valve guide diameter.
b.
Grind
valve faces or replace valves if necessary.
Valve
faces must be ground at an angle of 45 degrees. If a valve head must be ground to a
knife
edge
to obtain a true face, the valve should
be replaced.
c.
If necessary, grind valve seats at an angle of 45 degrees.
Grinding
a valve seat decreases valve
spring
pressure and increases the width of the seat.
The
nominal width of the valve seat is
[
1,59
mm.].
If a valve seat is wider than %" [1,98 mm.]
after grinding, it should be narrowed to specified
width
by the use of 20-degree and 70-degree stones.
Improper
operation of a hydraulic valve lifter may
result
if valve and seat are refinished to the extent
that the valve stem is raised more than .050" [1,27 mm.] above normal height. In this case, it
is necessary to grind off the end of the valve stetti or replace parts.
Note:
The normal height of the valve stem above
the valve spring seat surface of the head is
1.925"
[4,889 cm.].
d.
Lightly
lap the valves into seats with fine grind
ing compound. The refacing and reseating should
leave the refinished surfaces smooth and true so that a minimum of lapping
will
be required. Ex
cessive lapping
will
groove the valve face and pre
vent
good
valve seating.
e. Test valve seats for concentricity with guides,
and
for proper valve seating. Coat a small segment
of the valve face lightly with Prussian blue pig ment.. Insert the valve stem into its guide and
turn
the valve face against the seat. If the valve seat is concentric with the valve guide, a
mark
will
be made all around the seat. If the seat is not concentric with the guide, a
mark
will
be made
on only one side of the seat.
Clean
all pigment from both valve and seat. .Next,
coat a small segment of the valve seat lightly with
Prussian
blue pigment. Again insert the valve stem into its guide and rotate the valve face against the
seat. If the valve face is concentric with the valve
stem, and if the valve is seating all the way around,
pigment
will
coat the valve face with a uniform
band
around its entire perimeter. Both of
these
tests
are necessary to prove that proper valve seat
ing is obtained.
f. Inspect the valve springs visually for corrosion,
breaks,
and distortion.
With
a valve spring tester
check
each valve spring for proper tension. When
a
valve spring is compressed to a length of
1.640"
[4,166 cm.] (closed-valve condition), it should
have a tension of 64 lb. [29,03 kg.]. When a valve
spring
is compressed to a length of
1.260"
[3,200
cm.] (open-valve condition), it should have ten sion of 168 lb. [76,205 kg.]. Replace any valve
spring
which is visibly damaged or
does
not
meet
tension specifications.
Dl-64.
Valve Installation
Lubricate
valve stems with engine oil.
Install
valves, valve springs, spring retainers, and valve
retainers
on the cylinder head. Use the same equipment and reverse procedure used for removal.
Install
valve springs with closely wound coils to
ward
the cylinder head. Refer to Fig. Dl-29.
FIG.
Dl-29—VALVE
SPRING
1—
Spring
2—
Close
Wound
Coils
Toward
Head
94