light JEEP COMMANDER 2007 1.G Repair Manual
[x] Cancel search | Manufacturer: JEEP, Model Year: 2007, Model line: COMMANDER, Model: JEEP COMMANDER 2007 1.GPages: 456, PDF Size: 6.85 MB
Page 232 of 456
The center button on the left side rocker switch has no
function for a single disc CD player. However, when a
multiple disc CD player is equipped on the vehicle, the
center button will select the next available CD in the
player.
CD/DVD DISC MAINTENANCE
To keep the CD/DVD discs in good condition, take the
following precautions:
1. Handle the disc by its edge; avoid touching the
surface.
2. If the disc is stained, clean the surface with a soft cloth,
wiping from center to edge.
3. Do not apply paper, paper CD labels, or tape to the
disc; avoid scratching the disc.
4. Do not use solvents such as benzine, thinner, cleaners,
or antistatic sprays.5. Store the disc in its case after playing.
6. Do not expose the disc to direct sunlight.
7. Do not store the disc where temperatures may become
too high.
RADIO OPERATION AND CELLULAR PHONES
Under certain conditions, the cellular phone being On in
your vehicle can cause erratic or noisy performance from
your radio. This condition may be lessened or eliminated
by relocating the cellular phone antenna. This condition
is not harmful to the radio. If your radio performance
does not satisfactorily “clear” by the repositioning of the
antenna, it is recommended that the radio volume be
turned down or off during cellular phone operation.
232 UNDERSTANDING YOUR INSTRUMENT PANEL
Page 235 of 456
Bi-Level
Air flows both through the outlets located in the
instrument panel and those located on the floor. Air
flows through the registers in the back of the center
console, and under the front seats to the rear seat
passengers. These registers can be closed to partially
block airflow. The center console outlets deliver condi-
tioned air while the floor outlets deliver heated air.
Panel
Air flows through the outlets located in the instru-
ment panel. Air flows through the registers in the
back of the center console to the rear seat passengers.
These registers can be closed to block airflow.Recirculation
The recirculation feature can be selected with
the mode control knob. You may choose be-
tween Bi-Level Recirculation and Panel Recir-
culation air outlets while in this mode. Nor-
mally, air enters from outside the vehicle. However, when
in Recirculation mode air inside the vehicle is re-used.
Use this mode to rapidly cool the inside of the vehicle.
The Recirculation mode can also be used to temporarily
block out outside odors, smoke, and dust.
Air Conditioning Operation
To turn on the Air Conditioning, set the fan control
at any speed and press the snowflake button
located on the control panel. Conditioned air will
be directed through the outlets selected by the mode
control. A light in the snowflake button shows that the air
conditioning is on.
UNDERSTANDING YOUR INSTRUMENT PANEL 235
4
Page 236 of 456
Slight changes in engine speed or power may be noticed
when the air conditioning compressor is on. This is a
normal occurrence as the compressor will cycle on and
off to maintain comfort and increase fuel economy.
Automatic Temperature Control — If Equipped
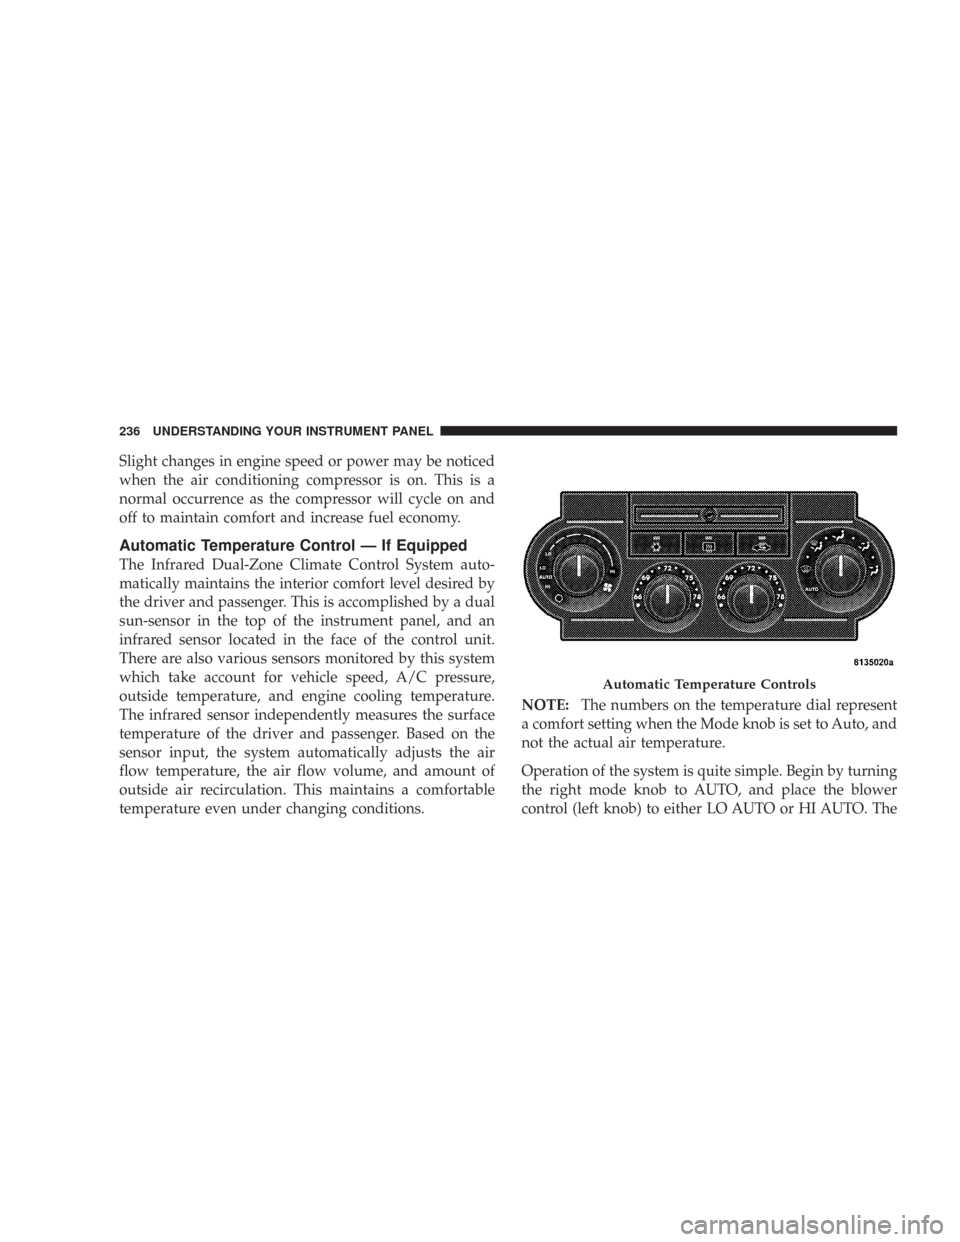
The Infrared Dual-Zone Climate Control System auto-
matically maintains the interior comfort level desired by
the driver and passenger. This is accomplished by a dual
sun-sensor in the top of the instrument panel, and an
infrared sensor located in the face of the control unit.
There are also various sensors monitored by this system
which take account for vehicle speed, A/C pressure,
outside temperature, and engine cooling temperature.
The infrared sensor independently measures the surface
temperature of the driver and passenger. Based on the
sensor input, the system automatically adjusts the air
flow temperature, the air flow volume, and amount of
outside air recirculation. This maintains a comfortable
temperature even under changing conditions.NOTE:The numbers on the temperature dial represent
a comfort setting when the Mode knob is set to Auto, and
not the actual air temperature.
Operation of the system is quite simple. Begin by turning
the right mode knob to AUTO, and place the blower
control (left knob) to either LO AUTO or HI AUTO. The
Automatic Temperature Controls
236 UNDERSTANDING YOUR INSTRUMENT PANEL
Page 245 of 456
Regular cleaning of the inside of the windows with a
non-filming cleaning solution (vinegar and water works
very well) will help prevent contaminates (cigarette
smoke, perfumes, etc.) from sticking to the windows.
Contaminates increase the rate of window fogging.
Summer Operation
Air conditioned vehicles must be protected with a high
quality antifreeze coolant during summer to provide
proper corrosion protection and to raise the boiling point
of the coolant for protection against overheating. A 50 %
concentration is recommended. Refer to Recommended
Fluids and Genuine Parts for the proper coolant type.
When using the air conditioner in extremely heavy traffic
in hot weather especially when towing a trailer, addi-
tional engine cooling may be required. If this situation is
encountered, operate the transmission in a lower gear to
increase engine RPM, coolant flow and fan speed. When
stopped in heavy traffic, it may be necessary to shift intoN (Neutral) and depress the accelerator slightly for fast
idle operation to increase coolant flow and fan speed.
Your air conditioning system is also equipped with an
automatic recirculation system. When the system senses
a heavy load or high heat conditions, it may use partial
Recirculation A/C mode to provide additional comfort.Winter Operation
When operating the system during the winter months,
make sure the air intake, located directly in front of the
windshield, is free of ice, slush, snow, or other obstruc-
tions.
Vacation Storage
Anytime you store your vehicle, or keep it out of service
(i.e. vacation) for two weeks or more, run the air condi-
tioning system at idle for about five minutes in the fresh
air and high blower setting. This will insure adequate
system lubrication to minimize the possibility of com-
pressor damage when the system is started again.
UNDERSTANDING YOUR INSTRUMENT PANEL 245
4
Page 261 of 456
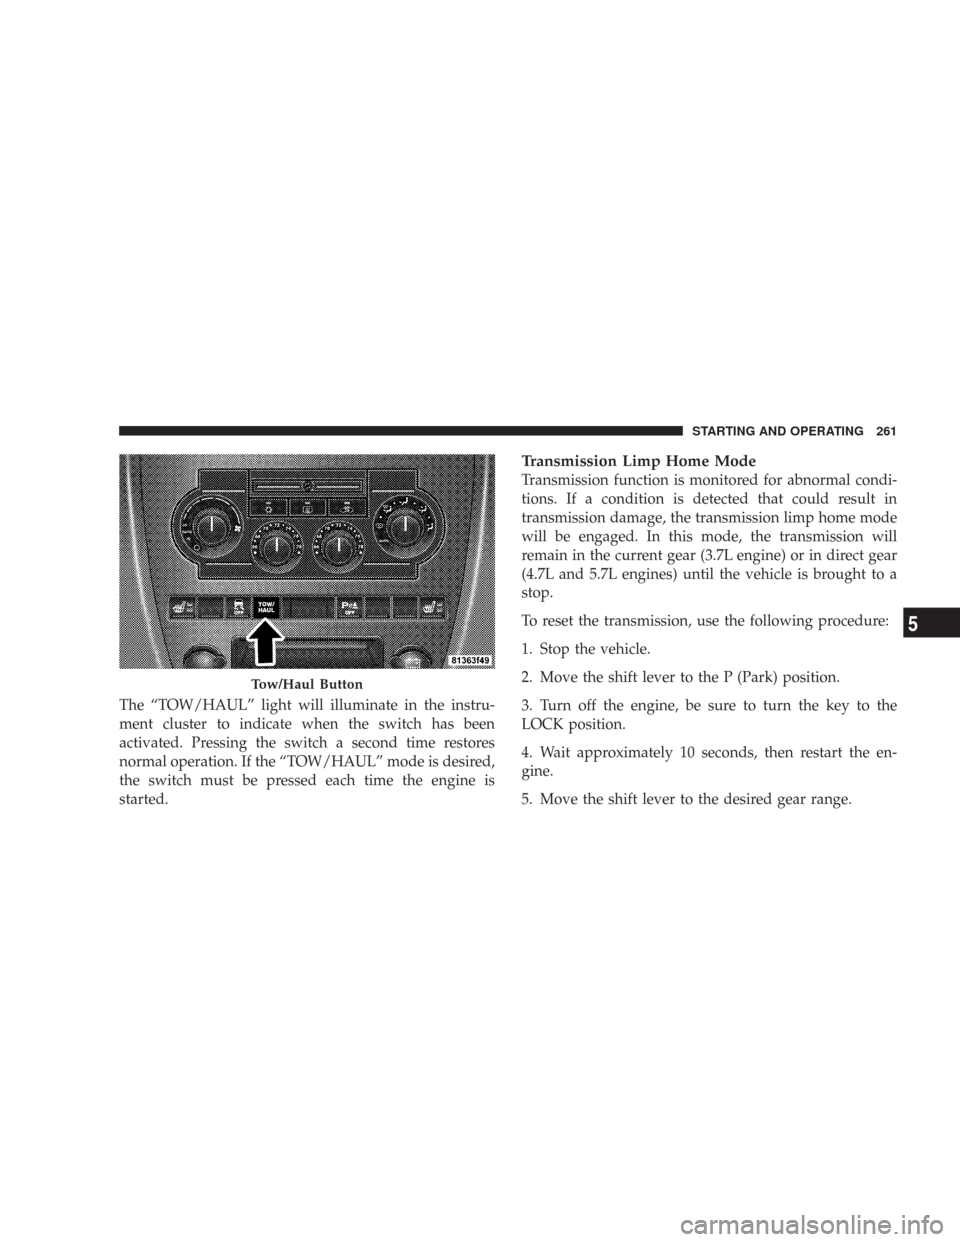
The “TOW/HAUL” light will illuminate in the instru-
ment cluster to indicate when the switch has been
activated. Pressing the switch a second time restores
normal operation. If the “TOW/HAUL” mode is desired,
the switch must be pressed each time the engine is
started.
Transmission Limp Home Mode
Transmission function is monitored for abnormal condi-
tions. If a condition is detected that could result in
transmission damage, the transmission limp home mode
will be engaged. In this mode, the transmission will
remain in the current gear (3.7L engine) or in direct gear
(4.7L and 5.7L engines) until the vehicle is brought to a
stop.
To reset the transmission, use the following procedure:
1. Stop the vehicle.
2. Move the shift lever to the P (Park) position.
3. Turn off the engine, be sure to turn the key to the
LOCK position.
4. Wait approximately 10 seconds, then restart the en-
gine.
5. Move the shift lever to the desired gear range.
Tow/Haul Button
STARTING AND OPERATING 261
5
Page 262 of 456
If the problem is no longer detected, the transmission will
return to normal operation. If the problem persists, P
(Park), R (Reverse), and N (Neutral) will continue to
operate. Only Second gear range will operate in the D
(Drive) shifter position. Have the transmission checked at
your authorized dealer as soon as possible.
Torque Converter Clutch
A feature, designed to improve fuel economy, has been
included in the automatic transmission on your vehicle.
A clutch within the torque converter engages automati-
cally at a calibrated speed at light throttle. It engages at
higher speeds under heavier acceleration. This may re-
sult in a slightly different feeling or response during
normal operation in high gear. When the vehicle speed
drops below a calibrated speed, or during acceleration,
the clutch automatically and smoothly disengages. The
feature is operational in Overdrive and in Drive.NOTE:The torque converter clutch will not engage
until the transmission fluid and engine coolant are warm
[usually after 1-3 miles (1.6 - 4.8 km) of driving]. Because
the engine speed is higher when the torque converter
clutch is not engaged, it may seem as if the transmission
is not shifting into Overdrive when cold. This is normal.
Manually shifting (using the ERS shift control) between 4
(direct gear) and 5/D (Overdrive gear) positions will
demonstrate that the transmission is able to shift into and
out of Overdrive.
NOTE:If the vehicle has not been driven in several
days, the first few seconds of operation after shifting the
transmission into gear may seem sluggish. This is due to
the fluid partially draining from the torque converter into
the transmission. This condition is normal and will not
cause damage to the transmission. The torque converter
will refill within five seconds of shifting from Park into
any other gear position.
262 STARTING AND OPERATING
Page 263 of 456
Rocking the Vehicle
If the vehicle becomes stuck in snow, sand, or mud, it can
often be moved by a rocking motion. Move the gear
selector rhythmically between D (Drive) and R (Reverse),
while applying slight pressure to the accelerator.
NOTE:The Electronic Stability Program (ESP) and
Traction Control (if equipped) should be turned OFF
before attempting to rock the vehicle. Refer to Section 3 of
this manual.
The least amount of accelerator pedal pressure to main-
tain the rocking motion without spinning the wheels or
racing the engine is most effective. Racing the engine or
spinning the wheels, due to the frustration of not freeing
the vehicle, may lead to transmission overheating and
failure. Allow the engine to idle with the transmission
selector in N (Neutral) for at least one minute after everyfive rocking-motion cycles. This will minimize overheat-
ing and reduce the risk of transmission failure during
prolonged efforts to free a stuck vehicle.
CAUTION!
When “rocking” a stuck vehicle by moving between
“First” and R (Reverse), do not spin the wheels faster
than 15 mph (24 km/h), or drivetrain damage may
result.
STARTING AND OPERATING 263
5
Page 272 of 456
If you stall or begin to lose headwaywhile climbing a
steep hill, allow your vehicle to come to a stop and
immediately apply the brakes. Restart the engine and
shift to R (Reverse). Back slowly down the hill allowing
the compression braking of the engine to help regulate
your speed. If the brakes are required to control vehicle
speed, apply them lightly and avoid locking or skidding
the tires.
WARNING!
If the engine stalls or you lose headway or cannot
make it to the top of a steep hill or grade, never
attempt to turn around. To do so may result in
tipping and rolling the vehicle. Always back care-
fully straight down a hill in R (Reverse) gear. Never
back down a hill in N (Neutral) using only the brake.
Remember, never drive diagonally across a hill-always
drive straight up or down.
If the wheels start to slip as you approach the crest of a
hill, ease off the accelerator and maintain headway by
turning the front wheels slowly. This may provide a fresh
“bite” into the surface and will usually provide traction
to complete the climb.
Traction Downhill
Shift the transmission into a low gear and the transfer
case to 4WD LOW range. Let the vehicle go slowly down
the hill with all four wheels turning against engine
compression drag. This will permit you to control the
vehicle speed and direction.
When descending mountains or hills, repeated braking
can cause brake fade with loss of braking control. Avoid
repeated heavy braking by downshifting the transmis-
sion whenever possible.
272 STARTING AND OPERATING
Page 274 of 456
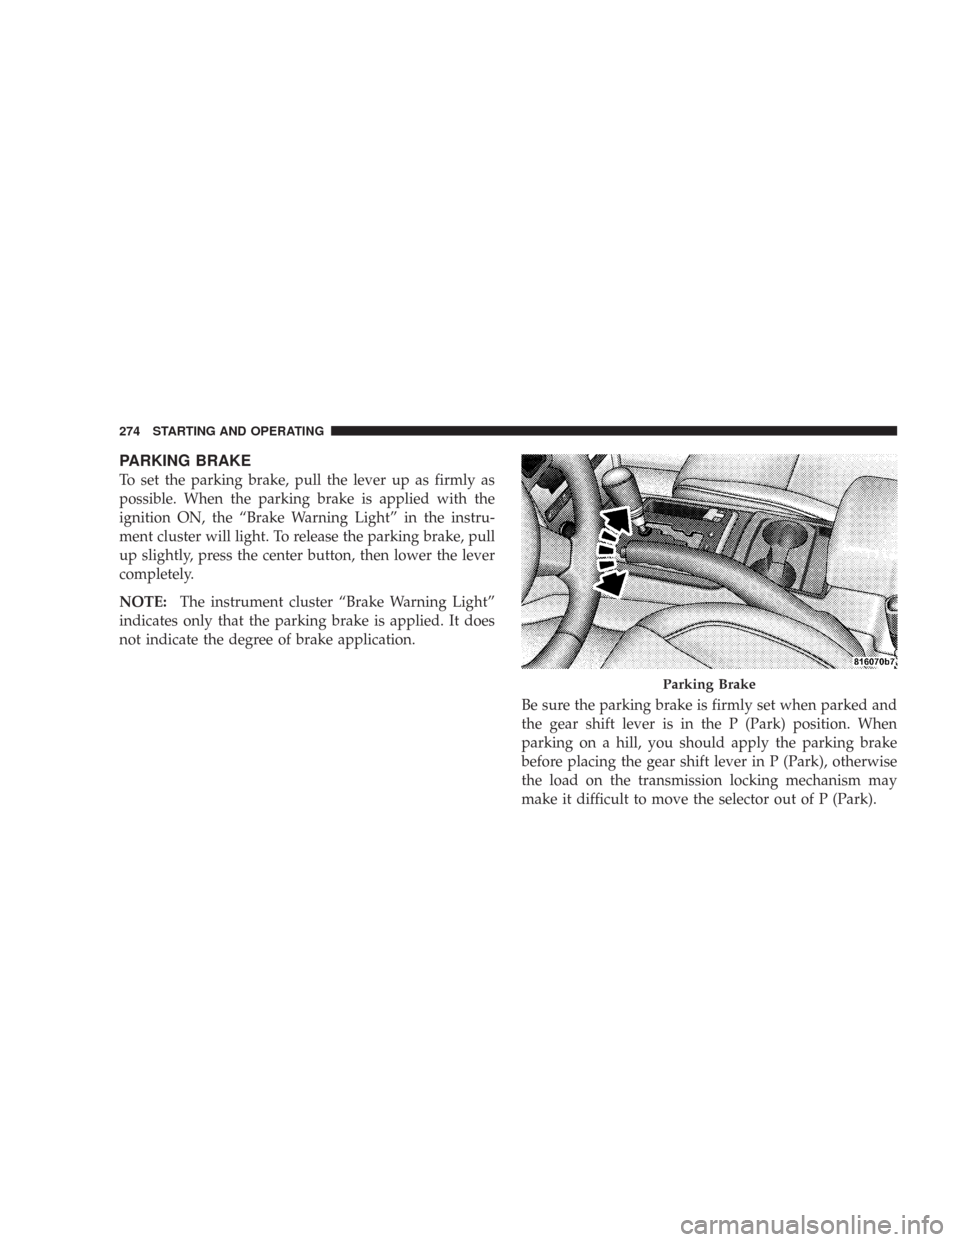
PARKING BRAKE
To set the parking brake, pull the lever up as firmly as
possible. When the parking brake is applied with the
ignition ON, the “Brake Warning Light” in the instru-
ment cluster will light. To release the parking brake, pull
up slightly, press the center button, then lower the lever
completely.
NOTE:The instrument cluster “Brake Warning Light”
indicates only that the parking brake is applied. It does
not indicate the degree of brake application.
Be sure the parking brake is firmly set when parked and
the gear shift lever is in the P (Park) position. When
parking on a hill, you should apply the parking brake
before placing the gear shift lever in P (Park), otherwise
the load on the transmission locking mechanism may
make it difficult to move the selector out of P (Park).
Parking Brake
274 STARTING AND OPERATING
Page 276 of 456
WARNING!
Significant over or under inflation of tires, or mixing
sizes of tires or wheels on the vehicle can lead to loss
of braking effectiveness.
The Anti-Lock Brake System conducts a low-speed self-
test at about 12 mph (20 km/h). If you have your foot
lightly on the brake while this test is occurring you may
feel slight pedal movement. The movement can be more
apparent on ice and snow. This is normal.
The Anti-Lock Brake System pump motor runs during
the self-test at 12 mph (20 km/h) and during an ABS stop.
The pump motor makes a low humming noise during
operation, which is normal.
WARNING!
Pumping of the Anti-Lock Brakes will diminish
their effectiveness and may lead to an accident.
Pumping makes the stopping distance longer. Just
press firmly on your brake pedal when you need to
slow down or stop.
276 STARTING AND OPERATING