mirror JEEP COMPASS 2008 1.G Owners Manual
[x] Cancel search | Manufacturer: JEEP, Model Year: 2008, Model line: COMPASS, Model: JEEP COMPASS 2008 1.GPages: 399, PDF Size: 6.59 MB
Page 69 of 399

UNDERSTANDING THE FEATURES OF YOUR VEHICLE
CONTENTS
mMirrors...............................73
NInside Day/Night Mirror Ð If Equipped......73
NOutside MirrorÐDriver's Side.............73
NOutside MirrorÐPassenger's Side...........74
NPower Remote Control Mirrors Ð
If Equipped..........................74
NVanity Mirrors Ð If Equipped.............76
NSun Visor Sliding Feature................76
mHands±Free Communication (UConnectŸ) Ð
If Equipped............................76NOperation............................78
NPhone Call Features....................85
NUConnectŸ System Features..............88
NAdvanced Phone Connectivity.............93
NThings You Should Know About Your
UConnectŸ System.....................95
NGeneral Information...................103
mSeats................................103
NFront Seat Adjustment..................103
3
Page 73 of 399

MIRRORS
Inside Day/Night Mirror Ð If Equipped
Adjust the mirror to center on the view through the rear
window. A two point pivot system allows for horizontal
and vertical mirror adjustment.
Annoying headlight glare can be reduced by moving the
small control under the mirror to the night position
(toward rear of vehicle). The mirror should be adjusted
while set in the day position (toward windshield).
Outside MirrorÐDriver's Side
Adjust the Flat (Drivers Side) Outside Mirror so you can
just see the side of your vehicle in the part of the mirror
closest to vehicle with your head close to the door glass.
Adjusting Rear View Mirror
UNDERSTANDING THE FEATURES OF YOUR VEHICLE 73
3
Page 74 of 399

Outside MirrorÐPassenger's Side
Adjust the convex outside mirror so you can just see the
side of your vehicle in the part of the mirror closest to the
vehicle with your head close to the center of the vehicle.
WARNING!
Vehicles and other objects seen in the passenger side
convex mirror will look smaller and farther away
than they really are. Relying too much on your
passenger side mirror could cause you to collide with
another vehicle or other object. Use your inside
mirror when judging the size or distance of a vehicle
seen in this convex mirror.
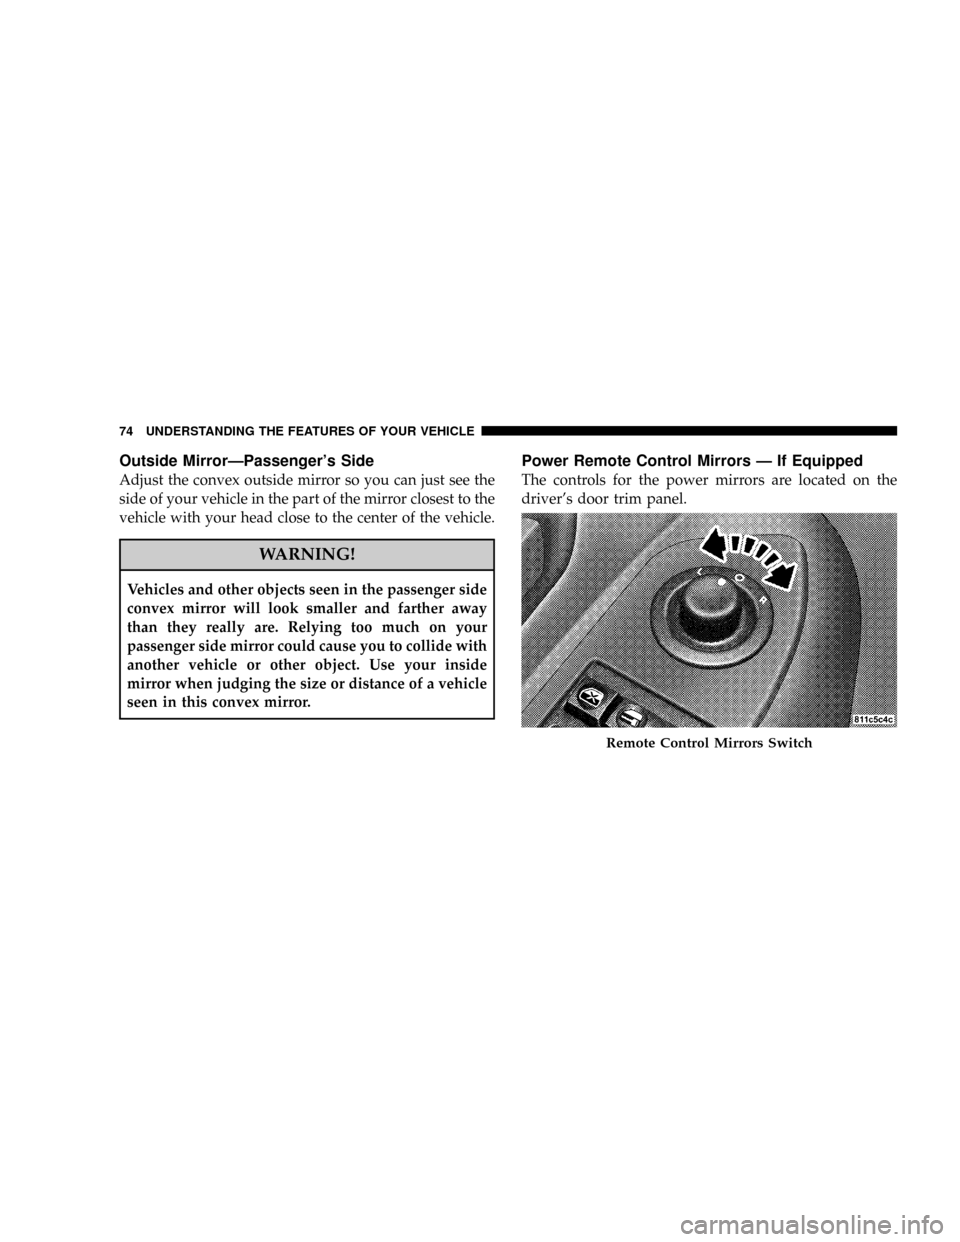
Power Remote Control Mirrors Ð If Equipped
The controls for the power mirrors are located on the
driver's door trim panel.
Remote Control Mirrors Switch
74 UNDERSTANDING THE FEATURES OF YOUR VEHICLE
Page 75 of 399

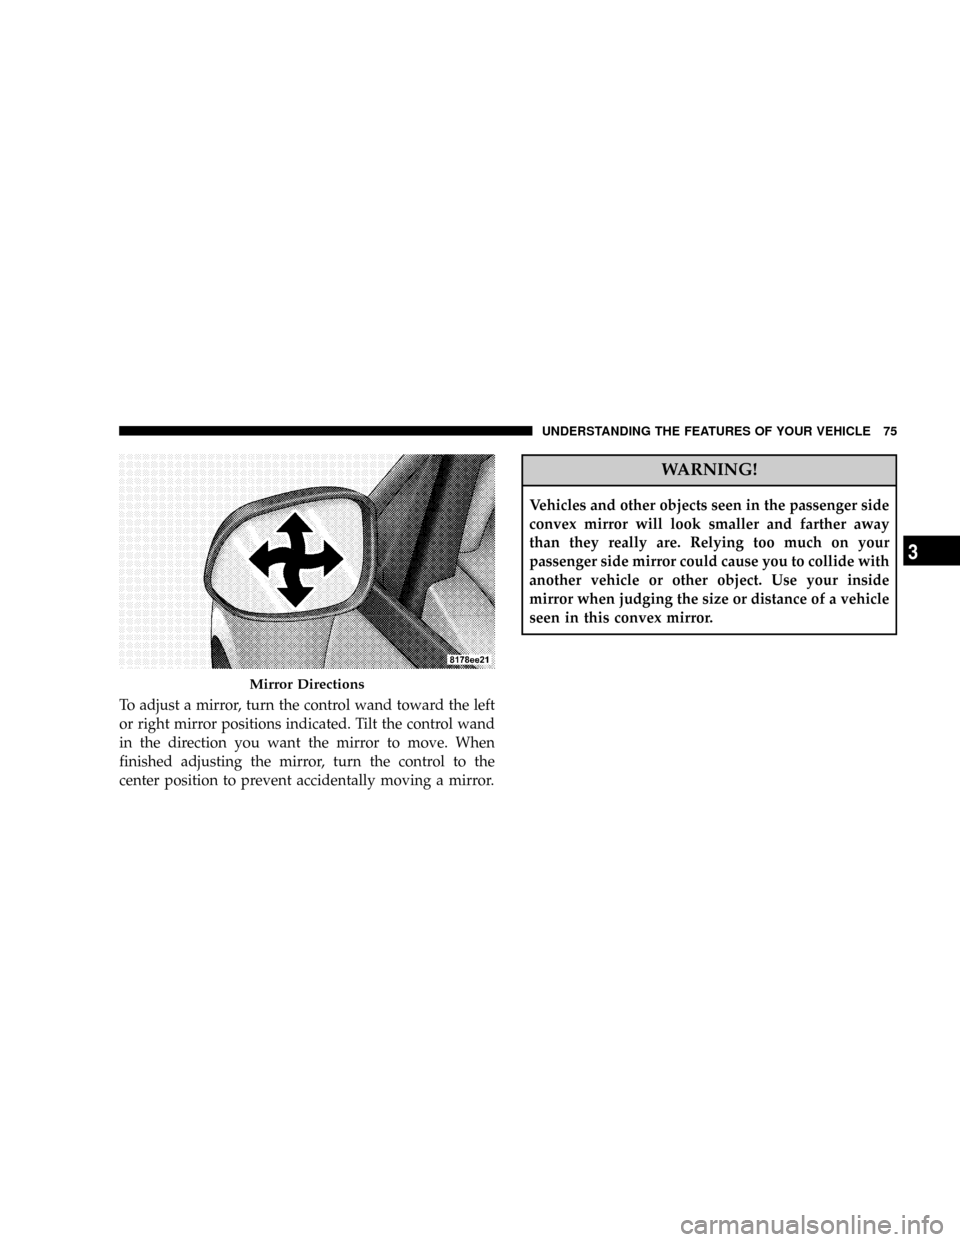
To adjust a mirror, turn the control wand toward the left
or right mirror positions indicated. Tilt the control wand
in the direction you want the mirror to move. When
finished adjusting the mirror, turn the control to the
center position to prevent accidentally moving a mirror.
WARNING!
Vehicles and other objects seen in the passenger side
convex mirror will look smaller and farther away
than they really are. Relying too much on your
passenger side mirror could cause you to collide with
another vehicle or other object. Use your inside
mirror when judging the size or distance of a vehicle
seen in this convex mirror.
Mirror Directions
UNDERSTANDING THE FEATURES OF YOUR VEHICLE 75
3
Page 76 of 399

Vanity Mirrors Ð If Equipped
To use the mirror, rotate the sun visor down and swing
the mirror cover upward.
Sun Visor Sliding Feature
The sun visors may be pulled out to provide extended
coverage of the side glass.
HANDS±FREE COMMUNICATION (UConnectŸ) Ð
IF EQUIPPED
UConnectŸ is a voice-activated, hands-free, in- vehicle
communications system. UConnectŸ allows you to dial
a phone number with your cellular phone using simple
voice commands (e.g.,9Callº{ªMikeº{ºWork9or9Dialº
{ª248-555-12129). Your cellular phone's audio is trans-
mitted through your vehicle's audio system; the system
will automatically mute your radio when using the
UConnectŸ system.
NOTE:The UConnectŸ system use requires a cellular
phone equipped with the Bluetooth9Hands-Free Profile,9
version 0.96 or higher. See UConnectŸ website for sup-
ported phones.
Vanity Mirror
76 UNDERSTANDING THE FEATURES OF YOUR VEHICLE
Page 78 of 399

Phone Button
The rearview mirror contains the microphone
for the system (depending on the type of
mirror and radio equipped), and either the
radio or the mirror has the two control buttons
(Phone Button and Voice Recognition Button) that will
enable you to access the system.
Voice Recognition Button
Actual button location may vary with radio.
The individual buttons are described in the
ªOperationº section.
The UConnectŸ system can be used with any Hands-
Free Profile certified BluetoothŸ cellular phone. See
UConnectŸ website for supported phones. If your cellu-
lar phone supports a different profile (e.g., HeadsetProfile) you may not be able to use any UConnectŸ
features. Refer to your cellular service provider or the
phone manufacturer for details.
The UConnectŸ system is fully integrated with the
vehicle's audio system. The volume of the UConnectŸ
system can be adjusted either from the radio volume
control knob or from the steering wheel radio control
(right switch), if so equipped.
The radio display will be used for visual prompts from
the UConnectŸ system such as9CELL9or caller ID on
certain radios.
Operation
Voice commands can be used to operate the UConnectŸ
system and to navigate through the UConnectŸ menu
structure. Voice commands are required after most
UConnectŸ system prompts. You will be prompted for a
specific command and then guided through the available
options.
78 UNDERSTANDING THE FEATURES OF YOUR VEHICLE
Page 95 of 399

Things You Should Know About Your UConnectŸ
System
UConnectŸ Tutorial
To hear a brief tutorial of the system features, press the
ªPhoneº button and say ªUConnectŸ Tutorial.º
Voice Training
For users experiencing difficulty with the system recog-
nizing their voice commands or numbers, the UCon-
nectŸ system Voice Training feature may be used. To
enter this training mode, follow one of the two proce-
dures:
From outside the UConnectŸ mode (e.g. from radio
mode)
²Press and hold the ªVoice Recognitionº button for 5
seconds until the session begins, or,
²Press the ªVoice Recognitionº button and say9Setup,
Voice Training9command.Repeat the words and phrases when prompted by the
UConnectŸ system. For best results, the Voice Training
session should be completed when the vehicle is parked,
engine running, all windows closed, and the blower fan
switched off.
This procedure may be repeated with a new user. The
system will adapt to the last trained voice only.
To restore the Voice Recognition system to factory default
settings, enter the Voice Training session via the above
procedure and follow the prompts.
Voice Recognition (VR)
²
For best performance, adjust the rear view mirror to
provide at least1¤2inch (1 cm) gap between the
overhead console (if equipped) and the mirror.
²Always wait for the beep before speaking.
²Speak normally, without pausing, just as you would
speak to a person sitting approximately eight (8) feet
away from you.
UNDERSTANDING THE FEATURES OF YOUR VEHICLE 95
3
Page 113 of 399

To prevent possible damage, do not slam the hood to
close it. Lower the hood until it is open approximately 20
cm (8 inches) and then drop it. This should secure both
latches. Never drive your vehicle unless the hood is fully
closed, with both latches engaged.
WARNING!
If the hood is not fully latched it could fly up when
the vehicle is moving and block your forward vision.
You could have a collision. Be sure all hood latches
are fully latched before driving.
LIGHTS
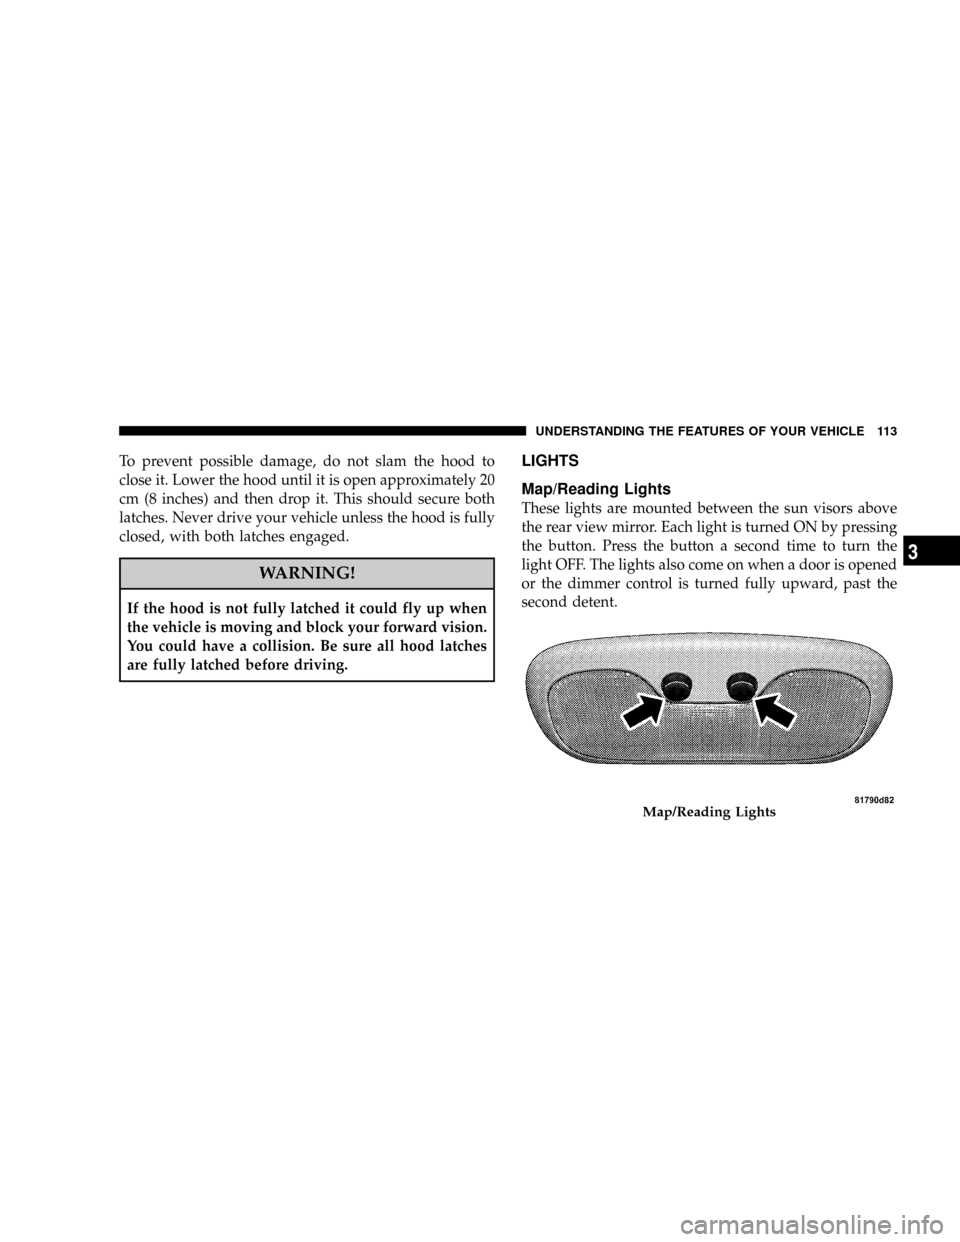
Map/Reading Lights
These lights are mounted between the sun visors above
the rear view mirror. Each light is turned ON by pressing
the button. Press the button a second time to turn the
light OFF. The lights also come on when a door is opened
or the dimmer control is turned fully upward, past the
second detent.
Map/Reading Lights
UNDERSTANDING THE FEATURES OF YOUR VEHICLE 113
3
Page 222 of 399

Side Window Demisters
A side window demister outlet is at each end of the
instrument panel. These nonadjustable outlets direct air
toward the side windows when the system is in either the
FLOOR, MIX, or DEFROST mode. The air is directed at
the area of the windows through which you view the
outside mirrors.
222 UNDERSTANDING YOUR INSTRUMENT PANEL
Page 227 of 399

STARTING PROCEDURES
Before starting your vehicle, adjust your seat, adjust both
inside and outside mirrors, and fasten your seat belts.
WARNING!
Never leave children alone in a vehicle. Leaving
children in a vehicle unattended is dangerous for a
number of reasons. A child or others could be seri-
ously or fatally injured. Don't leave the keys in the
ignition. A child could operate power windows,
other controls, or move the vehicle.
Manual Transaxle
Before starting the engine fully apply the parking brake,
press the clutch pedal to the floor, and place the gear
selector in N (Neutral).NOTE:The engine will not start unless the clutch pedal
is pressed to the floor.
NOTE:If key won't turn and steering wheel is locked,
rotate the wheel in either direction to relieve pressure on
the locking mechanism and then turn the key.
Automatic Transaxle
The gear selector must be in the P (Park) or N (Neutral)
position before you can start the engine. Apply the brakes
before shifting to any driving gear.
NOTE:You must press the brake pedal before shifting
out of P (Park).
Normal Starting
Normal starting of either a cold or a warm engine does
not require pumping or depressing the accelerator pedal.
Simply turn the ignition switch to the ªSTART'º position
and release when the engine starts. If the engine fails to
STARTING AND OPERATING 227
5