JEEP COMPASS 2015 1.G Owners Manual
Manufacturer: JEEP, Model Year: 2015, Model line: COMPASS, Model: JEEP COMPASS 2015 1.GPages: 560, PDF Size: 11.51 MB
Page 201 of 560
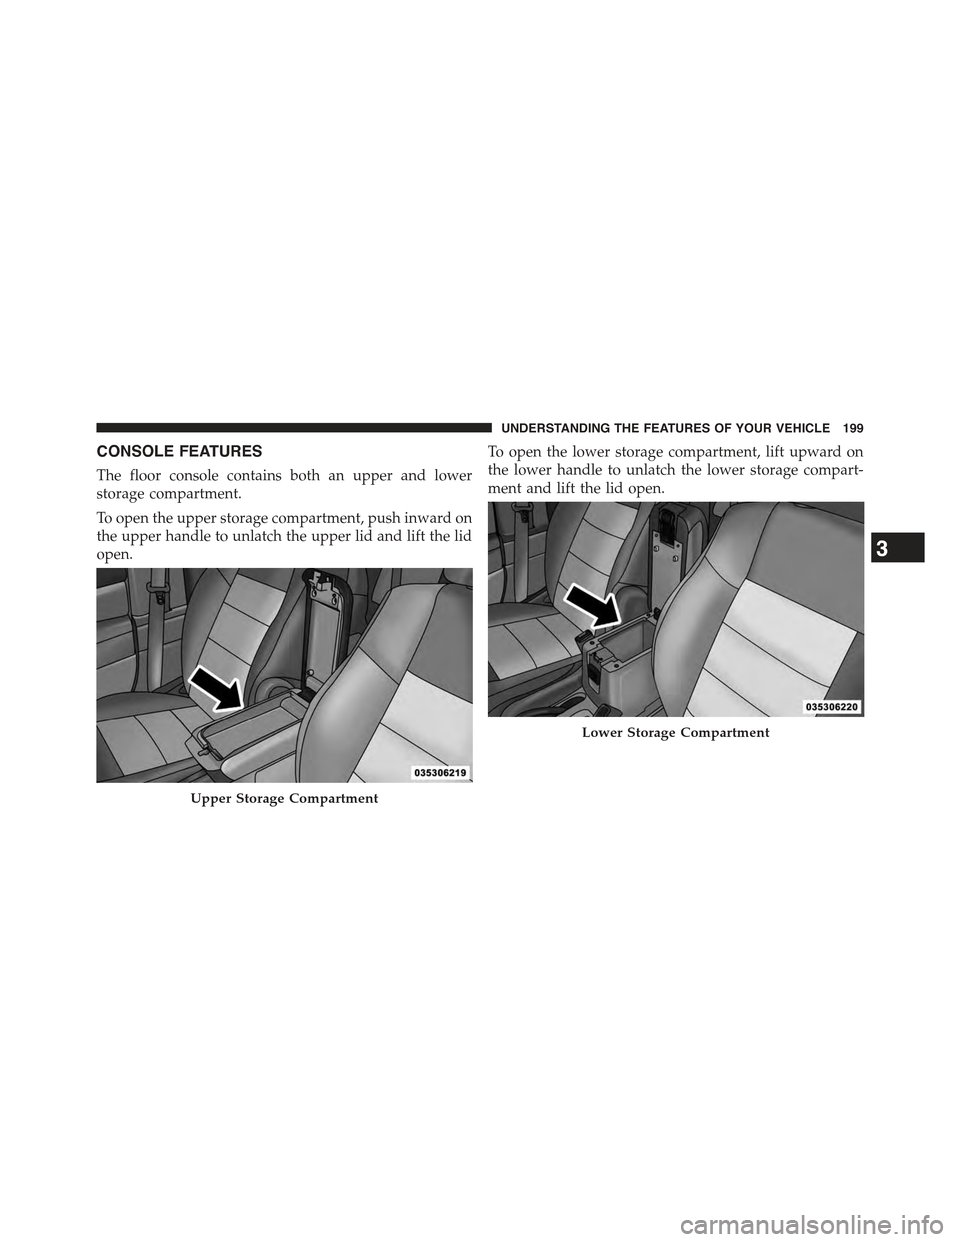
CONSOLE FEATURES
The floor console contains both an upper and lower
storage compartment.
To open the upper storage compartment, push inward on
the upper handle to unlatch the upper lid and lift the lid
open.
To open the lower storage compartment, lift upward on
the lower handle to unlatch the lower storage compart-
ment and lift the lid open.
Upper Storage Compartment
Lower Storage Compartment
3
UNDERSTANDING THE FEATURES OF YOUR VEHICLE 199
Page 202 of 560
WARNING!
Do not operate this vehicle with a console compart-
ment lid in the open position. Driving with the
console compartment lid open may result in injury in
a collision.
CARGO AREA FEATURES
Cargo Light
The light is mounted in the headliner above the cargo
area to illuminate the cargo area.
Cargo Cover
The cargo area trim panels include two notches for
mounting the available tonneau cover that accommo-
dates the reclining rear seat.
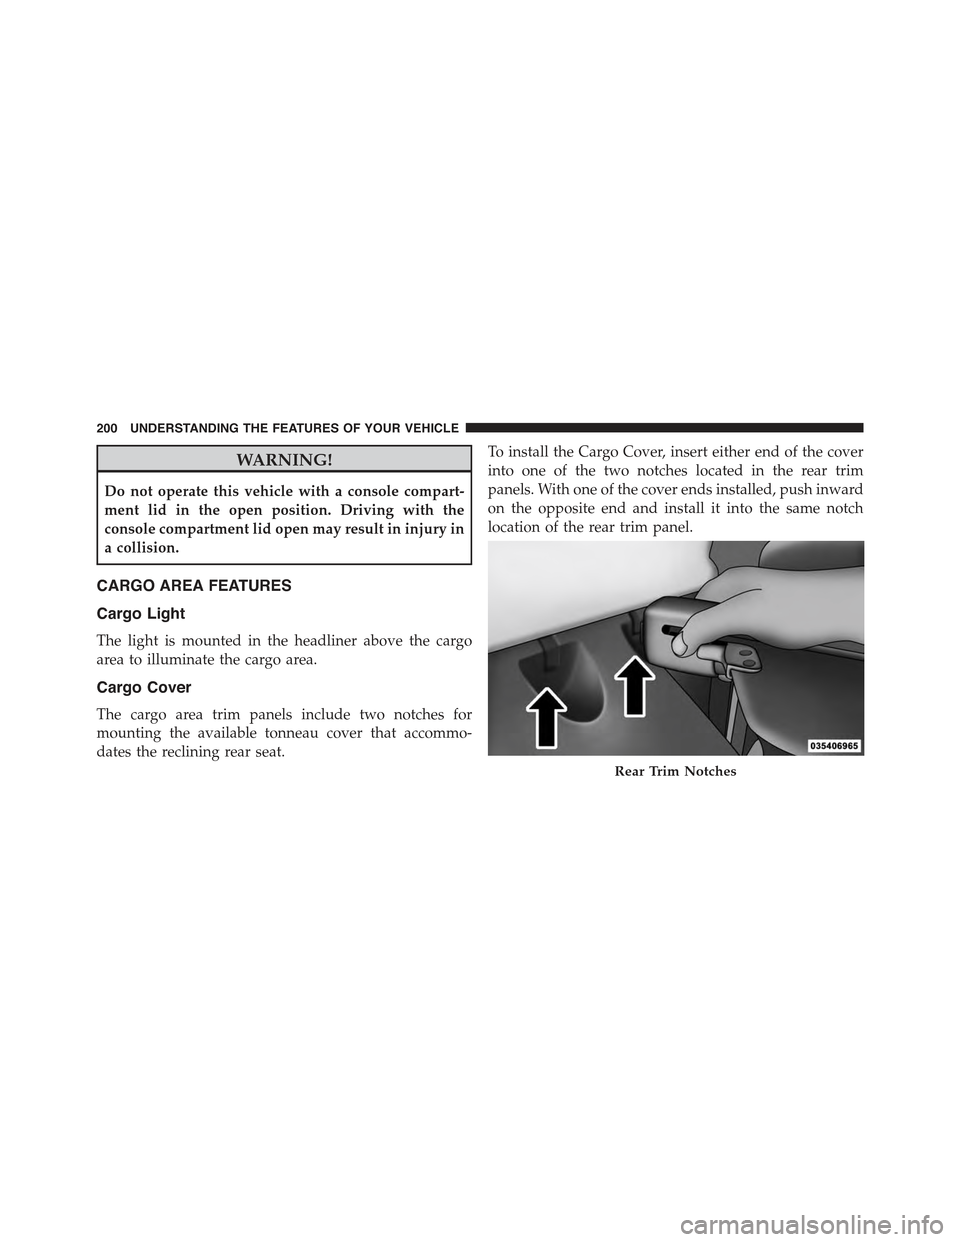
To install the Cargo Cover, insert either end of the cover
into one of the two notches located in the rear trim
panels. With one of the cover ends installed, push inward
on the opposite end and install it into the same notch
location of the rear trim panel.
Rear Trim Notches
200 UNDERSTANDING THE FEATURES OF YOUR VEHICLE
Page 203 of 560
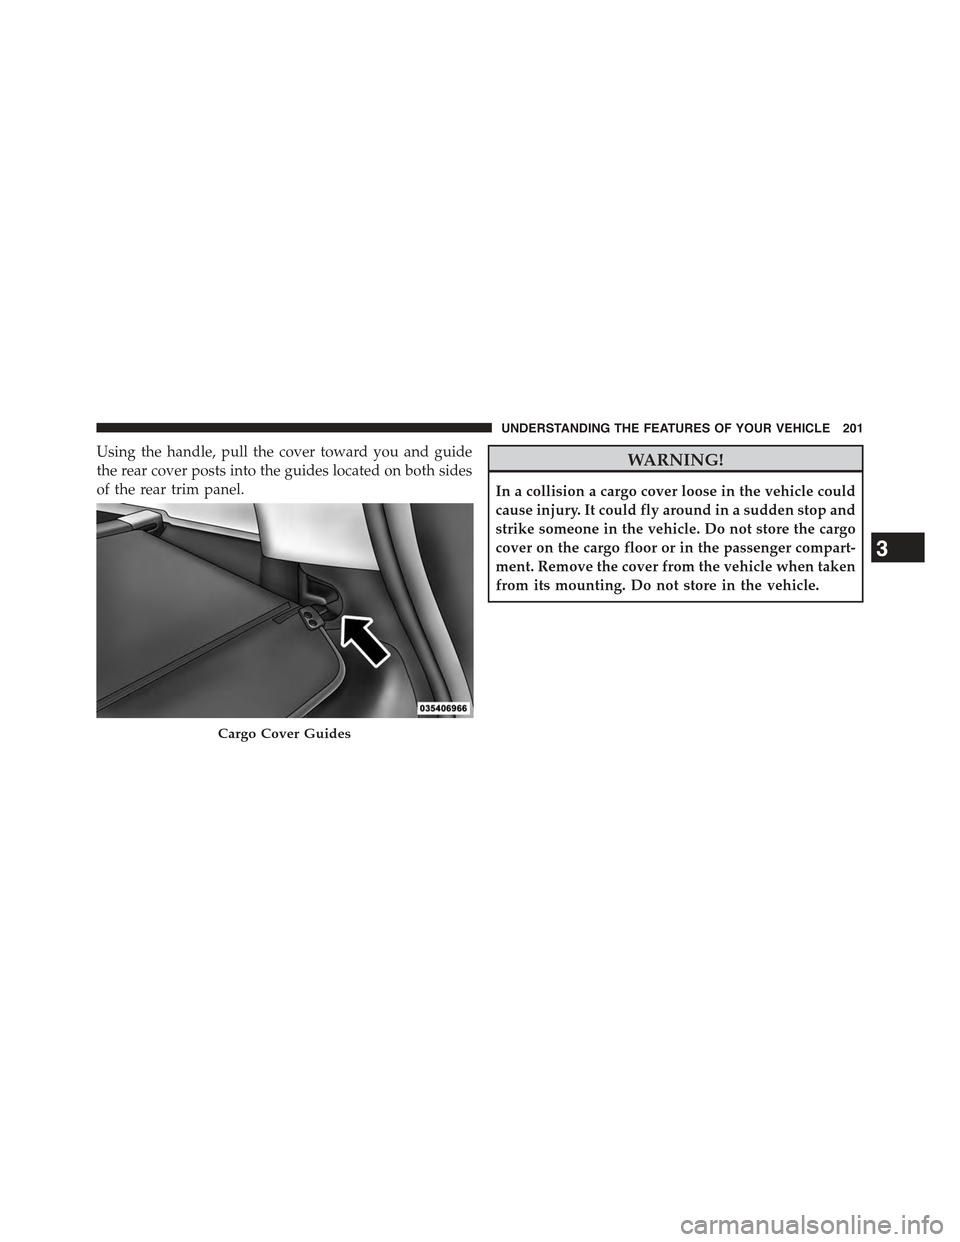
Using the handle, pull the cover toward you and guide
the rear cover posts into the guides located on both sides
of the rear trim panel.
WARNING!
In a collision a cargo cover loose in the vehicle could
cause injury. It could fly around in a sudden stop and
strike someone in the vehicle. Do not store the cargo
cover on the cargo floor or in the passenger compart-
ment. Remove the cover from the vehicle when taken
from its mounting. Do not store in the vehicle.
Cargo Cover Guides
3
UNDERSTANDING THE FEATURES OF YOUR VEHICLE 201
Page 204 of 560
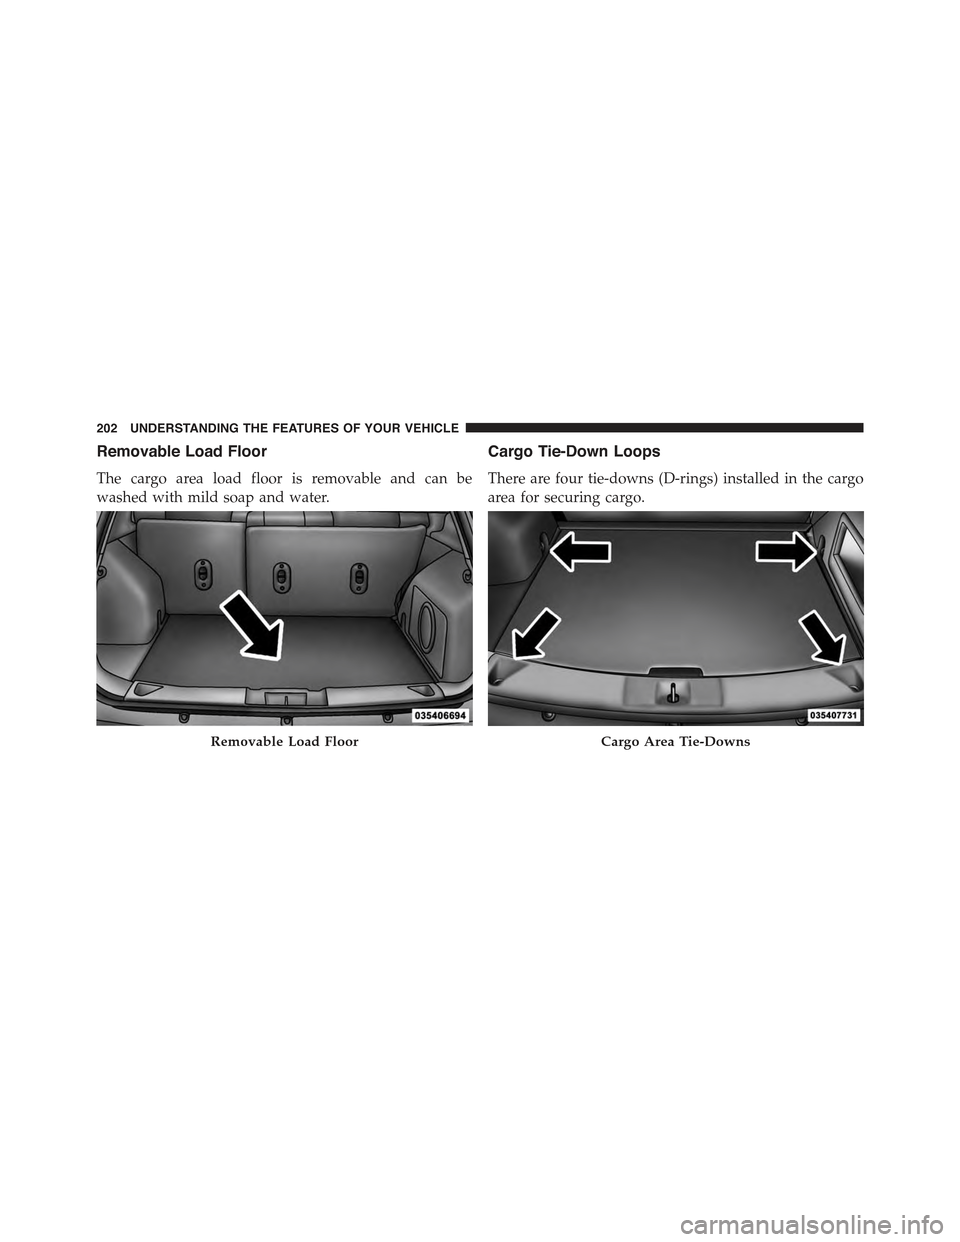
Removable Load Floor
The cargo area load floor is removable and can be
washed with mild soap and water.
Cargo Tie-Down Loops
There are four tie-downs (D-rings) installed in the cargo
area for securing cargo.
Removable Load FloorCargo Area Tie-Downs
202 UNDERSTANDING THE FEATURES OF YOUR VEHICLE
Page 205 of 560
WARNING!
•Cargo tie-down loops are not safe anchors for a
child seat tether strap. In a sudden stop or collision
a loop could pull loose and allow the child seat to
come loose. A child could be badly injured. Use
only the anchors provided for child seat tethers.
•The weight and position of cargo and passengers
can change the vehicle center of gravity and vehicle
handling. To avoid loss of control resulting in
personal injury, follow these guidelines for loading
your vehicle:
•Always place cargo evenly on the cargo floor. Put
heavier objects as low and as far forward as pos-
sible.
(Continued)
WARNING!(Continued)
•Place as much cargo as possible in front of the rear
axle. Too much weight or improperly placed weight
over or behind the rear axle can cause the rear of
the vehicle to sway.
•Do not pile luggage or cargo higher than the top of
the seatback. This could impair visibility or be-
come a dangerous projectile in a sudden stop or
collision.
•To help protect against personal injury, passengers
should not be seated in the rear cargo area. The rear
cargo space is intended for load carrying purposes
only, not for passengers, who should sit in seats
and use seat belts.
3
UNDERSTANDING THE FEATURES OF YOUR VEHICLE 203
Page 206 of 560

Fold Down Speakers — If Equipped
When the liftgate is open, the speakers can swing down off
the trim panel to face rearward, for tailgating and other
activities.
REAR WINDOW FEATURES
Rear Window Wiper/Washer
The rear wiper/washer is controlled by a rotary switch
located on the center portion of the control lever. The control
lever is located on the right side of the steering column.
Fold Down Speakers
Rear Wiper/Washer Control Lever
204 UNDERSTANDING THE FEATURES OF YOUR VEHICLE
Page 207 of 560
Rotate the center portion of the lever upward to
the first detent position for rear wiper operation.
NOTE:The rear wiper operates in an intermittent mode
only.
Rotate the center portion of the lever past the first
detent to activate the rear washer. The washer
pump and the wiper will continue to operate as
long as the switch is held (for a maximum of
10 seconds). Upon release, the wiper will continue to cycle
two times before returning to the set position.
If the rear wiper is operating when the ignition is turned
OFF, the wiper will automatically return to the “park”
position if power accessory delay is active. Power acces-
sory delay can be cancelled by opening the door, if this
happens the rear wiper will stop at its current position
and will not go to “park”.
Rear Window Defroster
The rear window defroster button is located on
the climate controls mode control knob. Push the
button to turn on the rear window defroster and the
heated outside mirrors (if equipped). An indicator in the
button will illuminate when the rear window defroster is
on. The rear window defroster automatically turns off
after approximately 10 minutes. For an additional five
minutes of operation, push the button a second time.
NOTE:To prevent excessive battery drain, use the rear
window defroster only when the engine is operating.
3
UNDERSTANDING THE FEATURES OF YOUR VEHICLE 205
Page 208 of 560
CAUTION!
Failure to follow these cautions can cause damage to
the heating elements:
•Use care when washing the inside of the rear
window. Do not use abrasive window cleaners on
the interior surface of the window. Use a soft cloth
and a mild washing solution, wiping parallel to the
heating elements. Labels can be peeled off after
soaking with warm water.
•Do not use scrapers, sharp instruments, or abrasive
window cleaners on the interior surface of the
window.
•Keep all objects a safe distance from the window.
ROOF LUGGAGE RACK — IF EQUIPPED
The crossbars and siderails are designed to carry the
cargo on vehicles equipped with a luggage rack. The load
must not exceed 150 lbs (68 kg), and should be uniformly
distributed over the luggage rack crossbars.
NOTE:If not equipped with crossbars, your authorized
dealer can order and install MOPAR® crossbars built
specifically for this roof rack system.
Distribute cargo weight evenly on the luggage rack
crossbars. The luggage rack does not increase the total
load carrying capacity of the vehicle. Be sure the total
load of cargo inside the vehicle plus that on the external
rack does not exceed the maximum vehicle load capacity.
The crossbars must also be secured in one of the seven
detent positions marked with an arrow on the siderails to
prevent movement. To move the crossbars, loosen the
thumb screws located at the upper edge of each crossbar
206 UNDERSTANDING THE FEATURES OF YOUR VEHICLE
Page 209 of 560
approximately eight turns, then move the crossbar to the
desired position, keeping the crossbars perpendicular to
the luggage rack side rails. Once the crossbar is in one of
the seven detent positions, retighten the thumb screws to
lock the crossbar into position.
NOTE:
•To help control wind noise when the crossbars are not
in use, place the front crossbar in the first detent from
the front of the vehicle and the rear crossbar in the
second detent from the rear of the vehicle.
•If the rear crossbar (or any metallic object) is placed
over the satellite radio antenna (if equipped), you may
experience interruption of satellite radio reception. For
improved satellite radio reception, place the rear cross-
bar in the second detent from the rear of the vehicle
when not in use.
•The grab handles on the back of the vehicle (if
equipped) are not to be used as a towing feature.
CAUTION!
•To prevent damage to the roof of your vehicle, DO
NOT carry any loads on the luggage rack without
crossbars installed. The load should be secured and
placed on top of the crossbars, not directly on the
roof. If it is necessary to place the load on the roof,
place a blanket or some other protection between
the load and the roof surface.
•To avoid damage to the luggage rack and vehicle,
do not exceed the maximum luggage rack load
capacity of 150 lb (68 kg). Always distribute heavy
loads as evenly as possible and secure the load
appropriately.
•Long loads which extend over the windshield, such
as wood panels or surfboards, or loads with large
frontal area should be secured to both the front and
rear of the vehicle.
(Continued)
3
UNDERSTANDING THE FEATURES OF YOUR VEHICLE 207
Page 210 of 560
CAUTION!(Continued)
•Travel at reduced speeds and turn corners carefully
when carrying large or heavy loads on the roof
rack. Wind forces, due to natural causes or nearby
truck traffic, can add sudden upward lift to a load.
This is especially true on large flat loads and may
result in damage to the cargo or your vehicle.
WARNING!
Cargo must be securely tied before driving your
vehicle. Improperly secured loads can fly off the
vehicle, particularly at high speeds, resulting in per-
sonal injury or property damage. Follow the roof rack
cautions when carrying cargo on your roof rack.
208 UNDERSTANDING THE FEATURES OF YOUR VEHICLE