service indicator JEEP COMPASS 2019 Owner handbook (in English)
[x] Cancel search | Manufacturer: JEEP, Model Year: 2019, Model line: COMPASS, Model: JEEP COMPASS 2019Pages: 362, PDF Size: 6.23 MB
Page 113 of 362
The Passenger Air Bag DISABLE Feature
consists of the following:
• Occupant Restraint Controller (ORC)
•
Passenger Air Bag DISABLE (OFF)
Indicator Light — an amber light located in
the center stack
•
Passenger Air Bag ENABLE (ON) Indi-
cator Light — an amber light located in the
center stack
•
Air Bag Warning Light — an amber
light located in the instrument cluster
display
The Occupant Restraint Controller (ORC)
monitors the readiness of the electronic parts
of the air bag system whenever the ignition
switch is in the START or ON/RUN position.
The ORC illuminates the Passenger Air Bag
DISABLE (OFF) Indicator Light and the Pas-
senger Air Bag ENABLE (ON) Indicator Light
in the center stack for approximately five to
eight seconds for a self-check when the igni-
tion switch is first in the START or ON/RUN
position. After the self-check, the indicator
light that is illuminated tells the driver and
passenger the status of the Passenger Ad-vanced Front Air Bag. If any of the following
occurs, have an authorized dealer service the
air bag system immediately:
• Both indicator lights do not come on as a
self-check when the ignition is first in the
START or ON/RUN position.
• Both indicator lights stay on after you start
the vehicle.
• Both indicator lights stay off after you start
the vehicle.
• Both indicator lights come on as you drive.
• Both indicator lights turn off as you drive.
Once the self-check is complete, only one
Passenger Air Bag Indicator Light should be
illuminated at a time.
WARNING!
If any of the above conditions occur, indi-
cating there is an issue with the Passenger
Air Bag Indicator Light, the Passenger Ad-
vanced Front Air Bag will remain in the last
selected state (DISABLED or ENABLED).
Passenger Air Bag DISABLE (OFF) Indicator
Light
The Passenger Air Bag DISABLE (OFF) Indi-
cator Light (an amber light located in the
center stack) tells the driver and front pas-
senger when the Passenger Advanced Front
Air Bag is deactivated. The Passenger Air Bag
DISABLE (OFF) Indicator Light on the center
stack will illuminate
to show that the
Passenger Advanced Front Air Bag will not
deploy during a collision.NEVERassume the
Passenger Advanced Front Air Bag is deacti-
vated unless the Passenger Air Bag DISABLE
(OFF) Indicator Light
on the center stack
is illuminated.
Passenger Air Bag ENABLE (ON) Indicator
Light
The Passenger Air Bag ENABLE (ON) Indica-
tor Light (an amber light located in the center
stack) tells the driver and front passenger
when the Passenger Advanced Front Air Bag
is activated. The Passenger Air Bag ENABLE
(ON) Indicator Light on the center stack will
illuminate
to show that the Passenger
Advanced Front Air Bag will deploy during an
impact that requires air bag deployment.
111
Page 159 of 362
would result. It will remain in the selected
gear until another upshift or downshift is
chosen, except as described below.
• Six-speed transmissions will automatically
upshift when necessary to prevent engine
over-speed.
• The transmission will automatically down-
shift as the vehicle slows (to prevent engine
lugging) and will display the current gear.
• The transmission will automatically down-
shift to first gear when coming to a stop.
After a stop, the driver should manually
upshift (+) the transmission as the vehicle
is accelerated.
• You can start out, from a stop, in first or
second gear (or third gear, in six-speed
models, or in 4LO range, Snow mode, or
Sand mode, where available). Tapping (+)
(at a stop) will allow starting in second gear.
Starting out in second gear can be helpful
in snowy or icy conditions.
• If a requested downshift would cause the
engine to over-speed, that shift will not
occur.• The system will ignore attempts to upshift
at too low of a vehicle speed.
• Transmission shifting will be more notice-
able when AutoStick is enabled.
• The system may revert to automatic shift
mode if a fault or overheat condition is
detected.
NOTE:
When Selec-Speed or Hill Descent Control is
enabled, AutoStick is not active.
To disengage AutoStick, return the gear se-
lector to the DRIVE position. You can shift in
or out of the AutoStick position at any time
without taking your foot off the accelerator
pedal.
WARNING!
Do not downshift for additional engine
braking on a slippery surface. The drive
wheels could lose their grip and the ve-
hicle could skid, causing a collision or
personal injury.Transmission Limp Home Mode
Transmission function is monitored electroni-
cally for abnormal conditions. If a condition
is detected that could result in transmission
damage, Transmission Limp Home Mode is
activated. In this mode, the transmission may
operate only in a fixed gear, or may remain in
NEUTRAL. The Malfunction Indicator Light
(MIL) may be illuminated. Limp Home Mode
may allow the vehicle to be driven to an
authorized dealer for service without damag-
ing the transmission.
In the event of a momentary problem, the
transmission can be reset to regain all for-
ward gears by performing the following steps:
1. Stop the vehicle.
2. Shift the transmission into PARK, if pos-
sible. If not, shift the transmission to
NEUTRAL.
3. Turn the ignition to the OFF position. On
vehicles with push button start, push and
hold the ignition until the engine turns
OFF.
4. Wait approximately 30 seconds.
5. Restart the engine.
157
Page 196 of 362
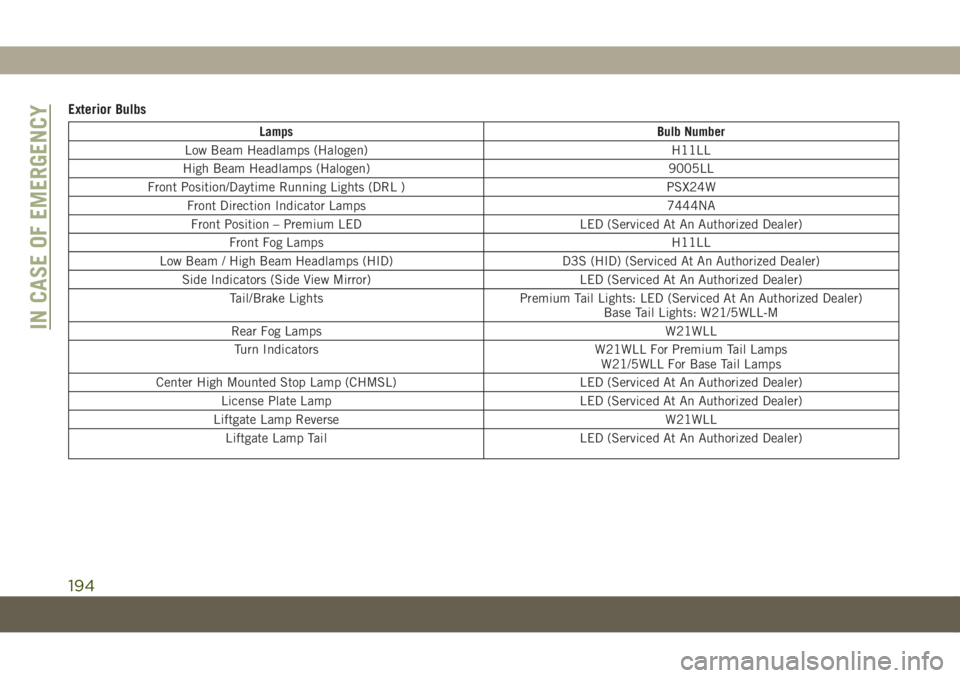
Exterior Bulbs
Lamps Bulb Number
Low Beam Headlamps (Halogen) H11LL
High Beam Headlamps (Halogen) 9005LL
Front Position/Daytime Running Lights (DRL ) PSX24W
Front Direction Indicator Lamps 7444NA
Front Position – Premium LED LED (Serviced At An Authorized Dealer)
Front Fog Lamps H11LL
Low Beam / High Beam Headlamps (HID) D3S (HID) (Serviced At An Authorized Dealer)
Side Indicators (Side View Mirror) LED (Serviced At An Authorized Dealer)
Tail/Brake Lights Premium Tail Lights: LED (Serviced At An Authorized Dealer)
Base Tail Lights: W21/5WLL-M
Rear Fog Lamps W21WLL
Turn Indicators W21WLL For Premium Tail Lamps
W21/5WLL For Base Tail Lamps
Center High Mounted Stop Lamp (CHMSL) LED (Serviced At An Authorized Dealer)
License Plate Lamp LED (Serviced At An Authorized Dealer)
Liftgate Lamp Reverse W21WLL
Liftgate Lamp Tail LED (Serviced At An Authorized Dealer)
IN CASE OF EMERGENCY
194
Page 233 of 362
SCHEDULED SERVICING
Correct servicing is crucial for guaranteeing a
long life for the car under the best conditions.
For this reason, Jeep has planned a series of
checks and services at fixed distance inter-
vals and, where provided, at fixed time inter-
vals, as described in the Scheduled Servicing
plan. To keep the car’s efficiency in tip-top
condition, in the following Scheduled Service
plan pages a few additional checks are listed
that should be carried out more frequently
with respect to the normal coupon redemp-
tion schedule. Scheduled Servicing is offered
by all authorized dealerships according to
fixed time or mileage intervals. If, during
each operation, in addition to the ones sched-
uled, the need arises for further replace-
ments or repairs, these may be carried out
with the owner's explicit agreement only.
The technicians at your dealership know your
vehicle best, and have access to factory trained
information, genuine Mopar parts, and specially
designed electronic and mechanical tools that
can help prevent future costly repairs. If your car
is used frequently for towing, the interval be-
tween one scheduled servicing operation and
the next should be reduced. More frequentmaintenance may be needed for vehicles in
severe operating conditions, such as dusty areas
and very short trip driving.
NOTE:
Scheduled Servicing interventions are set out
by the Manufacturer. Failure to have them
carried out may invalidate the warranty. It is
advised to inform an authorized dealership of
any small operating irregularities without
waiting for the next service.
1.4L Gasoline Engine
NOTE:
Under no circumstances should oil change
intervals exceed 9,000 miles (15,000 km) or
12 months, whichever comes first.
Once A Month Or Before A Long Trip
• Check engine oil level.
• Check windshield washer fluid level.
• Check tire pressure and look for unusual
wear or damage. Rotate tires at the first
sign of irregular wear, even if it occurs
before the oil indicator system turns on.
•
Check the fluid levels of the coolant reservoir
and brake master cylinder, fill as needed.
• Check function of all interior and exterior
lights.
At Each Oil Change
• Change oil and filter.
• Rotate the tires.Rotate at the first sign of
irregular wear, even if it occurs before the oil
indicator system turns on.
• Inspect battery and clean and tighten ter-
minals as required.
• Inspect brake pads, shoes, rotors, drums,
hoses and park brake.
• Inspect engine cooling system protection
and hoses.
• Inspect exhaust system.
• Inspect engine air cleaner if using in dusty
or off-road conditions.
Refer to the “Maintenance Plan” on the fol-
lowing page for the required maintenance
intervals.
CAUTION!
Failure to perform the required maintenance
items may result in damage to the vehicle.
231
Page 237 of 362
WARNING!
• You can be badly injured working on or
around a motor vehicle. Do only service
work for which you have the knowledge
and the right equipment. If you have any
doubt about your ability to perform a
service job, take your vehicle to a com-
petent mechanic.
• Failure to properly inspect and maintain
your vehicle could result in a component
malfunction and effect vehicle handling
and performance. This could cause an
accident.
Heavy Duty Use Of Vehicle
**** Change the engine oil and engine oil
filter at every 4500 miles (7,500 km) or
12 months if using your vehicle under any of
the following severe duty conditions:
• Stop and go driving.
• Driving in dusty conditions.
• Short trips of less than 10 miles (16 km).
• Trailer towing.• Taxi, police, or delivery service (commercial
service).
• Off-road or desert operation.
Diesel Engines
Your vehicle is equipped with an automatic
oil change indicator system. The oil change
indicator system will remind you that it is
time to take your vehicle in for engine oil
replacement.
Based on engine operation conditions, the oil
change indicator message will illuminate.
This means that service is required for your
vehicle. Operating conditions such as fre-
quent short-trips, trailer tow, extremely hot or
cold ambient temperatures will influence
when the “Oil Change Required” message is
displayed. Severe Operating Conditions can
cause the change oil message to illuminate
as earlier than specified. Have your vehicle
serviced as soon as possible, within the next
500 miles (805 km).To help you have the best driving experience
possible, the manufacturer has identified the
specific vehicle maintenance service inter-
vals that are required to keep your vehicle
operating properly and safely.
The manufacturer recommends that these
maintenance intervals be performed at your
selling dealer. The technicians at your deal-
ership know your vehicle best, and have ac-
cess to factory trained information, genuine
Mopar parts, and specially designed elec-
tronic and mechanical tools that can help
prevent future costly repairs.
The maintenance intervals shown should be
performed as indicated in this section.
NOTE:
•The actual interval for changing engine oil
and replacing the engine oil filter depends on
the vehicle usage conditions, and is signaled
by the warning light or message in the instru-
ment panel. In any case, it must never exceed
12,000 miles (20,000km) or 1 year.
•Flush and replace the engine coolant at
120 months or 150,000 miles (240,000 km)
whichever comes first.
235
Page 255 of 362
tire of identical size and service description
(Load Index and Speed Symbol). Replace the
tire pressure sensor as well as it is not de-
signed to be reused.
Run Flat Tires — If Equipped
Run Flat tires allow you the capability to drive
50 miles (80 km) at 50 mph (80 km/h) after
a rapid loss of inflation pressure. This rapid
loss of inflation is referred to as the Run Flat
mode. A Run Flat mode occurs when the tire
inflation pressure is of/or below 14 psi
(96 kPa). Once a Run Flat tire reaches the
run flat mode it has limited driving capabili-
ties and needs to be replaced immediately. A
Run Flat tire is not repairable. When a run flat
tire is changed after driving with underin-
flated tire condition, please replace the TPM
sensor as it is not designed to be reused when
driven under run flat mode (14 psi (96 kPa))
condition.
NOTE:
TPM Sensor must be replaced after driving
the vehicle on a flat tire condition.It is not recommended driving a vehicle
loaded at full capacity or to tow a trailer while
a tire is in the run flat mode.
See the tire pressure monitoring section for
more information.Tire Spinning
When stuck in mud, sand, snow, or ice con-
ditions, do not spin your vehicle's wheels
above 30 mph (48 km/h) or for longer than
30 seconds continuously without stopping.
Refer to “Freeing A Stuck Vehicle” in “In
Case Of Emergency” for further information.
WARNING!
Fast spinning tires can be dangerous.
Forces generated by excessive wheel
speeds may cause tire damage or failure. A
tire could explode and injure someone. Do
not spin your vehicle's wheels faster than
30 mph (48 km/h) for more than 30 sec-
onds continuously when you are stuck, and
do not let anyone near a spinning wheel,
no matter what the speed.
Tread Wear Indicators
Tread wear indicators are in the original
equipment tires to help you in determining
when your tires should be replaced.
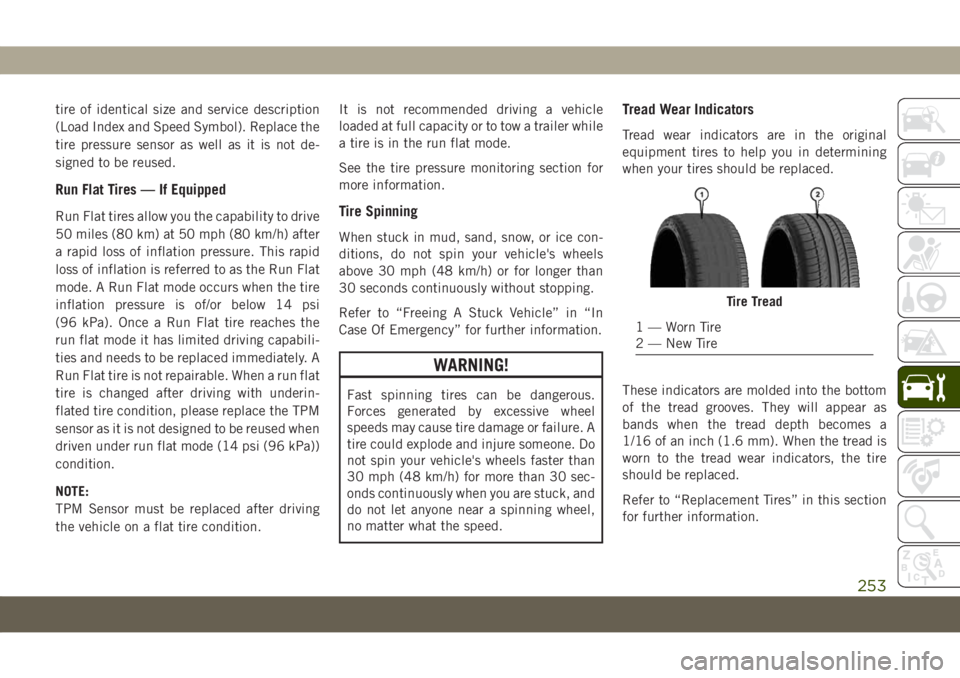
These indicators are molded into the bottom
of the tread grooves. They will appear as
bands when the tread depth becomes a
1/16 of an inch (1.6 mm). When the tread is
worn to the tread wear indicators, the tire
should be replaced.
Refer to “Replacement Tires” in this section
for further information.
Tire Tread
1 — Worn Tire
2 — New Tire
253
Page 291 of 362
• Press the “+” or “–” buttons on the touch-
screen, or press and drag over the level bar
for each of the equalizer bands. The level
value, which spans between plus or minus
nine, is displayed at the bottom of each of
the bands.
Speed Adjusted Volume
• Press the “Speed Adjusted Volume” button
on the touchscreen to activate the Speed
Adjusted Volume screen. The Speed Ad-
justed Volume is adjusted by pressing the
volume level indicator. This alters the auto-
matic adjustment of the audio volume with
variation to vehicle speed.
Loudness — If Equipped
• Press the “On” button on the touchscreen
to activate Loudness. Press “Off” to deac-
tivate this feature. When Loudness is On,
the sound quality at lower volumes
improves.
AUX Volume Offset
• Press the “AUX Volume Offset” button on
the touchscreen to activate the AUX Vol-
ume Offset screen. The AUX Volume Offset
is adjusted by pressing of the “+” and “–”buttons. This alters the AUX input audio
volume. The level value, which spans be-
tween plus or minus three, is displayed
above the adjustment bar.
Auto Play — If Equipped
• Press the “Auto Play” button on the touch-
screen to activate the Auto Play screen. The
Auto Play feature has two settings “On” and
“Off.” With Auto Play on, music begins
playing from a connected device, immedi-
ately after it is connected to the radio.
Auto On Radio — If Equipped
• The Radio automatically turns on when
vehicle is in run or will recall whether it was
on or off at last ignition off.
Radio Off With Door — If Equipped
• Press the “Radio Off With Door” button on
the touchscreen to activate the Radio Off
With Door screen. The Radio Off With Door
feature, when activated, keeps the radio on
until the driver or passenger door is opened,
or when the Radio Off Delay selected time
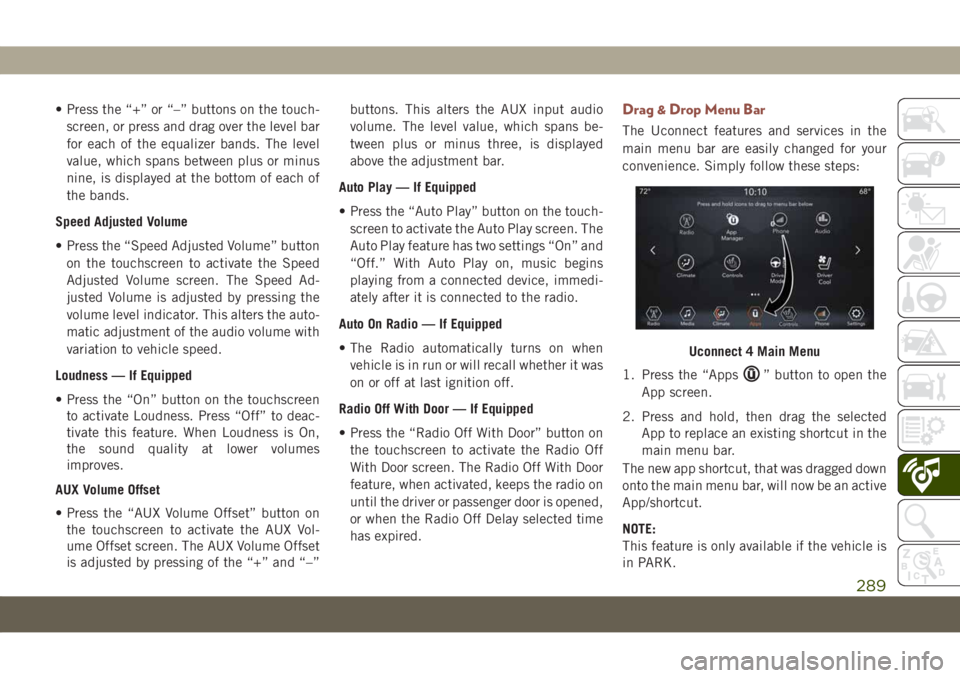
has expired.Drag & Drop Menu Bar
The Uconnect features and services in the
main menu bar are easily changed for your
convenience. Simply follow these steps:
1. Press the “Apps
” button to open the
App screen.
2. Press and hold, then drag the selected
App to replace an existing shortcut in the
main menu bar.
The new app shortcut, that was dragged down
onto the main menu bar, will now be an active
App/shortcut.
NOTE:
This feature is only available if the vehicle is
in PARK.
Uconnect 4 Main Menu
289
Page 299 of 362
Balance/Fade
• Press the “Balance/Fade” button on the
touchscreen to Balance audio between the
front speakers or fade the audio between
the rear and front speakers.
• Pressing the “Front,” “Rear,” “Left,” or
“Right” buttons on the touchscreen or
press and drag the Speaker Icon to adjust
the Balance/Fade.
Equalizer
• Press the “Equalizer” button on the touch-
screen to activate the Equalizer screen.
• Press the “+” or “–” buttons on the touch-
screen, or press and drag over the level bar
for each of the equalizer bands. The level
value, which spans between plus or minus
nine, is displayed at the bottom of each of
the Bands.Speed Adjusted Volume
• Press the “Speed Adjusted Volume” button
on the touchscreen to activate the Speed
Adjusted Volume screen. The Speed Ad-
justed Volume is adjusted by pressing the
volume level indicator. This alters the auto-
matic adjustment of the audio volume with
variation to vehicle speed.
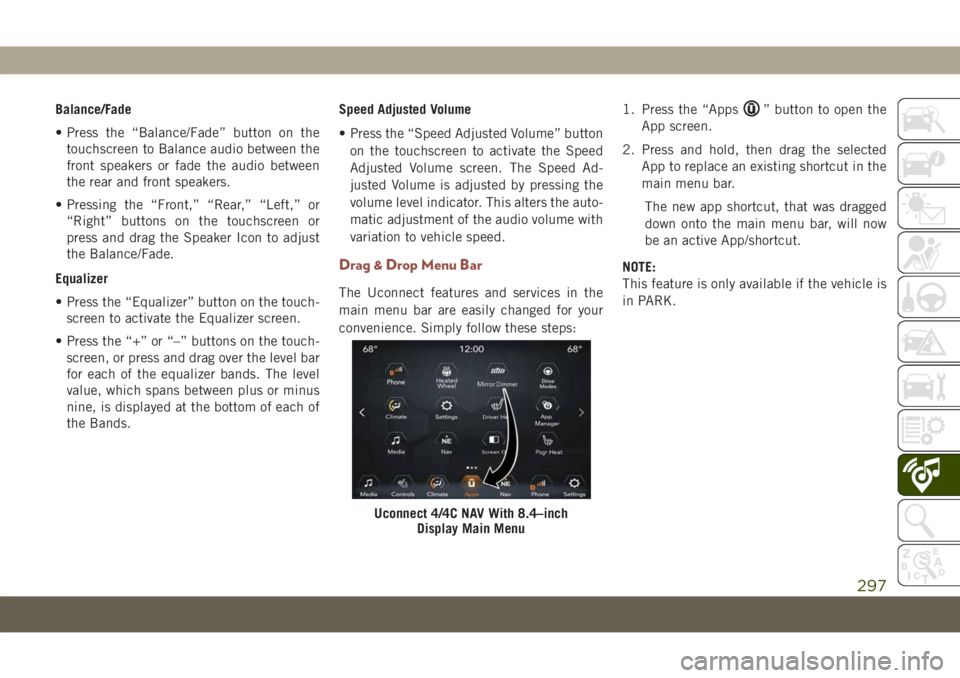
Drag & Drop Menu Bar
The Uconnect features and services in the
main menu bar are easily changed for your
convenience. Simply follow these steps:1. Press the “Apps
” button to open the
App screen.
2. Press and hold, then drag the selected
App to replace an existing shortcut in the
main menu bar.
The new app shortcut, that was dragged
down onto the main menu bar, will now
be an active App/shortcut.
NOTE:
This feature is only available if the vehicle is
in PARK.
Uconnect 4/4C NAV With 8.4–inch
Display Main Menu
297
Page 352 of 362
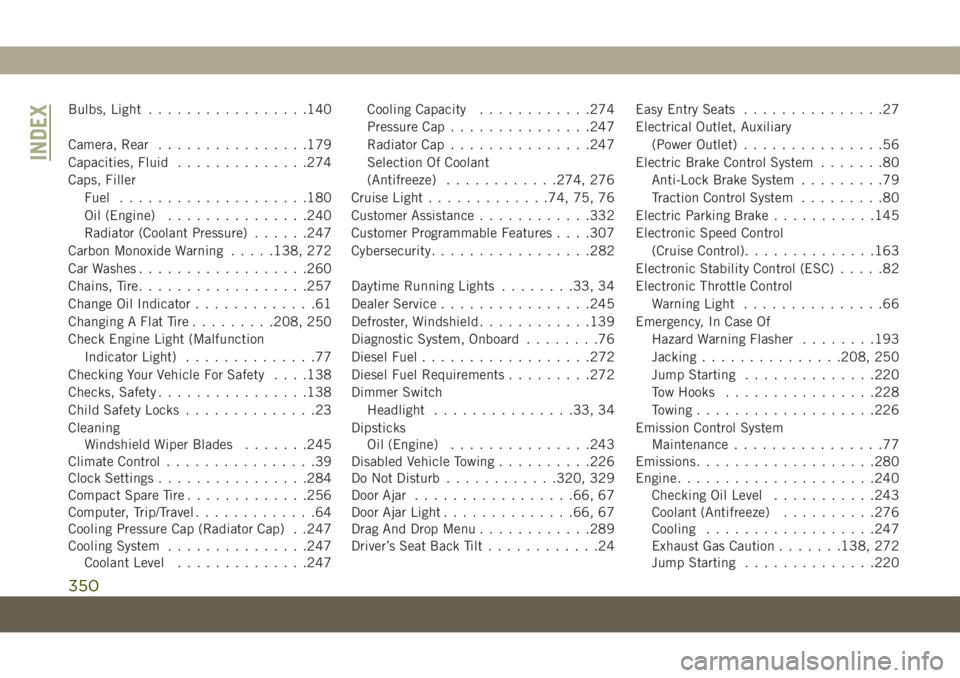
Bulbs, Light.................140
Camera, Rear................179
Capacities, Fluid..............274
Caps, Filler
Fuel....................180
Oil (Engine)...............240
Radiator (Coolant Pressure)......247
Carbon Monoxide Warning.....138, 272
Car Washes..................260
Chains, Tire..................257
Change Oil Indicator.............61
Changing A Flat Tire.........208, 250
Check Engine Light (Malfunction
Indicator Light)..............77
Checking Your Vehicle For Safety. . . .138
Checks, Safety................138
Child Safety Locks..............23
Cleaning
Windshield Wiper Blades.......245
Climate Control................39
Clock Settings................284
Compact Spare Tire.............256
Computer, Trip/Travel.............64
Cooling Pressure Cap (Radiator Cap) . .247
Cooling System...............247
Coolant Level..............247Cooling Capacity............274
Pressure Cap...............247
Radiator Cap...............247
Selection Of Coolant
(Antifreeze)............274, 276
Cruise Light.............74, 75, 76
Customer Assistance............332
Customer Programmable Features. . . .307
Cybersecurity.................282
Daytime Running Lights........33, 34
Dealer Service................245
Defroster, Windshield............139
Diagnostic System, Onboard........76
Diesel Fuel.................
.272
Diesel Fuel Requirements
.........272
Dimmer Switch
Headlight...............33, 34
Dipsticks
Oil (Engine)...............243
Disabled Vehicle Towing..........226
Do Not Disturb............320, 329
Door Ajar.................66, 67
Door Ajar Light..............66, 67
Drag And Drop Menu............289
Driver’s Seat Back Tilt............24Easy Entry Seats...............27
Electrical Outlet, Auxiliary
(Power Outlet)...............56
Electric Brake Control System.......80
Anti-Lock Brake System.........79
Traction Control System.........80
Electric Parking Brake...........145
Electronic Speed Control
(Cruise Control)..............163
Electronic Stability Control (ESC).....82
Electronic Throttle Control
Warning Light...............66
Emergency, In Case Of
Hazard Warning Flasher........193
Jacking...............208, 250
Jump Starting..............220
Tow Hooks................228
Towing...................226
Emission Control System
Maintenance................77
Emissions...................280
Engine.....................240
Checking Oil Level...........243
Coolant (Antifreeze)..........276
Cooling..................247
Exhaust Gas Caution.......138, 272
Jump Starting..............220
INDEX
350
Page 354 of 362
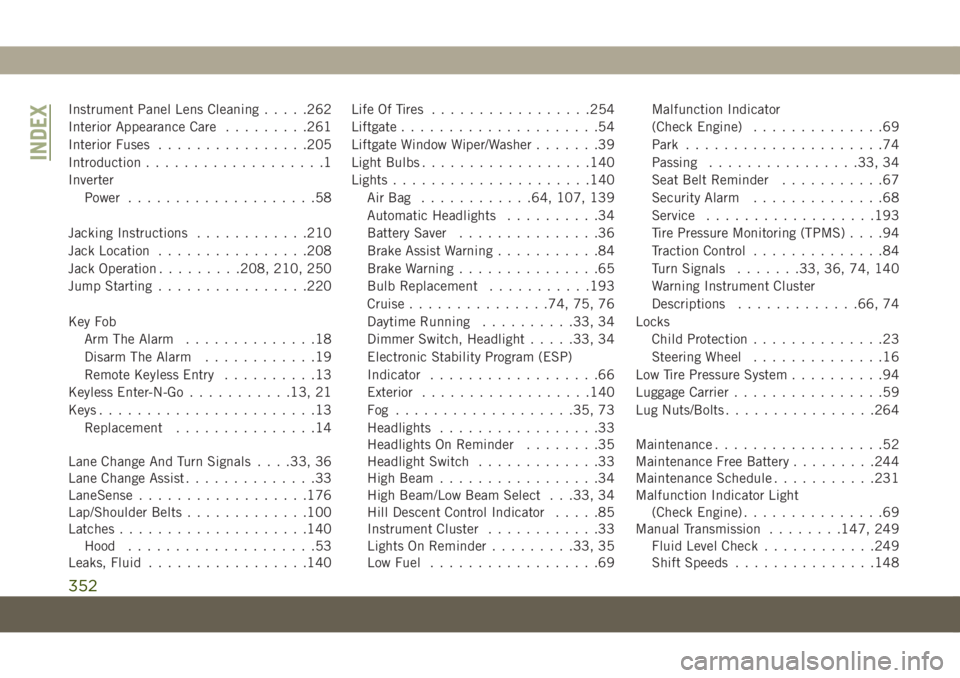
Instrument Panel Lens Cleaning.....262
Interior Appearance Care.........261
Interior Fuses................205
Introduction...................1
Inverter
Power....................58
Jacking Instructions............210
Jack Location................208
Jack Operation.........208, 210, 250
Jump Starting................220
Key Fob
Arm The Alarm..............18
Disarm The Alarm............19
Remote Keyless Entry..........13
Keyless Enter-N-Go...........13, 21
Keys.......................13
Replacement...............14
Lane Change And Turn Signals. . . .33, 36
Lane Change Assist..............33
LaneSense..................176
Lap/Shoulder Belts.............100
Latches....................140
Hood....................53
Leaks, Fluid.................140Life Of Tires.................254
Liftgate.....................54
Liftgate Window Wiper/Washer.......39
Light Bulbs..................140
Lights.....................140
AirBag ............64, 107, 139
Automatic Headlights..........34
Battery Saver...............36
Brake Assist Warning...........84
Brake Warning...............65
Bulb Replacement...........193
Cruise...............74, 75, 76
Daytime Running..........33, 34
Dimmer Switch, Headlight.....33, 34
Electronic Stability Program (ESP)
Indicator..................66
Exterior..................140
Fog ...................35, 73
Headlights
.................33
Headlights On Reminder........35
Headlight Switch.............33
High Beam.................34
High Beam/Low Beam Select . . .33, 34
Hill Descent Control Indicator.....85
Instrument Cluster............33
Lights On Reminder.........33, 35
Low Fuel..................69Malfunction Indicator
(Check Engine)..............69
Park.....................74
Passing................33, 34
Seat Belt Reminder...........67
Security Alarm..............68
Service..................193
Tire Pressure Monitoring (TPMS)....94
Traction Control..............84
Turn Signals.......33, 36, 74, 140
Warning Instrument Cluster
Descriptions.............66, 74
Locks
Child Protection..............23
Steering Wheel..............16
Low Tire Pressure System..........94
Luggage Carrier................59
Lug Nuts/Bolts................264
Maintenance..................52
Maintenance Free Battery.........244
Maintenance Schedule...........231
Malfunction Indicator Light
(Check Engine)...............69
Manual Transmission........147, 249
Fluid Level Check............249
Shift Speeds...............148
INDEX
352