Ipm JEEP COMPASS 2019 Owner handbook (in English)
[x] Cancel search | Manufacturer: JEEP, Model Year: 2019, Model line: COMPASS, Model: JEEP COMPASS 2019Pages: 362, PDF Size: 6.23 MB
Page 3 of 362
Congratulations on selecting your new FCA
vehicle. Be assured that it represents preci-
sion workmanship, distinctive styling, and
high quality.
ALWAYS drive safely and pay attention to the
road. ALWAYS drive safely with your hands on
the steering wheel. You have full responsibil-
ity and assume all risks related to the use of
the features and applications in this vehicle.
Only use the features and applications when
it is safe to do so. Failure to do so may result
in an accident involving serious injury or
death.
This guide illustrates and describes the op-
eration of features and equipment that are
either standard or optional on this vehicle.
This guide may also include a description of
features and equipment that are no longer
available or were not ordered on this vehicle.
Please disregard any features and equipment
described in this guide that are not available
on this vehicle. FCA reserves the right to
make changes in design and specifications
and/or make additions to or improvements to
its products without imposing any obligation
upon itself to install them on products previ-
ously manufactured.This User Guide has been prepared to help
you quickly become acquainted with the im-
portant features of your vehicle. It contains
most things you will need to operate and
maintain the vehicle, including emergency
information.
When it comes to service, remember that your
authorized dealer knows your Jeep
®vehicle
best, has factory-trained technicians and
genuine MOPAR
®parts, and cares about your
satisfaction.
HOW TO FIND YOUR
OWNER’S MANUAL ONLINE
This publication has been prepared as a ref-
erence item to help you quickly become ac-
quainted with the most important features
and processes of your vehicle. It contains
most things you will need to operate and
maintain the vehicle, including emergency
information and procedures.
This User Guide is not a replacement for the full
Owner’s Manual, and does not fully cover every
operation and procedure possible with your ve-
hicle.For more detailed descriptions of the topics
discussed in this User Guide, as well as
information covering features and processes
not covered in this User Guide, the full ve-
hicle Owner’s Manual can be accessed for
free online in a printer-friendly PDF format.
To get the full Owner’s Manual or applicable
supplement for your vehicle, follow the appro-
priate web address below:
www.mopar.eu/owner
or alternatively, to access
this information, go to the Internet website at
http://aftersales.fiat.com/elum/.
FCA is committed to protecting our environ-
ment and natural resources. By converting
from paper to electronic delivery for the ma-
jority of the user information for your vehicle,
together we greatly reduce the demand for
tree-based products and lessen the stress on
our environment.
WELCOME FROM FCA
1
Page 5 of 362
IMPORTANT NOTICE
ALL MATERIAL CONTAINED IN THIS PUB-
LICATION IS BASED ON THE LATEST IN-
FORMATION AVAILABLE AT TIME OF PUB-
LICATION APPROVAL. THE RIGHT IS
RESERVED TO PUBLISH REVISIONS AT
ANY TIME.
This User Guide has been prepared with the
assistance of service and engineering spe-
cialists to acquaint you with the operation
and maintenance of your new vehicle. It is
supplemented by a Warranty Information
Booklet and various customer-oriented docu-
ments. You are urged to read these publica-
tions carefully. Following the instructions and
recommendations in this User Guide will help
assure safe and enjoyable operation of your
vehicle.
After you have read the User Guide, it should
be stored in the vehicle for convenient refer-
ence and remain with the vehicle when sold.The manufacturer reserves the right to make
changes in design and specifications, and/or
to make additions to or improvements in its
products without imposing any obligations
upon itself to install them on products previ-
ously manufactured.
The User Guide illustrates and describes the
features that are standard or available as
extra cost options. Therefore, some of the
equipment and accessories in this publica-
tion may not appear on your vehicle.
NOTE:
Be sure to read the User guide first before
driving your vehicle and before attaching or
installing parts/accessories or making other
modifications to the vehicle.
In view of the many replacement parts and
accessories from various manufacturers
available on the market, the manufacturer
cannot be certain that the driving safety of
your vehicle will not be impaired by the at-
tachment or installation of such parts. Even if
such parts are officially-approved (for ex-
ample, by a general operating permit for the
part or by constructing the part in an officially
approved design), or if an individual operat-ing permit was issued for the vehicle after the
attachment or installation of such parts, it
cannot be implicitly assumed that the driving
safety of your vehicle is unimpaired. There-
fore, neither experts nor official agencies are
liable. The manufacturer only assumes re-
sponsibility when parts, which are expressly
authorized or recommended by the manufac-
turer, are attached or installed at an autho-
rized dealer. The same applies when modifi-
cations to the original condition are
subsequently made on the manufacturer's
vehicles.
Your warranties do not cover any part that the
manufacturer did not supply. Nor do they
cover the cost of any repairs or adjustments
that might be caused or needed because of
the installation or use of non-manufacturer
parts, components, equipment, materials, or
additives. Nor do your warranties cover the
costs of repairing damage or conditions
caused by any changes to your vehicle that do
not comply with the manufacturers specifica-
tions.
HOW TO USE THIS MANUAL
3
Page 8 of 362
WELCOME FROM FCA
HOW TO FIND YOUR OWNER’S MANUAL ONLINE.... 1
HOW TO USE THIS MANUAL
HOW TO USE THIS MANUAL............... 2Essential Information................ 2
Symbols........................ 2
ROLLOVER WARNING................... 2
IMPORTANT NOTICE................... 3
WARNINGS AND CAUTIONS............... 4
VEHICLE CHANGES/ALTERATIONS............ 4
GRAPHICAL TABLE OF CONTENTS
INSTRUMENT PANEL.................. 11
INTERIOR......................... 12
GETTING TO KNOW YOUR VEHICLE
KEYS........................... 13Key Fobs...................... 13
IGNITION SWITCH.................... 15Keyless Enter-N-Go — Ignition —
If Equipped..................... 15
Integrated/Manual Ignition — If Equipped . . 16
Electronic Steering Wheel Lock —
If Equipped..................... 16
Mechanical Steering Wheel Lock —
If Equipped..................... 16
REMOTE STARTING SYSTEM — IF EQUIPPED.... 17How To Use Remote Start — If Equipped . . . 17
To Enter Remote Start Mode........... 18
VEHICLE SECURITY ALARM — IF EQUIPPED..... 18To Arm The System................ 18
To Disarm The System.............. 19
Security System Manual Override........ 19
PREMIUM VEHICLE SECURITY ALARM —
IF EQUIPPED...................... 19
To Arm The System................ 20
To Disarm The System.............. 20
Security System Manual Override........ 21
DOORS.......................... 21Keyless Enter-N-Go — Passive Entry...... 21
Child-Protection Door Lock System —
Rear Doors..................... 23
SEATS .......................... 24Manual Adjustment (Rear Seats)........ 24
Driver Memory Seat — If Equipped....... 26
Front Heated Seats — If Equipped....... 28
Front Ventilated Seats — If Equipped..... 29
40/20/40 Rear Seat Armrest— If Equipped . 29
HEAD RESTRAINTS................... 29Front Head Restraint Adjustment........ 30
Rear Head Restraints............... 31
STEERING WHEEL................... 32Tilt/Telescoping Steering Column........ 32
Heated Steering Wheel — If Equipped..... 32
EXTERIOR LIGHTS.................... 33Multifunction Lever................ 33
Headlight Switch.................. 33
Daytime Running Lights (DRL) —
If Equipped..................... 34
High/Low Beam Switch.............. 34
Automatic High Beam Headlamp Control —
If Equipped..................... 34
Flash-To-Pass................... 34
Automatic Headlights — If Equipped..... 34
Headlight Time Delay............... 35
Lights-On Reminder — If Equipped...... 35
Front And Rear Fog Lights — If Equipped . . . 35
Turn Signals.................... 36Headlight Leveling System — If Equipped . . 36
Battery Saver Feature............... 36
WINDSHIELD WIPERS AND WASHERS......... 37Windshield Wiper Operation........... 37
Rain Sensing Wipers — If Equipped...... 38
Rear Window Wiper/Washer........... 39
CLIMATE CONTROLS................... 39Automatic Climate Controls Overview..... 39
Automatic Temperature Control (ATC)..... 47
Operating Tips................... 47
WINDOWS........................ 48Power Window Controls.............. 48
Auto-Down Feature................ 49
Auto-Up Feature With Anti-Pinch Protection . 49
Window Lockout Switch............. 49
Wind Buffeting.................. 50
POWER SUNROOF WITH POWER SHADE —
IF EQUIPPED....................... 50
Opening Sunroof.................. 51
Opening Sunroof — Vent............. 51
Closing Sunroof.................. 51
Opening Power Shade............... 51
Closing Power Shade............... 52
Pinch Protect Feature............... 52
Sunroof Maintenance............... 52
Ignition Off Operation............... 53
HOOD.......................... 53Opening The Hood................. 53
Closing The Hood................. 53
LIFTGATE......................... 54Opening....................... 54
Closing........................ 54
Power Liftgate — If Equipped.......... 54
INTERNAL EQUIPMENT................. 56Power Outlets.................... 56
TABLE OF CONTENTS
6
Page 58 of 362
• If your liftgate is power closing and you put
the vehicle in gear, the liftgate will con-
tinue to power close. However, vehicle
movement may result in a detection of an
obstruction.
• If the electronic liftgate release handle is
pushed with the power liftgate is opening,
the liftgate motor will disengage to allow
manual operation.
•
If the electronic liftgate release handle is
pushed while the power liftgate is closing, the
liftgate will reverse to the full open position.
WARNING!
•Driving with the liftgate open can allow
poisonous exhaust gases into your vehicle.
You and your passengers could be injured
by these fumes. Keep the liftgate closed
when you are operating the vehicle.
• If you are required to drive with the
liftgate open, make sure that all win-
dows are closed, and the climate control
blower switch is set at high speed. Do
not use the recirculation mode.NOTE:
Allow the power system to open the liftgate.
Manually pushing or pulling the liftgate may
activate the liftgate obstacle detection fea-
ture and stop the power operation or reverse
its direction.
WARNING!
Personal injury or cargo damage may occur
if caught in the path of the liftgate. Make
sure the liftgate path is clear before acti-
vating the liftgate.
INTERNAL EQUIPMENT
Power Outlets
Your vehicle is equipped with 12 Volt
(13 Amp) power outlets that can be used to
power cellular phones, small electronics and
other low powered electrical accessories. The
power outlets are labeled with either a “key”
or a “battery” symbol to indicate how the
outlet is powered. Power outlets labeled with
a “key” are powered when the ignition is in
the ON or ACC position, while the outlets
labeled with a “battery” are connected di-
rectly to the battery and powered at all times.
NOTE:
• All accessories connected to the “battery”
powered outlets should be removed or
turned off when the vehicle is not in use to
protect the battery against discharge.
CAUTION!
Power outlets are designed for accessory
plugs only. Do not insert any other object
in the power outlets as this will damage
the outlet and blow the fuse. Improper use
GETTING TO KNOW YOUR VEHICLE
56
Page 66 of 362
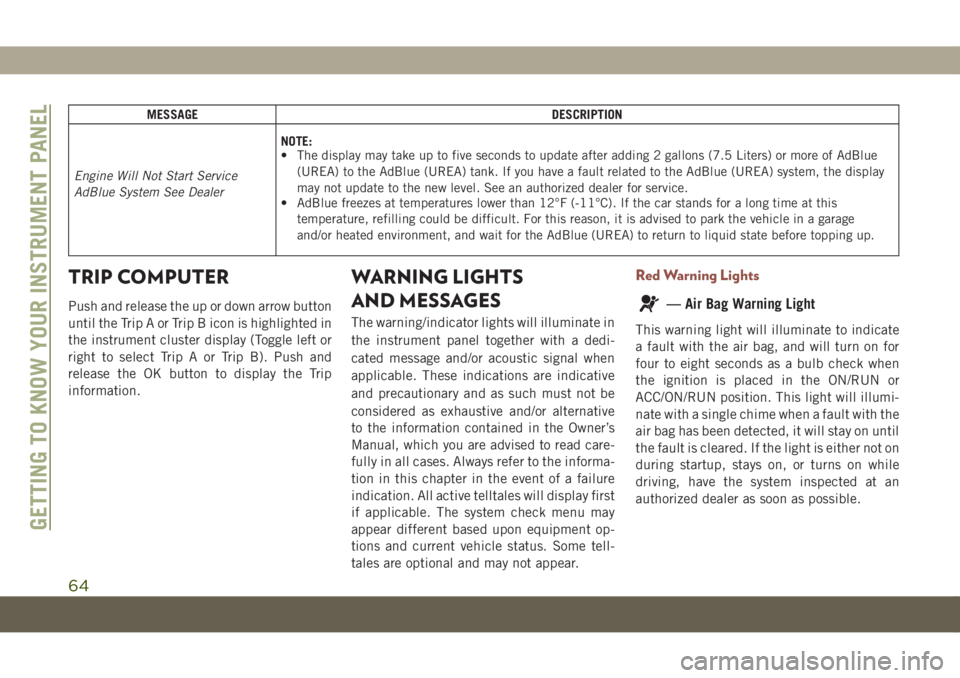
MESSAGE DESCRIPTION
Engine Will Not Start Service
AdBlue System See DealerNOTE:
• The display may take up to five seconds to update after adding 2 gallons (7.5 Liters) or more of AdBlue
(UREA) to the AdBlue (UREA) tank. If you have a fault related to the AdBlue (UREA) system, the display
may not update to the new level. See an authorized dealer for service.
• AdBlue freezes at temperatures lower than 12°F (-11°C). If the car stands for a long time at this
temperature, refilling could be difficult. For this reason, it is advised to park the vehicle in a garage
and/or heated environment, and wait for the AdBlue (UREA) to return to liquid state before topping up.
TRIP COMPUTER
Push and release the up or down arrow button
until the Trip A or Trip B icon is highlighted in
the instrument cluster display (Toggle left or
right to select Trip A or Trip B). Push and
release the OK button to display the Trip
information.
WARNING LIGHTS
AND MESSAGES
The warning/indicator lights will illuminate in
the instrument panel together with a dedi-
cated message and/or acoustic signal when
applicable. These indications are indicative
and precautionary and as such must not be
considered as exhaustive and/or alternative
to the information contained in the Owner’s
Manual, which you are advised to read care-
fully in all cases. Always refer to the informa-
tion in this chapter in the event of a failure
indication. All active telltales will display first
if applicable. The system check menu may
appear different based upon equipment op-
tions and current vehicle status. Some tell-
tales are optional and may not appear.
Red Warning Lights
— Air Bag Warning Light
This warning light will illuminate to indicate
a fault with the air bag, and will turn on for
four to eight seconds as a bulb check when
the ignition is placed in the ON/RUN or
ACC/ON/RUN position. This light will illumi-
nate with a single chime when a fault with the
air bag has been detected, it will stay on until
the fault is cleared. If the light is either not on
during startup, stays on, or turns on while
driving, have the system inspected at an
authorized dealer as soon as possible.
GETTING TO KNOW YOUR INSTRUMENT PANEL
64
Page 73 of 362
CAUTION!
Do not continue driving with one or more
flat tires as handling may be compro-
mised. Stop the vehicle, avoiding sharp
braking and steering. If a tire puncture
occurs, repair immediately using the dedi-
cated tire repair kit and contact an autho-
rized dealer as soon as possible.
Each tire, including the spare (if provided),
should be checked monthly when cold and
inflated to the inflation pressure recom-
mended by the vehicle manufacturer on the
vehicle placard or tire inflation pressure la-
bel. (If your vehicle has tires of a different
size than the size indicated on the vehicle
placard or tire inflation pressure label, you
should determine the proper tire inflation
pressure for those tires.)
As an added safety feature, your vehicle has
been equipped with a Tire Pressure Monitor-
ing System (TPMS) that illuminates a low tire
pressure telltale when one or more of your
tires is significantly under-inflated. Accord-
ingly, when the low tire pressure telltale illu-
minates, you should stop and check your tiresas soon as possible, and inflate them to the
proper pressure. Driving on a significantly
under-inflated tire causes the tire to overheat
and can lead to tire failure. Under-inflation
also reduces fuel efficiency and tire tread
life, and may affect the vehicle’s handling
and stopping ability.
Please note that the TPMS is not a substitute
for proper tire maintenance, and it is the
driver’s responsibility to maintain correct tire
pressure, even if under-inflation has not
reached the level to trigger illumination of the
TPMS low tire pressure telltale.
Your vehicle has also been equipped with a
TPMS malfunction indicator to indicate when
the system is not operating properly. The
TPMS malfunction indicator is combined
with the low tire pressure telltale. When the
system detects a malfunction, the telltale will
flash for approximately one minute and then
remain continuously illuminated. This se-
quence will continue upon subsequent ve-
hicle start-ups as long as the malfunction
exists. When the malfunction indicator is
illuminated, the system may not be able to
detect or signal low tire pressure as intended.
TPMS malfunctions may occur for a variety of
reasons, including the installation of replace-
ment or alternate tires or wheels on the vehicle
that prevent the TPMS from functioning prop-
erly. Always check the TPMS malfunction tell-
tale after replacing one or more tires or wheels
on your vehicle to ensure that the replacement
or alternate tires and wheels allow the TPMS to
continue to function properly.
CAUTION!
The TPMS has been optimized for the origi-
nal equipment tires and wheels. TPMS pres-
sures and warning have been established for
the tire size equipped on your vehicle. Un-
desirable system operation or sensor damage
may result when using replacement equip-
ment that is not of the same size, type,
and/or style. Aftermarket wheels can cause
sensor damage. Using aftermarket tire seal-
ants may cause the Tire Pressure Monitoring
System (TPMS) sensor to become inoper-
able. After using an aftermarket tire sealant
it is recommended that you take your vehicle
to your authorized dealer to have your sensor
function checked.
71
Page 79 of 362
CAUTION!
• Prolonged driving with the MIL on could
cause further damage to the emission
control system. It could also affect fuel
economy and driveability. The vehicle
must be serviced before any emissions
tests can be performed.
• If the MIL is flashing while the vehicle is
running, severe catalytic converter dam-
age and power loss will soon occur. Im-
mediate service is required.
Onboard Diagnostic System (OBD II)
Cybersecurity
Your vehicle is required to have an Onboard
Diagnostic system (OBD II) and a connection
port to allow access to information related to
the performance of your emissions controls.
Authorized service technicians may need to
access this information to assist with the
diagnosis and service of your vehicle and
emissions system.
WARNING!
• ONLY an authorized service technician
should connect equipment to the OBD II
connection port in order to read the VIN,
diagnose, or service your vehicle.
• If unauthorized equipment is connected
to the OBD II connection port, such as a
driver-behavior tracking device, it may:
• Be possible that vehicle systems,
including safety related systems,
could be impaired or a loss of ve-
hicle control could occur that may
result in an accident involving seri-
ous injury or death.
• Access, or allow others to access,
information stored in your vehicle
systems, including personal infor-
mation.
For further information, refer to “Cybersecu-
rity” in “Multimedia”.
EMISSIONS INSPECTION
AND MAINTENANCE
PROGRAMS
In some localities, it may be a legal require-
ment to pass an inspection of your vehicle's
emissions control system. Failure to pass
could prevent vehicle registration.
Normally, the OBD II system will
be ready. The OBD II system may
notbe ready if your vehicle was
recently serviced, recently had a dead battery
or a battery replacement. If the OBD II sys-
tem should be determined not ready for the
I/M test, your vehicle may fail the test.
Your vehicle has a simple ignition actuated
test, which you can use prior to going to the
test station. To check if your vehicle's OBD II
system is ready, you must do the following:
1. Cycle the ignition switch to the ON posi-
tion, but do not crank or start the engine.
NOTE:
If you crank or start the engine, you will
have to start this test over.
77
Page 81 of 362
SAFETY FEATURES
Anti-Lock Brake System (ABS)
The Anti-Lock Brake System (ABS) provides
increased vehicle stability and brake perfor-
mance under most braking conditions. The
system automatically prevents wheel lock,
and enhances vehicle control during braking.
The ABS performs a self-check cycle to en-
sure that the ABS is working properly each
time the vehicle is started and driven. During
this self-check, you may hear a slight clicking
sound as well as some related motor noises.
ABS is activated during braking when the
system detects one or more wheels begin to
lock. Road conditions such as ice, snow,
gravel, bumps, railroad tracks, loose debris,
or panic stops may increase the likelihood of
ABS activation(s).
You also may experience the following when
ABS activates:
• The ABS motor noise (it may continue to
run for a short time after the stop).
• The clicking sound of solenoid valves.• Brake pedal pulsations.
• A slight drop of the brake pedal at the end
of the stop.
These are all normal characteristics of ABS.
WARNING!
• The ABS contains sophisticated elec-
tronic equipment that may be suscep-
tible to interference caused by improp-
erly installed or high output radio
transmitting equipment. This interfer-
ence can cause possible loss of anti-lock
braking capability. Installation of such
equipment should be performed by
qualified professionals.
• Pumping of the Anti-Lock Brakes will
diminish their effectiveness and may
lead to a collision. Pumping makes the
stopping distance longer. Just press
firmly on your brake pedal when you
need to slow down or stop.
• The ABS cannot prevent the natural laws
of physics from acting on the vehicle,
nor can it increase braking or steering
efficiency beyond that afforded by the
WARNING!
condition of the vehicle brakes and tires
or the traction afforded.
• The ABS cannot prevent collisions, in-
cluding those resulting from excessive
speed in turns, following another vehicle
too closely, or hydroplaning.
• The capabilities of an ABS equipped
vehicle must never be exploited in a
reckless or dangerous manner that could
jeopardize the user’s safety or the safety
of others.
ABS is designed to function with the OEM
tires. Modification may result in degraded
ABS performance.
Anti-Lock Brake Warning Light
The yellow “Anti-Lock Brake Warning Light”
will turn on when the ignition is turned to the
ON/RUN mode and may stay on for as long as
four seconds.
If the “Anti-Lock Brake Warning Light” re-
mains on or comes on while driving, it indi-
cates that the anti-lock portion of the brake
system is not functioning and that service is
79
Page 96 of 362
internal system fault. Although the vehicle is
still drivable under normal conditions, have
the system checked by an authorized dealer.
Tire Pressure Monitor System (TPMS)
The Tire Pressure Monitor System (TPMS)
will warn the driver of a low tire pressure
based on the vehicle recommended cold
placard pressure.
The tire pressure will vary with temperature
by approximately 1 psi (7 kPa) for every 12°F
(6.5°C). This means that when the outside
temperature decreases, the tire pressure will
decrease. Tire pressure should always be set
based on cold inflation tire pressure. This is
defined as the tire pressure after the vehicle
has not been driven for at least three hours, or
driven less than 1 mile (1.6 km) after a three
hour period. The cold tire inflation pressure
must not exceed the maximum inflation pres-
sure molded into the tire sidewall. Refer to
“Tires” in “Servicing And Maintenance” for
information on how to properly inflate the
vehicle’s tires. The tire pressure will also
increase as the vehicle is driven. This is
normal and there should be no adjustment for
this increased pressure.The TPMS will warn the driver of a low tire
pressure if the tire pressure falls below the
low-pressure warning limit for any reason,
including low temperature effects and natu-
ral pressure loss through the tire. The TPMS
will continue to warn the driver of low tire
pressure as long as the condition exists, and
will not turn off until the tire pressure is at or
above the recommended cold placard pres-
sure.
NOTE:
Once the low tire pressure warning (TPMS
Warning Light) illuminates, you must in-
crease the tire pressure to the recommended
cold placard pressure in order for the TPMS
Warning Light to turn off.
NOTE:
When filling warm tires, the tire pressure may
need to be increased up to an additional 4 psi
(28 kPa) above the recommended cold plac-
ard pressure in order to turn the TPMS Warn-
ing Light off.
The system will automatically update and the
TPMS Warning Light will turn off once the
system receives the updated tire pressures.The vehicle may need to be driven for up to
10 minutes above 15 mph (24 km/h) in order
for the TPMS to receive this information.
For example, your vehicle may have a recom-
mended cold (parked for more than three
hours) placard pressure of 33 psi (227 kPa).
If the ambient temperature is 68°F (20°C)
and the measured tire pressure is 28 psi
(193 kPa), a temperature drop to 20°F (-7°C)
will decrease the tire pressure to approxi-
mately 24 psi (165 kPa). This tire pressure is
low enough to turn ON the “TPMS Warning
Light.” Driving the vehicle may cause the tire
pressure to rise to approximately 28 psi
(193 kPa), but the TPMS Warning Light will
still be on. In this situation, the TPMS Warn-
ing Light will turn off only after the tires are
inflated to the vehicle’s recommended cold
placard pressure value.
CAUTION!
• The TPMS has been optimized for the
original equipment tires and wheels.
TPMS pressures and warning have been
established for the tire size equipped on
SAFETY
94
Page 97 of 362
CAUTION!
your vehicle. Undesirable system opera-
tion or sensor damage may result when
using replacement equipment that is not
of the same size, type, and/or style. The
TPM sensor is not designed for use on
aftermarket wheels and may contribute
to a poor overall system performance or
sensor damage. Customers are encour-
aged to use OEM wheels to assure
proper TPM feature operation.
• Using aftermarket tire sealants may
cause the Tire Pressure Monitoring Sys-
tem (TPMS) sensor to become inoper-
able. After using an aftermarket tire
sealant it is recommended that you take
your vehicle to your authorized dealer to
have your sensor function checked.
• After inspecting or adjusting the tire
pressure always reinstall the valve stem
cap. This will prevent moisture and dirt
from entering the valve stem, which
could damage the TPMS sensor.NOTE:
• The TPMS is not intended to replace nor-
mal tire care and maintenance, or to pro-
vide warning of a tire failure or condition.
• The TPMS should not be used as a tire
pressure gauge while adjusting your tire
pressure.
• Driving on a significantly underinflated tire
causes the tire to overheat and can lead to
tire failure. Underinflation also reduces
fuel efficiency and tire tread life, and may
affect the vehicle’s handling and stopping
ability.
• The TPMS is not a substitute for proper tire
maintenance, and it is the driver’s respon-
sibility to maintain correct tire pressure
using an accurate tire pressure gauge, even
if underinflation has not reached the level
to trigger illumination of the TPMS Warning
Light.
• Seasonal temperature changes will affect
tire pressure, and the TPMS will monitor
the actual tire pressure in the tire.
• The system only warns the tire pressure is
low: it is not able to inflate them.
Premium System
The Tire Pressure Monitor System (TPMS)
uses wireless technology with wheel rim
mounted electronic sensors to monitor tire
pressure levels. Sensors, mounted to each
wheel as part of the valve stem, transmit tire
pressure readings to the receiver module.
NOTE:
It is particularly important for you to check
the tire pressure in all of the tires on your
vehicle monthly and to maintain the proper
pressure.
The TPMS consists of the following compo-
nents:
• Receiver Module
• Four Tire Pressure Monitoring Sensors
• Various Tire Pressure Monitoring System
messages, which will display in the instru-
ment cluster display.
• Tire Pressure Monitoring System Warning
Light
95