buttons JEEP COMPASS 2023 Owner's Manual
[x] Cancel search | Manufacturer: JEEP, Model Year: 2023, Model line: COMPASS, Model: JEEP COMPASS 2023Pages: 344, PDF Size: 18.8 MB
Page 121 of 344
STARTING AND OPERATING119
(Continued)
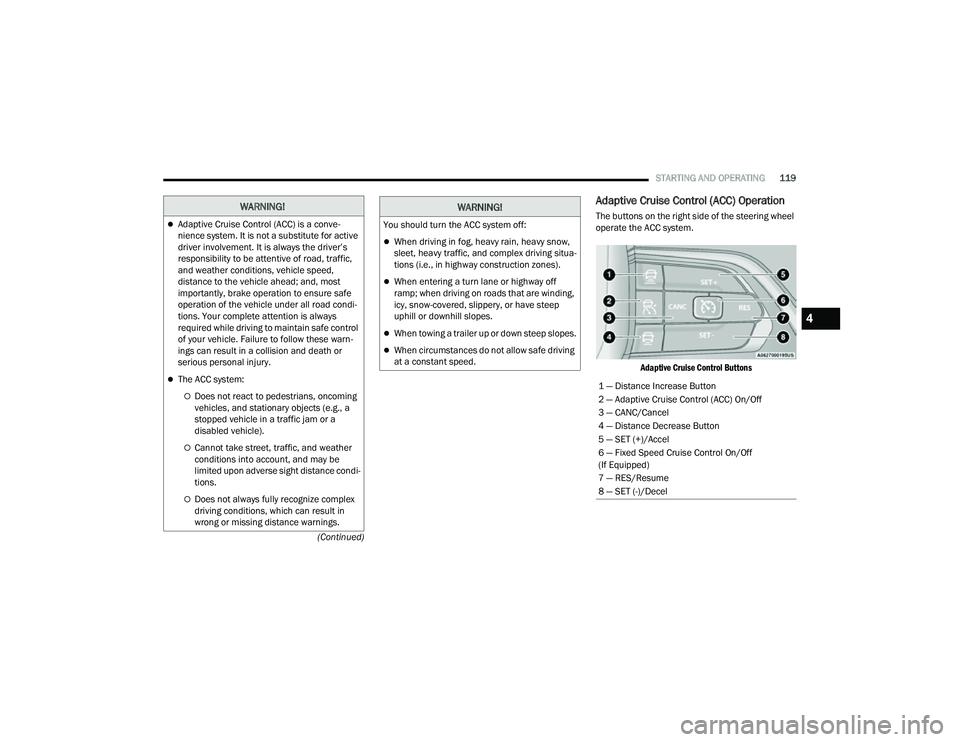
Adaptive Cruise Control (ACC) Operation
The buttons on the right side of the steering wheel
operate the ACC system.
Adaptive Cruise Control Buttons
WARNING!
Adaptive Cruise Control (ACC) is a conve -
nience system. It is not a substitute for active
driver involvement. It is always the driver’s
responsibility to be attentive of road, traffic,
and weather conditions, vehicle speed,
distance to the vehicle ahead; and, most
importantly, brake operation to ensure safe
operation of the vehicle under all road condi -
tions. Your complete attention is always
required while driving to maintain safe control
of your vehicle. Failure to follow these warn -
ings can result in a collision and death or
serious personal injury.
The ACC system:
Does not react to pedestrians, oncoming
vehicles, and stationary objects (e.g., a
stopped vehicle in a traffic jam or a
disabled vehicle).
Cannot take street, traffic, and weather
conditions into account, and may be
limited upon adverse sight distance condi -
tions.
Does not always fully recognize complex
driving conditions, which can result in
wrong or missing distance warnings.
You should turn the ACC system off:
When driving in fog, heavy rain, heavy snow,
sleet, heavy traffic, and complex driving situa -
tions (i.e., in highway construction zones).
When entering a turn lane or highway off
ramp; when driving on roads that are winding,
icy, snow-covered, slippery, or have steep
uphill or downhill slopes.
When towing a trailer up or down steep slopes.
When circumstances do not allow safe driving
at a constant speed.
WARNING!
1 — Distance Increase Button
2 — Adaptive Cruise Control (ACC) On/Off
3 — CANC/Cancel
4 — Distance Decrease Button
5 — SET (+)/Accel
6 — Fixed Speed Cruise Control On/Off
(If Equipped)
7 — RES/Resume
8 — SET (-)/Decel
4
22_MP_OM_EN_USC_t.book Page 119
Page 132 of 344
130STARTING AND OPERATING
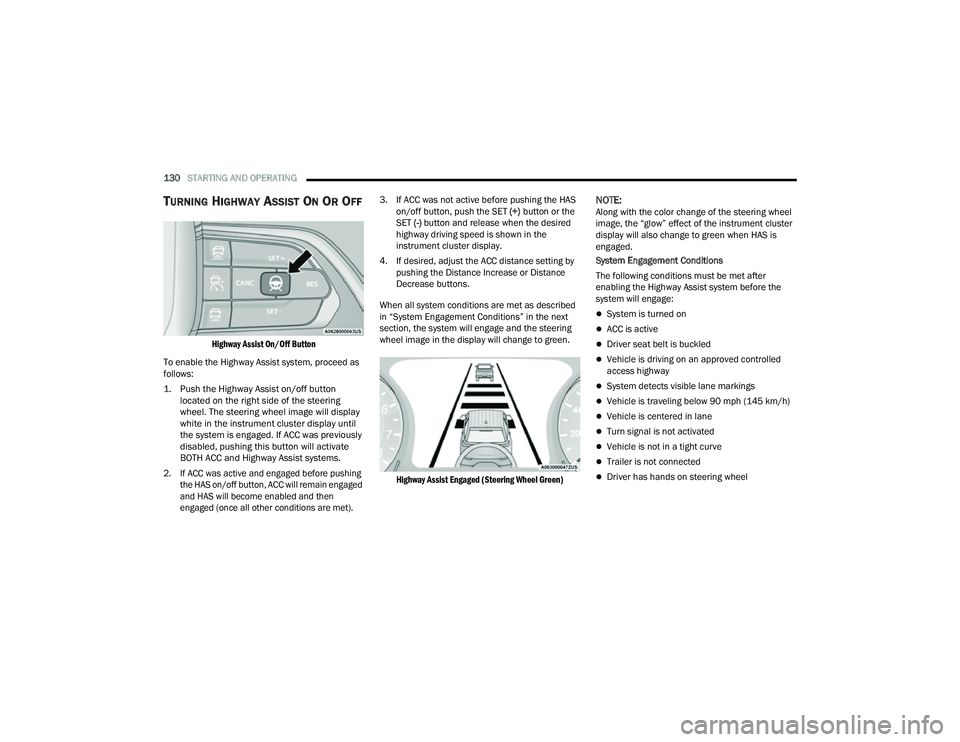
TURNING HIGHWAY ASSIST ON OR OFF
Highway Assist On/Off Button
To enable the Highway Assist system, proceed as
follows:
1. Push the Highway Assist on/off button located on the right side of the steering
wheel. The steering wheel image will display
white in the instrument cluster display until
the system is engaged. If ACC was previously
disabled, pushing this button will activate
BOTH ACC and Highway Assist systems.
2. If ACC was active and engaged before pushing the HAS on/off button, ACC will remain engaged
and HAS will become enabled and then
engaged (once all other conditions are met).
3. If ACC was not active before pushing the HAS
on/off button, push the SET (+) button or the
SET (-) button and release when the desired
highway driving speed is shown in the
instrument cluster display.
4. If desired, adjust the ACC distance setting by pushing the Distance Increase or Distance
Decrease buttons.
When all system conditions are met as described
in “System Engagement Conditions” in the next
section, the system will engage and the steering
wheel image in the display will change to green.
Highway Assist Engaged (Steering Wheel Green)
NOTE:Along with the color change of the steering wheel
image, the “glow” effect of the instrument cluster
display will also change to green when HAS is
engaged.
System Engagement Conditions
The following conditions must be met after
enabling the Highway Assist system before the
system will engage:
System is turned on
ACC is active
Driver seat belt is buckled
Vehicle is driving on an approved controlled
access highway
System detects visible lane markings
Vehicle is traveling below 90 mph (145 km/h)
Vehicle is centered in lane
Turn signal is not activated
Vehicle is not in a tight curve
Trailer is not connected
Driver has hands on steering wheel
22_MP_OM_EN_USC_t.book Page 130
Page 143 of 344

STARTING AND OPERATING141
Driver's door is opened.
Rear liftgate is opened.
Electronic Stability Control/Anti-lock Braking
System intervention.
The ParkSense Active Park Assist system will allow
a maximum number of shifts between DRIVE and
REVERSE. If the maneuver cannot be completed
within the maximum amount of shifts, the system
will cancel and the instrument cluster display will
instruct the driver to complete the maneuver
manually.
The ParkSense Active Park Assist system will only
operate and search for a parking space when the
following conditions are present:
Gear selector is in DRIVE.
Ignition is in the RUN position.
ParkSense Active Park Assist switch is acti -
vated.
Driver's door is closed.
Rear liftgate is closed.
The outer surface and the underside of the front
and rear fascias/bumpers are clean and clear
of snow, ice, mud, dirt or other obstruction.
Vehicle speed is less than 15 mph (25 km/h).
NOTE:If the vehicle is driven above approximately
15 mph (25 km/h), the instrument cluster display
will instruct the driver to slow down. If the vehicle
is driven above approximately 18 mph (30 km/h),
the system will cancel. The driver must then reac -
tivate the system by pushing the ParkSense Active
Park Assist switch.
When pushed, the LED on the ParkSense Active
Park Assist switch will blink momentarily, and then
the LED will turn off if any of the above conditions
are not present.
PARALLEL/PERPENDICULAR PARKING
S
PACE ASSISTANCE OPERATION
When the ParkSense Active Park Assist system
is enabled, the “Active ParkSense Searching -
Press or to Switch Maneuver” message will
appear in the instrument cluster display. You may
select perpendicular, parallel, or parallel park exit.
The arrow buttons on the left side of the steering
wheel can be used to switch parking maneuvers.
Active ParkSense Searching
NOTE:
When searching for a parking space, use the
turn signal indicator to select which side of the
vehicle you want to perform the parking
maneuver. The ParkSense Active Park Assist
system will automatically search for a parking
space on the passenger's side of the vehicle if
the turn signal is not activated.
The driver needs to make sure that the selected
parking space for the maneuver remains free
and clear of any obstructions (e.g. pedestrians,
bicycles, etc.).
The driver is responsible to ensure that the
selected parking space is suitable for the
maneuver and free/clear of anything that may
4
22_MP_OM_EN_USC_t.book Page 141
Page 146 of 344
144STARTING AND OPERATING
EXITING THE PARKING SPACE
NOTE:The function does not work for exiting a perpen -
dicular parking space, but only exiting parallel
parking spaces.
Activation
To activate this function, shift to DRIVE, push the
ParkSense Active Park Assist switch, and then use
the steering wheel arrow buttons to select the
Parallel Park Exit feature. After the selection, the
system activates and instructs the driver through
the instrument cluster display about the
operations that have to be carried out to perform
the maneuver correctly.
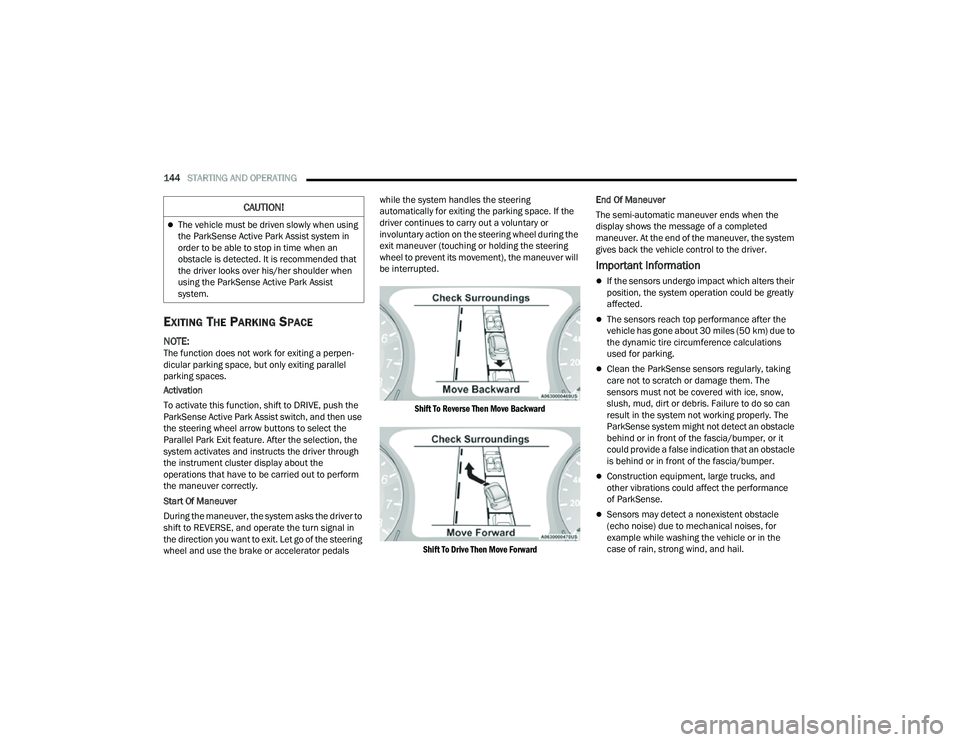
Start Of Maneuver
During the maneuver, the system asks the driver to
shift to REVERSE, and operate the turn signal in
the direction you want to exit. Let go of the steering
wheel and use the brake or accelerator pedals while the system handles the steering
automatically for exiting the parking space. If the
driver continues to carry out a voluntary or
involuntary action on the steering wheel during the
exit maneuver (touching or holding the steering
wheel to prevent its movement), the maneuver will
be interrupted.
Shift To Reverse Then Move Backward
Shift To Drive Then Move Forward
End Of Maneuver
The semi-automatic maneuver ends when the
display shows the message of a completed
maneuver. At the end of the maneuver, the system
gives back the vehicle control to the driver.
Important Information
If the sensors undergo impact which alters their
position, the system operation could be greatly
affected.
The sensors reach top performance after the
vehicle has gone about 30 miles (50 km) due to
the dynamic tire circumference calculations
used for parking.
Clean the ParkSense sensors regularly, taking
care not to scratch or damage them. The
sensors must not be covered with ice, snow,
slush, mud, dirt or debris. Failure to do so can
result in the system not working properly. The
ParkSense system might not detect an obstacle
behind or in front of the fascia/bumper, or it
could provide a false indication that an obstacle
is behind or in front of the fascia/bumper.
Construction equipment, large trucks, and
other vibrations could affect the performance
of ParkSense.
Sensors may detect a nonexistent obstacle
(echo noise) due to mechanical noises, for
example while washing the vehicle or in the
case of rain, strong wind, and hail.
The vehicle must be driven slowly when using
the ParkSense Active Park Assist system in
order to be able to stop in time when an
obstacle is detected. It is recommended that
the driver looks over his/her shoulder when
using the ParkSense Active Park Assist
system.
CAUTION!
22_MP_OM_EN_USC_t.book Page 144
Page 152 of 344
150STARTING AND OPERATING
SURROUND VIEW CAMERA SYSTEM —
IF EQUIPPED
Your vehicle may be equipped with the Surround
View Camera system that allows you to see an
on-screen image of the surroundings and Top View
of your vehicle whenever the gear selector is put
into REVERSE or a different view is selected
through the touchscreen soft buttons. The Top
View of the vehicle will show which doors are open.
The image will be displayed on the touchscreen
display along with a caution note “Check Entire
Surroundings” across the top of the screen.
After five seconds, this note will disappear. The
Surround View Camera system is comprised of four
sequential cameras located in the front grille, rear
liftgate and side mirrors.
NOTE:The Surround View Camera system has program -
mable settings that may be selected through the
Uconnect system Ú page 165.
Press this button on the touchscreen to
enter the Surround View Camera menu in
the Uconnect system.
When the vehicle is shifted into REVERSE, the Rear
View and Top View is the default view of the
system.
When the vehicle is shifted out of REVERSE with
camera delay turned on, the camera image will
continue to be displayed for up to 10 seconds
unless the vehicle speed exceeds 8 mph (13 km/h),
the vehicle is shifted into PARK or the ignition is
placed in the OFF position. There is a touchscreen
button X to disable the display of the camera image.
When the vehicle is shifted out of REVERSE with
camera delay turned off, the Surround View
Camera mode is exited and the last known screen
appears again.
When enabled, active guidelines are overlaid on
the image to illustrate the width of the vehicle,
including the side view mirrors and its projected
backup path based on the steering wheel position.
Different colored zones indicate the distance to
the rear of the vehicle.
The following table shows the approximate
distances for each zone:
Modes Of Operation
Manual activation of the Surround View Camera is
selected by pressing the Surround View Camera
soft key located in the Controls menu within the
Uconnect system.
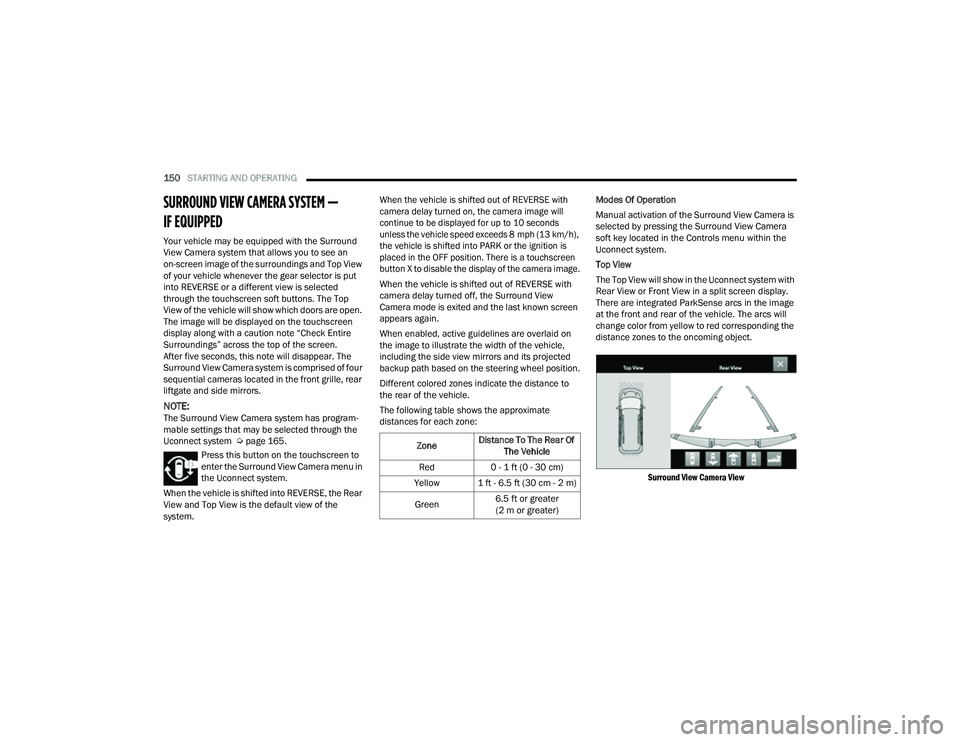
Top View
The Top View will show in the Uconnect system with
Rear View or Front View in a split screen display.
There are integrated ParkSense arcs in the image
at the front and rear of the vehicle. The arcs will
change color from yellow to red corresponding the
distance zones to the oncoming object.
Surround View Camera View
Zone Distance To The Rear Of
The Vehicle
Red 0 - 1 ft (0 - 30 cm)
Yellow 1 ft - 6.5 ft (30 cm - 2 m)
Green 6.5 ft or greater
(2 m or greater)
22_MP_OM_EN_USC_t.book Page 150
Page 167 of 344
MULTIMEDIA165
UCONNECT SETTINGS
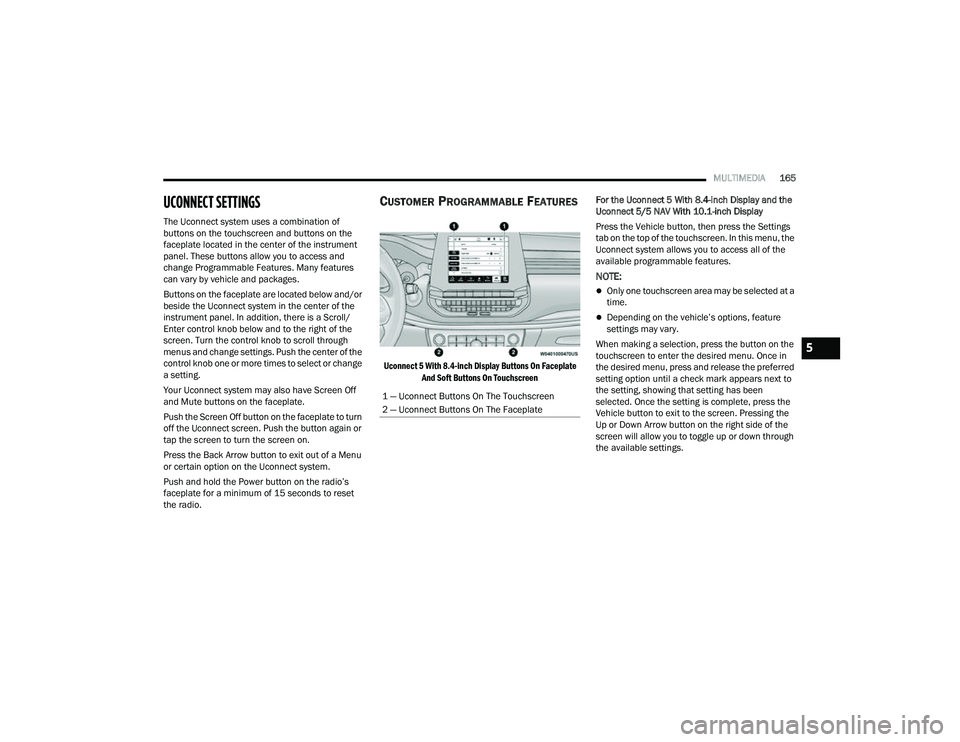
The Uconnect system uses a combination of
buttons on the touchscreen and buttons on the
faceplate located in the center of the instrument
panel. These buttons allow you to access and
change Programmable Features. Many features
can vary by vehicle and packages.
Buttons on the faceplate are located below and/or
beside the Uconnect system in the center of the
instrument panel. In addition, there is a Scroll/
Enter control knob below and to the right of the
screen. Turn the control knob to scroll through
menus and change settings. Push the center of the
control knob one or more times to select or change
a setting.
Your Uconnect system may also have Screen Off
and Mute buttons on the faceplate.
Push the Screen Off button on the faceplate to turn
off the Uconnect screen. Push the button again or
tap the screen to turn the screen on.
Press the Back Arrow button to exit out of a Menu
or certain option on the Uconnect system.
Push and hold the Power button on the radio’s
faceplate for a minimum of 15 seconds to reset
the radio.
CUSTOMER PROGRAMMABLE FEATURES
Uconnect 5 With 8.4-inch Display Buttons On Faceplate
And Soft Buttons On Touchscreen
For the Uconnect 5 With 8.4-inch Display and the
Uconnect 5/5 NAV With 10.1-inch Display
Press the Vehicle button, then press the Settings
tab on the top of the touchscreen. In this menu, the
Uconnect system allows you to access all of the
available programmable features.
NOTE:
Only one touchscreen area may be selected at a
time.
Depending on the vehicle’s options, feature
settings may vary.
When making a selection, press the button on the
touchscreen to enter the desired menu. Once in
the desired menu, press and release the preferred
setting option until a check mark appears next to
the setting, showing that setting has been
selected. Once the setting is complete, press the
Vehicle button to exit to the screen. Pressing the
Up or Down Arrow button on the right side of the
screen will allow you to toggle up or down through
the available settings.
1 — Uconnect Buttons On The Touchscreen
2 — Uconnect Buttons On The Faceplate
5
22_MP_OM_EN_USC_t.book Page 165