engine JEEP COMPASS 2023 Service Manual
[x] Cancel search | Manufacturer: JEEP, Model Year: 2023, Model line: COMPASS, Model: JEEP COMPASS 2023Pages: 344, PDF Size: 18.8 MB
Page 105 of 344
STARTING AND OPERATING103
While cruising, brief full-throttle acceleration within
the limits of local traffic laws contributes to a good
break-in. Wide-open throttle acceleration in low
gear can be detrimental and should be avoided.
The engine oil installed in the engine at the factory
is a high-quality energy conserving type lubricant.
Oil changes should be consistent with anticipated
climate conditions under which vehicle operations
will occur. For the recommended viscosity and
quality grades Ú page 323.
NOTE:A new engine may consume some oil during its first
few thousand miles (kilometers) of operation. This
should be considered a normal part of the break-in
and not interpreted as a problem.
PARK BRAKE
ELECTRIC PARK BRAKE (EPB)
Your vehicle is equipped with an EPB system that
offers simple operation, and some additional
features that make the parking brake more
convenient and useful. The parking brake is primarily intended to prevent
the vehicle from rolling while parked. Before
leaving the vehicle, make sure that the parking
brake is applied. Also, be certain to leave the
transmission in PARK.
You can engage the parking brake in two ways:
Manually, by applying the EPB switch.
Automatically, by enabling the Auto Park Brake
feature in the Customer Programmable
Features section of the Uconnect settings
Ú
page 165.
The EPB switch is located in the center console.
Electric Park Brake Switch
To apply the parking brake manually, pull up on the
switch momentarily. You may hear a sound from
the back of the vehicle while the parking brake
engages. Once the parking brake is fully engaged,
the BRAKE warning lamp in the instrument cluster and an indicator on the switch will illuminate. If
your foot is on the brake pedal while you apply the
parking brake, you may notice a small amount of
brake pedal movement. The parking brake can be
applied even when the ignition switch is OFF. The
Brake Warning Light will not illuminate and can
only be released when the ignition switch is in the
ON/RUN position.NOTE:The EPB fault lamp will illuminate if the EPB switch
is held for longer than 60 seconds in either the
released or applied position. The light will extin
-
guish upon releasing the switch.
If the Auto Park Brake feature is enabled, the
parking brake will automatically engage whenever
the transmission is placed into PARK. If your foot is
on the brake pedal, you may notice a small amount
of brake pedal movement while the parking brake
is engaging.
The parking brake will release automatically when
the ignition switch is ON/RUN, the transmission is
in DRIVE or REVERSE, the driver’s seat belt is
buckled, and an attempt is made to drive away.
To release the parking brake manually, the ignition
switch must be in the ON/RUN position. Put your
foot on the brake pedal, then push the EPB switch
down momentarily. You may hear a sound from the
back of the car while the parking brake
disengages. You may also notice a small amount of
movement in the brake pedal. Once the parking
CAUTION!
Never use Non-Detergent Oil or Straight Mineral
Oil in the engine or damage may result.
4
22_MP_OM_EN_USC_t.book Page 103
Page 108 of 344
106STARTING AND OPERATING
(Continued)
Brake Service Mode
We recommend having your brakes serviced by an
authorized dealer.
You should only make repairs for which you have
the knowledge and the right equipment. You
should only enter Brake Service Mode during
brake service.
When servicing your rear brakes, it may be
necessary for you or your technician to push the
rear piston into the rear caliper bore. With the EPB
system, this can only be done after retracting the
EPB actuator. The actuator retraction can be done
easily by entering the Brake Service Mode through
the Uconnect Settings in your vehicle. This
menu-based system will guide you through the
steps necessary to retract the EPB actuator in
order to perform rear brake service.
Service Mode has requirements that must be met
in order to be activated:
The vehicle must be at a standstill.
The parking brake must be disabled.
The transmission must be in PARK or NEUTRAL.
The EPB switch not activated.
The vehicle in ignition ON/RUN position.
The brake pedal not pressed.While in Service Mode, the EPB fault lamp will flash
continuously while the ignition switch is ON/RUN.
NOTE:A dedicated message will appear in the instrument
cluster display if Brake Service Mode cannot be
activated.
When brake service work is complete, the following
steps must be followed to reset the parking brake
system to normal operation:
Ensure the vehicle is at a standstill.
Press the brake pedal with moderate force.
Apply the EPB Switch.
NOTE:A dedicated message will appear in the instrument
cluster display if Brake Service Mode cannot be
deactivated.
AUTOMATIC TRANSMISSION
You must press and hold the brake pedal while
shifting out of PARK.
WARNING!
You can be badly injured working on or around a
motor vehicle. Do only that service work for
which you have the knowledge and the right
equipment. If you have any doubt about your
ability to perform a service job, take your vehicle
to a competent mechanic.
WARNING!
Never use the PARK (P) position as a substi
-
tute for the parking brake. Always apply the
parking brake fully when exiting the vehicle to
guard against vehicle movement and possible
injury or damage.
Your vehicle could move and injure you and
others if it is not in PARK. Check by trying to
move the gear selector out of PARK with the
brake pedal released. Make sure the trans -
mission is in PARK before exiting the vehicle.
It is dangerous to shift out of PARK or
NEUTRAL (N) if the engine speed is higher
than idle speed. If your foot is not firmly
pressing the brake pedal, the vehicle could
accelerate quickly forward or in reverse. You
could lose control of the vehicle and hit
someone or something. Only shift into gear
when the engine is idling normally and your
foot is firmly pressing the brake pedal.
The vehicle may not engage a newly selected
gear when shifting between PARK, REVERSE
(R), or DRIVE (D) if the vehicle is moving while
shifting.
22_MP_OM_EN_USC_t.book Page 106
Page 109 of 344
STARTING AND OPERATING107
IGNITION PARK INTERLOCK
This vehicle is equipped with an Ignition Park
Interlock which requires the transmission to be in
PARK (P) before the ignition can be turned to the
OFF position. This helps the driver avoid
inadvertently leaving the vehicle without placing
the transmission in PARK. This system also locks
the transmission in PARK whenever the ignition is
in the OFF position.
BRAKE/TRANSMISSION SHIFT
I
NTERLOCK (BTSI) SYSTEM
This vehicle is equipped with a BTSI that holds the
transmission gear selector in PARK (P) unless the
brakes are applied. To shift the transmission out of
PARK, the ignition must be in the ON/RUN position
(whether the engine is running or not), and the
brake pedal must be pressed. The brake pedal
must also be pressed to shift from NEUTRAL (N)
into DRIVE (D) or REVERSE (R) when the vehicle is
stopped or moving at low speeds.
6-SPEED OR 9-SPEED AUTOMATIC
T
RANSMISSION
NOTE:Your vehicle may be equipped with a 6-speed or
9-speed automatic transmission, depending on
model. This section describes operation of both
the 6-speed and 9-speed transmissions.
The transmission gear range (PRND) is displayed
both beside the gear selector and in the
instrument cluster. To select a gear range, push
the lock button on the gear selector and move the
selector rearward or forward. You must also press
the brake pedal to shift the transmission out of
PARK (P) (or NEUTRAL (N), when the vehicle is
stopped or moving at low speeds). Select the
DRIVE (D) range for normal driving.
Unintended movement of a vehicle could
injure those in or near the vehicle. As with all
vehicles, you should never exit a vehicle while
the engine is running. Before exiting a vehicle,
always come to a complete stop, then apply
the parking brake, shift the transmission into
PARK, and turn the ignition OFF. When the
ignition is in the OFF position, the transmis -
sion is locked in PARK, securing the vehicle
against unwanted movement.
When leaving the vehicle, always make sure
the ignition is in the OFF position, remove the
key fob from the vehicle, and lock the vehicle.
Never leave children alone in a vehicle, or with
access to an unlocked vehicle. Allowing chil -
dren to be in a vehicle unattended is
dangerous for a number of reasons. A child or
others could be seriously or fatally injured.
Children should be warned not to touch the
parking brake, brake pedal or the transmis -
sion gear selector.
Do not leave the key fob in or near the vehicle
(or in a location accessible to children), and do
not leave the ignition in the ON/RUN position.
A child could operate power windows, other
controls, or move the vehicle.
WARNING!CAUTION!
Damage to the transmission may occur if the
following precautions are not observed:
Shift into or out of PARK or REVERSE only after
the vehicle has come to a complete stop.
Do not shift between PARK, REVERSE,
NEUTRAL, or DRIVE when the engine is above
idle speed.
Before shifting into any gear, make sure your
foot is firmly pressing the brake pedal.4
22_MP_OM_EN_USC_t.book Page 107
Page 110 of 344
108STARTING AND OPERATING
NOTE:
The transmission electronics are self-cali -
brating; therefore, the first few shifts on a new
vehicle may be somewhat abrupt. This is a
normal condition, and precision shifts will
develop within a few hundred miles (kilome -
ters).
In the event of a mismatch between the gear
selector position and the actual transmission
gear (for example, driver selects REVERSE (R)
while driving forward), the position indicator will
blink continuously until the selector is returned
to the proper position, or the requested shift can
be completed.
The electronically controlled transmission adapts
its shift schedule based on driver inputs, along
with environmental and road conditions.
The 9-speed transmission has been developed to
meet the needs of current and future FWD/AWD
vehicles. Software and calibration is refined to
optimize the customer’s driving experience and
fuel economy. By design, some vehicle and
driveline combinations utilize NINTH gear only in
very specific driving situations and conditions. Only shift from DRIVE to PARK or REVERSE when
the accelerator pedal is released and the vehicle is
stopped. Be sure to keep your foot on the brake
pedal when shifting between these gears.
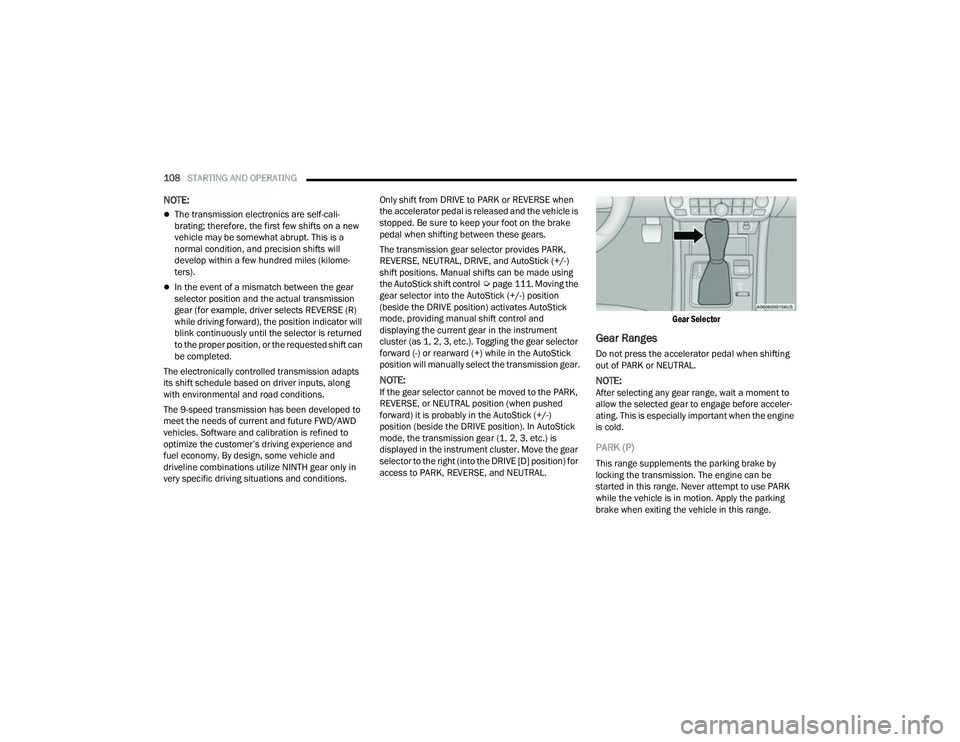
The transmission gear selector provides PARK,
REVERSE, NEUTRAL, DRIVE, and AutoStick (+/-)
shift positions. Manual shifts can be made using
the AutoStick shift control
Úpage 111. Moving the
gear selector into the AutoStick (+/-) position
(beside the DRIVE position) activates AutoStick
mode, providing manual shift control and
displaying the current gear in the instrument
cluster (as 1, 2, 3, etc.). Toggling the gear selector
forward (-) or rearward (+) while in the AutoStick
position will manually select the transmission gear.
NOTE:If the gear selector cannot be moved to the PARK,
REVERSE, or NEUTRAL position (when pushed
forward) it is probably in the AutoStick (+/-)
position (beside the DRIVE position). In AutoStick
mode, the transmission gear (1, 2, 3, etc.) is
displayed in the instrument cluster. Move the gear
selector to the right (into the DRIVE [D] position) for
access to PARK, REVERSE, and NEUTRAL.
Gear Selector
Gear Ranges
Do not press the accelerator pedal when shifting
out of PARK or NEUTRAL.
NOTE:After selecting any gear range, wait a moment to
allow the selected gear to engage before acceler
-
ating. This is especially important when the engine
is cold.
PARK (P)
This range supplements the parking brake by
locking the transmission. The engine can be
started in this range. Never attempt to use PARK
while the vehicle is in motion. Apply the parking
brake when exiting the vehicle in this range.
22_MP_OM_EN_USC_t.book Page 108
Page 111 of 344
STARTING AND OPERATING109
(Continued)
(Continued)
When parking on a hill, apply the parking brake
before shifting the transmission to PARK,
otherwise the load on the transmission locking
mechanism may make it difficult to move the gear
selector out of PARK. As an added precaution, turn
the front wheels toward the curb on a downhill
grade and away from the curb on an uphill grade.
When exiting the vehicle, always:
1. Apply the parking brake.
2. Shift the transmission into PARK.
3. Turn the engine off.
4. Remove the key fob from the vehicle.
NOTE:Block the wheels with a wedge or a stone if the
vehicle is parked on a steep slope.
WARNING!
Never use the PARK (P) position as a substi
-
tute for the parking brake. Always apply the
parking brake fully when exiting the vehicle to
guard against vehicle movement and possible
injury or damage.
Your vehicle could move and injure you and
others if it is not in PARK. Check by trying to
move the gear selector out of PARK with the
brake pedal released. Make sure the trans -
mission is in PARK before exiting the vehicle.
It is dangerous to shift out of PARK or
NEUTRAL (N) if the engine speed is higher
than idle speed. If your foot is not firmly
pressing the brake pedal, the vehicle could
accelerate quickly forward or in reverse.
You could lose control of the vehicle and hit
someone or something. Only shift into gear
when the engine is idling normally and your
foot is firmly pressing the brake pedal.
The vehicle may not engage a newly selected
gear when shifting between PARK, REVERSE
(R), or DRIVE (D) if the vehicle is moving while
shifting.
Unintended movement of a vehicle could
injure those in or near the vehicle. As with all
vehicles, you should never exit a vehicle while
the engine is running. Before exiting a vehicle,
always come to a complete stop, then apply
the parking brake, shift the transmission into
PARK, and turn the ignition OFF. When the
ignition is in the OFF position, the transmis -
sion is locked in PARK, securing the vehicle
against unwanted movement.
When leaving the vehicle, always make sure
the ignition is in the OFF position, remove the
key fob from the vehicle, and lock the vehicle.
WARNING!
Never leave children alone in a vehicle, or with
access to an unlocked vehicle. Allowing chil -
dren to be in a vehicle unattended is
dangerous for a number of reasons. A child or
others could be seriously or fatally injured.
Children should be warned not to touch the
parking brake, brake pedal or the transmis -
sion gear selector.
Do not leave the key fob in or near the vehicle
(or in a location accessible to children), and do
not leave the ignition in the ON/RUN position.
A child could operate power windows, other
controls, or move the vehicle.
CAUTION!
Before moving the transmission gear selector
out of PARK, you must turn the ignition to the
ON/RUN position, and also press the brake
pedal. Otherwise, damage to the gear selector
could result.
DO NOT race the engine when shifting from
PARK or NEUTRAL into another gear range, as
this can damage the drivetrain.
WARNING!
4
22_MP_OM_EN_USC_t.book Page 109
Page 112 of 344
110STARTING AND OPERATING
The following indicators should be used to ensure
that you have properly engaged the transmission
into the PARK position:
When shifting into PARK, push the lock button
on the gear selector, and firmly move the
selector all the way forward until it stops and is
fully seated.
Look at the transmission gear position display
and verify that it indicates the PARK position (P).
With the brake pedal released, verify that the
gear selector will not move out of PARK.
REVERSE (R)
This range is for moving the vehicle backward.
Shift into REVERSE only after the vehicle has come
to a complete stop.
NEUTRAL (N)
Use this range when the vehicle is standing for
prolonged periods with the engine running. The
engine may be started in this range. Apply the
parking brake and shift the transmission into
PARK if you must exit the vehicle.
DRIVE (D)
This range should be used for most city and
highway driving. It provides the smoothest upshifts
and downshifts, and the best fuel economy. The
transmission automatically upshifts through all
forward gears. When frequent transmission shifting occurs (such
as when operating the vehicle under heavy loading
conditions, in hilly terrain, traveling into strong
head winds, or while towing a heavy trailer), use
the AutoStick shift control to select a lower gear
Ú
page 111. Under these conditions, using a lower
gear will improve performance and extend
transmission life by reducing excessive shifting
and heat build-up.
If the transmission temperature exceeds normal
operating limits, the transmission controller may
modify the transmission shift schedule, reduce
engine torque, and/or expand the range of torque
converter clutch engagement. This is done to
prevent transmission damage due to overheating.
If the transmission becomes extremely hot, the
Transmission Temperature Warning Light may
illuminate, and the transmission may operate
differently until the transmission cools down.
During cold temperatures, transmission operation
may be modified depending on engine and/or
transmission temperature as well as vehicle
speed. This feature improves warm-up time of the
engine and transmission to achieve maximum
efficiency. Engagement of the torque converter
clutch (and, for the 9-speed, shifts into EIGHTH or
NINTH gear), are inhibited until the engine and/or
transmission is warm. Normal operation will
resume once the temperature(s) have risen to a
suitable level.
WARNING!
Do not coast in NEUTRAL and never turn off the
ignition to coast down a hill. These are unsafe
practices that limit your response to changing
traffic or road conditions. You might lose control
of the vehicle and have a collision.
CAUTION!
Towing the vehicle, coasting, or driving for any
other reason with the transmission in NEUTRAL
can cause severe transmission damage.
For Recreational Towing Ú page 160.
For Towing A Disabled Vehicle Ú page 264.
22_MP_OM_EN_USC_t.book Page 110
Page 113 of 344
STARTING AND OPERATING111
AUTOSTICK
AutoStick is a driver-interactive transmission
feature providing manual shift control, giving you
more control of the vehicle. AutoStick allows you to
maximize engine braking, eliminate undesirable
upshifts and downshifts, and improve overall
vehicle performance. This feature can also provide
you with more control during passing, city driving,
cold slippery conditions, mountain driving, trailer
towing, and many other situations.
Operation
When the gear selector is in the AutoStick position
(beside the DRIVE (D) position), it can be moved
forward and rearward. This allows the driver to
manually select the transmission gear being used.
Moving the gear selector forward (-) triggers a
downshift and rearward (+) an upshift. The current
gear is displayed in the instrument cluster.
In AutoStick mode, the transmission will shift up or
down when the driver moves the gear selector
rearward (+) or forward (-), unless an engine
lugging or overspeed condition would result. It will
remain in the selected gear until another upshift or
downshift is chosen, except as described below.
6-speed transmissions will automatically
upshift when necessary to prevent engine
over-speed.
The transmission will automatically downshift
as the vehicle slows (to prevent engine lugging)
and will display the current gear.
The transmission will automatically downshift to
FIRST gear when coming to a stop. After a stop,
the driver should manually upshift (+) the trans -
mission as the vehicle is accelerated.
You can start out, from a stop, in FIRST or
SECOND gear (or THIRD gear, in 6-speed
models, or in 4WD LOW, SNOW mode, or SAND
mode, where available). Tapping (+) (at a stop)
will allow starting in SECOND gear. Starting out
in SECOND gear can be helpful in snowy or icy
conditions.
If a requested downshift would cause the
engine to over-speed, that shift will not occur.
The system will ignore attempts to upshift at too
low of a vehicle speed.
Transmission shifting will be more noticeable
when AutoStick is enabled.
The system may revert to automatic shift mode
if a fault or overheat condition is detected.
NOTE:When Selec-Speed or Hill Descent Control is
enabled, AutoStick is not active.
To disengage AutoStick, return the gear selector to
the DRIVE position. You can shift in or out of the
AutoStick position at any time without taking your
foot off the accelerator pedal.
TRANSMISSION LIMP HOME MODE
Transmission function is monitored electronically
for abnormal conditions. If a condition is detected
that could result in transmission damage,
Transmission Limp Home Mode is activated. In this
mode, the transmission may operate only in a fixed
gear, or may remain in NEUTRAL (N). The
Malfunction Indicator Light (MIL) may be
illuminated. Limp Home Mode may allow the
vehicle to be driven to an authorized dealer for
service without damaging the transmission.
In the event of a momentary problem, the
transmission can be reset to regain all forward
gears by performing the following steps:
1. Stop the vehicle.
2. Shift the transmission into PARK (P), if possible. If not, shift the transmission to
NEUTRAL.
3. Push and hold the ignition until the engine turns off.
4. Wait approximately 30 seconds.
WARNING!
Do not downshift for additional engine braking
on a slippery surface. The drive wheels could
lose their grip and the vehicle could skid,
causing a collision or personal injury.
4
22_MP_OM_EN_USC_t.book Page 111
Page 114 of 344
112STARTING AND OPERATING
5. Restart the engine.
6. Shift into the desired gear range. If the problem is no longer detected, the
transmission will return to normal operation.
NOTE:Even if the transmission can be reset, we
recommend that you visit an authorized dealer at
your earliest possible convenience. An authorized
dealer has diagnostic equipment to assess the
condition of your transmission. If the transmission
cannot be reset, authorized dealer service is
required.
TORQUE CONVERTER CLUTCH
A feature designed to improve fuel economy has
been included in the automatic transmission on
your vehicle. A clutch within the torque converter
engages automatically at calibrated speeds. This
may result in a slightly different feeling or response
during normal operation in the upper gears. When
the vehicle speed drops or during some
accelerations, the clutch automatically
disengages.
NOTE:The torque converter clutch will not engage until
the engine and/or transmission is warm (usually
after 1 to 3 miles [2 to 5 km] of driving). Because
the engine speed is higher when the torque
converter clutch is not engaged, it may seem as if the transmission is not shifting properly when the
vehicle is cold. This is normal. The torque converter
clutch will function normally once the powertrain is
sufficiently warm.
FOUR-WHEEL DRIVE OPERATION —
IF EQUIPPED
JEEP® ACTIVE DRIVE
Your vehicle may be equipped with a Power
Transfer Unit (PTU). This system is automatic
with no driver inputs or additional driving skills
required. Under normal driving conditions, the
front wheels provide most of the traction. If the
front wheels begin to lose traction, power is shifted
automatically to the rear wheels. The greater the
front wheel traction loss, the greater the power
transfer to the rear wheels.
Additionally, on dry pavement under heavy throttle
input (where one may have no wheel spin), torque
will be sent to the rear in a preemptive effort to
improve vehicle launch and performance
characteristics.
Four-Wheel Drive (4x4)
The four-wheel drive (4WD) is fully automatic in
normal driving mode.
NOTE:It is not possible to carry out the change of mode
when the vehicle exceeds the speed of 75 mph
(120 km/h).
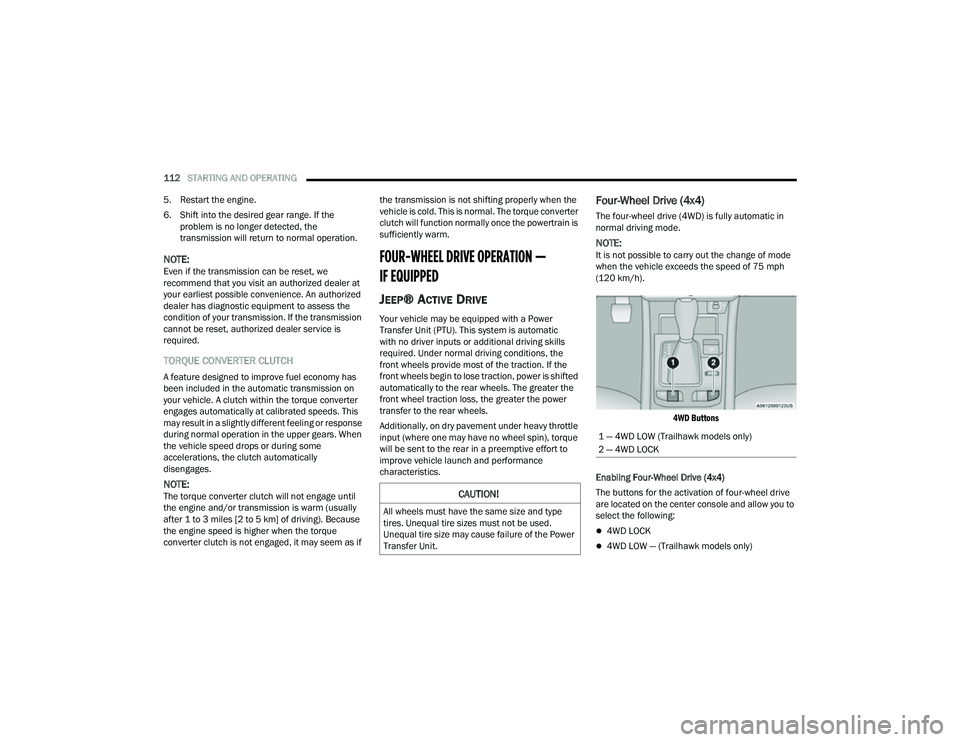
4WD Buttons
Enabling Four-Wheel Drive (4x4)
The buttons for the activation of four-wheel drive
are located on the center console and allow you to
select the following:
4WD LOCK
4WD LOW — (Trailhawk models only)
CAUTION!
All wheels must have the same size and type
tires. Unequal tire sizes must not be used.
Unequal tire size may cause failure of the Power
Transfer Unit.
1 — 4WD LOW (Trailhawk models only)
2 — 4WD LOCK
22_MP_OM_EN_USC_t.book Page 112
Page 115 of 344
STARTING AND OPERATING113
Active Drive Control — If Equipped
The Power Transfer Unit (PTU) is locked to ensure
immediate availability of torque to the rear drive
axles. This feature is selectable in AUTO mode and
automatic in the other driving mode. 4WD LOCK
can be enabled by the following ways:
When the 4WD LOCK button is pushed.
When the Selec-Terrain switch is moved from
AUTO to any other off-road modes.
Active Drive With Low Control — (Trailhawk models
only)
The 4WD LOW mode helps to improve the off-road
performance in all modes. To enable 4WD LOW,
please follow the steps below:
Enabling 4WD LOW
With the vehicle stationary, the ignition in the ON/
RUN position or with the engine running, shift the
transmission into NEUTRAL and push the 4WD
LOW button once. The instrument cluster will
display the message “4WD LOW” once the shift is
complete.
NOTE:
Both LOCK and LOW LED lights will blink and
then become active on the buttons until the
shift is complete.
The instrument cluster display will illuminate the
4WD LOW icon. Disabling 4WD LOW
To disable the 4WD LOW mode, the vehicle must
be stationary and the transmission shifted into
NEUTRAL. Push the 4WD LOW button once.
SELEC-TERRAIN — IF EQUIPPED
Selec-Terrain combines the capabilities of the
vehicle control systems, along with driver input, to
provide the best performance for all terrains.
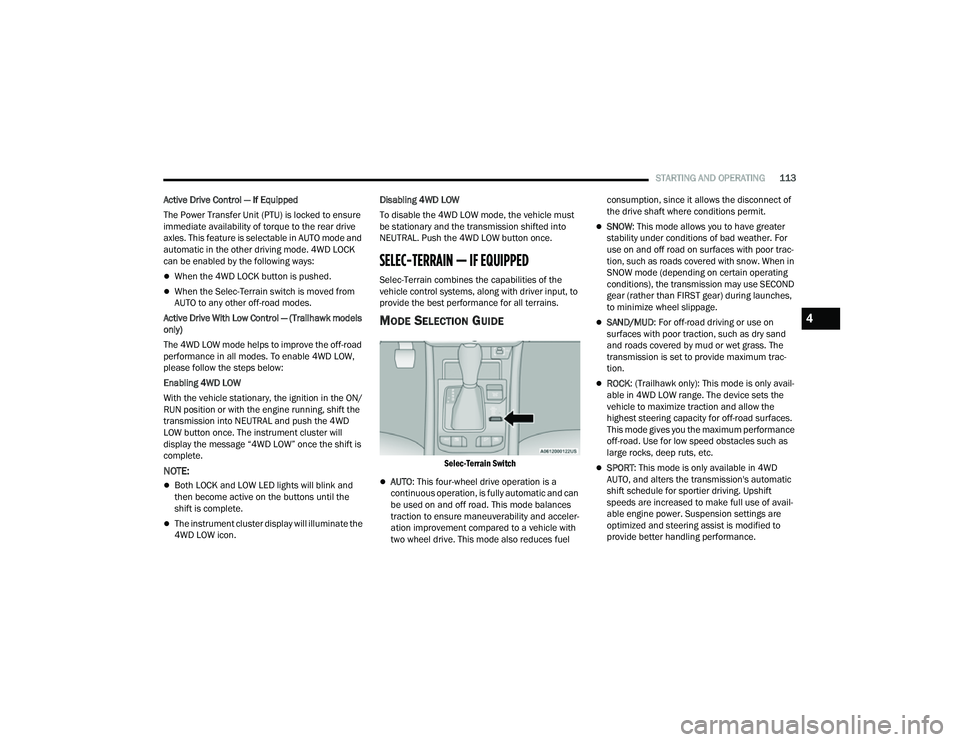
MODE SELECTION GUIDE
Selec-Terrain Switch
AUTO
: This four-wheel drive operation is a
continuous operation, is fully automatic and can
be used on and off road. This mode balances
traction to ensure maneuverability and acceler -
ation improvement compared to a vehicle with
two wheel drive. This mode also reduces fuel consumption, since it allows the disconnect of
the drive shaft where conditions permit.
SNOW
: This mode allows you to have greater
stability under conditions of bad weather. For
use on and off road on surfaces with poor trac-
tion, such as roads covered with snow. When in
SNOW mode (depending on certain operating
conditions), the transmission may use SECOND
gear (rather than FIRST gear) during launches,
to minimize wheel slippage.
SAND/MUD : For off-road driving or use on
surfaces with poor traction, such as dry sand
and roads covered by mud or wet grass. The
transmission is set to provide maximum trac -
tion.
ROCK : (Trailhawk only): This mode is only avail -
able in 4WD LOW range. The device sets the
vehicle to maximize traction and allow the
highest steering capacity for off-road surfaces.
This mode gives you the maximum performance
off-road. Use for low speed obstacles such as
large rocks, deep ruts, etc.
SPORT : This mode is only available in 4WD
AUTO, and alters the transmission's automatic
shift schedule for sportier driving. Upshift
speeds are increased to make full use of avail -
able engine power. Suspension settings are
optimized and steering assist is modified to
provide better handling performance.
4
22_MP_OM_EN_USC_t.book Page 113
Page 116 of 344

114STARTING AND OPERATING
NOTE:
ROCK mode is only available on the vehicles
equipped with the Off-Road package.
Activate the Hill Descent Control for steep down -
hill control Ú page 188.
POWER STEERING
The electric power steering system will provide
increased vehicle response and ease of
maneuverability. The electric power steering
system adapts to different driving conditions.
If the “SERVICE POWER STEERING” or “POWER
STEERING ASSIST OFF - SERVICE SYSTEM”
message and a steering wheel icon are displayed
on the instrument cluster display, it indicates that
the vehicle needs to be taken to an authorized
dealer for service. It is likely the vehicle has lost
power steering assistance Ú page 77.If the “POWER STEERING SYSTEM HOT -
PERFORMANCE MAY BE LIMITED” message and an
icon are displayed on the instrument cluster
display, it indicates that extreme steering
maneuvers may have occurred, which caused an
over temperature condition in the electric power
steering system. You will lose power steering
assistance momentarily until the over temperature
condition no longer exists. Once driving conditions
are safe, pull over and let the vehicle idle for a few
moments until the light turns off Ú
page 77.
NOTE:
Even if the power steering system is no longer
operational, it is still possible to steer the
vehicle. Under these conditions there will be a
substantial increase in steering effort, espe -
cially at low speeds and during parking maneu -
vers.
If the condition persists, see an authorized
dealer for service.
STOP/START SYSTEM — IF EQUIPPED
The Stop/Start function is developed to reduce
fuel consumption. The system will stop the engine
automatically during a vehicle stop if the required
conditions are met. Releasing the brake pedal or
pressing the accelerator pedal will automatically
restart the engine. This vehicle has been upgraded with a heavy-duty
starter, enhanced battery, and other upgraded
engine parts, to handle the additional engine
starts.
AUTOSTOP MODE
The Stop/Start feature is enabled after every
normal customer engine start. At that time, the
system will go into STOP/START READY.
To Activate The Autostop Mode, The Following
Must Occur:
The system must be in STOP/START READY
state. A “STOP/START READY” message will be
displayed in the instrument cluster display
within the Stop/Start section Ú
page 77.
The vehicle must be completely stopped.
The gear selector must be in a forward gear and
the brake pedal pressed.
The engine will shut down, the tachometer will
move to the zero position, and the Stop/Start
telltale will illuminate indicating you are in
Autostop. Customer settings will be maintained
upon return to an engine-running condition.
WARNING!
Continued operation with reduced assist could
pose a safety risk to yourself and others. Service
should be obtained as soon as possible.
22_MP_OM_EN_USC_t.book Page 114