JEEP GLADIATOR 2023 Owners Manual
Manufacturer: JEEP, Model Year: 2023, Model line: GLADIATOR, Model: JEEP GLADIATOR 2023Pages: 448, PDF Size: 17.37 MB
Page 111 of 448
GETTING TO KNOW YOUR VEHICLE109
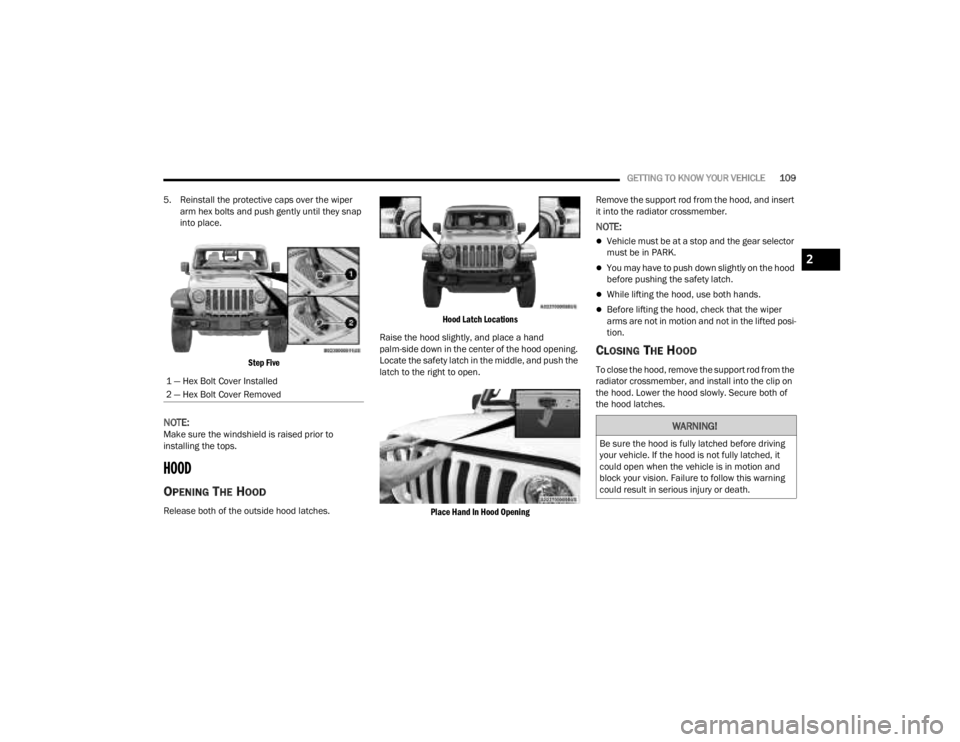
5. Reinstall the protective caps over the wiper arm hex bolts and push gently until they snap
into place.
Step Five
NOTE:Make sure the windshield is raised prior to
installing the tops.
HOOD
OPENING THE HOOD
Release both of the outside hood latches.
Hood Latch Locations
Raise the hood slightly, and place a hand
palm-side down in the center of the hood opening.
Locate the safety latch in the middle, and push the
latch to the right to open.
Place Hand In Hood Opening
Remove the support rod from the hood, and insert
it into the radiator crossmember.
NOTE:
Vehicle must be at a stop and the gear selector
must be in PARK.
You may have to push down slightly on the hood
before pushing the safety latch.
While lifting the hood, use both hands.
Before lifting the hood, check that the wiper
arms are not in motion and not in the lifted posi
-
tion.
CLOSING THE HOOD
To close the hood, remove the support rod from the
radiator crossmember, and install into the clip on
the hood. Lower the hood slowly. Secure both of
the hood latches.
1 — Hex Bolt Cover Installed
2 — Hex Bolt Cover Removed
WARNING!
Be sure the hood is fully latched before driving
your vehicle. If the hood is not fully latched, it
could open when the vehicle is in motion and
block your vision. Failure to follow this warning
could result in serious injury or death.
2
23_JT_OM_EN_USC_t.book Page 109
Page 112 of 448
110GETTING TO KNOW YOUR VEHICLE
TAILGATE
OPENING
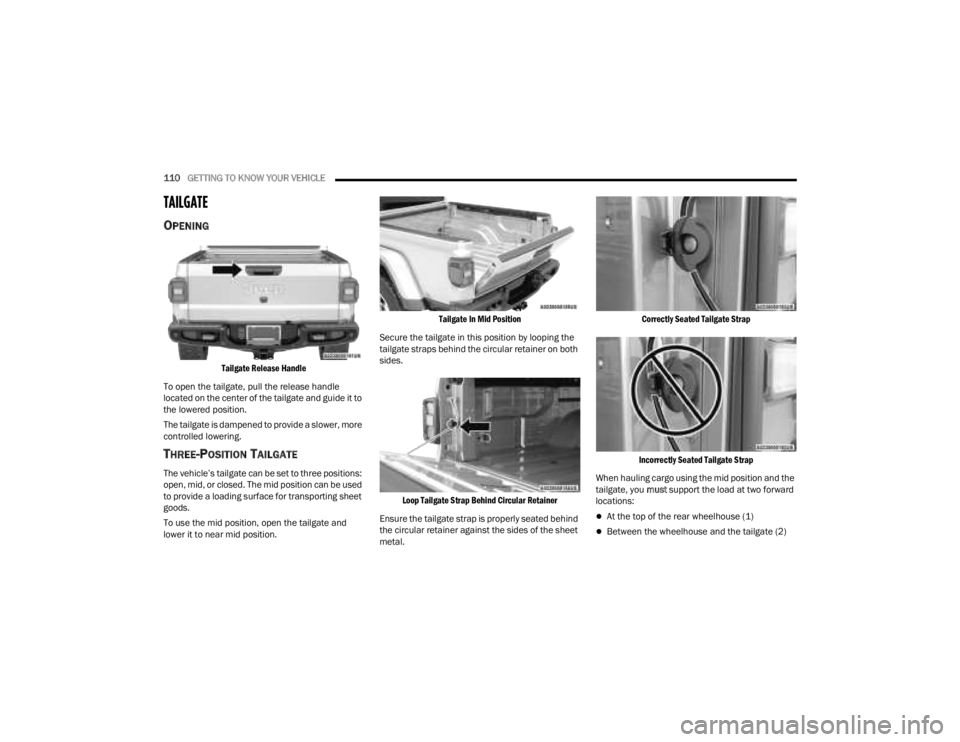
Tailgate Release Handle
To open the tailgate, pull the release handle
located on the center of the tailgate and guide it to
the lowered position.
The tailgate is dampened to provide a slower, more
controlled lowering.
THREE-POSITION TAILGATE
The vehicle’s tailgate can be set to three positions:
open, mid, or closed. The mid position can be used
to provide a loading surface for transporting sheet
goods.
To use the mid position, open the tailgate and
lower it to near mid position.
Tailgate In Mid Position
Secure the tailgate in this position by looping the
tailgate straps behind the circular retainer on both
sides.
Loop Tailgate Strap Behind Circular Retainer
Ensure the tailgate strap is properly seated behind
the circular retainer against the sides of the sheet
metal.
Correctly Seated Tailgate Strap
Incorrectly Seated Tailgate Strap
When hauling cargo using the mid position and the
tailgate, you must support the load at two forward
locations:
At the top of the rear wheelhouse (1)
Between the wheelhouse and the tailgate (2)
23_JT_OM_EN_USC_t.book Page 110
Page 113 of 448
GETTING TO KNOW YOUR VEHICLE111
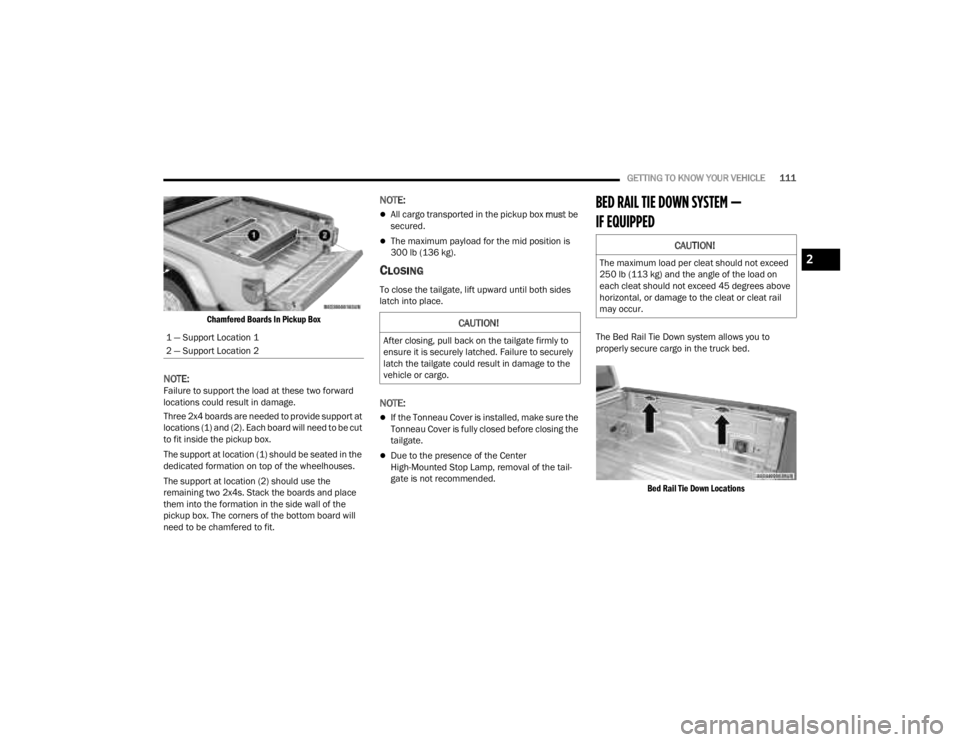
Chamfered Boards In Pickup Box
NOTE:Failure to support the load at these two forward
locations could result in damage.
Three 2x4 boards are needed to provide support at
locations (1) and (2). Each board will need to be cut
to fit inside the pickup box.
The support at location (1) should be seated in the
dedicated formation on top of the wheelhouses.
The support at location (2) should use the
remaining two 2x4s. Stack the boards and place
them into the formation in the side wall of the
pickup box. The corners of the bottom board will
need to be chamfered to fit.
NOTE:
All cargo transported in the pickup box must be
secured.
The maximum payload for the mid position is
300 lb (136 kg).
CLOSING
To close the tailgate, lift upward until both sides
latch into place.
NOTE:
If the Tonneau Cover is installed, make sure the
Tonneau Cover is fully closed before closing the
tailgate.
Due to the presence of the Center
High-Mounted Stop Lamp, removal of the tail -
gate is not recommended.
BED RAIL TIE DOWN SYSTEM —
IF EQUIPPED
The Bed Rail Tie Down system allows you to
properly secure cargo in the truck bed.
Bed Rail Tie Down Locations
1 — Support Location 1
2 — Support Location 2
CAUTION!
After closing, pull back on the tailgate firmly to
ensure it is securely latched. Failure to securely
latch the tailgate could result in damage to the
vehicle or cargo.
CAUTION!
The maximum load per cleat should not exceed
250 lb (113 kg) and the angle of the load on
each cleat should not exceed 45 degrees above
horizontal, or damage to the cleat or cleat rail
may occur.2
23_JT_OM_EN_USC_t.book Page 111
Page 114 of 448

112GETTING TO KNOW YOUR VEHICLE
There are two adjustable utility rail cleats on each
side of the bed that can be used to assist in
securing cargo.
Adjustable Cleat Assembly
Each utility rail cleat must be tightened down in
one of the detents along either utility rail in order to
keep cargo properly secured.
To move the utility rail cleat to any position on the
utility rail, turn the cleat retainer nut counter-
clockwise several times. Then, pull out on the
utility rail cleat and slide it to the detent nearest
the desired location. Make sure the utility rail cleat
is seated in the detent, and tighten the nut. To remove the utility rail cleats from the side utility
rails, slide the cleat to the rectangular cutout
located at the end of the rail toward the front of the
vehicle.
To remove the utility rail cleat from the front utility
rail, slide the cleat to the rectangular cutout
located on the left side of the rail.
TONNEAU COVER — IF EQUIPPED
The Tonneau Cover can be installed on the truck
bed to keep cargo out of view, and protect from
inclement weather.
The Tonneau Cover consists of the following
features:
Easy roll up cover
Tonneau fore/aft locator
Crossbar inside bed locator
Rear latches
Stowage straps
NOTE:The Tonneau Cover can be rolled up and secured
at the front of the truck bed without removing it
completely.
TONNEAU COVER INSTALLATION
To install the Tonneau Cover, proceed as follows:
1. Position the rolled up Tonneau Cover on the
truck bed and align it to the two fastener
locations at the front of the bed.
Fastener Locations
2. Using a #T50 Torx head driver, secure the fasteners to the bed.
3. Lower the tailgate to the fully open position before unrolling the Tonneau Cover.
1 — Utility Rail Detent
2 — Cleat Retainer Nut
3 — Utility Rail Cleat
23_JT_OM_EN_USC_t.book Page 112
Page 115 of 448
GETTING TO KNOW YOUR VEHICLE113
4. Release the stowage straps used to secure the Tonneau Cover in the rolled up position.
Release Stowage Strap
5. Roll the Tonneau Cover rearward toward the back of the truck bed.
Roll Tonneau Cover Rearward
6. Position both Tonneau Cover latches over the
locking mechanisms (one on each side of the
truck bed), making sure the plastic retainer is
correctly seated in the forward part of the
latch.
Correctly Seated Retainer
Incorrectly Seated Retainer
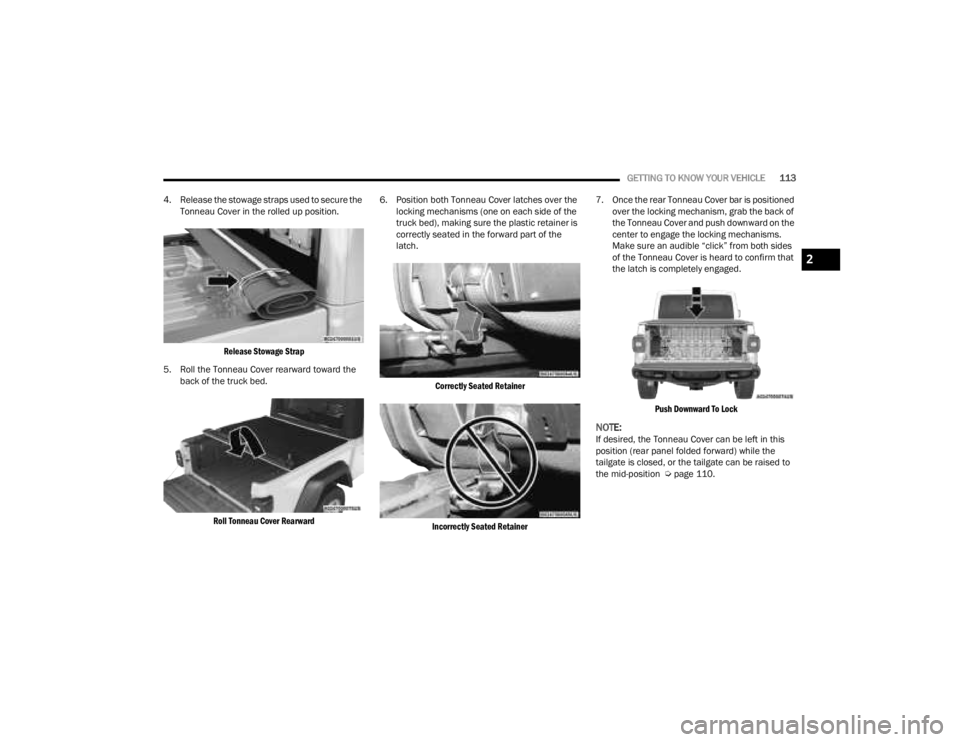
7. Once the rear Tonneau Cover bar is positioned
over the locking mechanism, grab the back of
the Tonneau Cover and push downward on the
center to engage the locking mechanisms.
Make sure an audible “click” from both sides
of the Tonneau Cover is heard to confirm that
the latch is completely engaged.
Push Downward To Lock
NOTE:If desired, the Tonneau Cover can be left in this
position (rear panel folded forward) while the
tailgate is closed, or the tailgate can be raised to
the mid-position Ú page 110.
2
23_JT_OM_EN_USC_t.book Page 113
Page 116 of 448
114GETTING TO KNOW YOUR VEHICLE
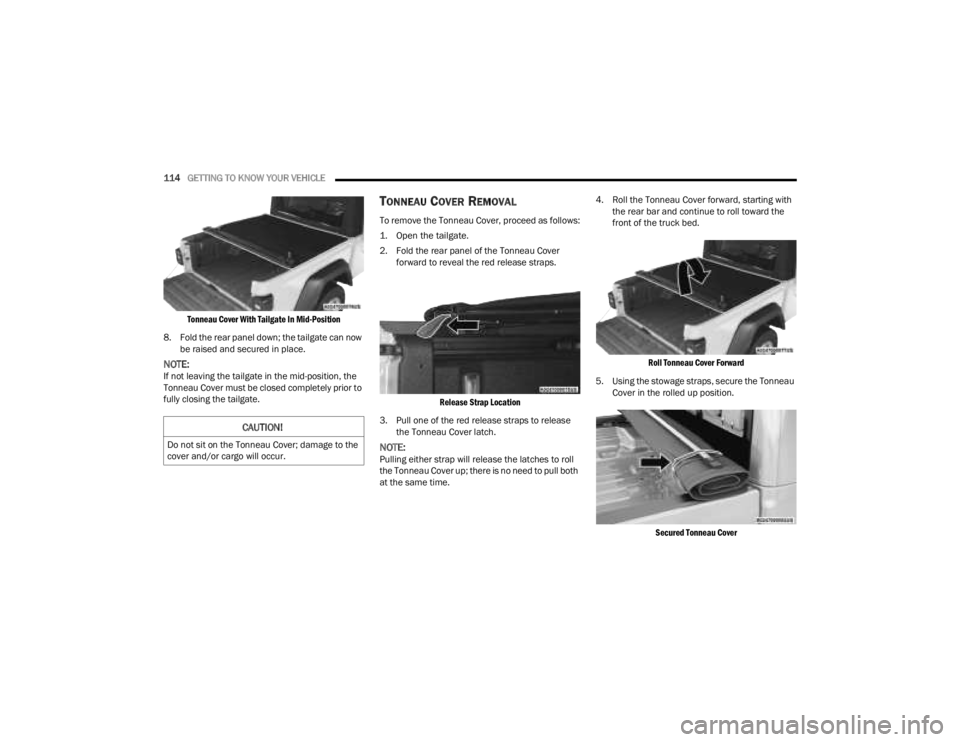
Tonneau Cover With Tailgate In Mid-Position
8. Fold the rear panel down; the tailgate can now be raised and secured in place.
NOTE:If not leaving the tailgate in the mid-position, the
Tonneau Cover must be closed completely prior to
fully closing the tailgate.
TONNEAU COVER REMOVAL
To remove the Tonneau Cover, proceed as follows:
1. Open the tailgate.
2. Fold the rear panel of the Tonneau Cover forward to reveal the red release straps.
Release Strap Location
3. Pull one of the red release straps to release the Tonneau Cover latch.
NOTE:Pulling either strap will release the latches to roll
the Tonneau Cover up; there is no need to pull both
at the same time. 4. Roll the Tonneau Cover forward, starting with
the rear bar and continue to roll toward the
front of the truck bed.
Roll Tonneau Cover Forward
5. Using the stowage straps, secure the Tonneau Cover in the rolled up position.
Secured Tonneau Cover
CAUTION!
Do not sit on the Tonneau Cover; damage to the
cover and/or cargo will occur.
23_JT_OM_EN_USC_t.book Page 114
Page 117 of 448
GETTING TO KNOW YOUR VEHICLE115
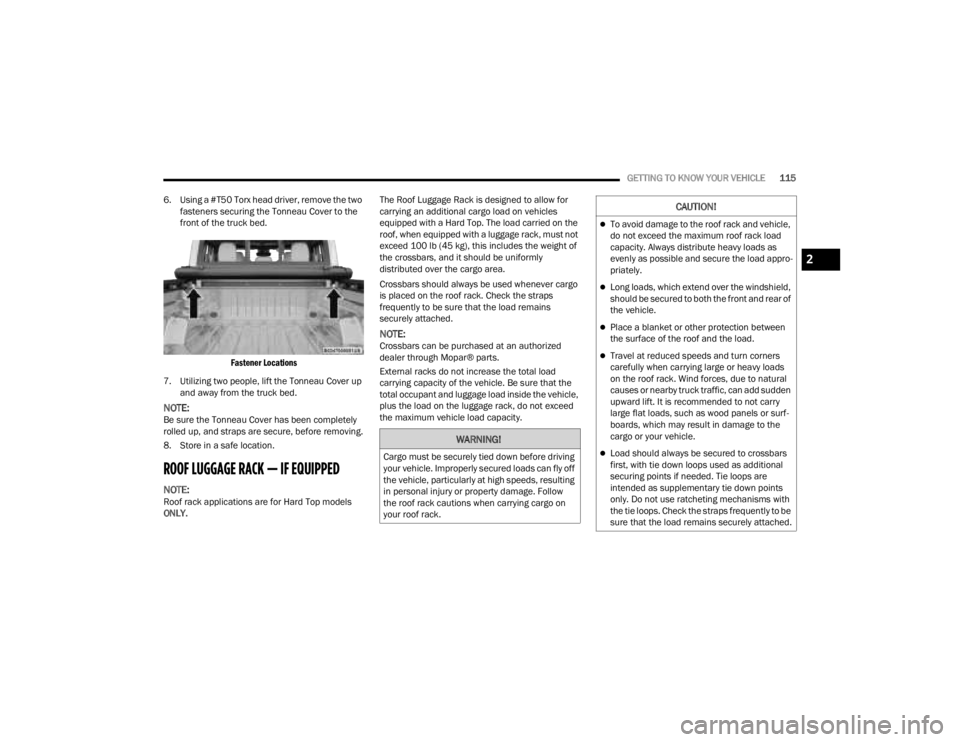
6. Using a #T50 Torx head driver, remove the two fasteners securing the Tonneau Cover to the
front of the truck bed.
Fastener Locations
7. Utilizing two people, lift the Tonneau Cover up and away from the truck bed.
NOTE:Be sure the Tonneau Cover has been completely
rolled up, and straps are secure, before removing.
8. Store in a safe location.
ROOF LUGGAGE RACK — IF EQUIPPED
NOTE:Roof rack applications are for Hard Top models
ONLY. The Roof Luggage Rack is designed to allow for
carrying an additional cargo load on vehicles
equipped with a Hard Top. The load carried on the
roof, when equipped with a luggage rack, must not
exceed 100 lb (45 kg), this includes the weight of
the crossbars, and it should be uniformly
distributed over the cargo area.
Crossbars should always be used whenever cargo
is placed on the roof rack. Check the straps
frequently to be sure that the load remains
securely attached.
NOTE:Crossbars can be purchased at an authorized
dealer through Mopar® parts.
External racks do not increase the total load
carrying capacity of the vehicle. Be sure that the
total occupant and luggage load inside the vehicle,
plus the load on the luggage rack, do not exceed
the maximum vehicle load capacity.
WARNING!
Cargo must be securely tied down before driving
your vehicle. Improperly secured loads can fly off
the vehicle, particularly at high speeds, resulting
in personal injury or property damage. Follow
the roof rack cautions when carrying cargo on
your roof rack.
CAUTION!
To avoid damage to the roof rack and vehicle,
do not exceed the maximum roof rack load
capacity. Always distribute heavy loads as
evenly as possible and secure the load appro
-
priately.
Long loads, which extend over the windshield,
should be secured to both the front and rear of
the vehicle.
Place a blanket or other protection between
the surface of the roof and the load.
Travel at reduced speeds and turn corners
carefully when carrying large or heavy loads
on the roof rack. Wind forces, due to natural
causes or nearby truck traffic, can add sudden
upward lift. It is recommended to not carry
large flat loads, such as wood panels or surf -
boards, which may result in damage to the
cargo or your vehicle.
Load should always be secured to crossbars
first, with tie down loops used as additional
securing points if needed. Tie loops are
intended as supplementary tie down points
only. Do not use ratcheting mechanisms with
the tie loops. Check the straps frequently to be
sure that the load remains securely attached.
2
23_JT_OM_EN_USC_t.book Page 115
Page 118 of 448
116
GETTING TO KNOW YOUR INSTRUMENT PANEL
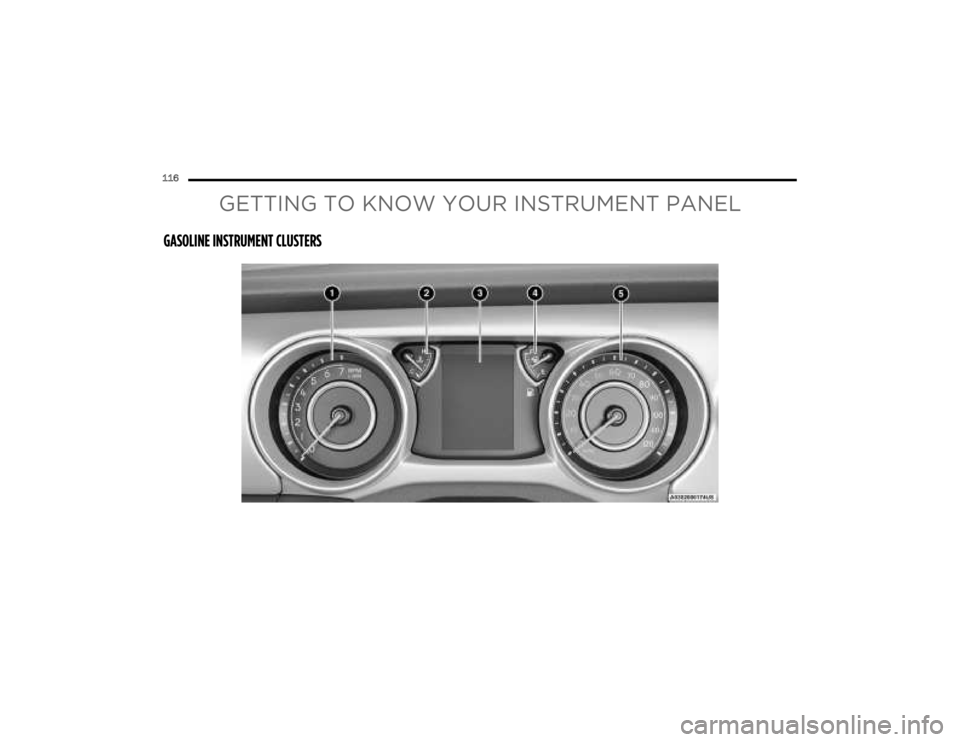
GASOLINE INSTRUMENT CLUSTERS
23_JT_OM_EN_USC_t.book Page 116
Page 119 of 448
GETTING TO KNOW YOUR INSTRUMENT PANEL117
3
23_JT_OM_EN_USC_t.book Page 117
Page 120 of 448
118GETTING TO KNOW YOUR INSTRUMENT PANEL
Use this QR code to access your
digital experience.
INSTRUMENT CLUSTER
D
ESCRIPTIONS
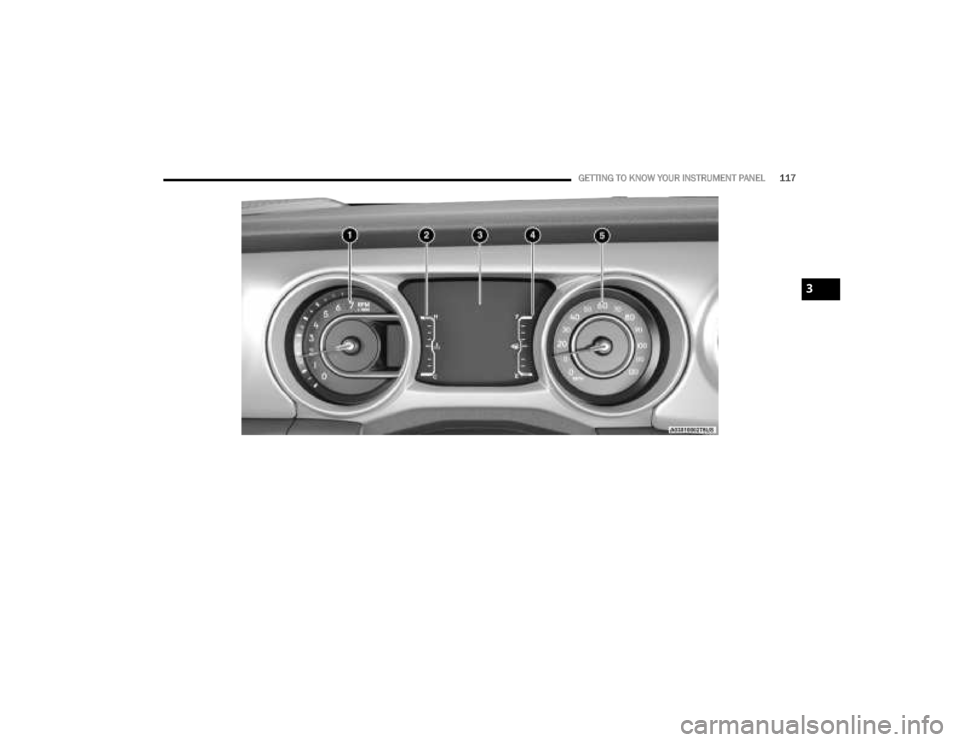
1.
Tachometer
Indicates the engine speed in revolutions
per minute (RPM x 1000).
2. Temperature Gauge
The temperature gauge shows engine
coolant temperature. Any reading within the
normal range indicates that the engine
cooling system is operating satisfactorily.
The gauge pointer will likely indicate a
higher temperature when driving in hot
weather, up mountain grades, or when
towing a trailer. It should not be allowed to
exceed the upper limits of the normal oper -
ating range. 3.
Instrument Cluster Display
The instrument cluster display features a
driver interactive display Ú page 121.
4. Fuel Gauge
The pointer shows the level of fuel in the
fuel tank when the ignition switch is in the
ON/RUN position.
The fuel pump symbol points to
the side of the vehicle where the fuel
filler door is located Ú page 191.
5. Speedometer
Indicates vehicle speed.CAUTION!
Do not operate the engine with the tachometer
pointer in the red area. Engine damage will
occur.
WARNING!
A hot engine cooling system is dangerous. You or
others could be badly burned by steam or boiling
coolant. It is recommended that you call an
authorized dealer for service if your vehicle
overheats.
CAUTION!
Driving with a hot engine cooling system could
damage your vehicle. If the temperature gauge
reads “H” pull over and stop the vehicle. Idle the
vehicle with the air conditioner turned off until
the pointer drops back into the normal range. If
the pointer remains on the “H”, turn the engine
off immediately and call an authorized dealer for
service.
23_JT_OM_EN_USC_t.book Page 118