JEEP GRAND CHEROKEE 2011 WK2 / 4.G Workshop Manual
Manufacturer: JEEP, Model Year: 2011, Model line: GRAND CHEROKEE, Model: JEEP GRAND CHEROKEE 2011 WK2 / 4.GPages: 100, PDF Size: 5.46 MB
Page 51 of 100
If Equipped with Media Center 130 with Satellite Radio (Sales
Code RES + RSC), Media Center 430/430N (Sales Code RBZ/RHB)
or Media Center 730N (RHR)
• There are many ways to play music fromiPod®players or other portable devices
through your vehicle's speakers. Your
choices depend on what radio your
vehicle is equipped with.
• The radio sales code is located on the lower right side of the radio faceplate.
• The USB port located within the center console, allows you to plug an iPod
®
into the vehicle's sound system.
• The USB port is located inside the center console. To hear audio from devices
connected to this port from a
non-touch-screen radio, press the AUX
button on the radio faceplate. From a
touch-screen radio, press the MEDIA
hard-key, then touch the AUX or iPod
®
soft-key.
• When connected to this feature: • The iPod
®audio can be played on the vehicle’s sound system.
• The iPod
®can be controlled using the radio buttons to Play, Browse, and List the
iPod®or external devices contents. Refer to the Owner's Manual on the DVD for
details.
• The iPod
®battery charges when plugged into the USB port (if supported by the
specific audio device).
NOTE:
• The USB port supports certain Mini, Classic, Nano, Touch, and iPhone
®devices. The
USB port also supports playing music from compatible external USB Mass Storage Class
memory devices. For supported audio file formats, refer to the USB Port section on the
Owner's Manual on the DVD. Refer to www.jeep.com/uconnect website for a list of
tested iPod
®s. Some iPod®software versions may not fully support the USB port
features. Please visit Apple’s website for iPod®software updates.
Bluetooth®Streaming Audio
• If equipped with Uconnect™ Voice Command, your bluetooth-equipped iPod®
devices, cellphones or other media players, may also be able to stream music to your
vehicle's speakers. Your connected device must be bluetooth-compatible, and paired
with your Media Center radio (see Uconnect™ Phone for pairing instructions). Press
the AUX button on the radio faceplate until "BT" is displayed on the radio screen.
WARNING!
Do not plug in or remove the iPod®or external device while driving. Failure to
follow this warning could result in a collision.
ELECTRONICS
49
Page 52 of 100
VIDEO ENTERTAINMENT SYSTEM (VES)™
System Operation
• The screen is located on the headlinerbehind the front seat. To lower the
screen, press the release button located
in the rear of the overhead console.
• The system may be controlled by the front seat occupants using the
touch-screen radio, or by the rear seat
occupants using the remote control.
•
The video screen displays information in a
split-screen format. The left side of the
screen is referred to as Channel 1 and the
right side of the screen is referred to as
Channel 2. All modes except video modes
are displayed in a split-screen format.
• To use the headphones, press the power button located on the right ear cup. Select the channel on the headphones (1 or 2) that corresponds to the channel selected on the
VES™ screen.
Operation Of The Touch-Screen Radio
• To view a DVD video, press the OPEN/CLOSE or LOAD hard-key and insert the disc.Playback will begin automatically after the DVD is recognized by the disc drive. If
playback does not begin automatically, follow these steps:
• Press the MENU hard-key, then touch the Rear VES™ soft-key. If a chapter list appears on the right side of the screen touch the HIDE LIST soft-key to display the
Rear VES™ Control screen.
• Touch the 1 soft-key to select an audio channel, then touch the DISC soft-key in the MEDIA column.
SIRIUS Backseat TV™ • Press the MENU hard-key, then touch the Rear VES™ soft-key. If a chapter list appears on the right side of the screen, touch the HIDE LIST soft key to display the Rear VES™
Control screen.
• Touch the 1 soft-key to select an audio channel, then touch the TV soft-key in the RADIO column to select SIRIUS Backseat TV™.
• To view SIRIUS Backseat TV™ using the remote, set the remote control channel selector switch to channel 1. Press the MODE button, then using the arrow buttons select TV
and press ENTER.
ELECTRONICS
50
Page 53 of 100
Operation Of The Remote
•The remote control operates similarly to any DVD remote you have used before and
allows the rear seat passengers to change stations, tracks, discs and audio/video modes.
• The remote control is designed to control either channel by using the selector switch located on the right side of the remote.
• Pressing the power button will turn the VES™ system ON/OFF.
• Pressing the MODE button causes the Mode Selection menu to appear on the VES™ screen. Use the remote control arrow buttons to scroll through the available modes,
then press ENTER to select the desired mode.
Auxiliary Audio/Video Input Jacks
• The Aux jacks are located on the rear of the center console.
• Connect the video game or other external media devices to the AUX jacks followingthe color coding for VES™ jacks.
• Using either the touch-screen radio or remote control, select AUX from the Rear VES™ Control or Mode Selection screen.
• Refer to “Uconnect™ Multimedia – Video Entertainment System (VES)™” in the Uconnect™ User's Manual on the DVD for further details.
ELECTRONIC VEHICLE INFORMATION CENTER (EVIC)
• The EVIC features a driver interactivedisplay that is located in the instrument
cluster. Pressing the controls on the left
side of the steering wheel allows the
driver to select vehicle information and
Personal Settings. For additional
information, refer to Programmable
Features in this guide.
• Press and release the UP
button to
scroll upward through the main menus
(Fuel Economy, Vehicle Info, Tire PSI,
Cruise, Messages, Units, System Setup)
and sub menus.
• Press and release the DOWN
button to scroll downward through the main
menus and sub menus.
• Press and release the SELECT
button for access to main menus, sub menus or to
select a personal setting in the setup menu.
• Press the BACK button to scroll back to a previous menu or sub menu.
ELECTRONICS
51
Page 54 of 100
Compass Calibration
• This compass is self-calibrating, which eliminates the need to set the compassmanually. When the vehicle is new, the compass may appear erratic and the EVIC will
display “CAL” until the compass is calibrated.
• You may also calibrate the compass by completing one or more 360 degree turns (in an area free from large metal or metallic objects) until the “CAL” message displayed
in the EVIC turns off. The compass will now function normally.
ECO
• The ECO message will appear in your EVIC display whenever you are driving in afuel efficient manner.
• This feature allows you to monitor when you are driving in a fuel efficient manner, and it can be used to modify driving habits in order to increase fuel economy.
PROGRAMMABLE FEATURES
Electronic Vehicle Information Center (EVIC) – If Equipped
• The EVIC can be used to program the following Personal Settings. Press the UP
or DOWNbutton until System Setup displays, then press the SELECT
button. Scroll through the settings using the UP or DOWN buttons. Press the
SELECTbutton to change the setting. Press the BACK button to scroll back to a
previous menu or sub menu.
• Select Language • Key-Off Power Delay
• Nav – Turn By Turn • Illuminated Approach
• Auto Unlock Doors • Display ECO Symbol
• Remote Unlock Sequence • Keyless Enter-N-Go
• RKE Linked To Memory • Auto High Beams
• Remote Start Comfort Sys. • Wiper Mode
• Horn with Remote Lock • Hill Start Assist (HSA)
• Horn With Remote Start • Blind Spot Alert
• Flash Lamps With Lock • Forward Collision Warning
• Headlamp Off Delay • Display Units of Measure In:
• Headlamps with Wipers • Calibrate Compass
• Easy Entry/Exit Seat • Compass Variance
• Tilt Mirror in Reverse
ELECTRONICS
52
Page 55 of 100
UNIVERSAL GARAGE DOOR OPENER (HomeLink®)
Programming HomeLink®
Begin Programming• The HomeLink
®buttons are located in
the overhead console.
• Erase all channels before you begin programming by holding the two
outside buttons for up to 20 seconds
until the red indicator flashes.
• Park your vehicle outside of the garage and turn the ignition switch to the
ON/RUN position.
• Place the hand-held transmitter 1 to 3 in (3 to 8 cm) from the HomeLink
®buttons
while keeping the indicator light in view.
• Simultaneously, press and hold both the chosen HomeLink
®button and the hand-held
transmitter button until the HomeLink®indicator flash rate changes from a slow to a
rapidly blinking light, then release both the HomeLink®and the hand-held transmitter
buttons. This may take up to 30 seconds, or longer in rare cases.
• Press and hold the just-programmed HomeLink
®button; if the indicator light stays on
constantly, programming is complete and the garage door should open.
NOTE:
• Only use this transceiver with a garage door opener that has a “stop and reverse” feature as required by Federal safety standards. This includes most garage door opener
models manufactured after 1982. Do not use a garage door opener without these safety
features. Call toll-free 1–800–355–3515 or, on the Internet, at www.HomeLink.com for
safety information or assistance.
• If you are having difficulty programming your HomeLink
®and your garage door opener
was manufactured after 1995, you may have a rolling code. Follow the steps below for
Programming A Rolling Code System.
Programming A Rolling Code System • At the garage door opener motor (in the garage), locate the “learn” or “programming” button. This can usually be found where the hanging antenna wire is
attached to the garage door opener motor (it is NOT the button normally used to open
and close the door).
• Firmly press and release the “learn” or “programming” button. The name and color of the button may vary by manufacturer. Within 30 seconds, return to the vehicle and
press the programmed HomeLink
®button twice (holding the button for two seconds
each time). If the device is plugged in and activates, programming is complete.
• If the device does not activate, press the button a third time (for two seconds) to complete the programming.
ELECTRONICS
53
Page 56 of 100
Using HomeLink®
• To operate, simply press and release the programmed HomeLink®button and the
programmed device will operate.
• Refer to your Owner’s Manual on the DVD for further details. If you have any problems programming HomeLink
®, or require assistance, please call toll-free
1–800–355–3515 or, on the Internet, at www.HomeLink.com.
WARNING!
• Your motorized door or gate will open and close while you are programming the universal transceiver. Do not program the transceiver if people or pets are in
the path of the door or gate.
• Do not run your vehicle in a closed garage or confined area while programming the transceiver. Exhaust gas from your vehicle contains Carbon
Monoxide (CO) which is odorless and colorless. Carbon Monoxide is poisonous
when inhaled and can cause you and others to be severely injured or killed.
POWER INVERTER
• There is a 115 Volt, 150 Watt powerinverter outlet located on the back of the
center console. This outlet can power
cellular phones, electronics and other
low power devices requiring power up
to 150 Watts.
• Press the switch located in the switch bank on the lower instrument panel to
turn the power inverter on. The indicator
light will turn on to indicate the inverter
is producing AC power.
• Press the switch again to turn the power inverter off. The indicator light will turn off.
NOTE:
The power inverter is designed with built-in overload protection. If the power rating
of 150 Watts is exceeded, the power inverter will automatically shut down. Once the electrical
device has been removed from the outlet, the inverter should automatically reset. If the power
rating exceeds approximately 170 Watts, the power inverter may have to be reset manually.
To reset the inverter manually, unplug the device and plug it in again. To avoid overloading the
circuit, check the power ratings on electrical devices prior to using the inverter.
WARNING!
To Avoid Serious Injury or Death: Do not use a three-prong adaptor. Do not insert
any objects into the receptacles. Do not touch with wet hands. Close the lid when
not in use. If this outlet is mishandled, it may cause an electric shock and failure.
ELECTRONICS
54
Page 57 of 100
POWER OUTLETS
• The front power outlet is located insidethe center storage bin of the instrument
panel. Push inward on the storage lid to
open the compartment and gain access
to this power outlet.
• A second front power outlet is located inside the center console.
• The rear power outlet is located in the right rear cargo area.
• The power outlets are labeled with either a “key” or a “battery” symbol to indicate how the outlet is powered. Power outlets labeled with a “key” are powered when the
ignition switch is in the ON/RUN or ACC position, while the outlets labeled with a
“battery” are connected directly to the battery and powered at all times.
NOTE:
• Do not exceed the maximum power of 160 Watts (13 Amps) at 12 Volts. If the 160 Watt (13 Amp) power rating is exceeded, the fuse protecting the system will need to be
replaced.
• All accessories connected to the “battery” powered outlets should be removed or turned off when the vehicle is not in use to protect the battery against discharge.
ELECTRONICS
55
Page 58 of 100
QUADRA-TRAC I®
FOUR-WHEEL DRIVE
Quadra-Trac I®Operating
Instructions/Precautions - 3.6L
Only
• The Quadra-Trac I®is a single-speed
(HI range only) transfer case, which
provides convenient full-time
four-wheel drive. No driver interaction
is required. The Brake Traction Control
(BTC) System, which combines
standard ABS and Traction Control,
provides resistance to any wheel that
is slipping to allow additional torque
transfer to wheels with traction.
QUADRA-TRAC II®/
QUADRA-DRIVE II
®
FOUR-WHEEL DRIVE
Quadra-Trac II®/Quadra-Drive
II®Operating Instructions/
Precautions
• The Quadra-Trac II®/Quadra-Drive
II®transfer case is fully automatic in
the normal driving 4WD HI mode. The Quadra-Trac II
®/Quadra-Drive
II®transfer case provides three mode
positions:
• 4WD HI
• NEUTRAL
• 4WD LOW
• This transfer case is fully automatic in the 4WD HI mode.
• When additional traction is required, the 4WD LOW position can be used
to lock the front and rear driveshafts
together and force the front and rear
wheels to rotate at the same speed.
The 4WD LOW position is intended
for loose, slippery surfaces only.
Driving in the 4WD LOW position on
dry, hard-surfaced roads may cause
increased tire wear and damage to
driveline components.
• When operating your vehicle in 4WD LOW, the engine speed is
approximately three times that of the
4WD HI position at a given road
speed. Take care not to overspeed the
engine and do not exceed 25 mph
(40 km/h).
NOTE:
• If shift conditions/interlocks are not met, or a transfer case motor temperature
protection condition exists, a “For 4x4
Low Slow Below 5 MPH or 8 KPH Put
Trans in N Press 4 Low” message will
flash from the Electronic Vehicle
Information Center (EVIC).
Shifting Procedures
4WD HI To 4WD LOW
• With the vehicle at speeds of 0 to 3 mph (0 to 5 km/h), the ignition
switch in the ON/RUN position or the
engine running, shift the transmission
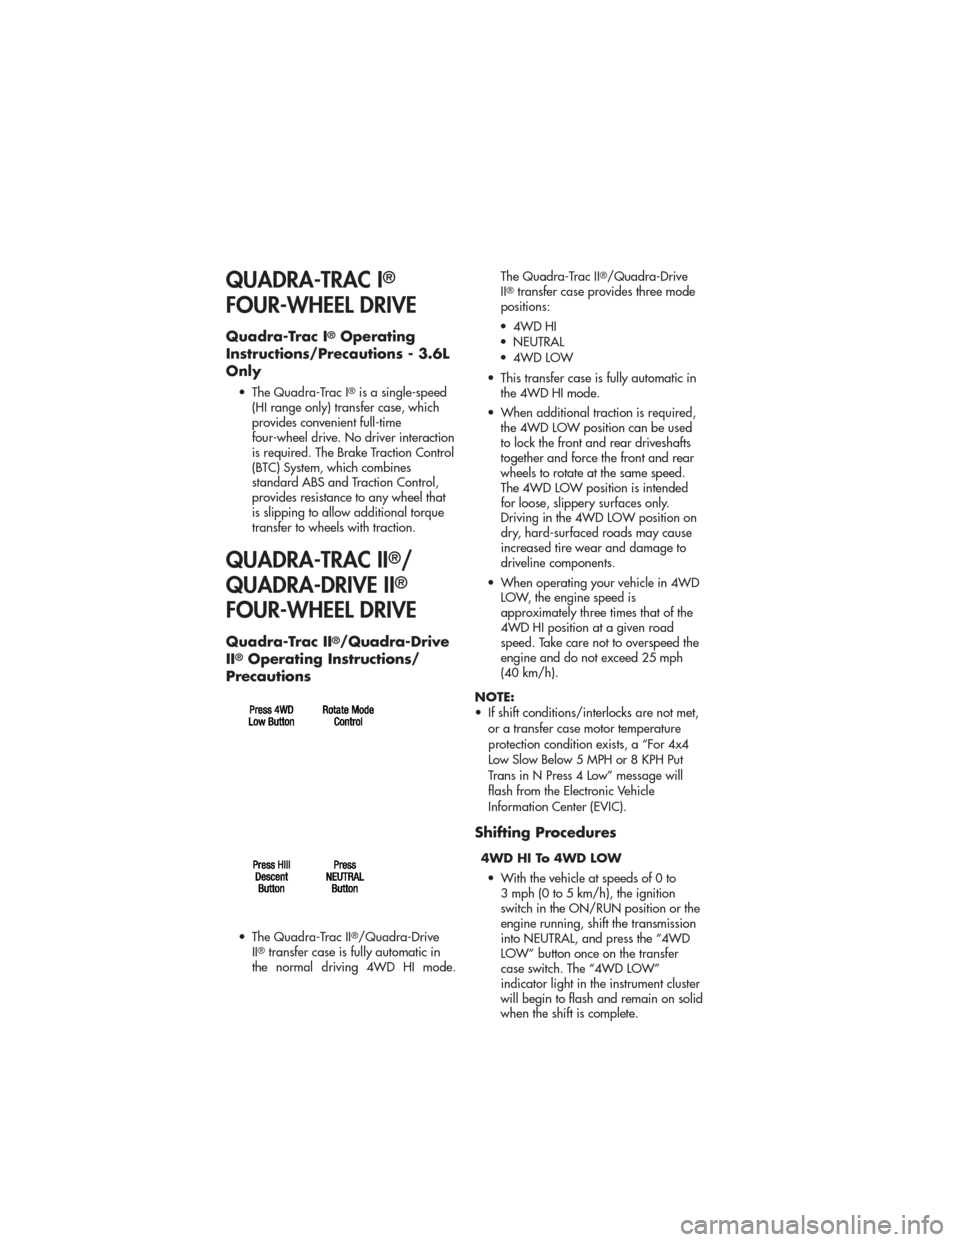
into NEUTRAL, and press the “4WD
LOW” button once on the transfer
case switch. The “4WD LOW”
indicator light in the instrument cluster
will begin to flash and remain on solid
when the shift is complete.
OFF-ROAD CAPABILITIES
56
Page 59 of 100
4WD LOW To 4WD HI• With the vehicle at speeds of 0 to 3 mph (0 to 5 km/h), the ignition
switch in the ON/RUN position or the
engine running, shift the transmission
into NEUTRAL, and press the “4WD
LOW” button once on the transfer
case switch. The “4WD LOW”
indicator light in the instrument cluster
will flash and turn off when the shift is
complete.
NOTE:
• If the shift conditions/interlocks are not met, or a transfer case motor
temperature protection exists, a “For 4x4
Low Slow Below 5 MPH or 8 KPH Put
Trans in N Press 4 Low” message will
flash on the Electronic Vehicle
Information Center (EVIC).
• Shifting into or out of 4WD LOW is possible with the vehicle completely
stopped; however, difficulty may occur
due to the mating clutch teeth not being
properly aligned. Several attempts may
be required for clutch teeth alignment
and shift completion to occur. The
preferred method is with the vehicle
rolling 0 to 3 mph (0 to 5 km/h). If the
vehicle is moving faster than 3 mph
(5 km/h), the transfer case will not allow
the shift.
NEUTRAL Shift Procedure
• Turn the ignition switch to theON/RUN position, engine off.
• Vehicle stopped, with foot on brake.
• Place the transmission into NEUTRAL. • Press and hold the NEUTRAL button
located near the 4WD mode control
knob with a pen or similar object for
four seconds. The indicator light will
begin to flash indicating the shift is in
progress. The light will stop blinking
(stay on solid) when the NEUTRAL shift
is complete. A “4WD SYSTEM IN
NEUTRAL” message will display on
the Electronic Vehicle Information
Center (EVIC).
• Repeat these Steps to shift out of NEUTRAL.
SELEC-TERRAIN™
• Selec-Terrain™ combines thecapabilities of the vehicle control
systems, along with driver input, to
provide the best performance for all
terrains.
Rotate the mode control knob to select the
following Selec-Terrain™ positions: • Sport – Dry weather, on-road
calibration. Only available in 4WD
High range. Performance-based
tuning that provides a rear wheel
drive feel but with improved handling
and acceleration over a two-wheel
drive vehicle. The Electronic Stability
Control will set to allow more driver
control of the vehicle while
maintaining safe handling controls.
The vehicle will lower (if equipped
with Air Suspension) by 0.59 inches
(15 mm) in the SPORT mode.
• Snow – The Electronic Stability
Control is set for additional stability in
inclement weather. Use on and off
road on loose traction surfaces such
as snow.
• Auto – Fully automatic full-time
four-wheel drive operation can be
used on and off road. Balances
traction with steering feel to provide
improved handling and acceleration
over two-wheel drive vehicles.
OFF-ROAD CAPABILITIES
57
Page 60 of 100
•Sand/Mud – Off-road calibration
for use on low traction surfaces such
as mud, sand, or wet grass. Driveline
is maximized for traction. Some
binding may be felt on less forgiving
surfaces. The electronic brake controls
are set to limit traction control
management of throttle and wheel
spin.
• Rock – Off-road calibration only
available in 4WD Low range. The
vehicle is raised (if equipped with Air
Suspension) for improved ground
clearance. Traction based tuning with
improved steer-ability for use on high
traction off-road surfaces. Activates
the Hill Descent Control for steep
downhill control. Use for low speed
obstacles such as large rocks, deep
ruts, etc.
Quadra-Lift™
• The Quadra-Lift™ air suspension system provides full time load leveling
capability along with the benefit of
being able to adjust vehicle height by
the push of a button. Quadra-Lift™ is
available with both Quadra-Trac II
®
and Quadra-Drive II™.
• The system requires that the engine be running for all changes. When
lowering the vehicle all of the doors,
including the liftgate, must be closed. • The Quadra-Lift™ air suspension
system uses a lifting and lowering
pattern which keeps the headlights
from shining into oncoming traffic.
When raising the vehicle, the rear of
the vehicle will move up first and then
the front. When lowering the vehicle,
the front will move down first and then
the rear.
• After the engine is turned off, you may notice that the air suspension system
operates briefly. This is normal. The
system is correcting the position of the
vehicle.
• To assist with changing a spare tire, the Quadra-Lift™ air suspension
system has a feature which allows the
automatic leveling to be disabled.
Press and hold both the “Up” and
“Down” buttons simultaneously
between 5 and 10 seconds; a
message will appear in the EVIC
stating leveling has been disabled
immediately after both buttons have
been released. Driving the vehicle
over 5 mph (8 km/h) will return the
air suspension to normal operation.
• An audible chime will be heard whenever a system error has been
detected.
Operation • Pressing the “Up” or “Down” button once will move the suspension one
position higher or lower from the
current position, assuming all
conditions are met (i.e., engine
running and all doors and liftgate
closed).
• The 4 indicator lamps will illuminate to show the current position of the
vehicle. Flashing indicator lamps will
show a position which the system is
working to achieve. If multiple
indicator lamps are flashing on the
“Up” button, the highest flashing
indicator lamp is the position the
system is working to achieve.
OFF-ROAD CAPABILITIES
58