headrest JEEP GRAND CHEROKEE 2013 Owner handbook (in English)
[x] Cancel search | Manufacturer: JEEP, Model Year: 2013, Model line: GRAND CHEROKEE, Model: JEEP GRAND CHEROKEE 2013Pages: 408, PDF Size: 3.21 MB
Page 61 of 408

Installing a Child Restraint with an ALR:
1. To install a child restraint with ALR, first, pull
enough of the seat belt webbing from the retrac-
tor to route it through the belt path of the child
restraint. Slide the latch plate into the buckle
until you hear a “click.” Next, extract all the seat
belt webbing out of the retractor and then allow
the belt to retract into the retractor. As the belt
retracts, you will hear a ratcheting sound. This
indicates the safety belt is now in the Automatic
Locking mode.
2. Finally, pull on any excess webbing to
tighten the lap portion around the child restraint.
Any seat belt system will loosen with time, so
check the belt occasionally, and pull it tight if
necessary.To attach a child restraint tether strap:
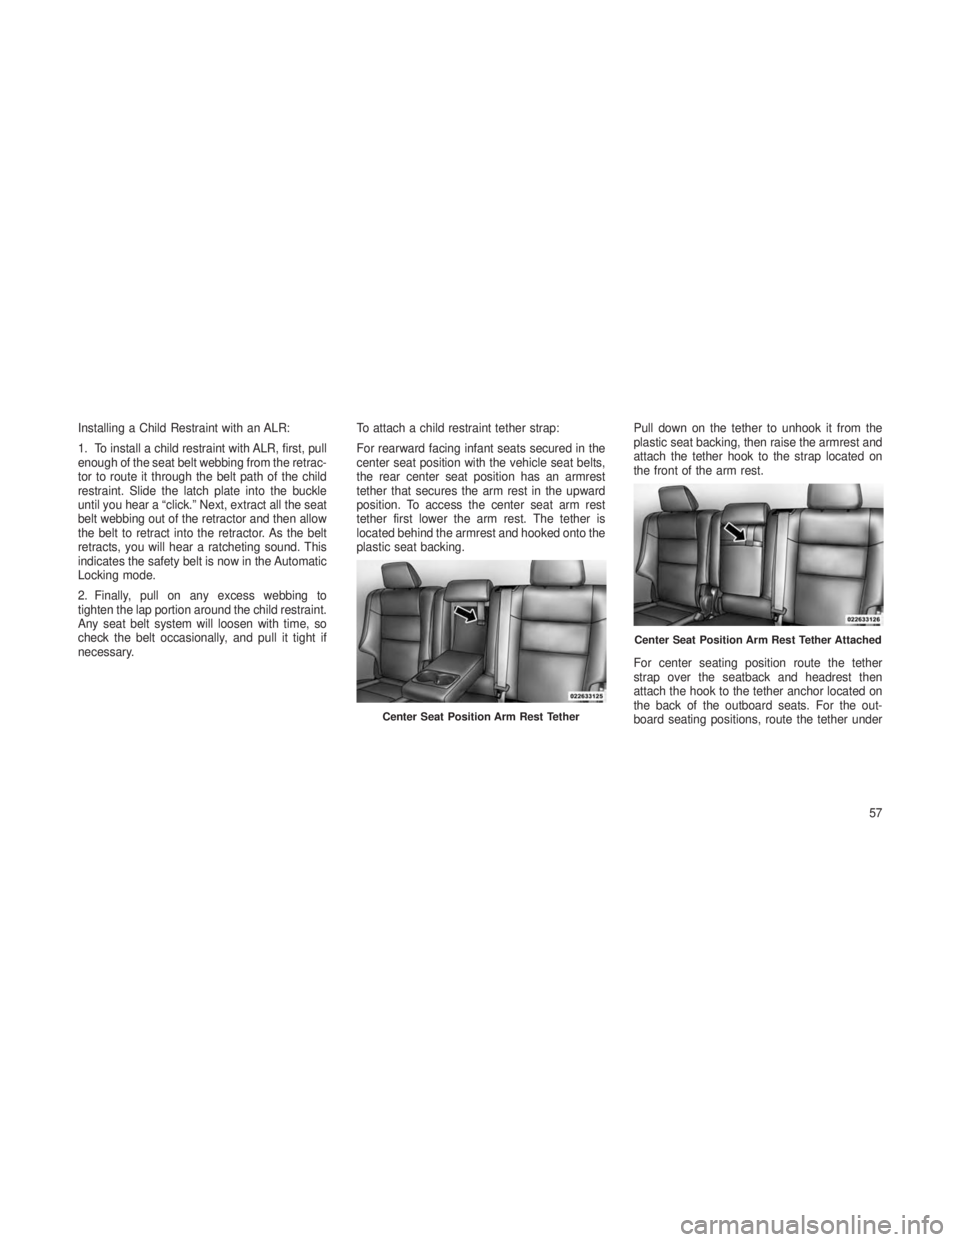
For rearward facing infant seats secured in the
center seat position with the vehicle seat belts,
the rear center seat position has an armrest
tether that secures the arm rest in the upward
position. To access the center seat arm rest
tether first lower the arm rest. The tether is
located behind the armrest and hooked onto the
plastic seat backing.
Pull down on the tether to unhook it from the
plastic seat backing, then raise the armrest and
attach the tether hook to the strap located on
the front of the arm rest.
For center seating position route the tether
strap over the seatback and headrest then
attach the hook to the tether anchor located on
the back of the outboard seats. For the out-
board seating positions, route the tether under
Center Seat Position Arm Rest Tether
Center Seat Position Arm Rest Tether Attached
57
Page 104 of 408

WARNING!
•Do not place items over the top of the
Active Head Restraint, such as coats, seat
covers or portable DVD players. These
items may interfere with the operation of
the Active Head Restraint in the event of a
collision and could result in serious injury
or death.
• Active Head Restraints may be deployed if
they are struck by an object such as a
hand, foot or loose cargo. To avoid acci-
dental deployment of the Active Head Re-
straint ensure that all cargo is secured, as
loose cargo could contact the Active Head
Restraint during sudden stops. Failure to
follow this warning could cause personal
injury if the Active Head Restraint is de-
ployed. Head Restraints — Rear Seats
The head restraints on the outboard seats are
not adjustable. They automatically fold forward
when the rear seat is folded to a load floor
position but do not return to their normal posi-
tion when the rear seat is raised. After returning
either seat to its upright position, raise the head
restraint until it locks in place. The outboard
headrests are not removable.
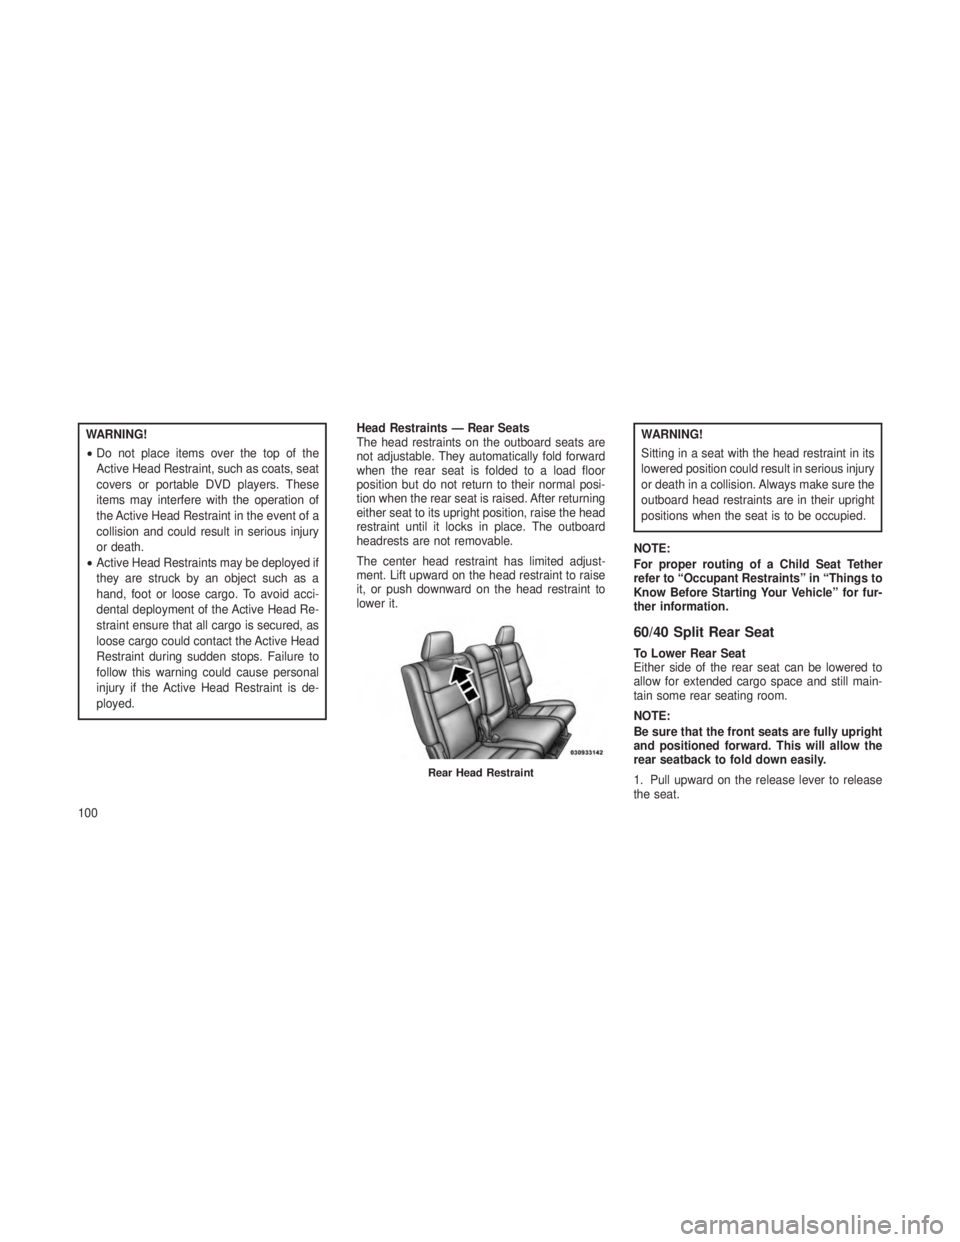
The center head restraint has limited adjust-
ment. Lift upward on the head restraint to raise
it, or push downward on the head restraint to
lower it.WARNING!
Sitting in a seat with the head restraint in its
lowered position could result in serious injury
or death in a collision. Always make sure the
outboard head restraints are in their upright
positions when the seat is to be occupied.
NOTE:
For proper routing of a Child Seat Tether
refer to “Occupant Restraints” in “Things to
Know Before Starting Your Vehicle” for fur-
ther information.
60/40 Split Rear Seat
To Lower Rear Seat
Either side of the rear seat can be lowered to
allow for extended cargo space and still main-
tain some rear seating room.
NOTE:
Be sure that the front seats are fully upright
and positioned forward. This will allow the
rear seatback to fold down easily.
1. Pull upward on the release lever to release
the seat.
Rear Head Restraint
100
Page 337 of 408

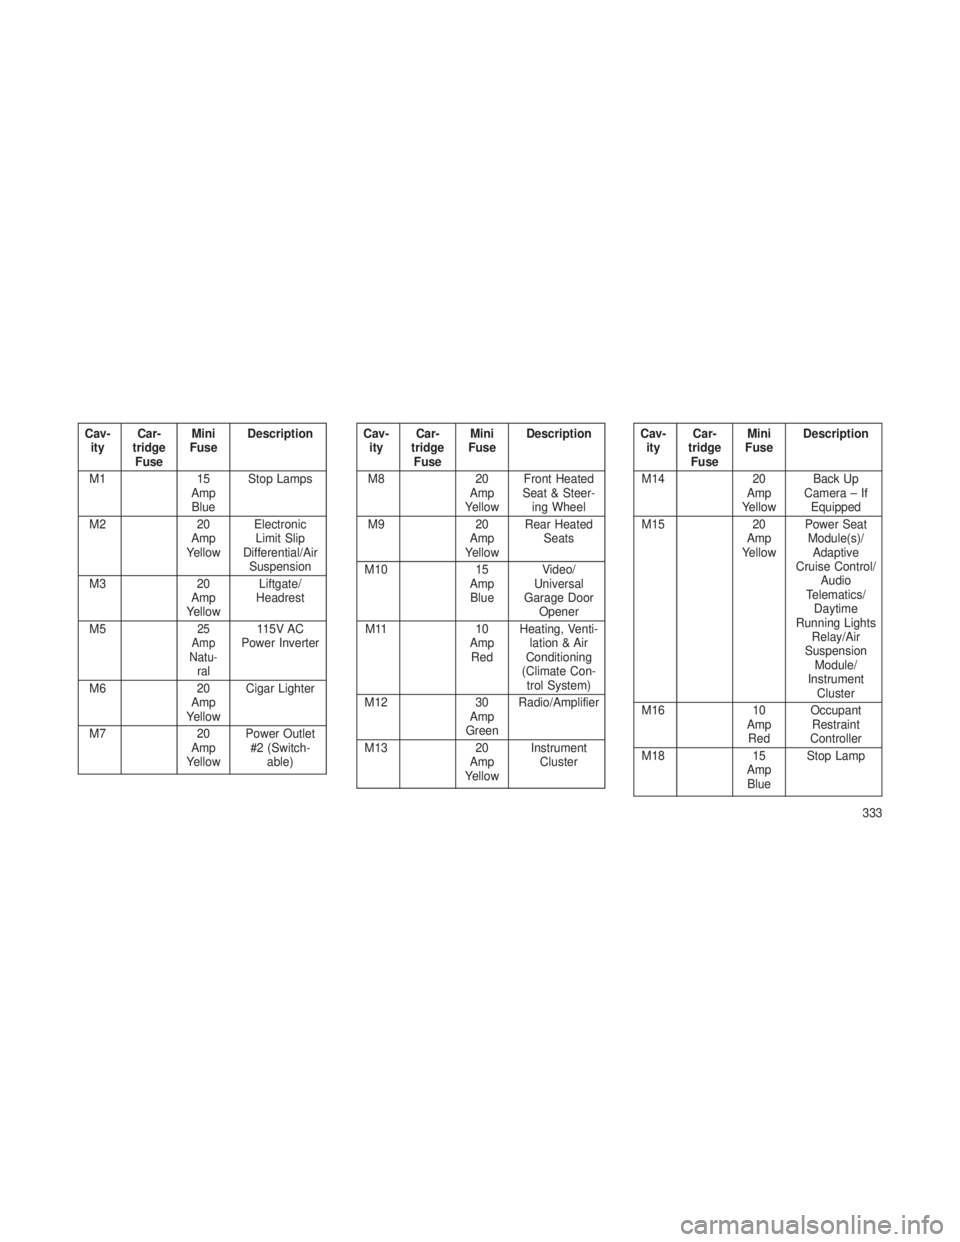
Cav-ity Car-
tridge Fuse Mini
Fuse Description
M1 15
Amp Blue Stop Lamps
M2 20
Amp
Yellow Electronic
Limit Slip
Differential/Air Suspension
M3 20
Amp
Yellow Liftgate/
Headrest
M5
25
Amp
Natu- ral115V AC
Power Inverter
M6 20
Amp
Yellow Cigar Lighter
M7 20
Amp
Yellow Power Outlet
#2 (Switch- able)
Cav-ity Car-
tridge Fuse Mini
Fuse Description
M8 20
Amp
Yellow Front Heated
Seat & Steer- ing Wheel
M9 20
Amp
Yellow Rear Heated
Seats
M10 15
Amp Blue Video/
Universal
Garage Door Opener
M11 10
Amp Red Heating, Venti-
lation & Air
Conditioning
(Climate Con- trol System)
M12 30
Amp
Green Radio/Amplifier
M13 20
Amp
Yellow Instrument
ClusterCav-ity Car-
tridge Fuse Mini
Fuse Description
M14 20
Amp
Yellow Back Up
Camera – If Equipped
M15 20
Amp
Yellow Power Seat
Module(s)/ Adaptive
Cruise Control/ Audio
Telematics/ Daytime
Running Lights Relay/Air
Suspension Module/
Instrument Cluster
M16 10
Amp Red Occupant
Restraint
Controller
M18 15
Amp Blue Stop Lamp
333